 FREE 1 to 3-Day Delivery on Orders $149+ Details

How to Install Barricade HD Rock Sliders w/ LED Rock Lights - Textured Black on your Wrangler

Shop Parts in this Guide
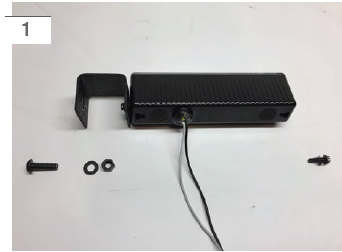
Begin by installing the U-shaped spacer bracket to the LED light using the small phillips scres that come threaded into the light. **Note: The spacer faces the tire. Pictured above is the passenger front LED light. Repeat this for all (4) lights.
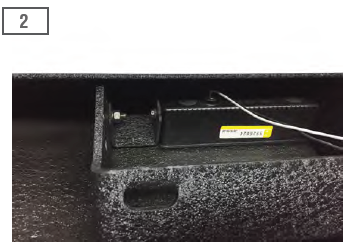
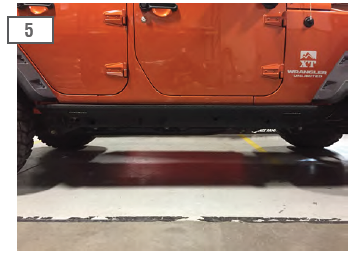
Install the LED light with attached bracket into the rock slider. Secure the bracket side of the light with the supplied M5 hardware. Secure the LED side with the supplied phillips screw.
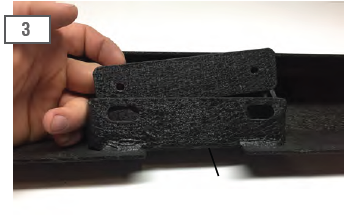
Place the plate-nut brackets into the slider. The handle will be used to align the plate in step 6.
Using a 18mm socket remove the body mount bolts from the vehicle.
Have a helper hold the side step up to the vehicle, loosely re-install the body mount bolts. **Note: Do not tighten the body mount bolts all the way. Adjustments will need to be made to line up the pinch weld mounts.

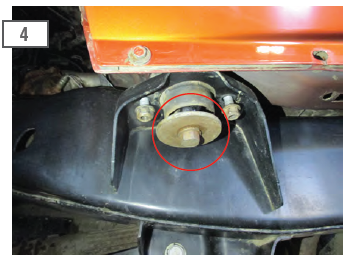
Using the handle on the plate-nut align the plate to the pinch weld holes. Using the supplied bolts and washers secure them to the pinch welds. Then fully tighten the body mount bolts. The dotted red line above represents the pinch weld.
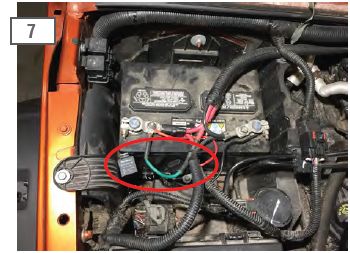
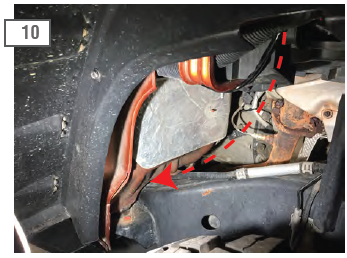
Begin by unwrapping the wiring harness. The longest wires run to the driver side step. Mount the fuse and relay close to the battery.
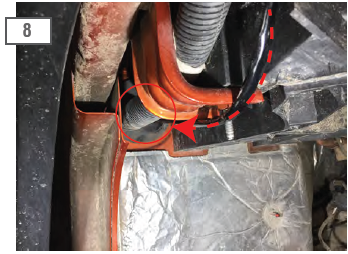
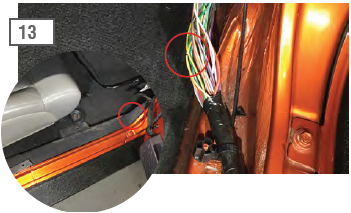
Run the switch wiring harness through the battery box into the inner fender, then carefully punch a hole through the body grommet feed the plug into the passenger compartment.
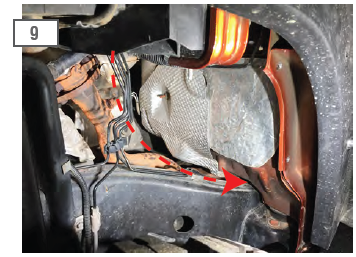
Run the driver side wiring over the top of the engine and down the driver side of the engine bay. Connect the wiring to the LED lights. Black to Black
White to Red
Run the shorter wires down through the battery box down to the passenger side LED lights. Connect the wiring to the LED lights. Black to Black
White to Red
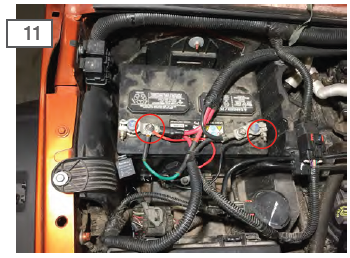
Once the LED lights are attached, connect the red wire from the relay harness to the positive battery terminal and the black wire to the negative battery terminal. Secure any and all wires away from heat and moving parts with the supplied zip ties.

Locate the switch wiring harness under the dash on the passenger side of the vehicle. Reconnect the switch to the harness. Clean the switch mounting location with isopropyl alcohol to ensure the cleanest possible surface before mounting the switch.
Optional Wiring:
Connect the lead coming off the switch harness to the interior dome light circuit. Using the vehicles wiring diagram identify the dome light wire located in the passenger side wiring harness. Using the supplied wire tap, tap into the factory wiring harness. Now the LED side steps will illuminate when the vehicle is locker or unlocked with the key FOB.

