FREE 1 to 3-Day Delivery on Orders $149+ Details

How to Install Barricade BodyShield Rocker Panel Decal - Textured Black on your Wrangler
Installation Time
15 minutes
Tools Required
- X-acto knife
- Spray bottle with dish soap & water mixture
- Surface cleaner– such as Mequiars Deep Crystal System paint cleaner

Shop Parts in this Guide
JK Rockers
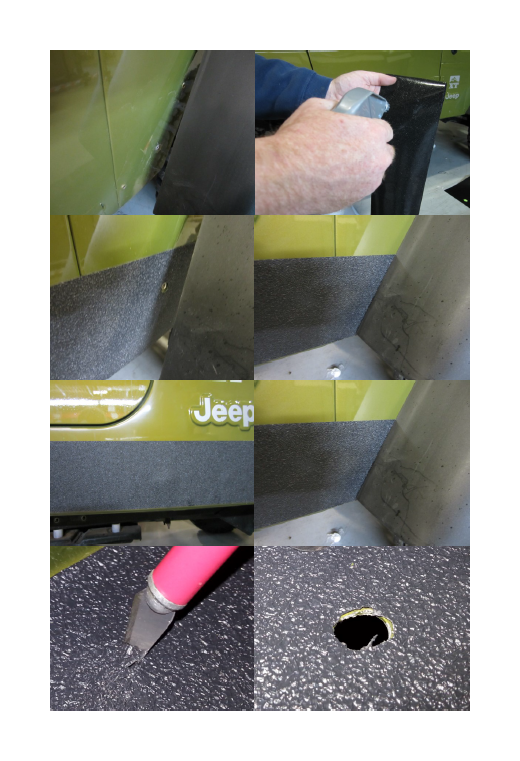
Step 1:
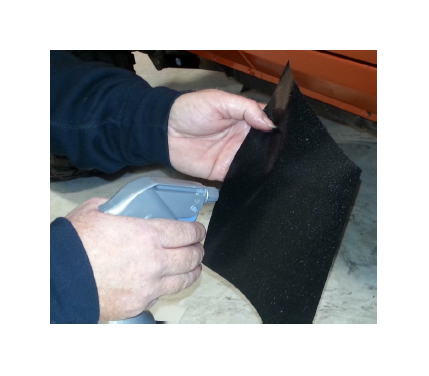
Clean surface you are applying the material to. You may use a com-mercially available cleaner designed for auto finishes. When it is time to spray the material peel backing from material exposing the adhesive. Spray material with a light amount of the soap and water mixture. Simply mist the material This will help the adhesive from not sticking right away till you get it in place.
Step 2:
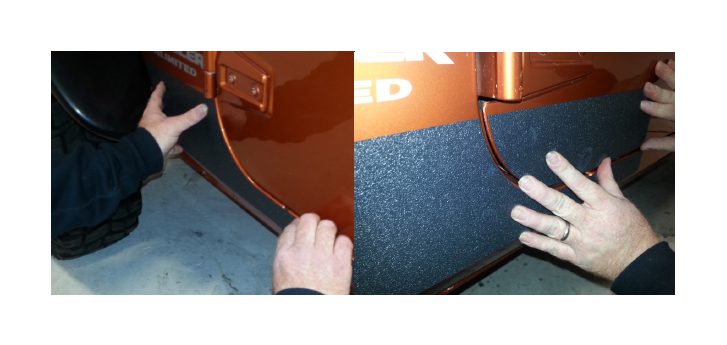
On material for the rocker area remove the body piece and spray the material as described before. Place it on the vehicle. Evenly space the vinyl on the door seems and the front and rear fender area. Then add the door pieces. Spray and align the door pieces so they are space at the door gap like the body panels were. Also make sure that the top is level between the door and body panels. You may use a hair dryer to dry the material. Remem-ber wait ample time to make sure it is dry before driving
TJ Rockers
Step 1: Remove the bolts securing the flare ex-tension and remove it. Next remove the 3 bottom bolts securing the fender flares. This will give you access to place the material under the flare.
Step 2: Clean surface you are applying the mate-rial to. You may use a commercially available cleaner designed for auto finishes. When it is time to spray the material peel backing from ma-terial exposing the adhesive. Spray material with a light amount of the soap and water mixture. Simply mist the material This will help the adhe-sive from not sticking right away till you get it in place.
Step 3: place the material on the vehicle. On this product there is one hole in it to place over the bottom fender flare mounting bolt hole under the front and rear fender flares. Align the material to run level along the vehicle and use the bottom as a guide when aligning the material. Tucking the material under the fender flares.
Step 4: Remount the fender flares. Also remount if desired the flare extensions. The material is not cut for those mounting hole in case these are not present on your vehicle or you choose to not rein-stall them. In the case that you would like them back on. Simply use an x-acto knife and poke through the center of the hole then with the tip of the blade in the hole using it as a guide cut in a circular motion to remove material for bolt clear-ance.
After installation you would do best by leaving ample dry time before driving or washing the vehicle, if you installed the recom-mended wet method. This is a permanent adhesive on this product. Great care should be taken if it is needed to be removed later.