 FREE 1 to 3-Day Delivery on Orders $149+ Details

How to Install Artec Industries A-Pillar Dual LED Cube Light Mounts (18-19 Jeep Wrangler JL) on your Jeep Wrangler
Installation Time
60 minutes
Tools Required
- 3/8 Ratchet
- T-40 Torx Bit
- 4mm Allen Key
- 5mm Allen Key
Installation Instructions:
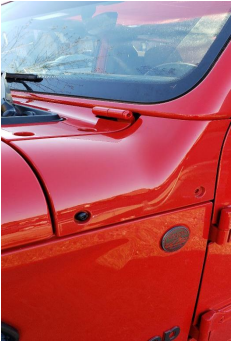
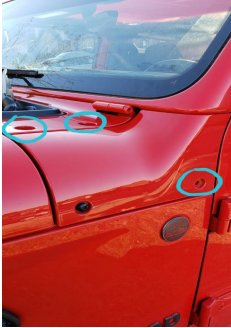
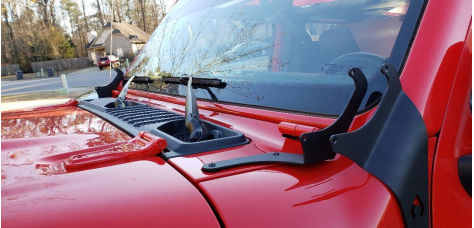
Start by removing the 3 factory bolts from your cowl with the T-40 torx bit. There are 4
bolts total on the cowl, but only remove the top 2 and the 1 on the side that is located
closer to the door. These are you mounting points for the new hardware.
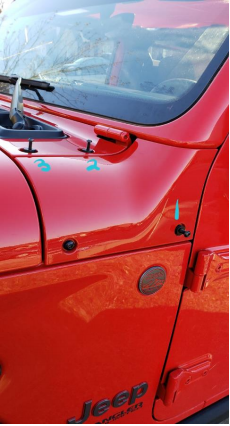
The included bolts are all the same length, but there are 3 different size spacers that will be used. They are identified by have 1 groove, 2 grooves, and 3 grooves in the sides. The single groove is used on the lower bolt, the double on the top located closer to the windshield, and the triple is used on the top further out. I have them labeled bellow with which spacer they correspond to.
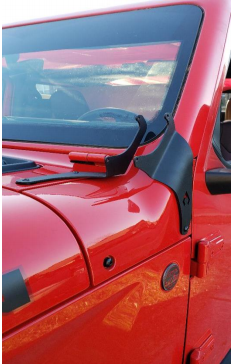
Now simply drop the spacers in the appropriate holes and attach the side piece to the a-pillar with the included bolt (shorter bolt) and tighten with the 5mm Allen key.
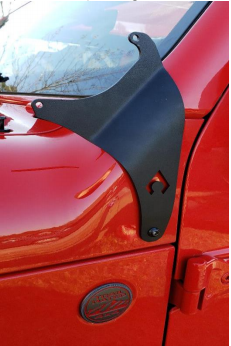
Next you will install the top bracket using the 2 longer bolts and the 4mm Allen key.
Make sure everything lines up before completely tightening the bolts.
To install the other side, simply do the exact same steps with the remaining hardware.
Note that you do not need to fully tighten all of the bolts until you have added your lights in so that you have a little wiggle room to get them where they need to be. The mounting width for lights to work with this bracket is between 1.93-2.17" apart. That is around a 3- inch light, so make sure you get the correct size light to go with this.
Installation Instructions Written by ExtremeTerrain Customer Jordan Wade 01/27/2018
