Talk to a Tacoma Sales Tech
1-877-870-8556
M-F 8:30A-11P, Sat-Sun 8:30A-9P
Logo Image
$20K Sweeps! 10 Chances to Win! Enter Daily >

ARB Roof Rack Fitting Kit (05-23 Tacoma)

Item TT5848
Verify parts fit and get product recommendations.
Tacoma Sales Techs: Connect Now M-F 8:30A-11P, Sat-Sun 8:30A-9P
$0.00
Our Price

$200.00 (kit)

FREE Shipping Market Price $229.99 You Save 13% ($29.99) Up to 10% off for Military & First Responders! See Details

Will this fit your Vehicle?

Select a different vehicle Help?
Update or Change Vehicle
Ship to: Ashburn - 20149
Sorry, please enter a valid US or CA postal code
We're sorry, zip can't be updated at this time.
    Create a list
    Add to New List

    Saved - View your saved items

    We're sorry. We couldn't save this product at this time.

    or use

      Product Videos

      Hey, guys, Sarah from extremeterrain.com, and today we have a review and install of the ARB roof rack fitting kit, which fits the '05 and newer Toyota Tacomas. This fitting kit enables the install of the ARB roof rack, adding another storage space option to your Tacoma. This kit comes with stainless steel hardware, as well as two steel rails in an attractive dark gray finish.Coming in at around $165, this roof rack fitting kit is an affordable way to set you up for the addition of a roof rack on your Tacoma. I'm giving this install a one out of three wrenches on the difficulty meter. It can be done in about an hour with minimal tools required. As far as fitment goes, the bracket was absolutely spot on, it was exactly where it needed to be, and fairly easy to install. However, when it comes to the roof seal liner, you will need to modify that almost completely. It did take up a majority of the install time, and it was a little bit tedious work.So if you do shy away from things like that, this might not be the kit for you. However, it was definitely doable, and as long as you're careful with your cuts, it came out fantastic. One more thing I would like to note is that I don't believe the double sided tape was really getting the job done, so you might wanna get some additional weatherstripping or some stronger, larger adhesive to really seal that seal liner back to your roof. Either way, it's completely up to you, this kit did go on without that very nicely, and I was pretty happy with the install. For this install, you will need a torque wrench, a razor knife, measuring tape, 3-inch extension, 5-millimeter Allen socket, 3/8 drive ratchet, and an optional but helpful tool is a trim removal tool.All right, guys. So the first step in our install is going to be to remove these roof seal liners, and then we can go ahead and mount our brackets. Okay. So for this, we're gonna grab a trim panel removal tool, preferably a plastic one so you don't damage the paint. You can do this by hand but this does make it a little bit easier. So you're gonna fish this in between the windshield molding and this plastic piece, and then just pry up. And then now that we have it up, we can go ahead and remove it from the back portion as well. All right. As you can see, there might be some adhesive weatherstripping under here. There's not really a way to get around and removing that, aside from just pulling it up. If you want, during reinstall, you can put some additional weatherstripping in there, or possibly silicone, just to ensure that it's a nice, snug fit, but we will look at that with our install.Next step now that we have this trim piece removed, is we're gonna locate these adhesive covers, and they're over the holes they want us to use to mount the roof racks. So, just locate these holes, and then you're gonna take a knife and cut "Xs" in each one of them. Should be fairly simple, there's two at the front, one in the center, and one at the rear. So, once the "X" has been cut, you might need to just go at it from a couple of different angles here, and being very careful not to scratch the paint in the process, you should see a threaded hole underneath. So, for the second adhesive cover, it is a little bit thicker. And if you're not certain where to puncture, you can put the bar up and line it up with the first two holes that you cut in the front, and that way you know exactly where the third hole should be.So, using our bracket as a guide, we can go ahead and puncture our third hole. Moving on to the last two holes for the back of the bracket, this adhesive cover really only has two spots to cut into anyway, so we can go ahead and put our knife through and make a nice "X", like we did with the front too. Again, if you're more comfortable, you can definitely place the bracket up here, and use the template that it makes for you.Okay. Now that we have all of our holes cut, we can go ahead and grab our bracket. Okay. Next step right before we place our bracket here is...it came with these little rubber gaskets. We're gonna place these along the holes lined up to the corresponding hole. So, the middle sized one first. This is gonna help its seal to your roof, just ensure that there are no leaks, the smallest one goes in the center, and then the largest one goes at the back. Now we can go ahead and grab our bracket. You may wanna also grab some microfibers, just to ensure that you don't hurt the paint when you're placing this on here. Just right under these so that it can rest nicely without scratching any paint.Now that our bracket is in place, we can go ahead and grab our hardware. You will want to grab the smaller bolts that are included, they are the M6 x 20 socket head cap screws, you wanna get two of these with the added washer and lock washer. So, using the bolt with the lock washer and washer in that configuration, line them up to the two bolt holes, get them started. All right. Now we're gonna grab our 3/8 ratchet with our 5-millimeter Allen socket. We're just gonna get these started until they're pretty snug, and then we will bring in a torque wrench for the final adjustment to make sure we are doing them correctly. All right. Grabbing our ratchet with our 5-millimeter Allen socket, you can go ahead and get these snug. But don't over-tighten because we will be using a torque wrench. While you're tightening it down, you do wanna make sure the bracket is seated properly in this channel, you don't wanna damage the paint on the truck by tightening it incorrectly.All right. Moving on to our next bolt. Grabbing another one of our M6 bolts with our lock washer and washer, we can go ahead and get it started in the one middle section. Okay. Then we're gonna grab our 5-millimeter Allen socket, and tighten it down until it's snug, but not over-tightening because we will be using a torque wrench. All right. Moving on to our last two bolts. With our final two M6 bolts and hardware, we're gonna thread them into the last two holes. Some of these might be a little tricky just because there's still some of that adhesive in here. Grab our socket and tighten these down.All right. Now we have our torque wrench and we're ready to tighten these down. We have it set to 3 foot-pounds, the directions call for 2.5 but our torque wrench does not do halves. We also have an extension on here which does change it up a little bit, so getting in the ballpark is gonna be fine. Moving on to our next bolt. All right. Now to the front two. Okay. Now that our bracket is on and bolted down, we wanna put the molding back up here, just to see how much we have to trim off. I recommend snapping it back in place up front here, just to get the most accurate measurement.Now, you will need to cut it in two places, one being to notch out this top part. The second is this entire second layer of molding, where the bolt part of the brackets are, will have to be removed. So, we're gonna mark right at the edge of this, where we have to start notching our molding. We're also gonna mark under here, exactly where it has to come out. You don't have to cut this underside the entire length of it, you can if you want, but you really just have to notch it where the actual brackets bolt to the truck. So, this top piece, you wanna notch right about here, for the length of it, and then this underside, you wanna cut just from the front to the back of the actual physical bracket.Okay. So we have our weatherstripping here, and we also have our passenger side bracket just for reference. We did measure it on the truck, which is the best way to go about this. But the fact that we have the bracket here, we can also just double check our measurements. So, measuring our front bracket, have that about five inches, it's hard to see on here but we can just double check the marks that I made, also about five inches. So, I'd say we're ready to go ahead and cut this. So we have our marks, five inches apart. We can go ahead and make a cut with a razor knife.Using our marks as a guide, we can also cut down. And the same thing on the other side. You might have to make several cuts to get this perfect but just go carefully until we're all the way done. Once we've made our cuts here and here, and they're all the way through the second layer, you can go ahead and start to peel this back and cut along this metal piece underneath. You should be able to install this with the metal piece still on there, I like to keep it in there for rigidity. But if you do need to cut it out, you can. I recommend slicing...checking the fitment on the truck and then coming back if you need some more clearance. But I believe the easiest way to do this is just to peel it back, and slice along here. Slow and steady but eventually, we'll be clear.Now that we have that piece removed, this should be the exact length of our original bracket, we can go ahead and cut 10 millimeters out of the inside side of this. So you wanna make sure you're double checking this because at the front of the truck, we're gonna cut 10 millimeters out right here, just enough to clear the bracket. Again, if you wanna bring your bracket over and measure, just make sure we have enough. Looks like we're gonna be spot on here. We might have to take a little bit more out that side but I'd rather cut not enough than cut too much.All right. So next we're gonna cut about 10 millimeters out of this right here so it clears our bracket. We're just gonna cut two slices down here, and one right along there. Again, if you're not sure how much to take out, always err on the side of a little less than you need. You can always cut more later on. And each truck might be slightly different, how the bracket sits on the top of your Tacoma, it's always best to just check with your truck. So, we checked the fitment on our first section, and it worked out pretty nicely, so we're gonna go ahead and move on to our second section. Again, we just wanted to double check figment on the actual bracket, which we did, and now we can cut our measured sections, here to here. Just wanna be careful to only cut this bottom part and not the top section. All right. Now that we have a pretty good slice, just peel it back, cut it back a little bit more. Now that we have our cut made, we can, sort of, bend this back a little bit, and start to cut towards the other side.All right. So we've made a mark right at our points where this bracket touches, and we cut about 10 millimeters back. Again, it's just a guess, we're trying to fit it to our truck, we might have to cut a little bit more, but I like to err on the side of caution as far as that goes. So let's go ahead and make our cuts here. Nice. All right. And then we're just gonna go ahead and cut along this line. We're gonna try to be as careful as possible with this, again, because it will be facing up. We will see our cut and we just want everything to look neat. You might wanna just take another pass. Not putting a whole lot of pressure on this, I could be pushing harder, but I'd rather just let the knife do its work, and I don't wanna slip and cut too much, so...Okay. So we're gonna cut our final section for the bracket. This one is about six inches. Again, you can measure the spare bracket you have, the passenger side. Also, I would check fitment on your driver side as well. But we have made our marks, and go ahead and slice in two. Now, a good tip is that we are cutting from the inside of this piece to the outside, so we are nicking this outside ridge a little bit, but this needs to get cut anyway, and we are actually making our cut exactly where it needs to go. Make sure we're not cutting this inside ridge, which faces the inside of the roof. All right. Once we've hit the metal piece, you can go ahead and stop. Now that we have our measurements about how much we wanna cut out, we've marked them down, we can grab our knife and just make our cuts. You may need multiple cuts just like the other sides but that's okay. All right. Now let's double check our fitment.Now that we are done cutting our weatherstripping, we can go ahead and grab our two-sided tape. We're gonna wanna grab two of the four strips, and this one is gonna go in this first big groove here. You're gonna want to clean this as much as possible, just so you get good adhesive on each side. All right. We can go ahead and peel back the red tape, and then get our second piece and put it in the farther section. Okay. Sticking our second section back here. There might be some leftover weatherstripping. You don't have to remove this, you can if you want to. I think leaving it in there will give it a little bit better of a seal, even if it's not adhesive anymore. But again, that's gonna be up to you, however you would like, it's not gonna hurt it either way.We're gonna grab our weatherstripping, and we're gonna go ahead and put it in the front clip, make sure not to overlap the windshield molding, and tuck it into our cutouts. This may take a little bit of finagling around these brackets, you know, because it is a modified piece, it might not fit perfectly at first, but we're gonna do our best. And then we should have a good amount left to overlap our last piece of molding at the back of the roof.With our driver side complete, we're gonna go ahead and repeat the steps on the passenger side. All right. Now we're grabbing the weatherstripping that we cut. Go ahead and make sure it's in this first bracket in front, and it's not overlapping the windshield molding, and then tuck our cuts around. You may have to work it around a little bit to get it to sit nicely. All right. Now that we have it in place, we're gonna just lift up a little bit on this back piece of molding, so that we can tuck this piece underneath, because it does clip in in that formation. So, with our main piece of weatherstripping tucked under, we just wanna press down on the back, make sure everything's all sealed, and we are all finished.All right. So that is gonna do it for the review and install of our roof rack fitting kit. Remember, for all things Tacoma, keep it at extremeterrain.com.

      Product Information

      Features, Description, Reviews, Q&A, Specs & Installation

      Features

      • Roof Rack Fitment Kit
      • Enables the Installation of the ARB Roof Rack
      • Stainless Steel Fittings for Durability
      • Quick to Install
      • Designed to Fit 2005-2023 Toyota Tacoma Models

      Description

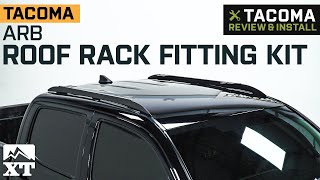
      Provides Extra Storage Space. If your Toyota Tacoma doesn’t have any more room to accommodate your luggage, you can transform your truck’s roof into an extra storage space. Install an ARB Roof Rack using this ARB Roof Rack Fitting Kit. You’ll finally be able to store bulky items such as sleeping bags, chairs, or tents, without losing space on the truck bed or cabin.

      High-Quality Stainless Steel. To ensure a secure fit and all-weather durability, this roof rack fitment kit is made with high-quality stainless steel material. Using stainless steel virtually guarantees corrosion-free hardware that can last as long as your roof rack.

      Quick to Install. Setting up the roof rack is made simple. Using the right tools, you can easily and quickly install the rack with the complete components in this installation kit.

      Application. The ARB Roof Rack Fitting Kit is designed to fit 2005-2023 Toyota Tacoma models.

      Fitment:

      Details

      ARB 3723010

      CA Residents: WARNING: Cancer and Reproductive Harm - www.P65Warnings.ca.gov

      Installation & What's in the Box

      Installation Info

      What's in the Box

      • (1) Roof Rack Fitting Kit
      5.0

      Customer Reviews (3)

        Brand Image

        Reviews of ARB Exterior products have an average rating of 4.7 out of 5

          Questions & Answers

          10 More Questions

          Will It Fit My Tacoma