 FREE 1 to 3-Day Delivery on Orders $149+ Details

How to Install American Fastback Recon Solid Hard Top - Textured Black (97-06 Wrangler TJ) on your Jeep Wrangler
Please read instructions entirely before installing this product
This accessory is designed and manufactured primarily to augment the vehicles appearance and to protect the occupants from normal weather conditions. This product is not designed to protect occupants from injury or death in the event of an accident. Always wear your seat belt.
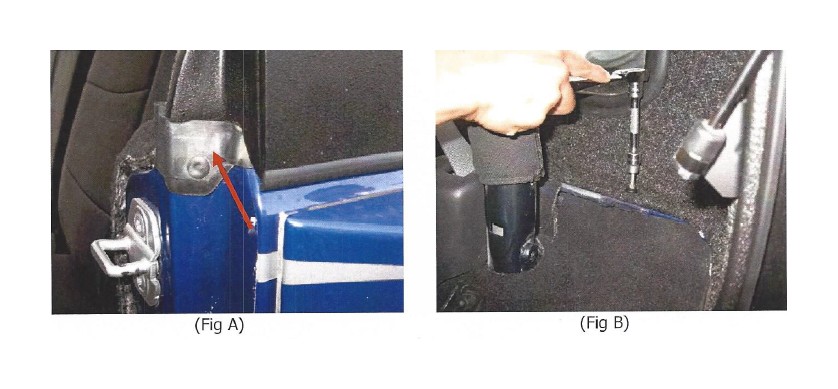
Step 1: If your vehicle is/was equipped with a softop remove all associated hardware. (Bow assembly, tail gate bar, tailgate bar clamps, ect) Do not remove the front Mucket seals behind the door openings. ( Fig A) Now would be a good time to inspect all the factory seals and replace if necessary.
Step 2: With assistance carefully place the rear section of the top onto the vehicle lining up the holes in the top and the holes on the body. (3 per side) Attach using included hardware. (Fig B) Do not fully tighten at this time. NOTE: Nuts are included if your vehicle does not have the OEM nut plates.
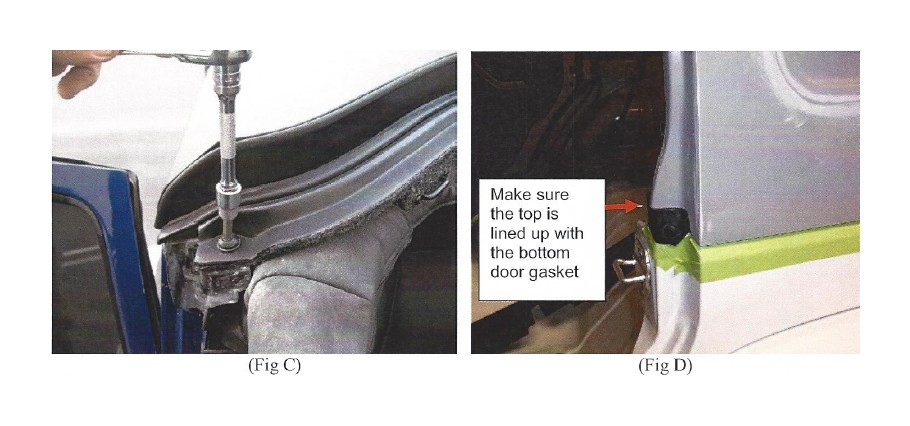
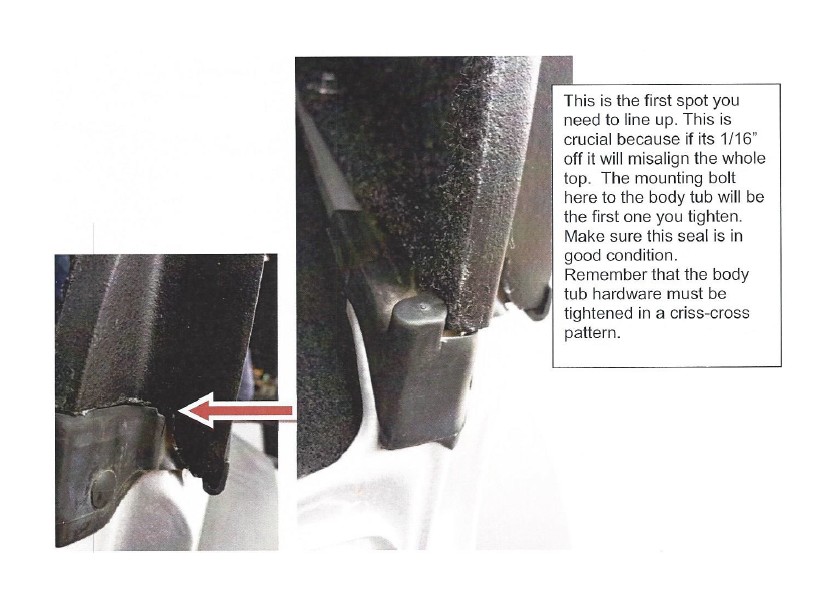
Step 3: Install the included front top bolt on the top front corner of the top (4 -Door Only) Fig C Make sure top is aligned evenly on both sides of the vehicle and with the rear door opening. (Fig D) Secure all rear section (top and bottom) mounting bolts at this time. It may be helpful to have your assistant push from the outside of the top inwards to help align holes. NOTE: Due to variances in vehicle manufacturing if a hole is slightly off you can easily open the hole up with a drill bit. (Figure D) Alignment is crucial to the entire top fitment.
Step 4: With assistance install the rear window. While your assistant holds the window attach window hinge through the holes in the top with the included machine screws. (Fig E) Do not tighten completely.
Step 5: Close window and make sure gap on each side of window between glass and top is even. (Fig F)
Step 6: When proper placement is reached go back and securely tighten hinge bolts. Raise glass up and install gas struts. (Fig G)
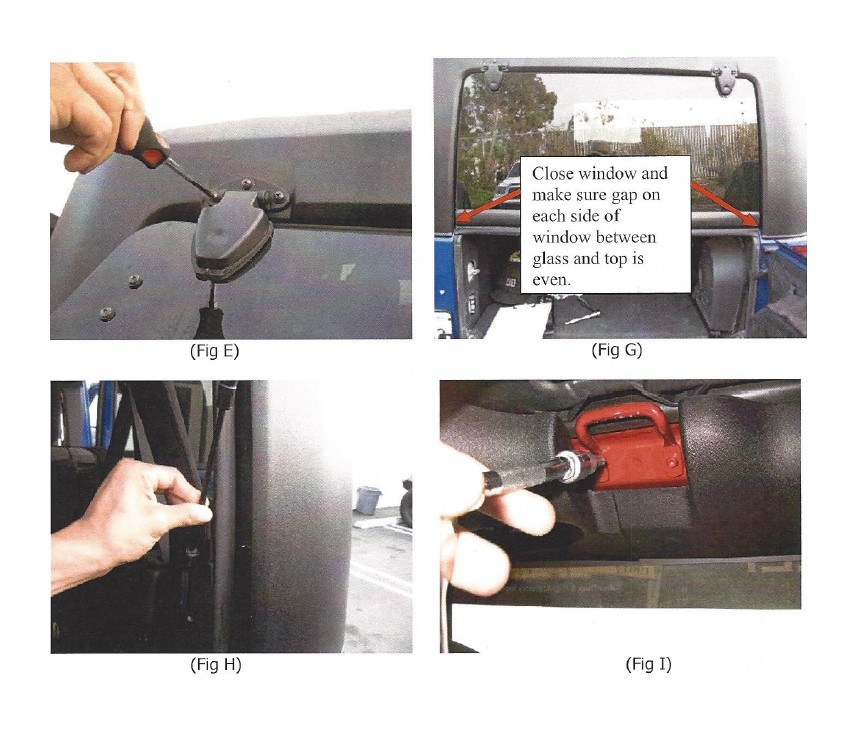
Step 7: Pull the sun visors back and remove the footman loop attached to the top of the windshield frame using a #25 torx bit. (Fig I)
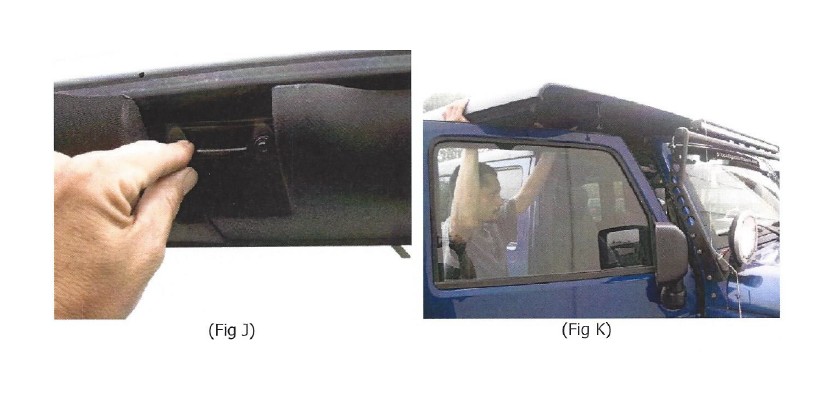
Step 8: Install the included footman loops using the previously removed hardware. (Fig J)
Step 9: With assistance carefully place the front section on the vehicle. (Fig K)
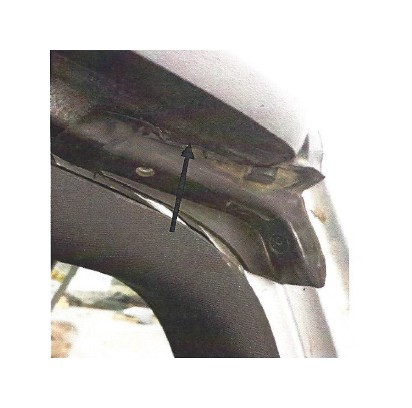
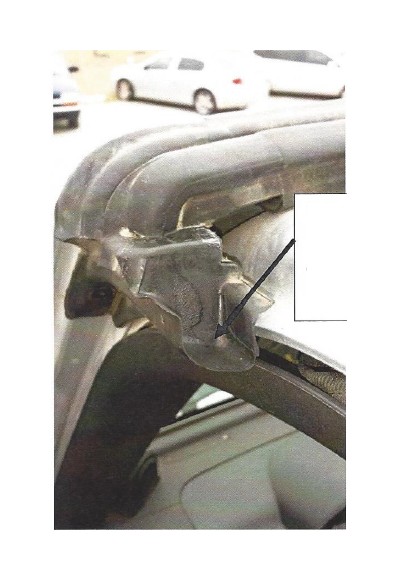
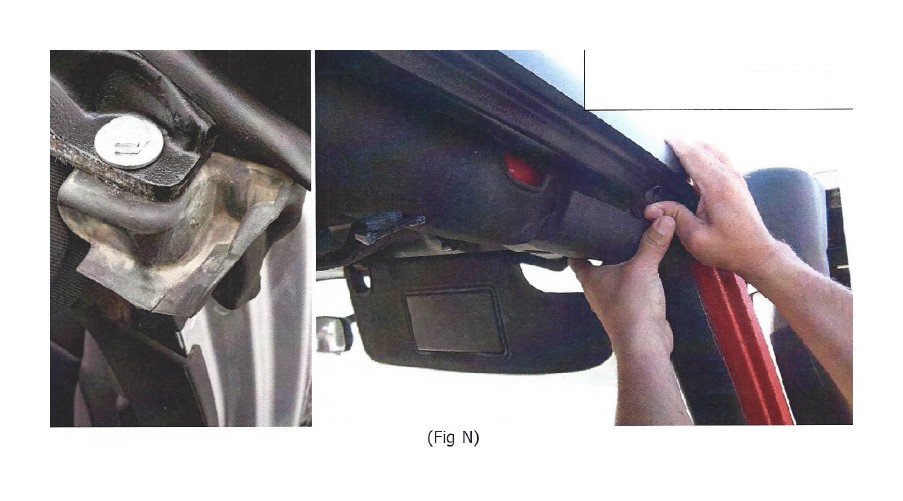
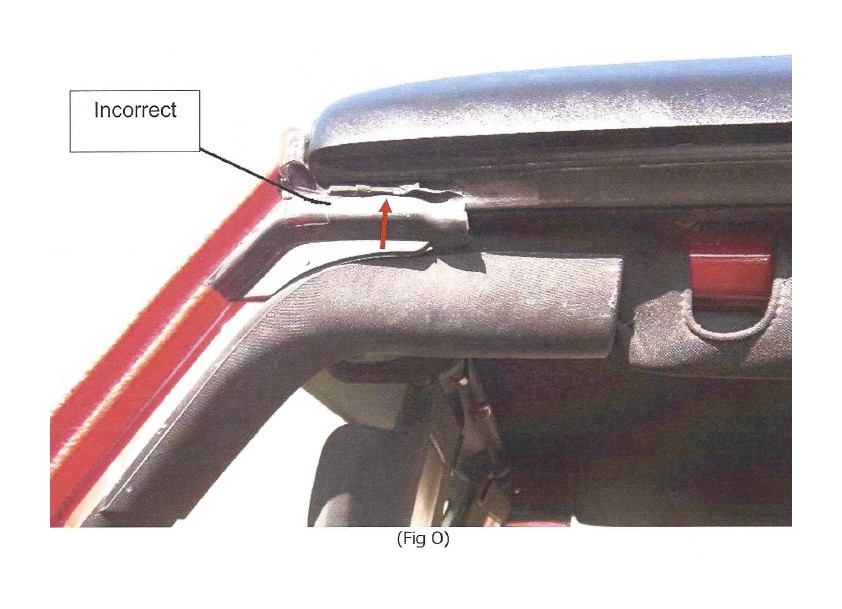
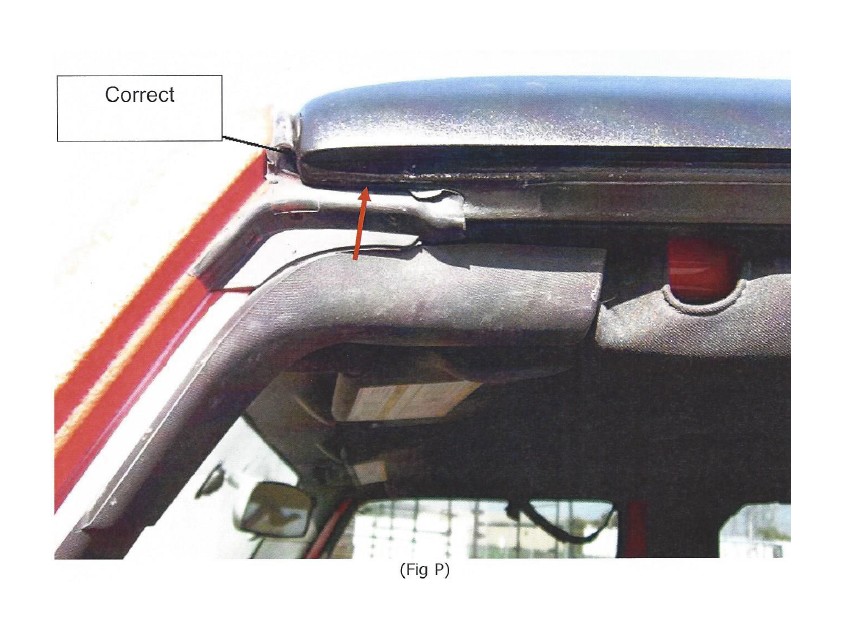
Step 10: IMPORTANT- When placing the front deck section on; make sure the rear fits into the OEM seals. (Fig L, M) Be sure to "Tuck" in the front OEM corner seals (Fig N, 0, P)
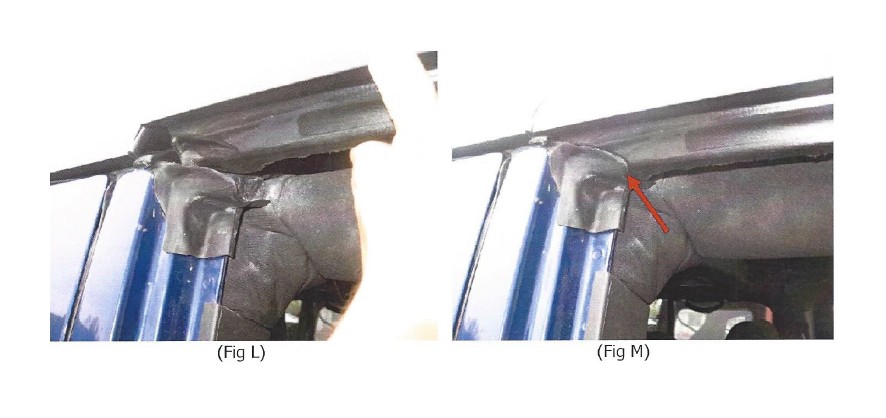
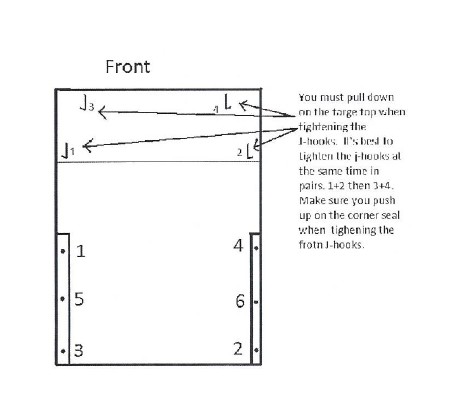
Tuck the factory seal up into the top. You will also need to push up on the seal at the arrow when tightening the j-hooks. Remember to pull down on the top when tightening the j-hooks.
Make sure the inside of this seal is clean. The factory uses a foam to seal the doors, the foam will dry and stick to the seal.
This is the other seal that needs to be clean. This one is on the B pillar where the middle door surround bolt goes. Do not over tighten these, the top may crack if torque down too much.
When fitting the front section of the top you need to "tuck" in the OEM seals
NOTE: The instructions for installing this top must be followed and done every time as described when the top is removed and re-installed.
Step 12: Secure front section of top to vehicle by attaching the latches to the rear footman loops first then the front latches to the front footman loops on the windshield frame. (Fig Q, R, S) NOTE: Do not over tighten, tighter does not always equal better. The clamp on the latch can be adjusted by turning the nut counter clockwise and the hook clockwise. It is best to tighten the J-hooks at the same time while also pulling down on the top.
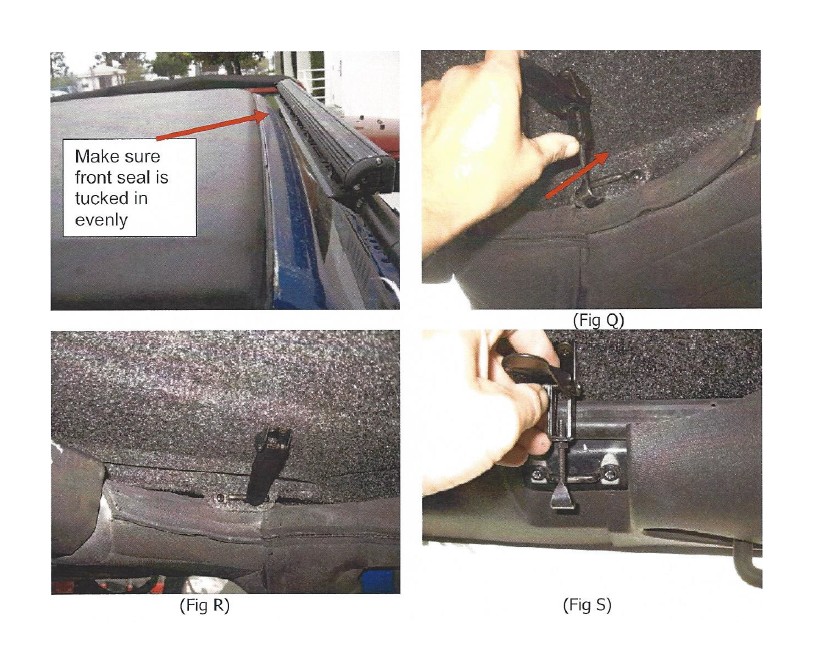
Do not over tighten latch, this could cause damage to your top and/or latch
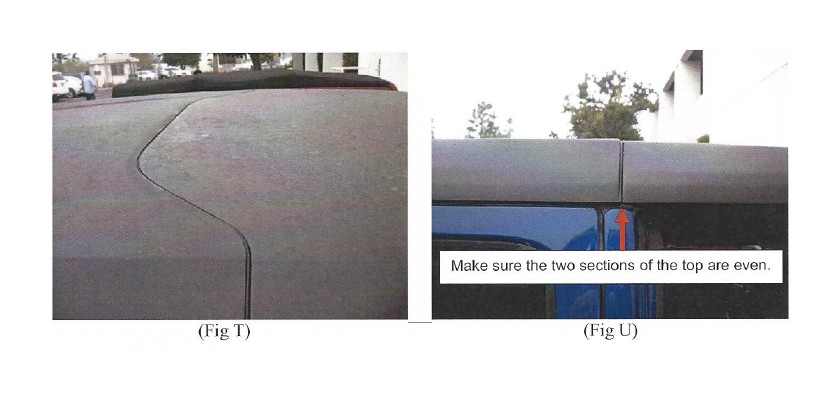
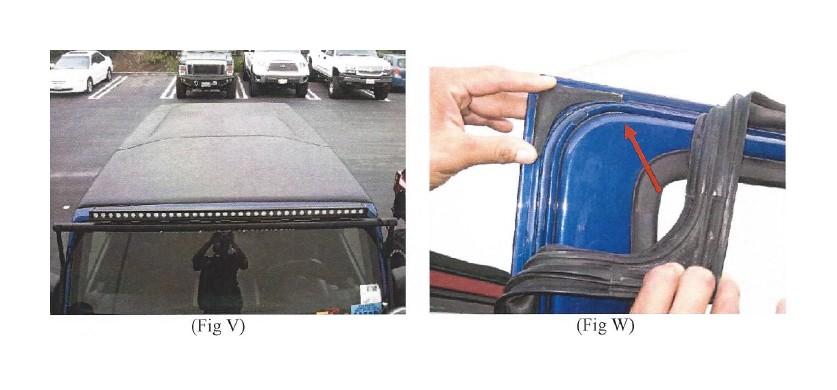
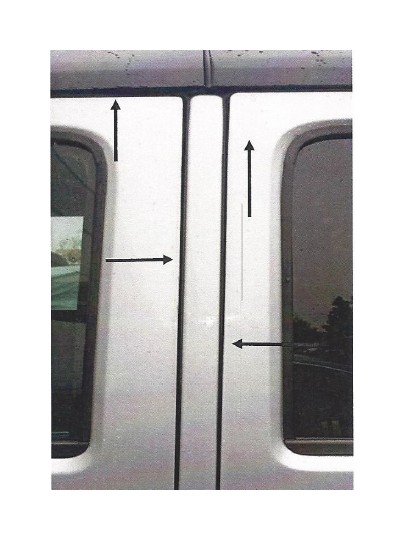
Step 13: Make sure seal between front section and rear section is evenly spaced (Fig T, U, V) and the front portion runs evenly along top of windshield frame.
Step 14: Pull back top rear corner seal from the front door_ Making sure door is clean, peel back the paper from the seal and place on door. (Fig V)
Doors can be adjusted for better fit by adjusting the door striker, the door striker can be adjusted about 3/8".
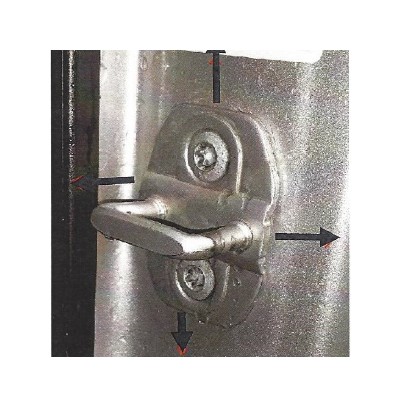
Make sure door gap is equal around the door. Adjust door hinges and/or striker if necessary. You also want the door to sit level with the B-pillar as much as possible.
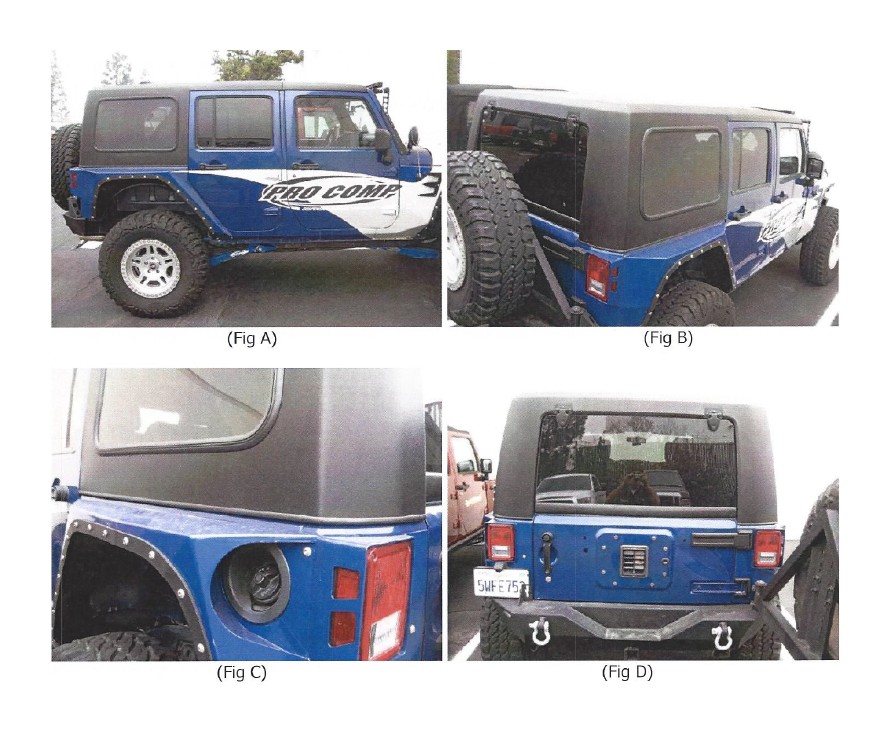
Step 15: Installation is now complete. (Fig A-D)
ADJUSTMENTS I INSTALLATION TIPS
Due to variations in construction and assembly procedures during vehicle manufacturing and also dealing with a vehicle that has been on the road for almost 5-10 years, in most cases you will be required to make some sort of adjustments.
1. In many instances the actual steel door on the vehicle will need to be adjusted. You can make adjustments to the lower doors by slightly loosening the door hinge bolts using a T40 torx bit and reposition the door for an improved fit. NOTE: Use caution when doing so. When loosened the doors can move forward, backwards, up and down. You can also adjust the door striker to tighten the door to top fitment. The door striker has about 3/8"-1/2" of adjustment. It also has been noticed that the curvature of the door will vary front vehicle to vehicle and can be adjusted by pulling on the top of the door while it's held open.
2. Make sure top is sitting in the factory seals correctly. Make sure the seals are not folded or smashed in the wrong position. ( Refer to Fig L-O)
3. If the back side of the door is hitting the top, unhook the windshield latches, loosen the rear mounting bolts and then push top backwards. Re-tighten the rear bolts and re adjust front latches.
4. Make sure vehicle is square In some cases the windshield frame may need to be adjusted. an 1/8" can make a big difference in regards the angles. This would be done by loosening the windshield hinge/bracket bolts. With an assistant pulling or pushing the frame (depending on which way you need to go) retighten the bolts.
5. If the top of the door is hitting the top, you can shim the top. Unlatch the front of the top and remove the rear bolts. You can shim top simply by placing the needed amount of flat washers over the mounting holes on the vehicle and then replace top over and reattach bolts.
6. The OEM seals may need to be changed. Depending on the condition either one or all of the rubber seals needed for a good fit may need to be replaced. (Full Steel Door Seal, Cowl Rubber, Windshield header Seal.) Signs of a seal needing replacement are; worn, dry or flattening of the rubber.
