FREE 1 to 3-Day Delivery on Orders $149+ Details

How to Install Alloy USA Performance Axle Tube Seal Pair, Red on your 1987-2006 Jeep Wrangler YJ, TJ

Shop Parts in this Guide
Front Dana 35, Dana 44 (YJ, TJ, XJ, ZJ without CV joint) Installation Instructions
11102 - Alloy Axle Tube Seal (Red)
11103 - Alloy Axle Tube Seal (Black)
Contents: (1set) Axle Tube Seals

IMPORTANT: The Axle Seals are designed to help control and minimize dirt, rocks, and mud from entering the axle tubes. They are not intended for use as an oil seal. Because the inner axle tube surface and the axles themselves do not have a clean machined surface these seals can not control large amounts of gear oil from leaking. To control the amount of gear oil in the axle tubes all inner seals should be replaced at this time. The ALLOY USA tubes seals are not intended to control gear oil leaks caused by failed inner axle seals.
NOTE: Before installing axle tube seals make sure that the vehicle has been placed in gear and the emergency brake is set. Read instructions fully before proceeding with installation.
Step1: Place vehicle in gear and set the emergency brake. Remove front tire, brakes, and axle as noted in your vehicles shop manual.
Step2: With axle removed clean the inside surface of the axle tube. Surface area needs to be as clean, smooth and dry as possible. Use steel wool to remove scaling and rust. Brake cleaner should be used to remove any remaining dirt and oil from inner axle tube. Clean surface should extend 4" into tube.
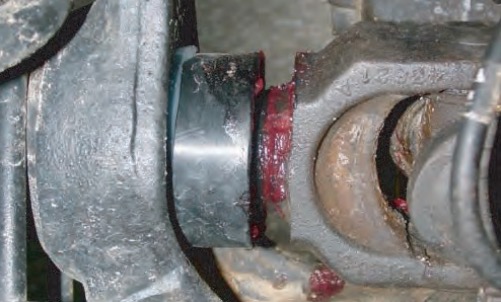
Step3: Clean the axle surface to remove any dirt, oil or rust. The axle should be cleaned 4" back from yoke flange (pic.1). Test fit axle seal onto axle at this time. There should be a tight fit but the axle should be able to spin inside of the seal.
Pic 1
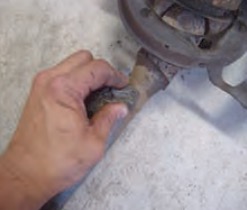
Step4: With inner tube and axle cleaned apply RTV silicone to the tube seal area (pic2).
Pic 2
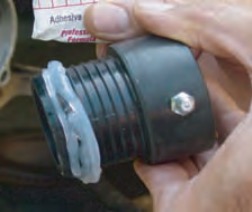
Step5: Press axle tube seal into housing making note of Zerk fitting location. Make sure that you will be able to add grease to tube seal when installed. It is important to follow the silicones curing instructions at this time. Not allowing the silicone to dry before driving vehicle may result in a bad seal and possible leaks. (pic.3).
Pic 3
Step6: Before final assembly inspect all other axle seals including the inner axle seals located at the carrier. These seals must be in good condition and should be replaced at this time. Follow instructions outlined in the vehicles shop manual.
Step7: Apply grease to both the axle tube seal and axle surface before inserting axle. With axle installed assembly outer knuckle, brakes , and tire as noted in vehicles shop manual.
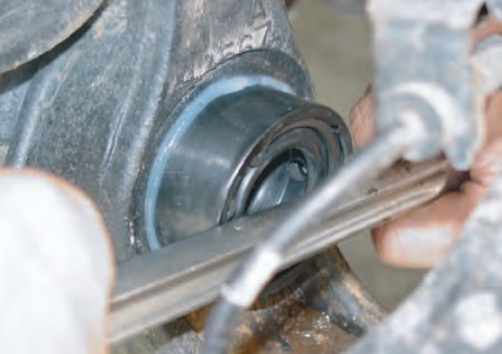
Step8: Connect grease gun to Zerk fitting and add grease to axle seal. Grease should flow out of seal (pic.4). DO NOT DRIVE VEHICLE until silicone has cured.
Pic 4