 FREE 1 to 3-Day Delivery on Orders $149+ Details

How to Install an AIRAID MXP Series Cold Air Intake on your 2012-2017 3.6L Jeep Wrangler JK
Installation Time
5 minutes
Tools Required
- 3/8 Drill and bits. Scratch Awl andStraight Edge. Hack Saw and Bench Vice. Allen wrench
- set. 8 and 10mm sockets and wrenches
- ratchet and extension

Shop Parts in this Guide
Full color instructions can be viewed on our web site at Airaid.com. Use the Product Search function to find your part number, and click View Details.
Installation Instructions
For Part Numbers:
310-132 700-462 Airaid Oiled Media Filter
311-132 701-462 SynthaMax Dry Media Filter - Red
312-132 702-462 SynthaMax Dry Media Filter - Black
313-132 703-462 SynthaMax Dry Media Filter - Blue
2012-15 Jeep Wrangler
3.6L V6
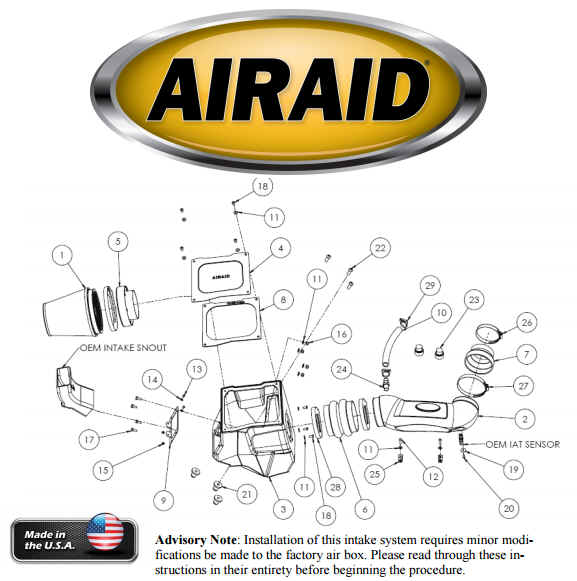
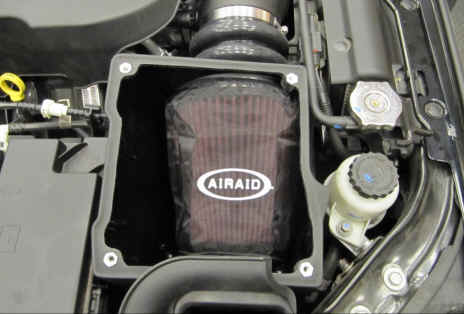
Component Identification
| 1 | Airaid Premium Filter | 1 |
| 2 | Intake Tube | 1 |
| 3 | Cold Air Box | 1 |
| 4 | Airbox Lid | 1 |
| 5 | Filter Adapter | 1 |
| 6 | Double Hump Hose | 1 |
| 7 | Silicone Reducer | 1 |
| 8 | Airbox Lid Gasket | 1 |
| 9 | Air Scoop Bracket | 1 |
| 10 | 5/8” Hose 7 1/2” long | 1 |
| 11 | 1/4” Flat Washer | 13 |
| 12 | 6mm x 1.0-20 Bolt | 2 |
| 13 | 8-32 x 3/8”Button Head Bolt | 2 |
| 14 | #8 Washer | 2 |
| 15 | #8 Kep nut | 2 |
| 16 | 1/4” Nylock Nut | 4 |
| 17 | 1/4-20 x 5/8” Hex Bolt | 4 |
| 18 | 1/4-20 x 1/2” Button Head Bolt | 7 |
| 19 | #8 Fender Washer | 1 |
| 20 | #8-32 x 1/2 Button Head Bolt | 1 |
| 21 | 3/8-16 Well Nut | 3 |
| 22 | 3/8-16 x 1 1/2” Button Head Bolt | 3 |
| 23 | Engine Cover Grommet | 2 |
| 24 | 3/8 NPT x 5/8 Barbed Fitting | 1 |
| 25 | 1/2” Adel Clamp | 2 |
| 26 | #48 Hose Clamp | 1 |
| 27 | #64 Hose Clamp | 1 |
| 28 | #72 Hose Clamp | 2 |
| 29 | #19 Speed Clamp | 2 |
Disconnect The Negative Battery Terminal!
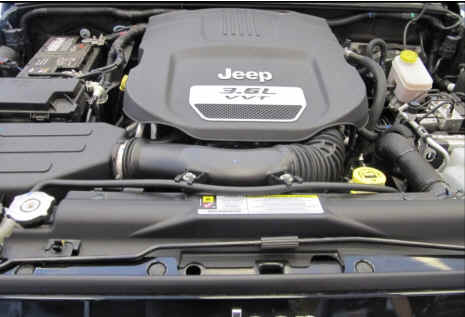
1. Remove the engine cover and set it aside
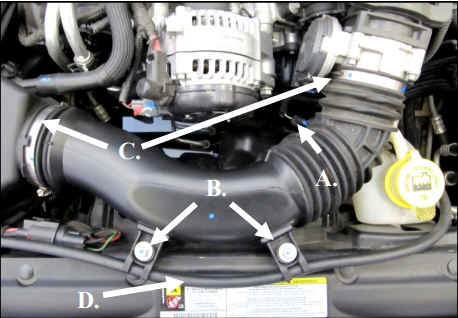
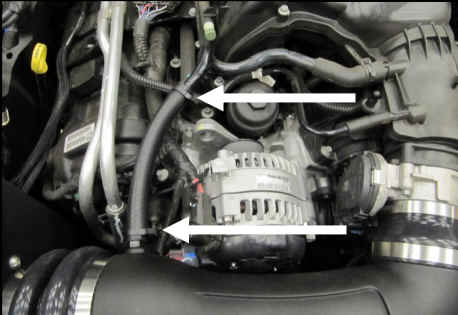
2. A.) Disconnect the air temp sensor in the factory intake. B.) Remove the two 6 mm bolts holding the intake tube to the fan Shroud. C.) Loosen the Clamps on both sides of the factory intake tube. D.) Unclip the coolant line from the intake tube and remove it from the vehicle.
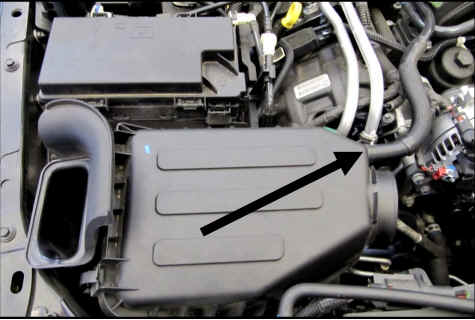
3. Disconnect the crankcase breather line in the top of the airbox. Remove the entire airbox as an assembly by unseating it from the mounting grommets in the inner fender and lifting upward.
4. Install The Filter Adapter (#5) in the Cold Air Box (#3) using three 1/4-20 x 1/2” Button Head Bolts (#18) and 1/4” Flat Washers (#11).
5. Install the Air Scoop Bracket (#9) into the Cold Air Box as shown by using four 1/4-20 x 5/8 Hex Bolts (#17), 1/4” Flat Washers (#11), and 1/4” Nylock Nuts (#16).
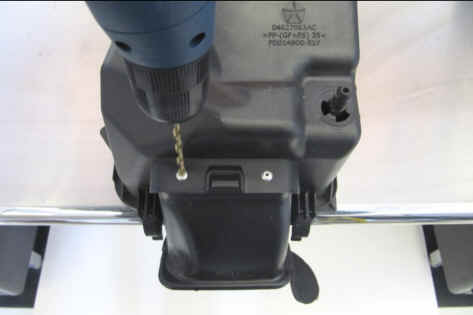
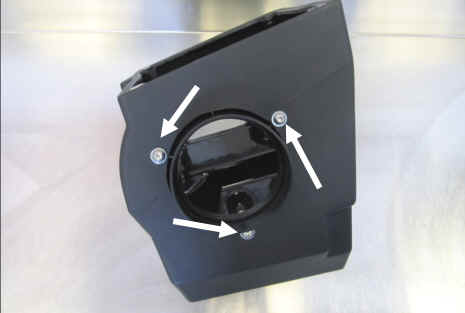
6. Drill out the rivet heads on the factory airbox and remove the air scoop.

7. Set the factory air scoop on a workbench and mark all four corners at the three inch mark using a scratch awl. Using a straight edge and the awl, scribe a line connecting all four corners.
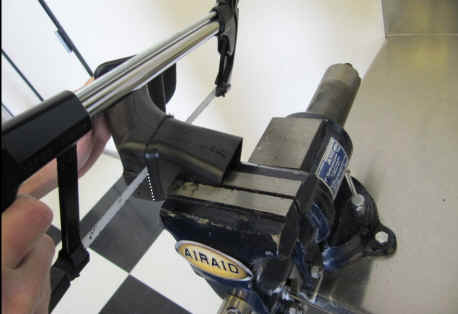
8. Firmly place the air scoop into a bench vice and cut along the line created in step 7 using a hack saw or equivalent.
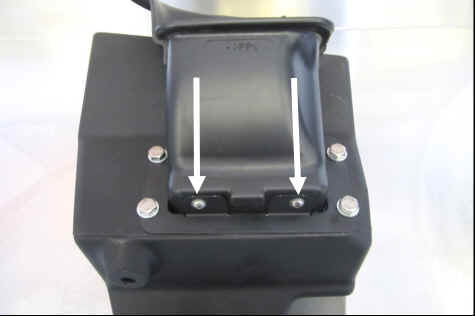
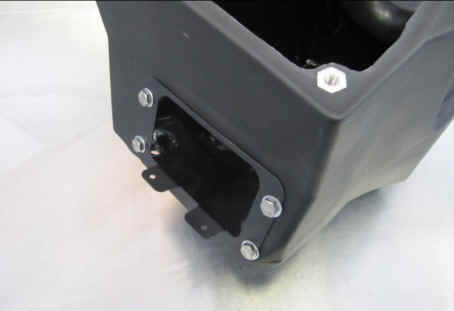
9. Insert the factory air scoop into the Cold Air Box and secure it using two 8-32 x 3/8” Button Head Bolts (#13), #8 Flat Washers (#14), and #8 Kep Nuts (#15).
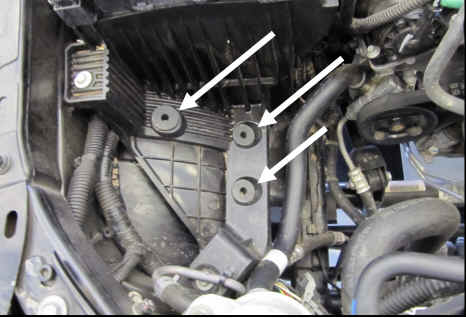
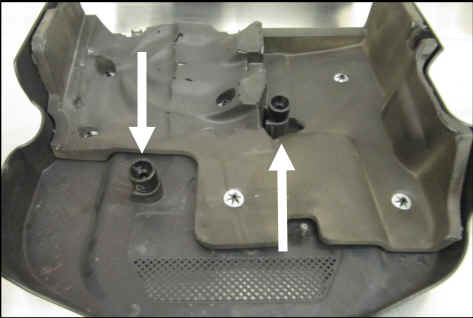
10. Replace the factory airbox grommets in the inner fender area with the three 3/8” Well Nuts (#21).
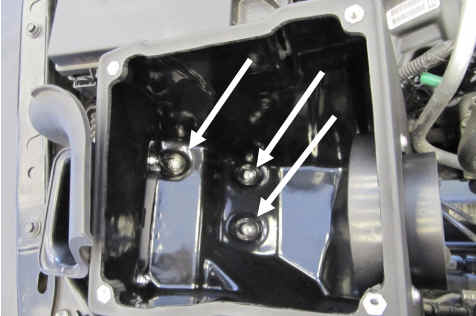
11. Mount the Cold Air Box assembly in the inner fender using the three 3/8” x 1 1/2” Button Head Bolts (#22)

12. A.) Install the 5/8” Barbed Fitting (#24) into the threaded 3/8 hole in the side of the Airaid Intake Tube (#2). B.) Transfer the air temp sensor from the factory intake into the Airaid Intake Tube and secure it using the #8-32 x 1/2” Button Head Bolt (#20) and #8 Fender Washer(#19).

13. Slide the Double Hump Hose (#6), and two #72 Hose Clamps (#28), onto straight end of the Tube. Slide the Silicone Reducer (#7) and the #48 and #64 Clamps on the 90 deg. bend of the Intake tube. Leave the Clamps loose for now.
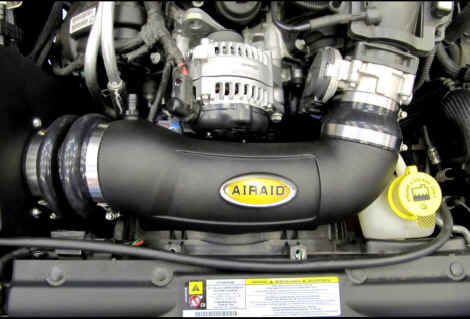
14. Install the Airaid Intake Tube onto the Cold Air Box and throttle body, align and tighten all four of the Clamps. Reconnect the air temp sensor.
15. Replace the factory breather line with the supplied 5/8” Hose (#10), and connect it to the Barbed Fitting on the Intake Tube. Secure it using a single Speed Clamp (#29) on each end.

16. Secure the coolant line to the fan shroud using the two Adel Clamps (#25), 6 mm Bolts (#12), and 1/4” Flat Washers (#11).
17. Replace the factory engine cover grommets with the larger, Airaid Engine Cover Grommets (#23). Reinstall the engine cover.
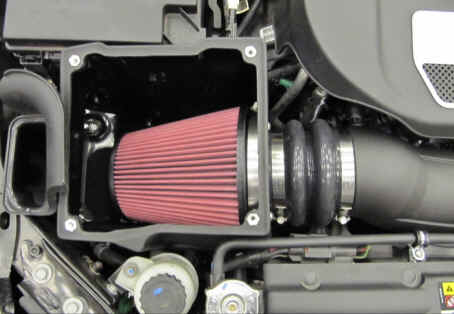
18. Install the Airaid Premium Filter (#1) onto the Filter Adapter
19. Place the Gasket (#8) onto the underside of the Air Box Lid (#4) and peel off the protective film. Mount the lid on the Air Box using four 1/4-20 x 1/2” Button Head Bolts (#18), and 1/4” Flat washers (#11).

20. Double check your work! Make sure there is no foreign material in the intake path. Make sure all clamps, hoses, bolts, and screws are tight. Double check the hood clearance! Reconnect the negative battery cable!
21. Pre Filter Option: Part Number 799-445
For maximum protection in the harshest environments Airaid offers a slip on Pre Filter.
- Prolongs Cleaning Intervals
- Water Repellant
- Free Flowing Protection
Thank you for purchasing the Airaid Intake System. Contact Airaid @ (800) 498-6951 8:00 AM - 5:00 PM MST weekdays for questions regarding fit or instructions that are not clear to you. Your Airaid Intake System was carefully inspected and packaged. Check that no parts are missing, or were damaged during shipping. If any parts are missing, contact Airaid. The air filter element is protected from direct exposure to water and debris; care should be taken not to drive through deep water. WATER INGESTION IS THE DRIVERS RESPONSIBILITY! The air filter is reusable and should be cleaned periodically.
FILTER IDENTIFICATION
700-462 Airaid Oiled Media
702-462 Airaid SynthaMax Dry Media - Black
701-462 Airaid SynthaMax Dry Media - Red
703-462 Airaid SynthaMax Dry Media - Blue
For your Oiled media filter we suggest using the AIRAID Filter Tune-Up Kit!
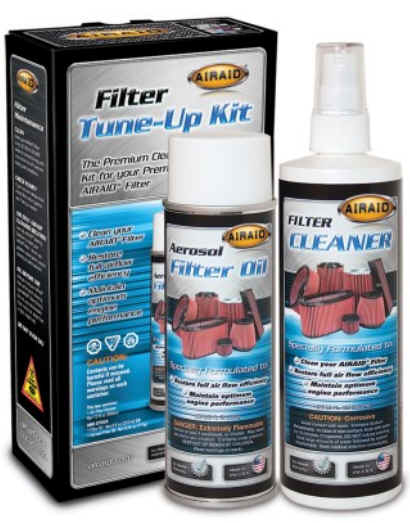
P/N 790-551 Aerosol Spray
P/N 790-550 Squeeze Spray

Synthamax Air Filters do not require oil. Service air filter as needed by cleaning with common non-petroleum all-purpose household cleaner and water. Simple Green®, Formula 409® or equivalent works great. Apply cleaner to outside of air filter and allow to soak. Then flush filter clean from the inside out with a garden hose and repeat steps if necessary. Do not apply high pressure water or air to clean filter. Allow filter to air dry and reinstall.
