FREE 1 to 3-Day Delivery on Orders $149+ Details

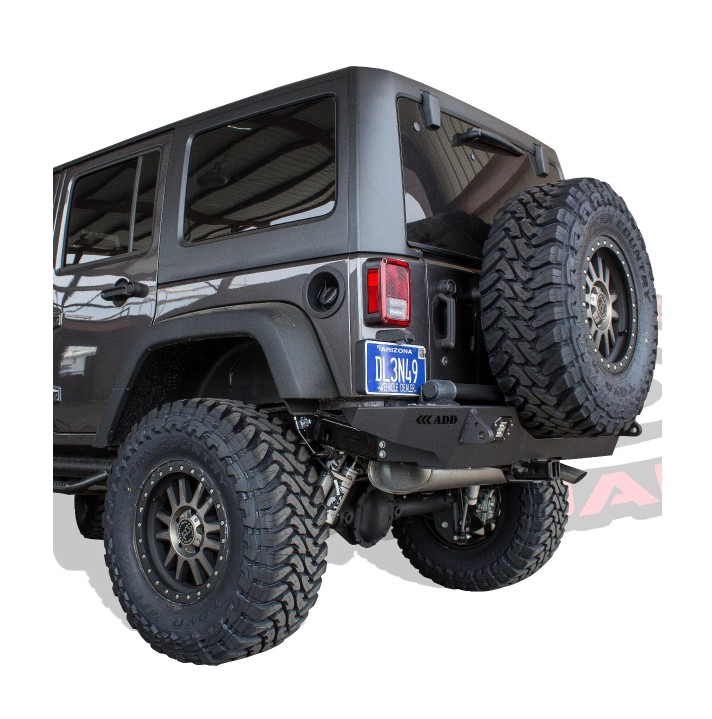
How to Install Addictive Desert Designs Tire Carrier (07-17 Wrangler JK) on your Jeep Wrangler
Installation Time
45 minutes
Tools Required
- Ratchet
- 19mm Socket
- 13mm Socket
- 16mm Socket
- 18mm Socket
- 7/32” Allen Wrench or Allen Key Socket
- 9/16” Wrench
- 3/4” Socket & Wrench
- 1 1/2” Socket
- Razor Blade
PREPARATION
1. Disconnect the negative terminal on the battery. Park the vehicle on level ground and set the emergency brake.
2. We recommend reading through the installation instructions in whole before performing the work.
3. Estimated Installation Time: 2 Hours
4. You will need the following tools:
a. Ratchet
b. 19mm Socket
c. 13mm Socket
d. 16mm Socket
e. 18mm Socket
f. 7/32” Allen Wrench or Allen Key Socket
g. 9/16” Wrench
h. 3/4” Socket & Wrench
i. 1 1/2” Socket
j. Razor Blade
Note: this installation requires 2 people for best results
5. Included in Kit:
2 – Hex Head Bolts – 1/2”-20 x 4 1/2”
18 – Flat Washers – 1/2”
8 – Metal Locking Nuts – 1/2”-20
6 – Hex Head Bolts – 1/2”-20 x 1 1/2”
10 – Button Head Bolts – 3/8”-16 x 1”
20 – Flat Washers – 3/8”
10 – Nylon Locking Nuts – 3/8”-16
1 – Hex Head Bolt – 1/2”-13 x 2”
1 – Hex Head Bolt – 1/2”-13 x 1 1/2”
1 – Nylon Locking Nut – 1/2”-13
1 – Nylon Locking Jam Nut – 1/2”-13
1 – Male Heim – 1/2” x 1/2”
1 – Female Heim – 1/2” x 1/2”
1 – Non-Locking Grade 8 Nut – 1/2”-20
REMOVAL
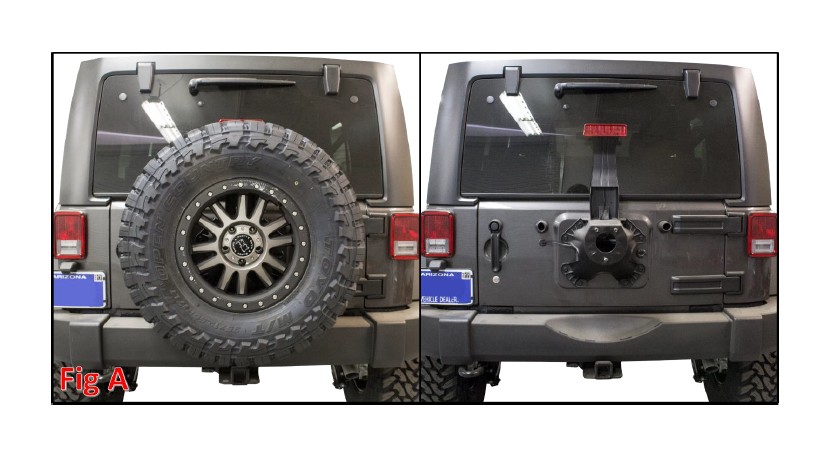
1. Remove your Spare Wheel/Tire. (Fig A)
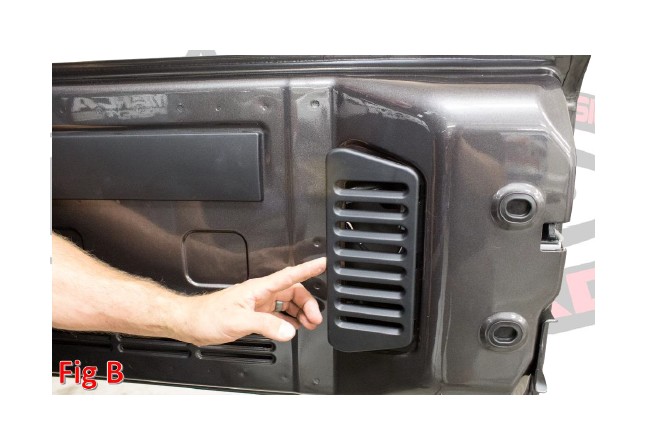
2. Open your rear hatch, then find the small plastic cover that sits on the inside portion of your hatch. Remove this panel by pulling the left side of the panel outwards. (Fig B)
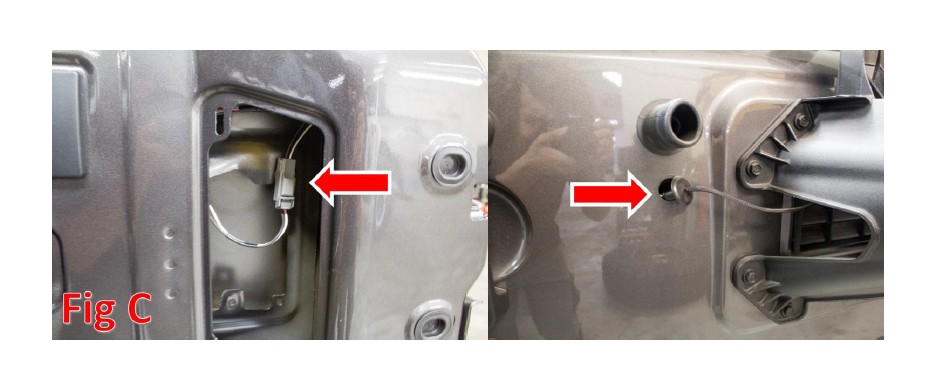
3. Unplug the electrical connector just inside of that panel. Then, reinstall the panel. Pull the rubber grommet/harness assembly out of your hatch. (Fig C)
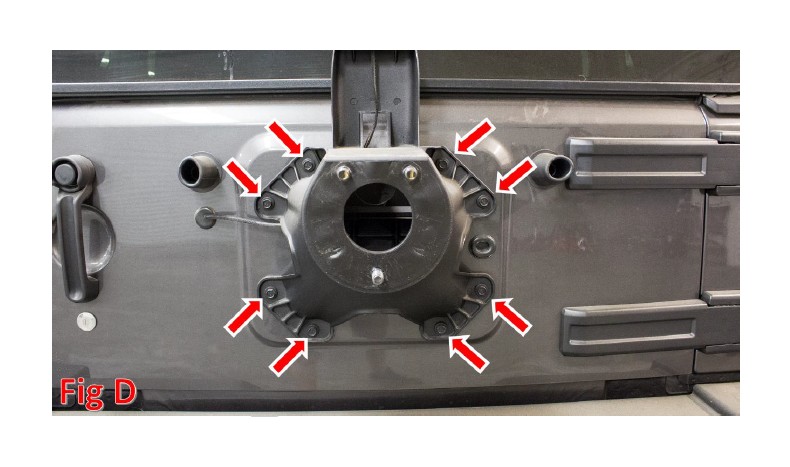
4. Using a 13mm Socket, remove the bolts (x8) that hold on the spare tire carrier. Then, remove the carrier. (Fig D) Save these bolts for reuse.
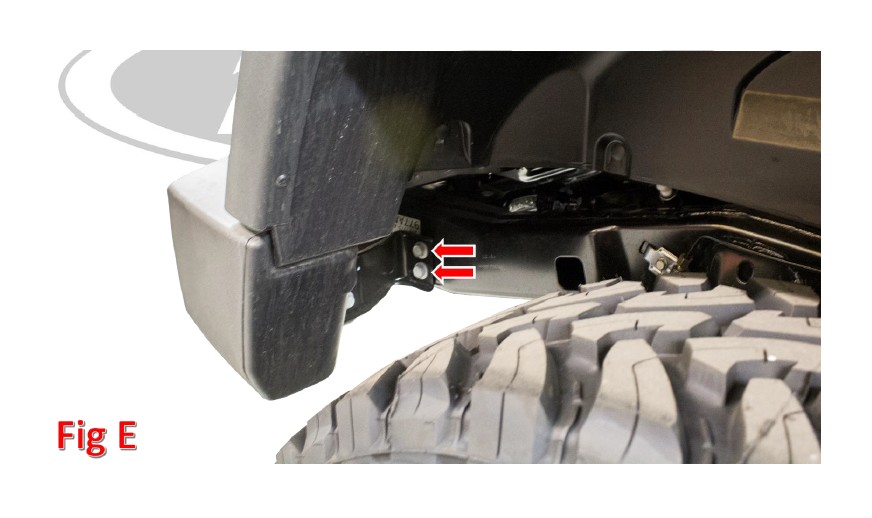
5. There are two 16mm bolts per side that hold the bumper to the frame. Remove these bolts. (Fig E) This picture was taken looking towards the rear of the vehicle into the wheel well. SAVE THESE BOLTS FOR REUSE.
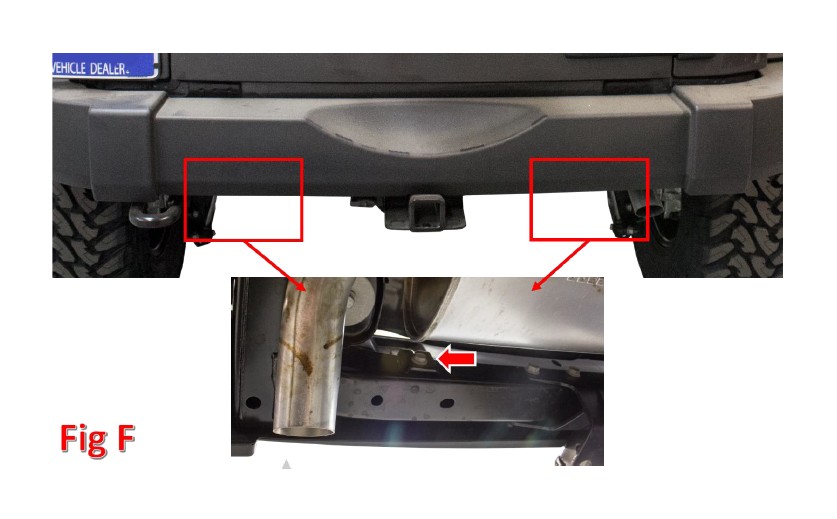
6. There are two 16mm bolts on the bottom portion of the OEM bumper. Remove these bolts. Then, remove the rear bumper. (Fig F)
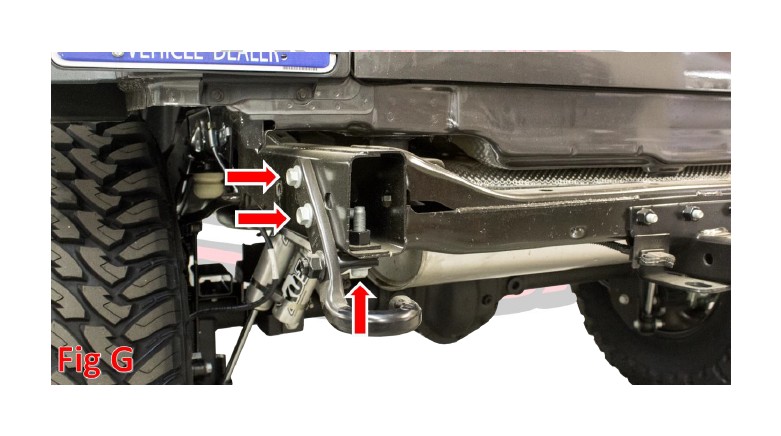
7. Remove the 18mm bolts (x3) that hold on the rear tow hook. Then remove the tow hook. (Fig G)
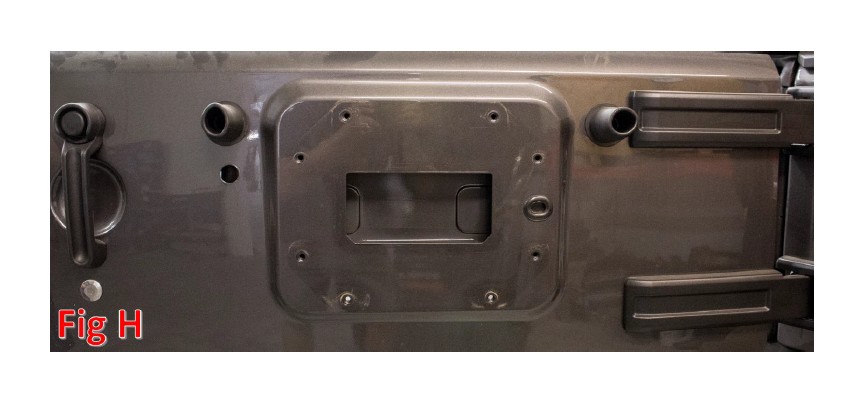
8. Pull the vent out of the rear hatch. (Fig H)
9. Prepare to install your new ADD Stealth Fighter Rear Bumper.
INSTALLATION
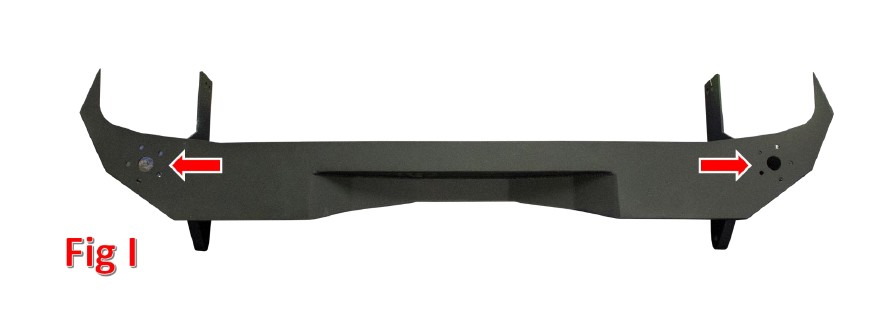
1. Remove the bolts (x10) and plates (x2) that come attached to the top of your new bumper. (Fig I)
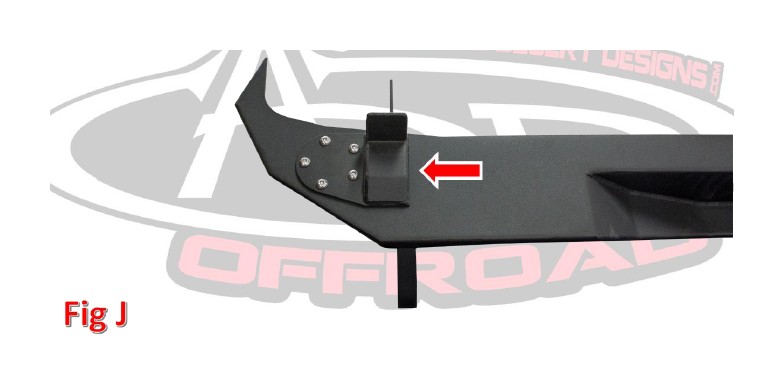
2. Using the bolts/washers/nuts you removed from the Driver Side of your new bumper, install the stop plate for your tire carrier. (Fig J)
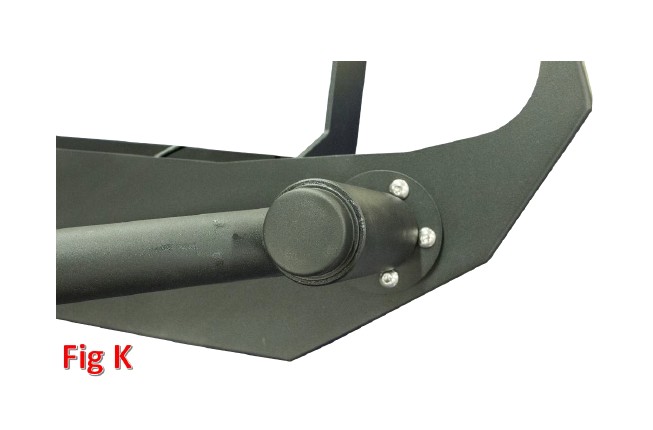
3. Using the bolts already connected to the swing arm and the nuts/washers you removed from the passenger side of your bumper, install the tire carrier swing arm onto the rear bumper. (Fig K)
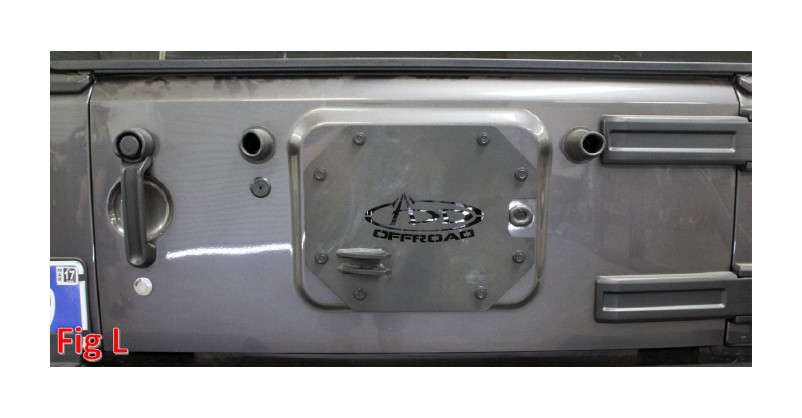
4. Install the ADD Spare Tire Plate where the OEM spare tire carrier used to sit. Use the bolts that you saved from Removal Step 4. (Fig L)
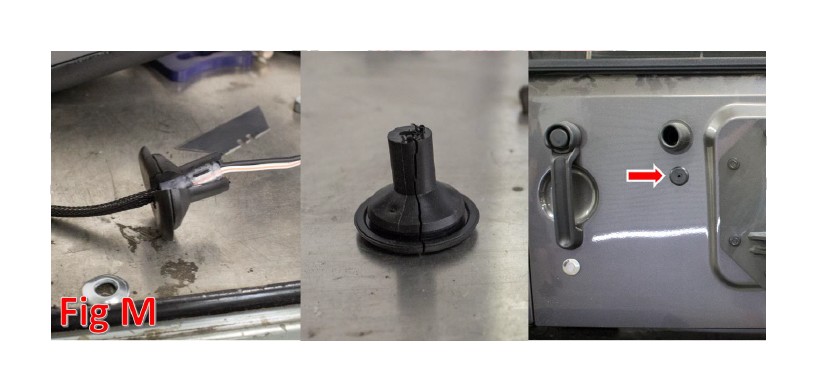
5. Using a razor blade, cut the rubber grommet that is on the OEM 3rd brake light harness down one side. Then reinstall it in the hole it originally came from. (Fig M)
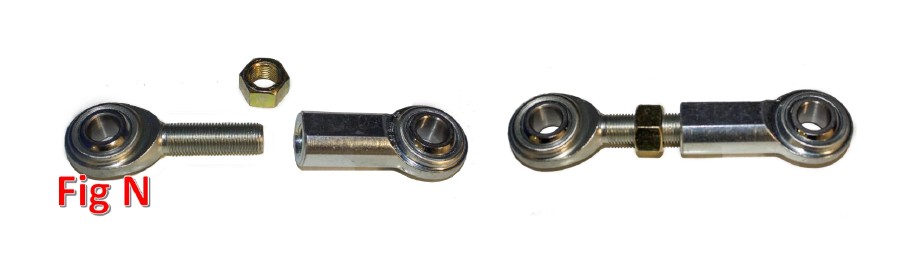
6. Find the supplied Heims (x2) and the 1/2”-20 NON-Locking Nut (x1). Assemble them as shown in Fig N. Leave everything loose for now.
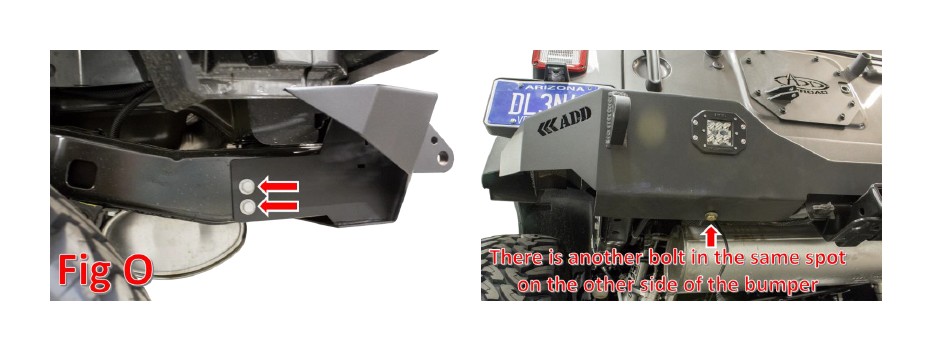
7. Set the rear bumper in place. Secure it to the Jeep using both the hardware that was removed in Removal Step 5 and the supplied 1/2” x 4 1/2” Bolts (x2), 1/2” Washers (x4), and 1/2” Metal Lock Nuts (x2). Use the stock hardware on the side mounting holes and the supplied hardware on the bottom holes. Leave these finger tight for now. (Fig O)
8. Line the bumper up so that it is as straight as you can get it. Then, tighten the OEM hardware to OEM torque spec and tighten the supplied hardware to 70 foot pounds.
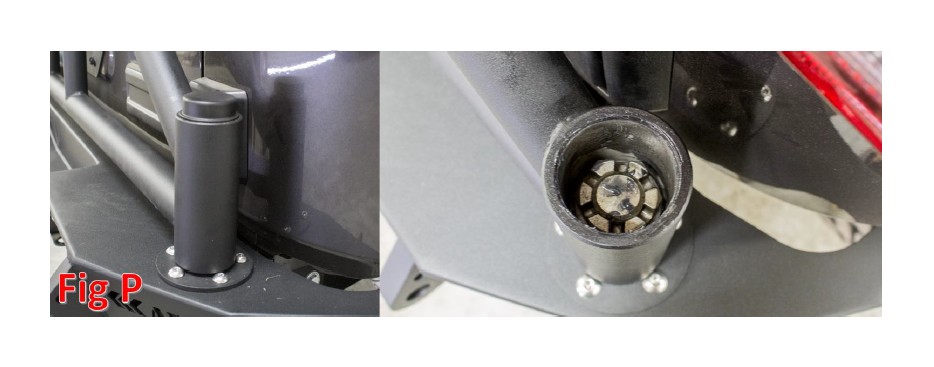
9. If your tire gate has play in it (up and down), then the bearing nut needs to be tightened. To do so, remove the dust cap on the post that connects the swing arm to the bumper, then tighten that nut (1 1/2” Socket) just enough to get rid of the play. Replace the dust cap. (Fig P)
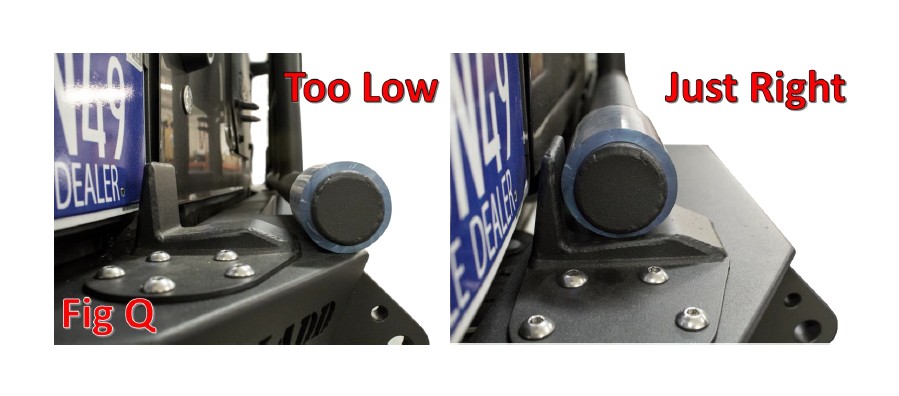
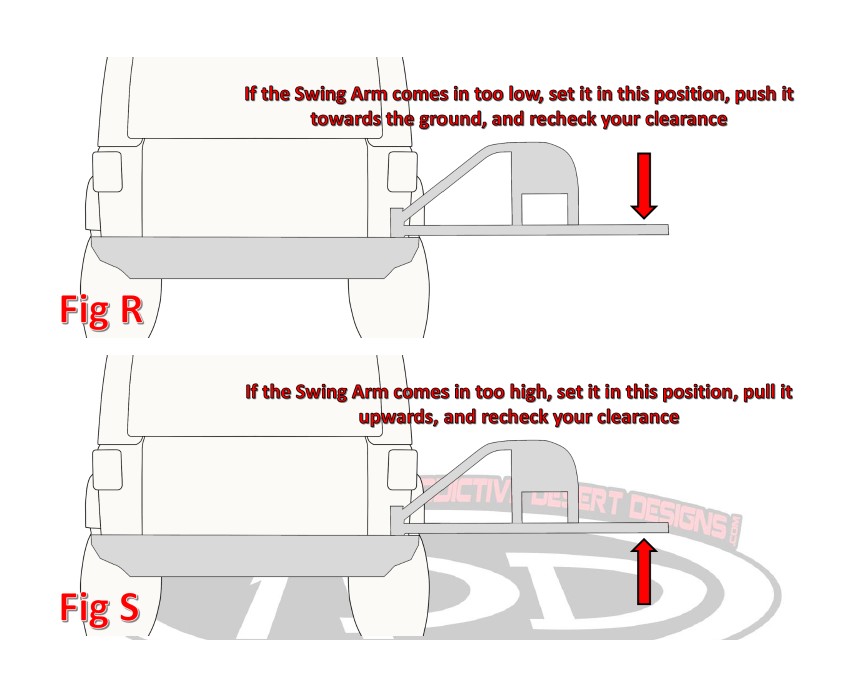
10. Push the tire gate closed to make sure it closes properly. It should take a small amount of force, but the tube with the rubber protection should be able to be pushed all the way against the stop. If the rubber protected tube comes in too low and requires too much force to close, then it needs adjustment. If the swing arm comes in too high and doesn’t take any force to get it over the hump of the stopper piece, then it also needs adjustment. Swing the tire carrier 180 degrees out from where it sits in the closed position. Then, push it downwards or pull it upwards and recheck the clearance until it seats properly. Follow Fig Q, Fig R, & Fig S.
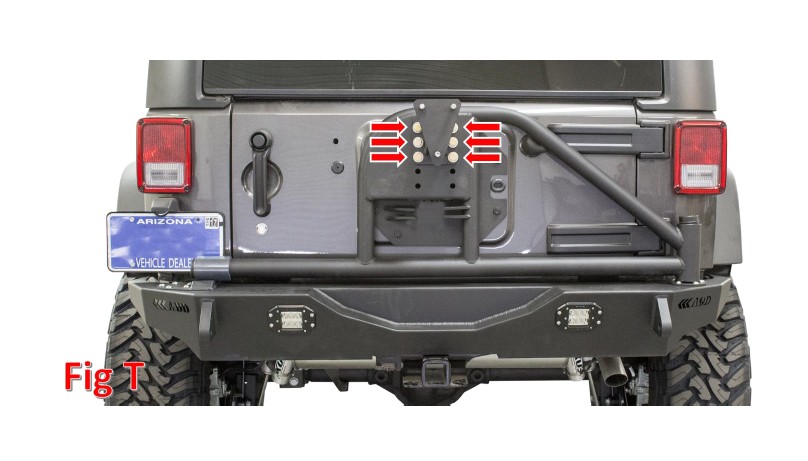
11. Install the spare tire adapter to your swing arm. Use the supplied 1/2”-20 x 1 1/2” Bolts (x6), 1/2” Washers (x12), and 1/2”-20 Metal Lock Nuts (x6) to hold it in place. Once all the bolts are loosely installed, go back and torque them to 70 foot pounds. You may install this at which ever height you think will be acceptable. The bigger the tire, the higher you need to mount it. (Fig T)
12. Take the Heim Joint Assembly you created in Installation Step 6 and set it into place. Use the supplied 1/2”-13 x 1 1/2” Bolt (x1) and the 1/2”-13 Nylon Locking Jam Nut (x1) on the passenger side of the assembly and the supplied 1/2”-13 x 2” Bolt (x1), 1/2” Washers (x2), and 1/2”-13 Nylon Lock Nut (x1) on the driver side of the assembly. Leave everything loose for now (including the Heim Assembly). (Fig U)
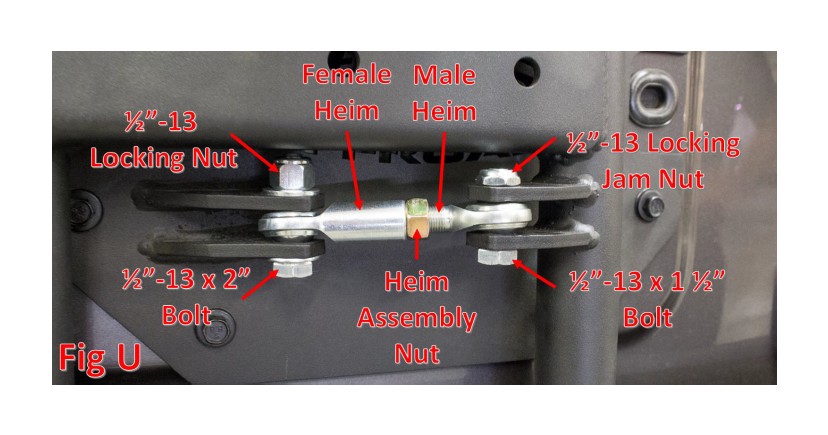
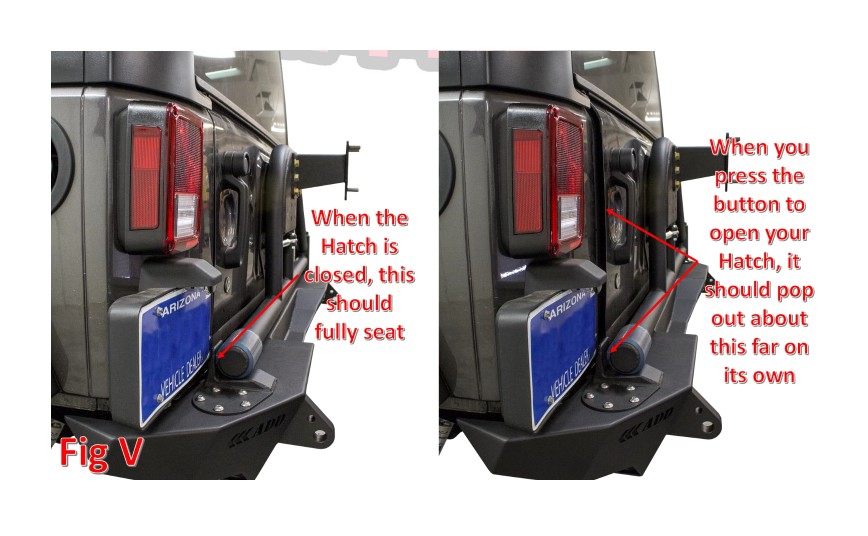
13. This Heim Assembly needs to be adjusted. To do this, you will have to remove the bolt from the Male Heim and spin the Male Heim in or out of the Female Heim until the tension is correct. You want there to be a little bit of tension on the tire gate when the Jeep’s tailgate is closed. This means that you should have to close the Jeep’s hatch with a little bit of force. This also means that the Swing Arm portion of your tire gate should seat properly when the Jeep’s tailgate is closed. This also means that when you press the button to release your Jeep’s tailgate, the Jeep’s Tailgate and the Tire Carrier Swing Arm should both pop out about 1/2” on its own (without your influence). (Fig V) Once you’ve achieved this, tighten the Heim Assembly Nut and both Heim Assembly Mounting Bolts.
14. Mount your spare tire to the carrier.
15. Stand back and enjoy your new ADD Stealth Fighter Rear Bumper.
16. Check and re-tighten if needed, all mounting bolts after 100 miles and periodically thereafter.