 FREE 1 to 3-Day Delivery on Orders $149+ Details

How to Install JKS Sway Bar Quick Disconnect for 2.5-6 in. Lift (97-06 Jeep Wrangler TJ) on your Jeep Wrangler
Installation Time
60 minutes
Tools Required
- 15/16 Socket
- 1 1/16 Socket
- 15mm Socket
- 17mm Socket
- 6mm Allen Wrench
- 3/4 Socket
- Punch
- Crescent Wrench
Note: If your Jeep is stock, MPN# JKS2000 will work. If you think your Jeep may have a front suspension lift go with the MPN# JKS2001 for 2.5-6 in. Lift. The JKS2000 for 0-2 in. lift will max out even around 2 in. of lift.
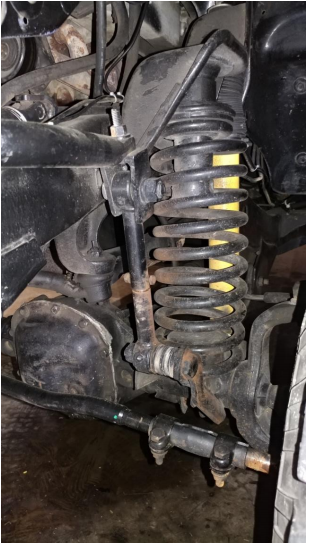
Before
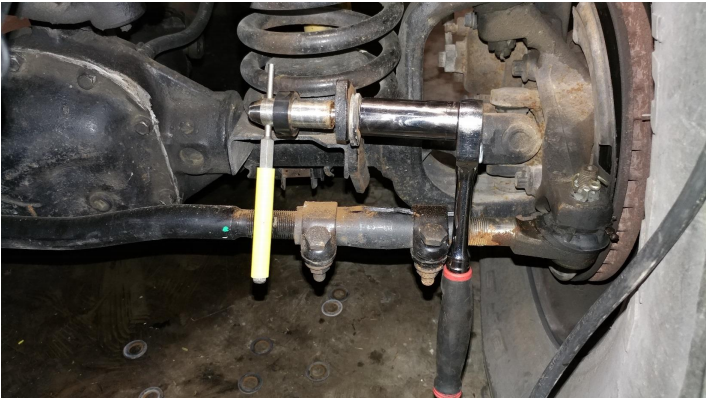
1. Using a 15/16 socket for the lower nut and a 1 - 1/16” socket for the lower bolt head remove the assembly.
2. Using a 15mm socket for top nut, remove it and this will release the existing sway bar link.
3. Completing one side at a time will keep the sway bar in place while working.
Assembly notes
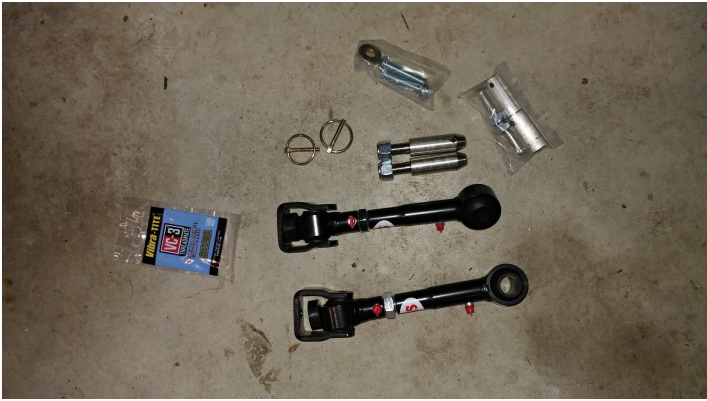
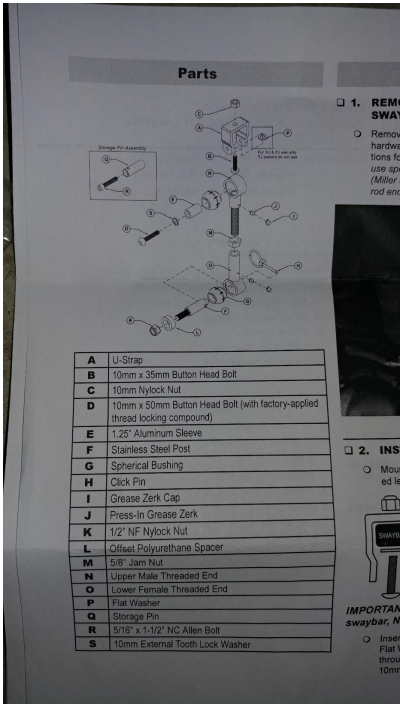
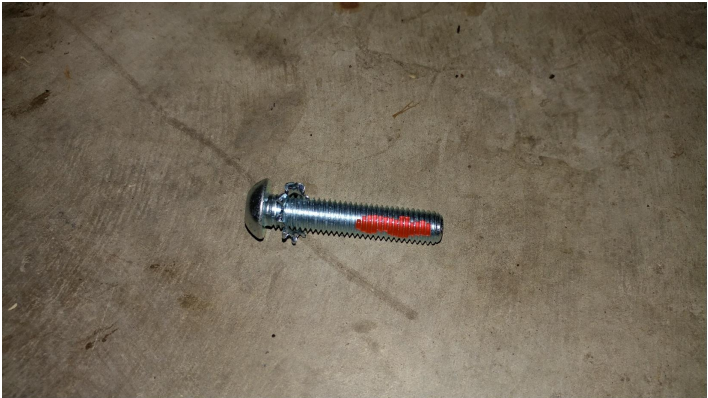
What comes with the JKS Sway Bar Quick Disconnect for 2.5-6 in. Lift (97-06 Wrangler TJ)
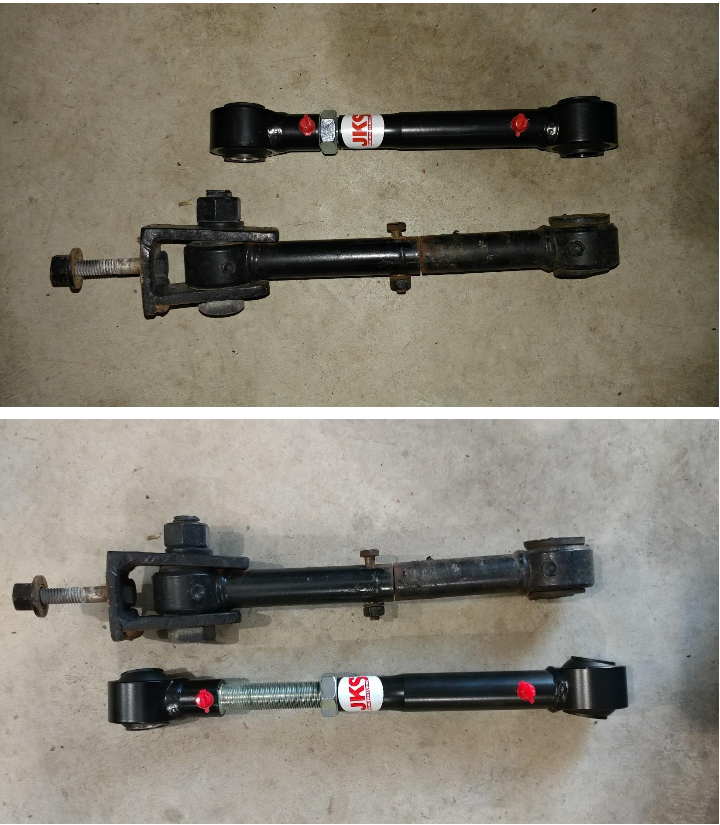
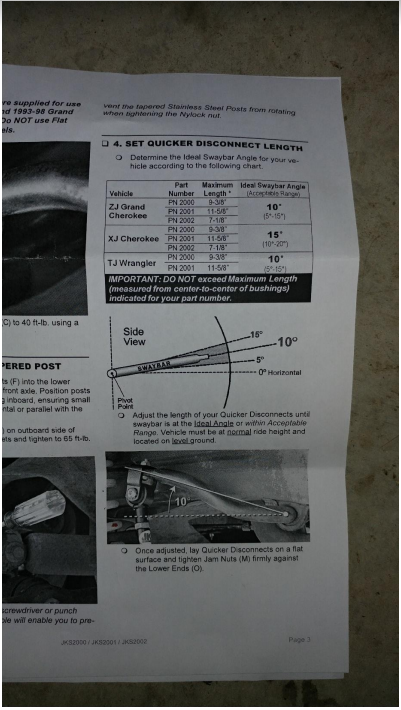
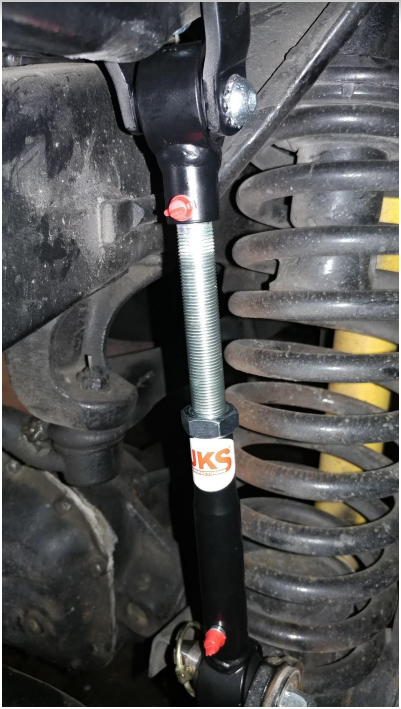
4. Using the removed link, adjust the new JKS Sway Bar Quick Disconnect to the same length or longer to get the required 10 degrees shown later.
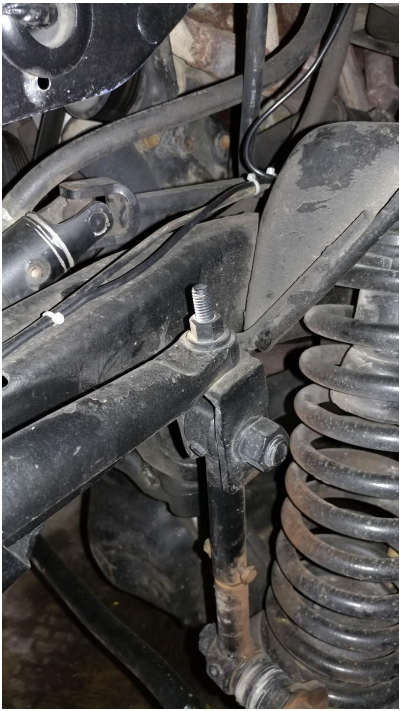
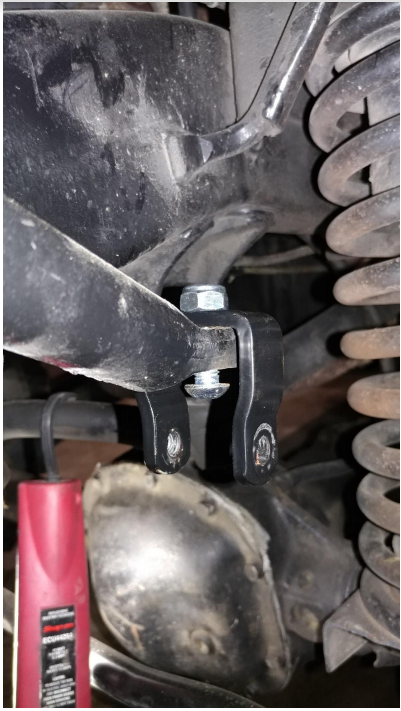
5. Locate the upper U-strap and hardware.

6. Using a 6mm Allen and 17mm socket tighten the provided hardware. The threaded side of the U-strap must face inboard.
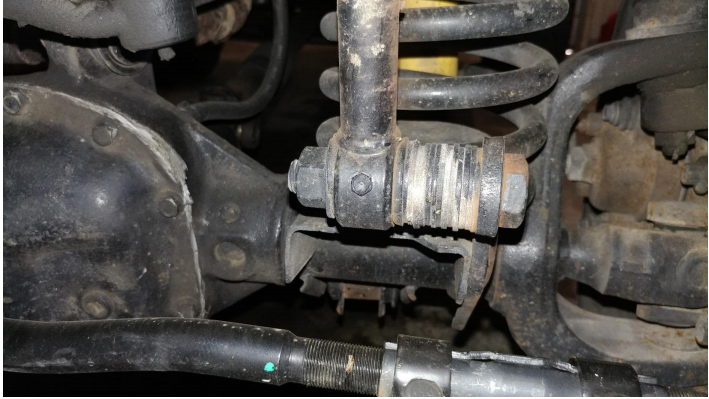
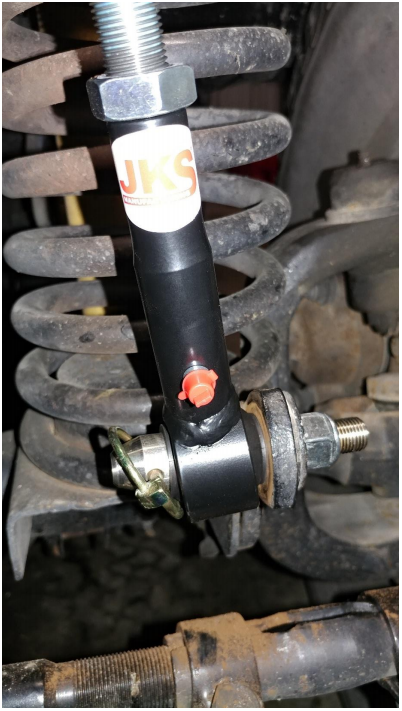
7. Locate the lower quick release post.
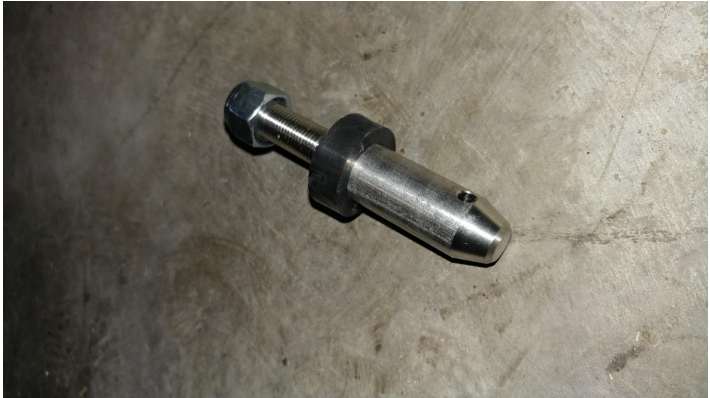
8. Install the lower post using a 3/4 socket and a punch to hold the post in place.
9. The post sat too far inside the hole not allowing the nut to fully tighten. I had to add washers to push the nut back to where the threads where.
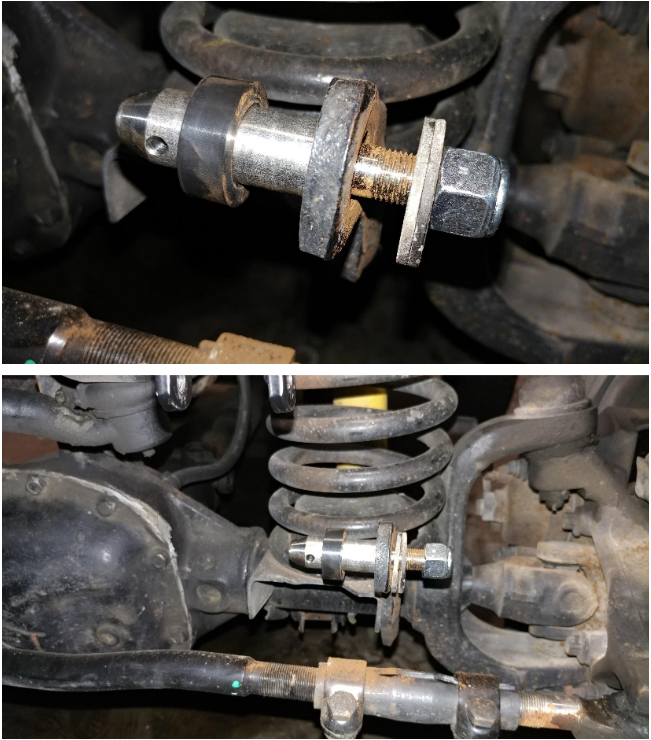
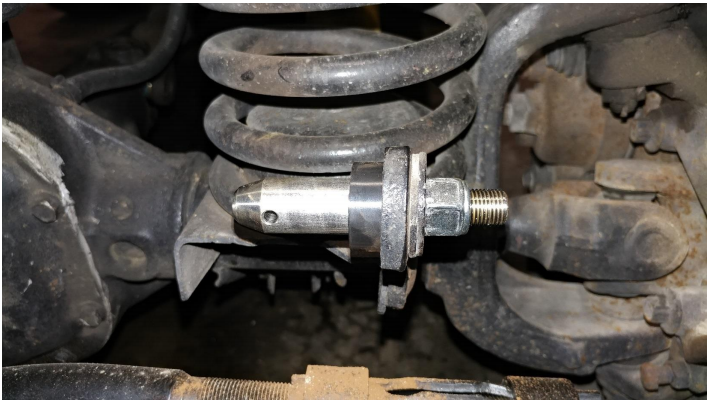
10. I also found that the provided rubber spacer did not allow for the sway bar link end and locking pin. So, I did not install the rubber spacer, seen in the final photos.
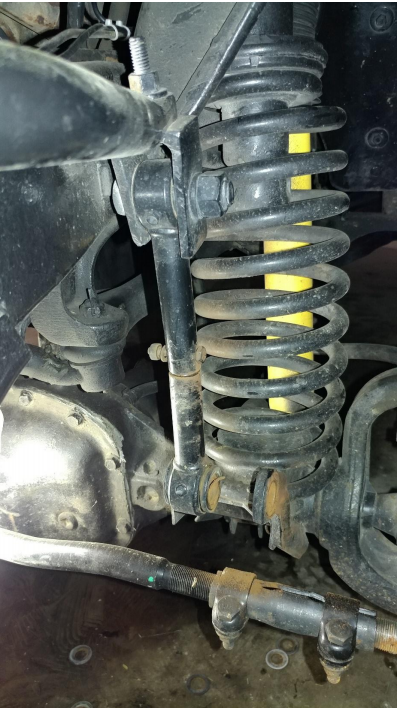
11. Locate the 6mm Allen bolt for the upper mount of the sway bar link. Apply the provided thread locker.
12. Using a 6mm Allen install the sway bar link.

13. Slide the lower end of the sway bar link on to the post. Notice the amount of space, therefore I did not install the rubber spacer.
17. Set the angle of the sway bar per the 10-degree requirement using a crescent wrench tighten the locking nut.
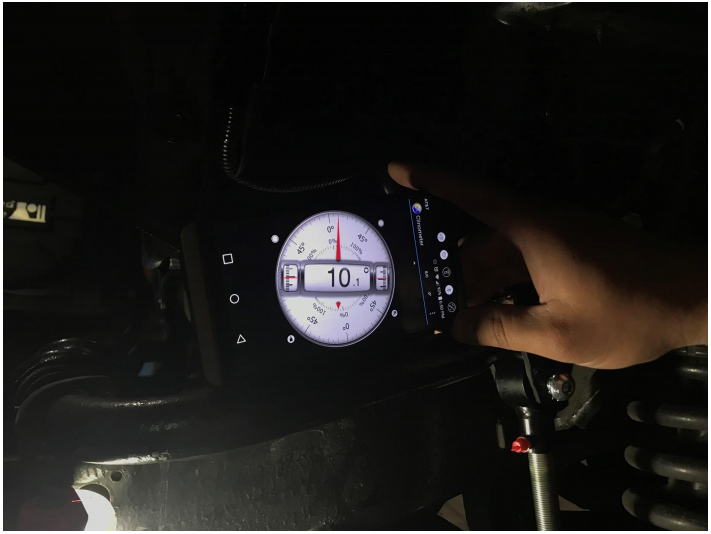
15. I used a level app on my phone to find the angle.
Installation complete
Installation Instructions Written by ExtremeTerrain Customer T. Boyer 4/17/2018


