 FREE 1 to 3-Day Delivery on Orders $149+ Details

How to Install Zone Offroad Sway Bar Clamp Kit (97-18 Wrangler TJ & JK) on your Jeep Wrangler

Shop Parts in this Guide
Welcome
CONGRATULATIONS on purchasing a set of sway bar clamps from JKS Manufacturing. We are committed to providing you with the best products available and your satisfaction is our first priority.
PLEASE READ these Installation Instructions carefully, and save them for future reference, as they contain important installation and maintenance information.
Installation
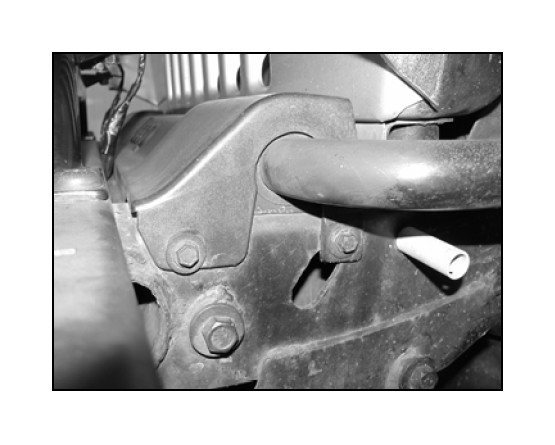
1. REMOVE SWAY BAR COVER | TJ MODELS ONLY
Remove the 4 bolts (2 on each side) that attach the sway bar cover to the frame.
2. CENTER THE SWAY BAR | ALL MODELS
Measure the distance from the sway bar to the frame from consistent locations on each side. Divide the difference in the measurements by 2. This is the distance the sway bar will need to be moved to center it.
Using a dead blow hammer or pry bar, slide the sway bar to center
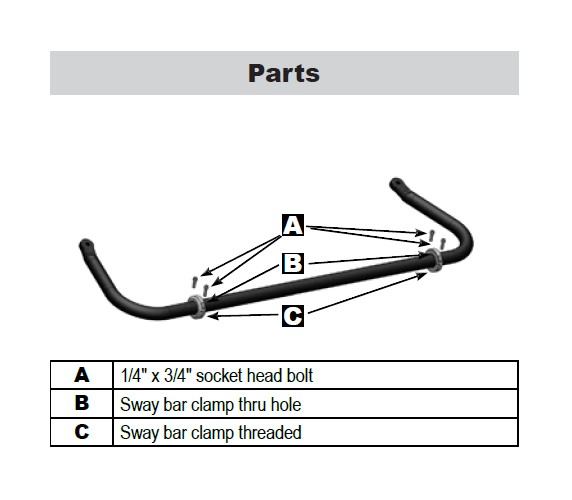
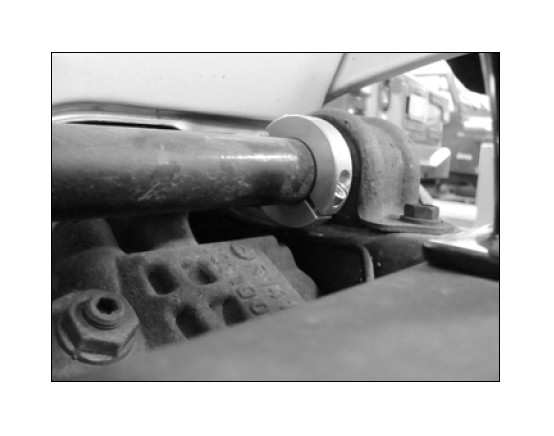
3. INSTALL SWAY BAR | COLLARS ALL MODELS
Place each collar around the sway bar on the inside of the sway bar bushing with the taper towards the outside of the vehicle. Leave a small gap between the sway bar bushing and the clamp to allow some slight movement in the sway bar.
Apply Loctite and gently tighten the socket head cap screws so the gap where the two sides meet is equal. Torque bolts to 60 in-lbs (approx. 5 ft-lbs). Do not overtighten or damage to the threads can occur.
Note: 1997-2006 TJ model shown. On 2007-2015 JK models the installation is similar, but the sway bar is mounted on the bottom of the frame.
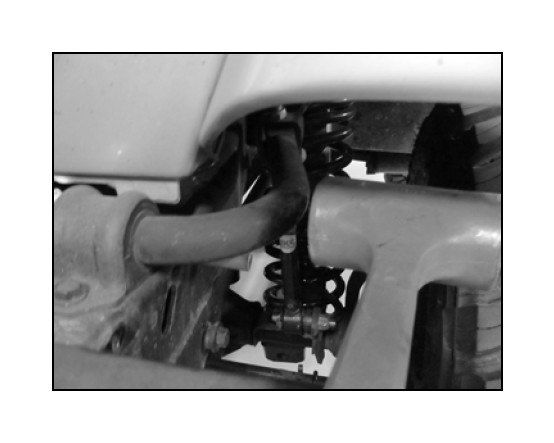
If necessary reform the brake lines to ensure clearance to the clamps.
4. RE-INSTALL SWAY BAR COVER | TJ MODELS ONLY
Re-install the cover using the factory hardware.


