 FREE 1 to 3-Day Delivery on Orders $149+ Details

How to Install Zone Offroad Spare Tire License Plate Mount Kit w/ Light (87-18 Wrangler YJ, TJ & JK) on your Jeep Wrangler
Tools Required
- Metric/Standard Socket Wrench Set
- Phillips/Flat Screwdriver
- T30 Torx bit
- Wire Stripper/Crimper

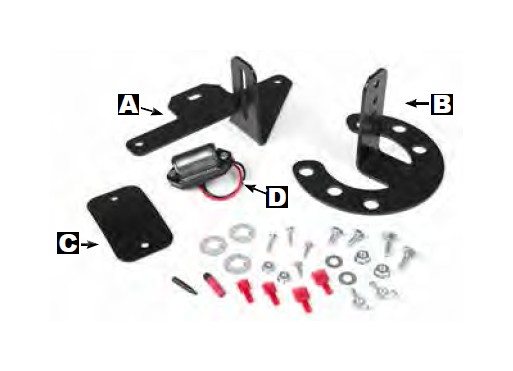
Shop Parts in this Guide
Welcome
CONGRATULATIONS on purchasing the Spare Tire License Plate Mount from JKS Manufacturing. We are committed to providing you with the best products available and your satisfaction is our first priority.
PLEASE READ these Installation instructions carefully, and save them for future reference, as they contain important installation and maintenance information.
Notes
System includes parts necessary to covert the 3rd brake light wiring to power the license plate light on JK applications. The 3rd brake light will be removed.
If you prefer to keep the 3rd brake light or are using a swing out tire carrier, approximately. 12 ft. of additional wire will be required.
YJ & TJ applications will require additional wiring to complete the installation. These instructions only cover the wiring and installation steps for the 2007-2015 JK.
Will fit spare tires with 5 on 5" or 5 on 4.5" bolt patterns.
Adjustable mounting depth 4-1/4" to 6-1/4"
Installation
These instructions are only written for the 2007- 2015 Wrangler JK application.
1. SPARE/3RD BRAKE LIGHT DISASSEMBLY
Remove the spare tire.
Open the tailgate to access the 4 screws mounting the 3rd brake light to the bracket. Remove the 4 screws and unplug the light.
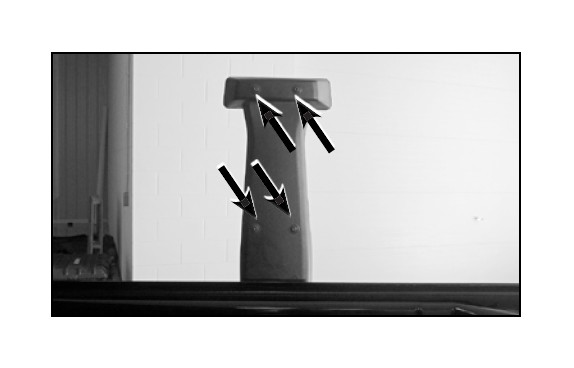
Remove the spare tire mounting bracket from the tailgate by removing the 8 bolts using a 13mm socket.
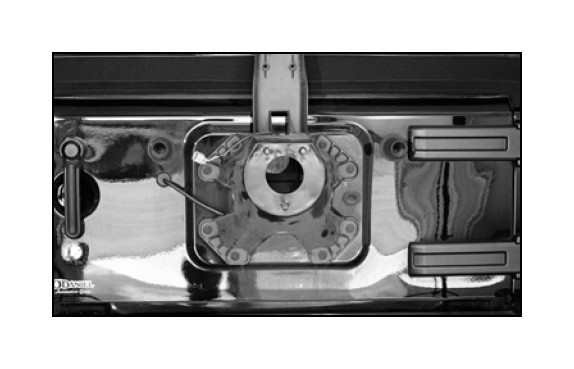
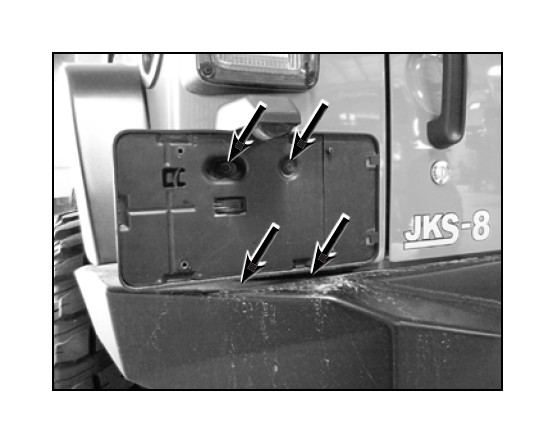
2. LICENSE PLATE REMOVAL
Remove the 2 screws holding the license plate to the OE bracket.
Remove the two screws under the license plate using a 7mm socket. Two more screws are located below the bumper that will need to be removed.
Note: If an aftermarket bumper has been installed it may be necessary to remove the bumper to access the lower screws
3. FILLER PLATE INSTALLATION
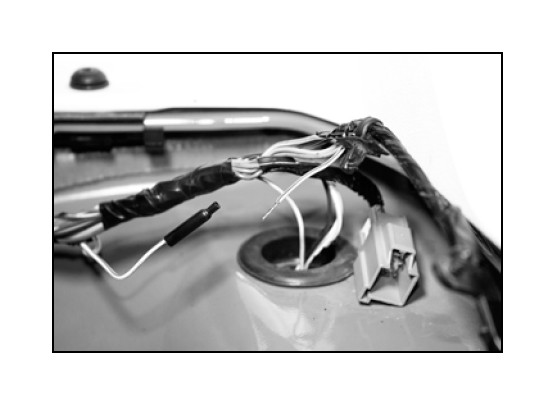
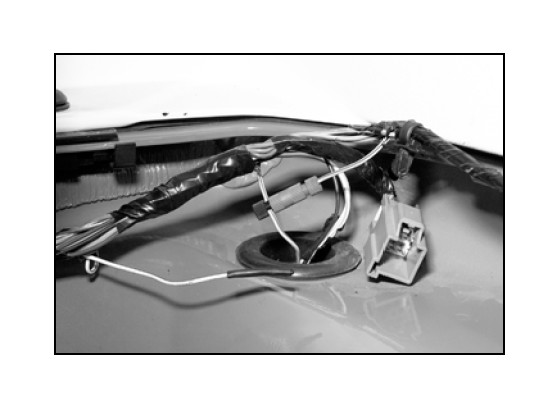
Unplug the license plate light and tuck the harness through the hole in the body
Locate the filler plate for the OE license plate location. Install the plate with the provided #8 pan head screws.

4. LICENSE PLATE LIGHT WIRING
The kit is designed to use the 3rd brake light wiring to power the new license plate light. This will be cut and tapped into the right tail light wiring harness.
If you wish to keep the 3rd brake light or are using a swing out tire carrier, you will need approximately 6 ft. each of 18 ga. wire for a power and ground wire to route back to the passenger side tail light.
Use a screwdriver to lift the top plastic cap from the passenger side rear seat belt cover.
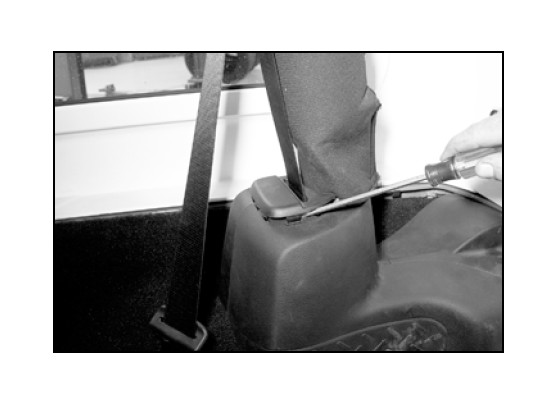
Pull on the outside cover to release the clips and remove it.
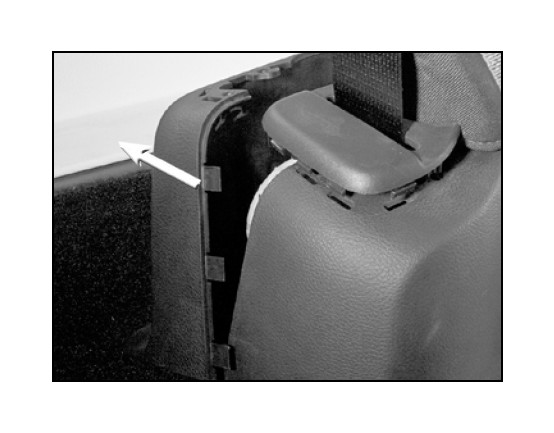
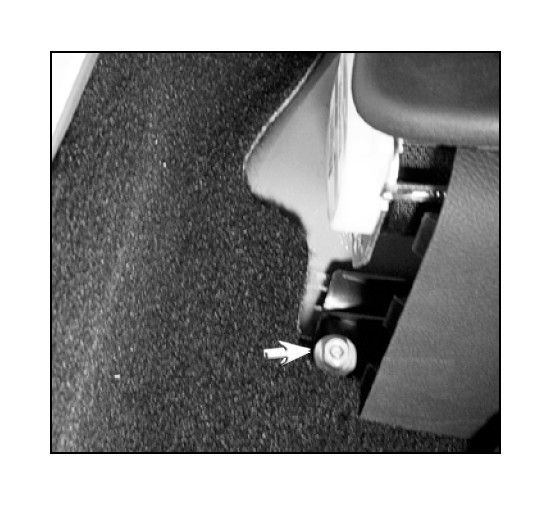
Remove the two screws holding the inner plastic cover to the floor.

Lastly, remove the nut located in front of seat belt to remove the inner plastic cover
Pull back the carpet to expose the wire harness and remove the 2 plastic clips to make the harness easier to work on.
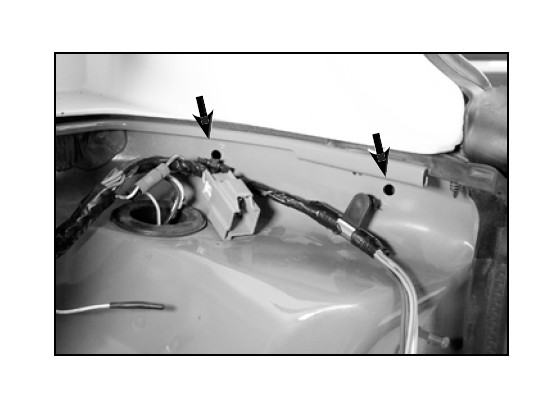
Locate the white with tan stripe wire that powers the 3rd brake light. Cut this wire about 4 in from where it meets the main harness. Place the heat shrink wire cap over the end of the wire going forward use a heat gun or lighter seal it. Strip the lead of the remaining wire that routes back to the tailgate.
Locate the white with violet stripe wire running from the right tail lamp. Insert this wire into the posi-tap connector and tighten. Insert the stripped lead from the end of the white-tan wire and tighten the cap of the posi-tap connector.
Cut the harness near the plug for the 3rd brake light. Strip the wires and install the provided female spade terminals to the ends of the black and white-orange wire.
5. ASSEMBLY
If still using the factory spare tire mount, you may consider cutting off the 3rd brake light bracket from the mount since it will no longer function. Ignore this note if new wires have been routed for the license plate light instead.
Re-install the spare tire mount with the factory hardware
Align the spare tire mounting studs with the holes in the provided mount that has the square holes in it. Attach this bracket to the spare tire studs with the provided 1/2" push nuts. A deep socket can be used to tap these on if necessary.
Route the new light wiring through the hole in the spare tire carrier.
Install the spare tire onto the studs and tighten the lug nuts.
Install the LED light to the license plate bracket with the provided machine screws and flange lock nuts. Install the male spade connectors to the ends of each wire.
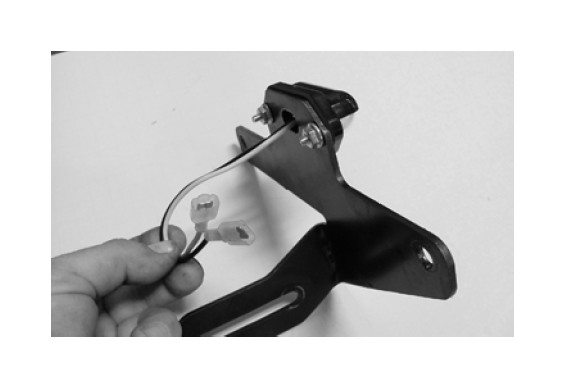
Using the provided carriage bolts and wing nuts attach the license plate mount to the left side of the inner bracket. The spacing is adjustable, place the carriage bolts into the square holes that line up best for the application and tighten the wing nuts.
Plug the light harness in so the red wire from the light connects to the white-orange (power) wire and the black wire from the light connects to the black (ground) wire.
Verify the light works by turning on the running lights.
Note: If the light doesn't come on, reverse the wires and try it again.
Re-install the inner plastic covers in reverse of removal.
Install the license plate to the license plate mount using the provide 1/4" hardware.

