 FREE 1 to 3-Day Delivery on Orders $149+ Details

How to Install Zone Offroad Mini Skid Plates for Aftermarket Lower Control Arm (97-06 Wrangler TJ) on your Jeep Wrangler
Tools Required
- Metric/Standard Socket Wrench Set
- Torque Wrench
- Tape Measure
- Hammer
- Sanding Wheel (or similar tool for removing paint and debris from axle)
- Grinding Wheel (or similar tool for grinding away tack welds)
- Welding Equipment
- Satin Black Spray Paint
- Factory Service Manual (recommended)

Shop Parts in this Guide

Welcome
CONGRATULATIONS on purchasing a set of new MiniSkids from JKS Manufacturing. We are committed to providing you with the best products available and your satisfaction is our first priority.
PLEASE READ these instructions carefully, as they contain important installation information.
Important
NOT COMPATIBLE WITH OE suspension arms for XJ, MJ, ZJ, or TJ. JKSOGS116 MiniSkids are compatible with OE suspension arms for Wrangler JK.
FOR BEST RESULTS, install this product before damage occurs to the suspension arm brackets. If damage already exists, the deformed brackets can often be straightened as long as damage is not too severe.
Installation
1. PREPARE FRONT AXLE
Remove the lower suspension arm from axle bracket to prepare for welding.
Temporarily position MiniSkid on front axle so that “wings” align with bottom edges of axle bracket and “tab” aligns with axle tube.
Note where MiniSkid will be welded to axle. If suspension arm brackets have been damaged or deformed, hammer back into shape until a maximum gap of 1/8” exists between edges of bracket and MiniSkid.
Completely remove any paint, rust, or other debris from the suspension arm bracket and axle tube where MiniSkid will be welded.
HINT: A sanding wheel, disc sander, or similar tool is useful for paint removal.
2. WELD MINI SKID PLATE TO AXLE
Reposition MiniSkid on front axle and tack weld “wings” to bottom edges of suspension arm bracket. Check for 1/8” gap between edges of bracket and MiniSkid and adjust if necessary.
HINT: A hammer may be used for minor gap adjustments. For larger adjustments, grind away tack welds and reposition MiniSkid.
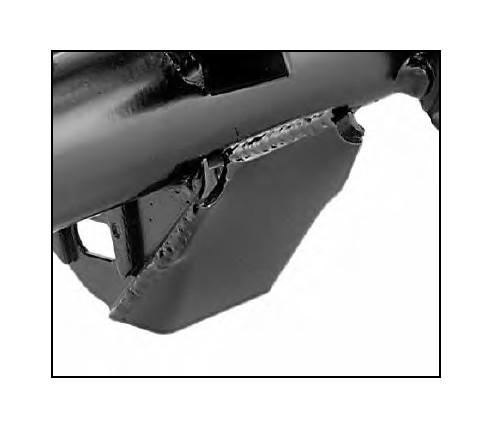
Once positioned correctly, fillet weld “wings” of MiniSkid to suspension arm bracket.
Hammer “tab” of MiniSkid towards axle tube until gap measures 1/8” or less.
Fillet weld “tab” of MiniSkid to axle tube.
IMPORTANT: Avoid overheating the axle tube by allowing the surface to cool off regularly.
Once all welding is complete, spray paint any bare metal on MiniSkids, suspension arm brackets, and axle tube to prevent corrosion. All exposed metal must be completely covered.
3. REINSTALL SUSPENSION ARMS
Reinstall lower front suspension arm to axle bracket using the original mounting hardware. HINT: It will be necessary to unbolt chassis end of suspension arm in order to insert axle end into “pocket” formed by MiniSkid.
Using a torque wrench, tighten the suspension arm mounting hardware to the factory torque specifications for your vehicle.

