 FREE 1 to 3-Day Delivery on Orders $149+ Details

How to Install Zone Offroad 3 in. Aluminum Front Bump Stop Extension Kit (97-18 Wrangler TJ & JK) on your Jeep Wrangler

Shop Parts in this Guide
Welcome
Thank you for purchasing a front bump stop spacer kit from JKS Manufacturing. We are committed to providing you with the best products available and your satisfaction is our first priority.
PLEASE READ these Installation Instructions carefully, and save them for future reference, as they contain important installation and maintenance information.
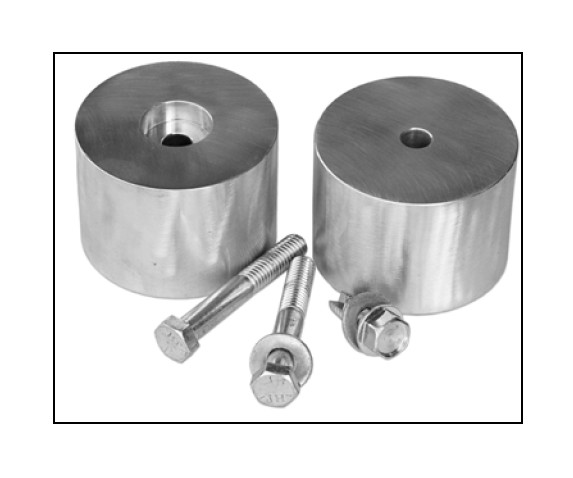
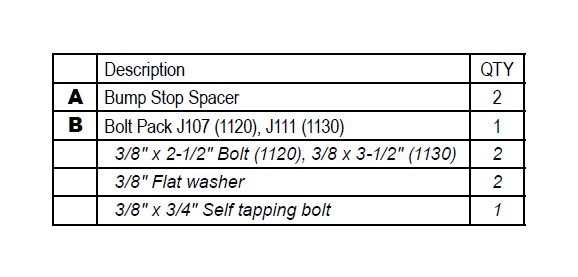
Parts
Installation
1. FRONT DISASSEMBLY
Disconnect the front track bar (21mm) from the axle. Save bolt and nut tab.
Raise the vehicle and support the frame with jack stands behind the front lower control arm pockets.
Remove the wheels.
Disconnect the front brake line brackets from the frame rails (10mm). 2011-15 models: Disconnect the brakelines from the axle below the coil spring. Save hardware.
Rubicon models: Disconnect the front locker wires from the differential.
Disconnect the sway bar links from the axle (18mm).
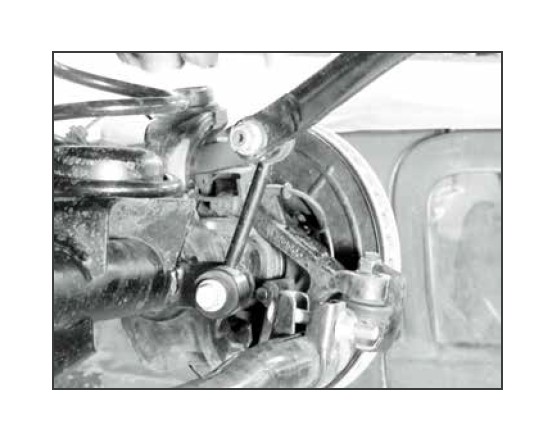
Support the axle with a hydraulic jack and disconnect the front shocks at the axle (18mm).
Lower the front axle and remove the coil springs. As the axle is lowered, verify all brake and electrical wires have enough slack.
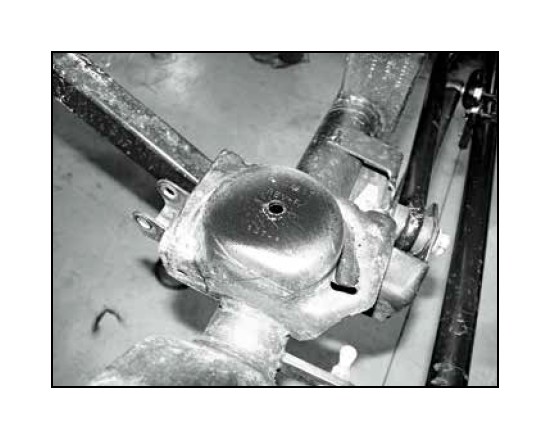
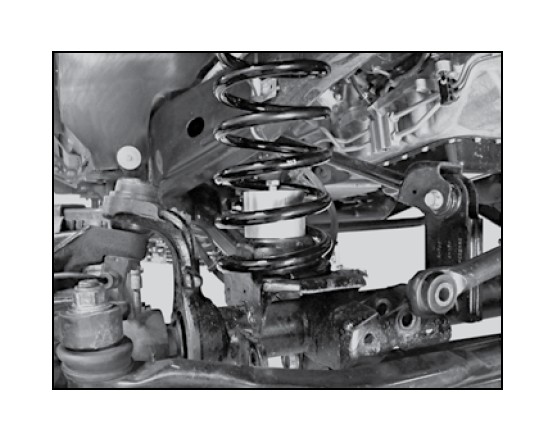
2. BUMP STOP INSTALLATION
With the coils springs removed, make a mark in the center of the lower coil spring mound pad. Drill a 5/16” hole at the mark. Using the provided 3/8” x 1” self tapping bolt (9/16”), tap a hole and remove the bolt.
Place the provided bump stop extension inside one of the coil springs. Re-install the coil springs with the bump stop extension inside. Make sure the spring is seated properly in the axle mount.
Attach the bump stop extension to the axle using the 3/8” bolt and washer into the tapped hole. Torque to approximately 25 ft-lbs.
Repeat the spring and bump stop installation on the other side.
Re-install the shock lower hardware. Torque the bolts to 60 ft-lbs.
Attach the sway bar links to the axle with the factory hardware, torque bolts to 75 ft-lbs.
Reconnect all brake lines and wiring harnesses.
Install the wheels and torque to the lug nuts to 125 ft-lbs.
Lower the vehicle to the ground and attach the front track bar to the axle with the OE hardware. Have an assistance turn the steering wheel to aid in aligning the track bar bolt. Torque the frame and axle track bar bolts to 125 ft-lbs.

