 FREE 1 to 3-Day Delivery on Orders $149+ Details

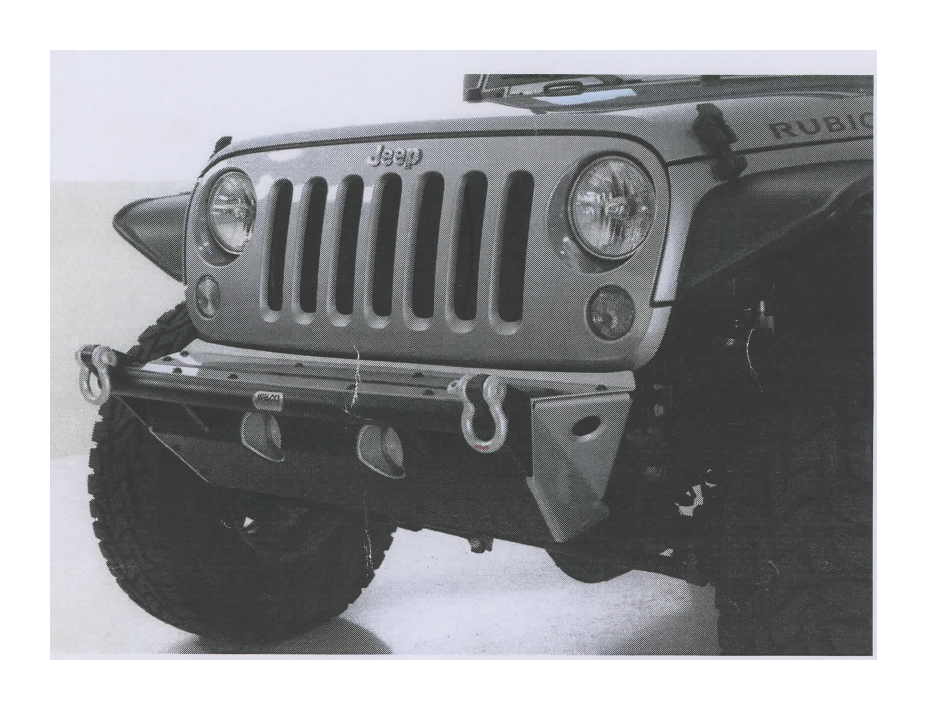
How to Install Wilco Offroad MC2X Chromoly Aluminum Front Bumper w/ Recovery Bar and Full Stinger on your 07-18 Jeep Wrangler JK; 2018 Jeep Wrangler JL
Tools Required
- Safety Glasses
- 19mm socket
- 15mm socket
- 19mm wrench
- 9mm wrench
- Vi" socket wrench
- 1/2" socket wrench
- wrench extension
- 6mm Allen wrench
- Philips screw driver
Please Read Before Install:
• Standard install time 2-3 hours
• Recommended to use two people for install
• Weighs approximately 50 lbs
• Review torque chart
• Recommended to apply anti-seize lubricant to bolts
• Lay out tools
• Clean working environment
• Wear proper safety gear
Step 1: To remove the stock bumper start by removing the air damn. Unscrew the 2 plastic screws in grommets on top of the bumper, shown in figure 1. Remove them from the bumper.
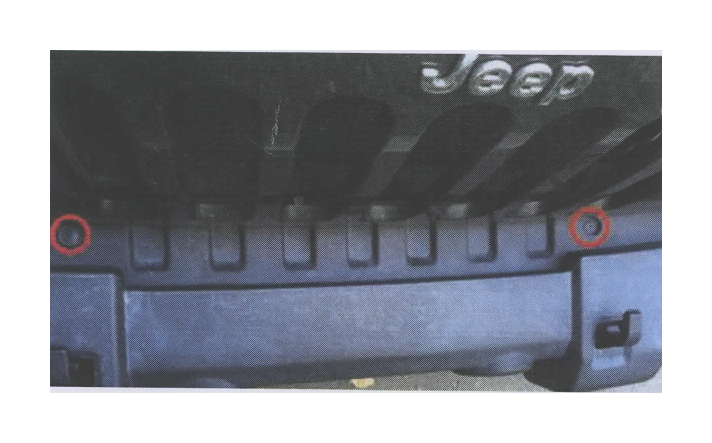
Figure 1: The red circles shows where the grommets need to be removed
Step 2: Remove the 4 plastic screws in grommets at the bottom of the bumper, shown in figure 2.
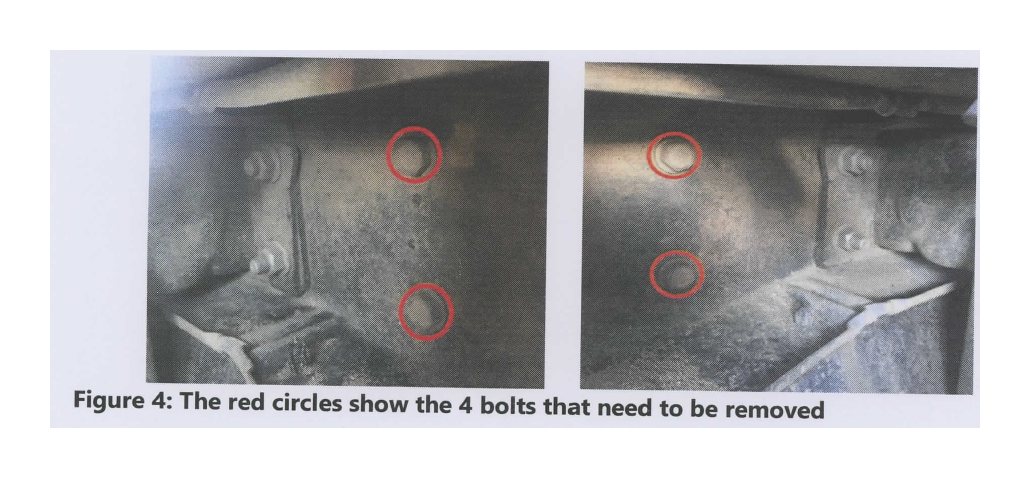
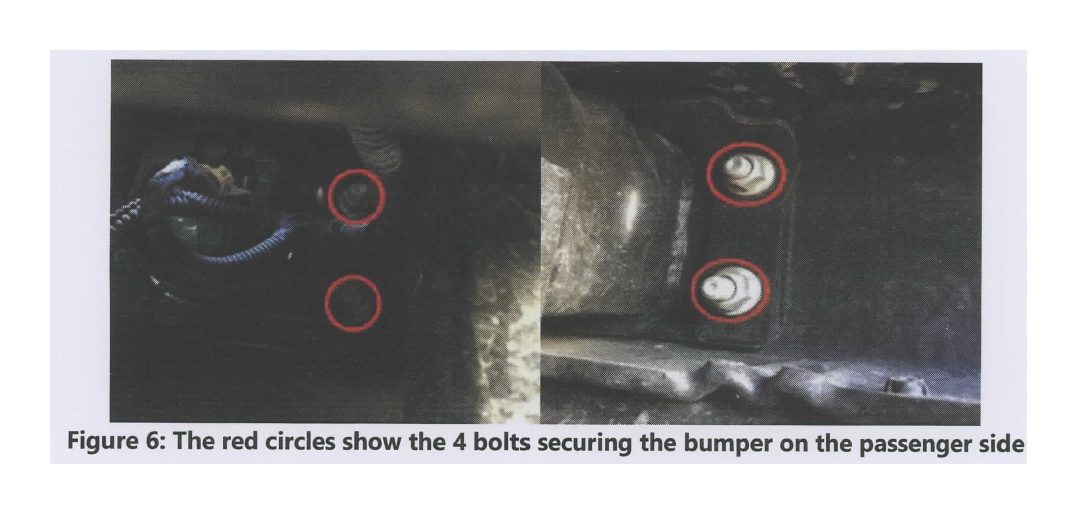
Figure 4: The red circles show the 4 bolts that need to be removed
Step 5: To unplug the fog lights reach to the back of the bumper and locate the wire loom that goes to the fog light (Figure 5), to remove the plug press the clip on the side and pull the plug off of the fog light.

Step 6: To remove the last parts of the bumper use a 19mm socket and 4 inch extension. There are 8 nuts securing the bumper to the vehicle, figure 5 shows the 4 bolts on the passenger side of the bumper.
Step 7: To remove from the vehicle grab the tow hooks, lift slightly, and pull away from the vehicle. The bumper will slide off of the stock mounting points. Place bumper away from the vehicle.
WARNING: Stock bumper weighs approximately 30 lbs. Help may be needed to lift bumper.
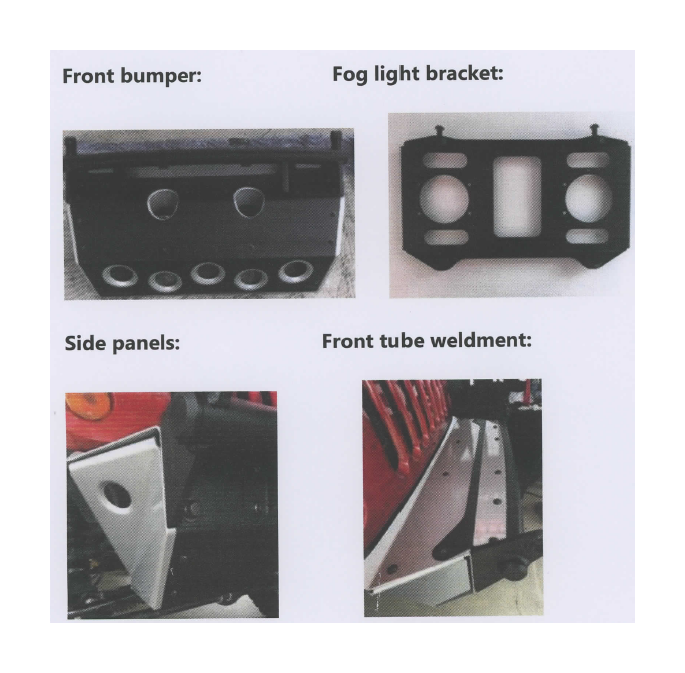
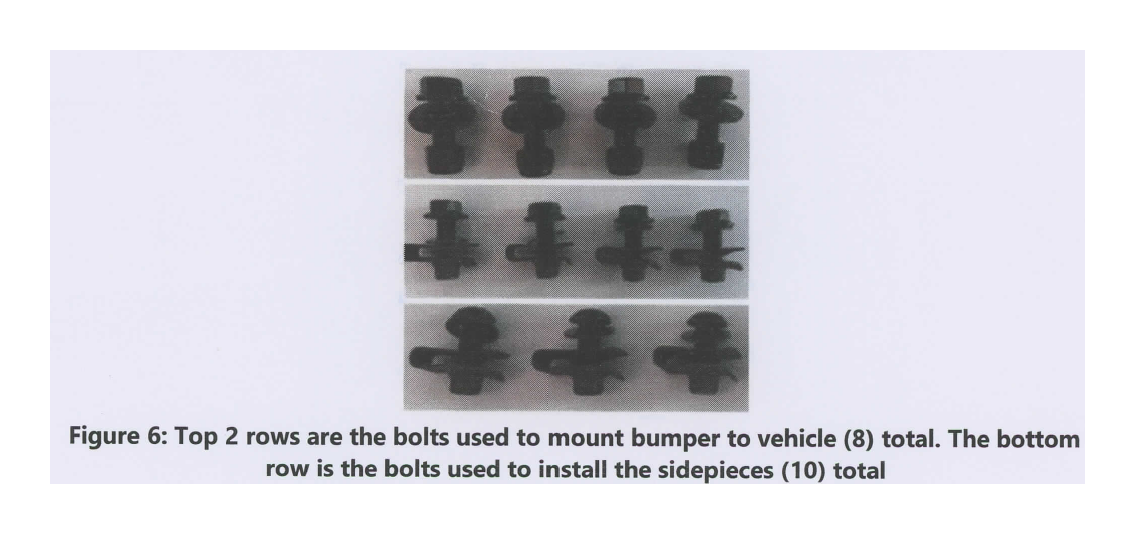
Step 8: To prepare the Wilco Offroad MC2X bumper start by laying out all the components and sort the bolts into section for the bumper as shown in figure 6.
Step 9: To remove the stock fog lights out of the stock bumper use a Philips screw driver. Remove the 4 screws on each fog light and take them off the bumper.
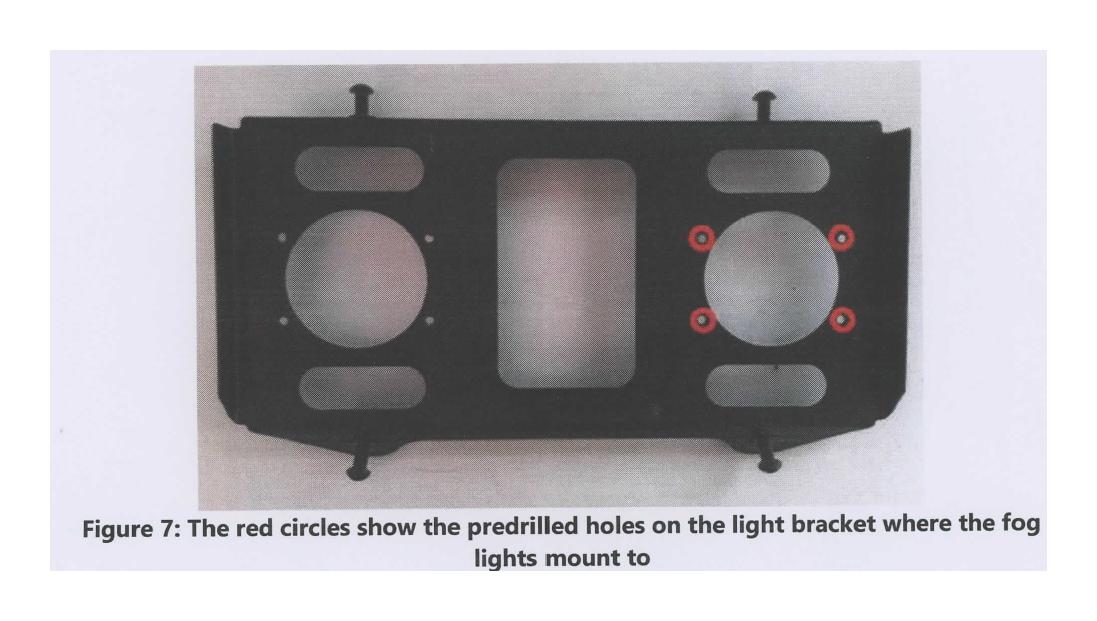
Step 10: To install the fog lights use the (8) 8-32x.50 bolts, (8) #8 flat washers and (8) 8-32 lock nuts. Figure 7 shows the 4 predrilled holes on the light bracket where the fog light will bolt onto.
Step 11: Bolt the fog lights to the bracket using a Philips screwdriver and 9mm wrench. Put the 8-32 lock nut on the back of the bracket closest to the bumper, then stick the screw with the #8 washer through the fog light and bracket. Tighten to approximately 8 in-lbs.
***Steps 12-14 are for references if you would like to remove, or re-install your light bracket on the Wilco MC2X bumper.
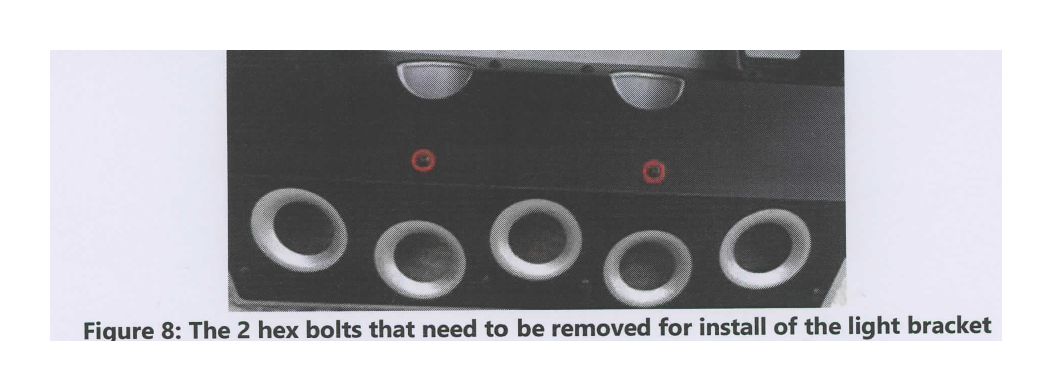
Step 12: To install light bracket (2) M10x1.5x30 hex bolts have to be removed from the main portion of the Wilco Offroad MC2X bumper shown in Figure 8. The bolts are removed using a 6mm Allen wrench.
Step 13: Now the light bracket can be installed. Slide the bracket into the backside of main portion and line up the holes.
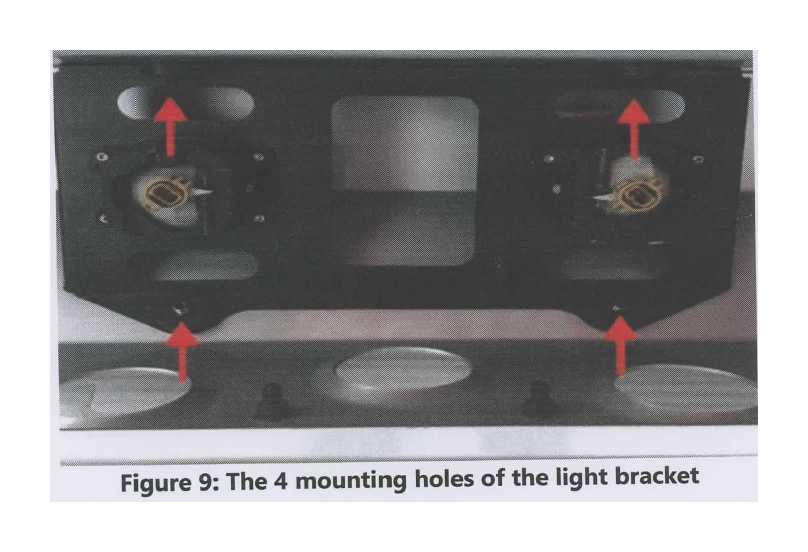
Step 14: To secure the bracket use (4) M10x1.5x30 hex bolts with (4) M10 flat washers on the front side of the bumper shown in Figure 9. Tighten the bolts using a 6mm Allen wrench, torque bolts to approximately 35 ft-lbs.
Step 15: Before installing the bumper onto the vehicle this is the time to set up any accessories that were purchased with your Wilco Offroad MC2X bumper.
Accessories include:
- Mini Stinger
- Full Stinger
- Original Winch/Grille Guard
- Winch Mounting Plate
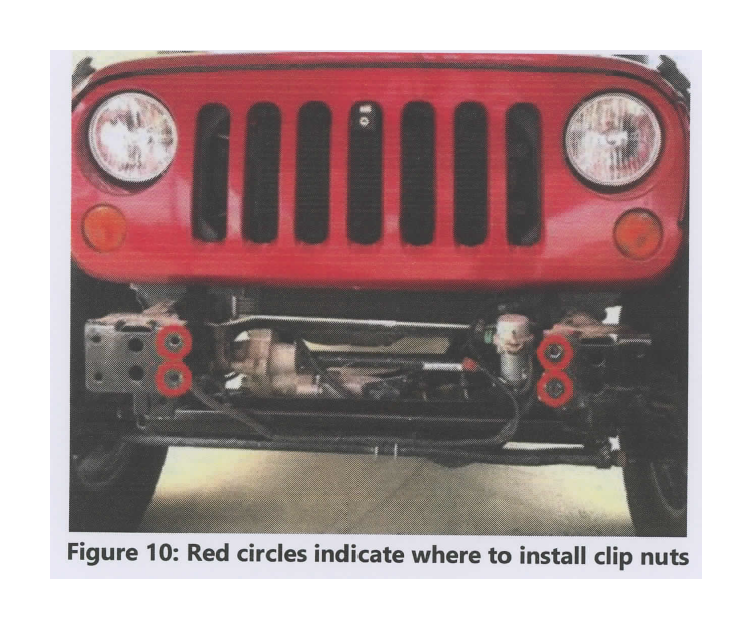
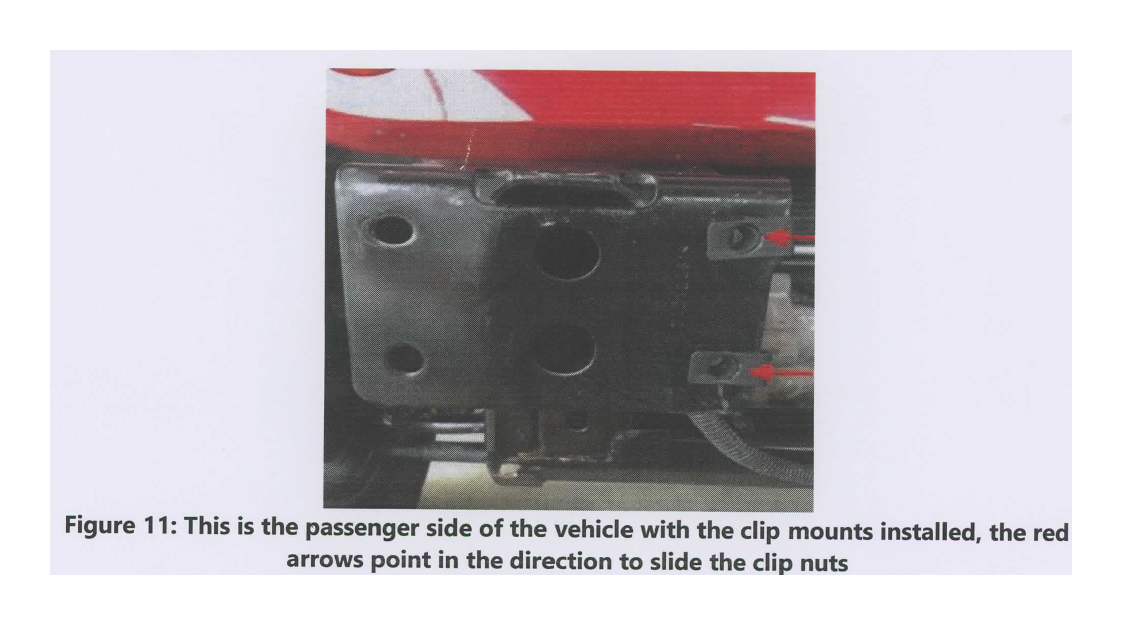
Step 16: To prepare the vehicle (4) M10x1.5 clip nuts have to be installed onto the stock mounting point on the vehicle. Figure 10 shows where the clip nuts have to be installed.
Step 17: To install the M 10x1.5 clip nuts, simply slide them onto the stock mounts, they will click into place. Figure 11 shows the clip nut installed on the vehicle.
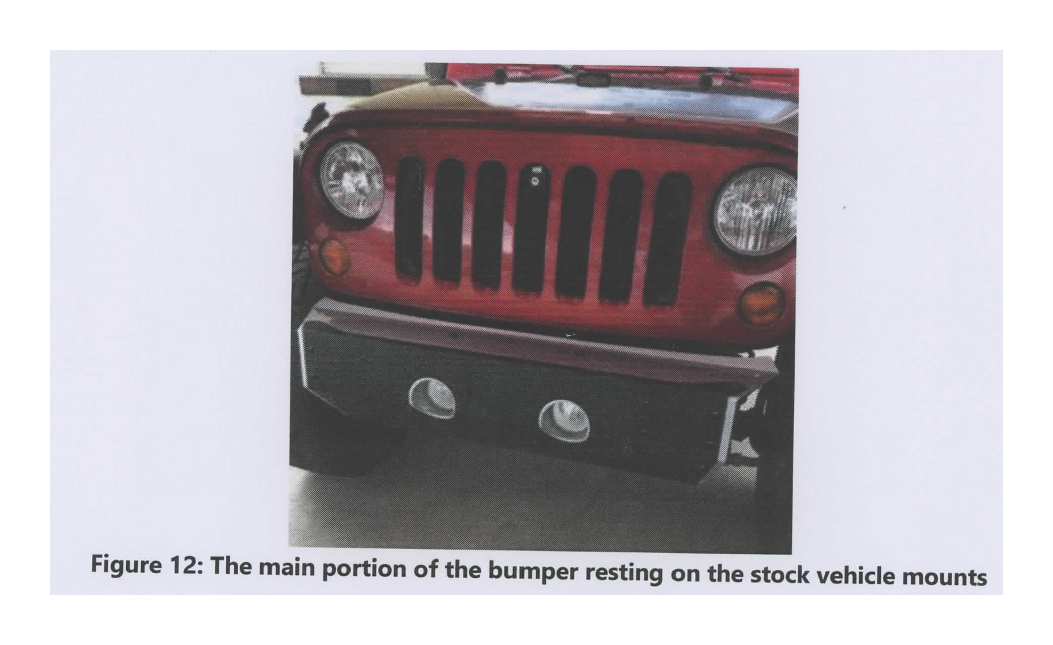
Step 18: Now time to install the main portion of the Wilco Offroad MC2X bumper. Grab the bumper and place it on the vehicle. The bumper should slide onto the mounting points and rest in place. Figure 12 shows the bumper resting on the vehicle.
WARNING: Wilco Offroad MC2X bumper weighs approximately 50 lbs and if help is needed we advise a second person for install.
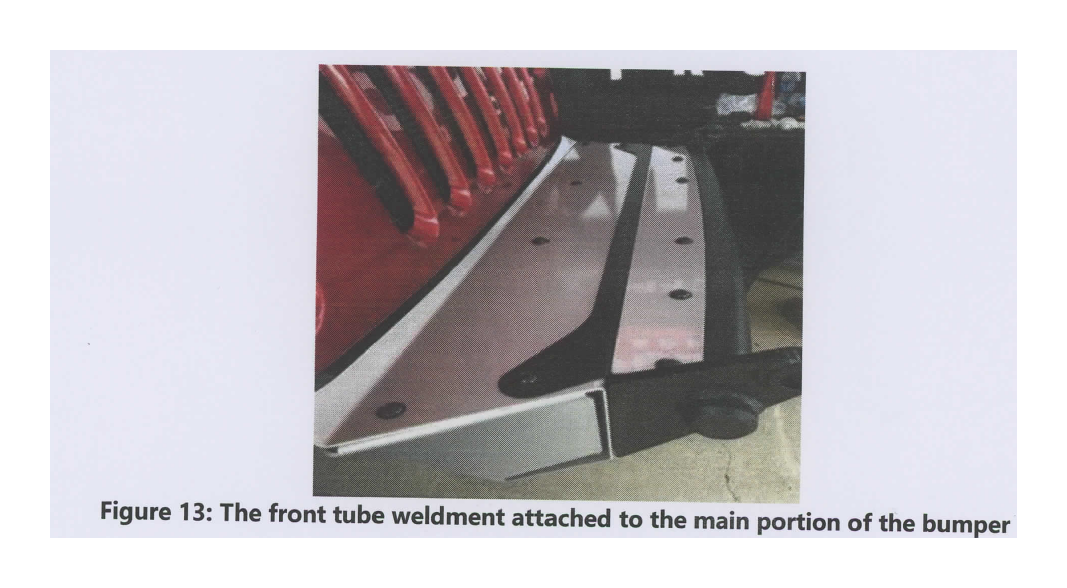
Step 19: To prepare for securing the bumper, place the front tube weldment on the bumper. The front tube weldment has 8 holes that will line up with the 8 holes on the main portion. Figure 13 shows the front tube weldment on the main portion of the bumper. To help hold the front tube weldment on the vehicle an assistant is recommended.
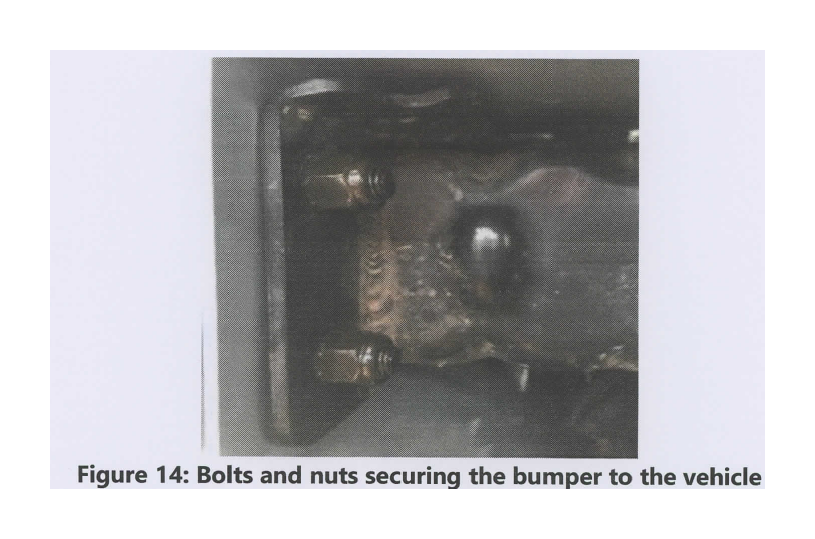
Step 20: To secure the bumper and front tube weldment onto the vehicle use (4) V2-13x1.5 hex bolts, (4) M 10x1.5x30 hex bolts, (4) V2" lock nuts, (4) V2" washers, and (4) M10 washers. Each side has (2) ¥2-13x1.5 hex bolts and (2) M 10x1.5x30 hex bolts. Slide the ¥2-13x1.5 hex bolts with ¥2" flat washers through the open holes in the front tube weldment then through the bumper shown in figure 14. Move bumper up and down to aid getting the bolts to go through the holes. Thread the ¥2" lock nuts onto the bolts. Do not fully tighten. Repeat for the other side.
Step 21: To finish securing the bumper thread the M10x1.5x30 hex bolts with the M10 washers into the M10 clip nuts, which were installed in step 17. Do not fully tighten. Repeat for the other side.
Step 22: The placement of the bumper can be moved up and down to align with the vehicles bodylines. Hold bumper at desired location and tighten the M10x1.5x30 hex bolts on each side of the bumper to approximately 35 ft-lbs.
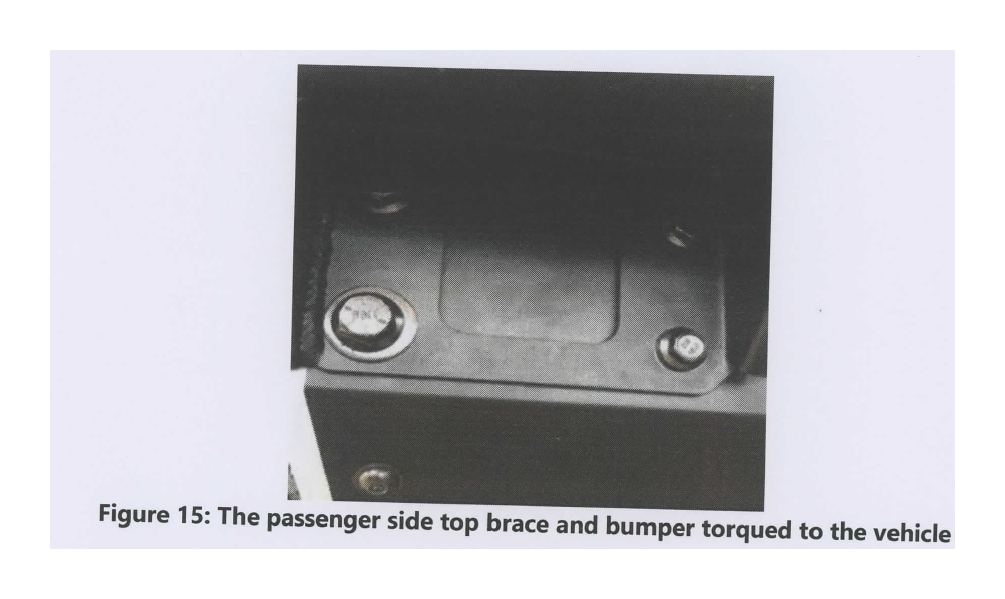
Step 23: To tighten the ¥2-13x1.5 hex bolts and ¥2" nuts use a 19mm wrench and 19mm socket. Torque to approximately 75 ft-lbs. Figure 15 shows what the bolts torqued down should look like.
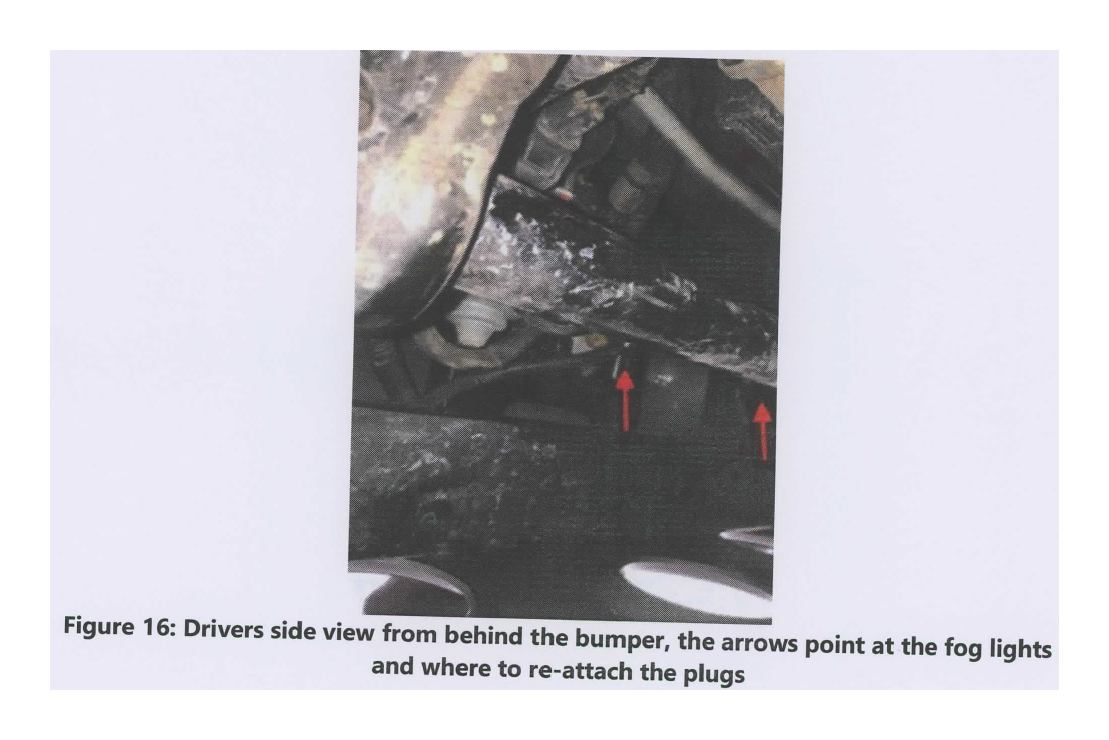
Step 24: To plug in stock fog lights reach into the side of the bumper by the sway bar. Attach the orange clip into the back of the stock fog light. Repeat for the other side. This step may take a few tries because it is difficult to see into the back of the bumper. Figure 16 shows where the fog lights and plugs are from a rear view of the bumper.
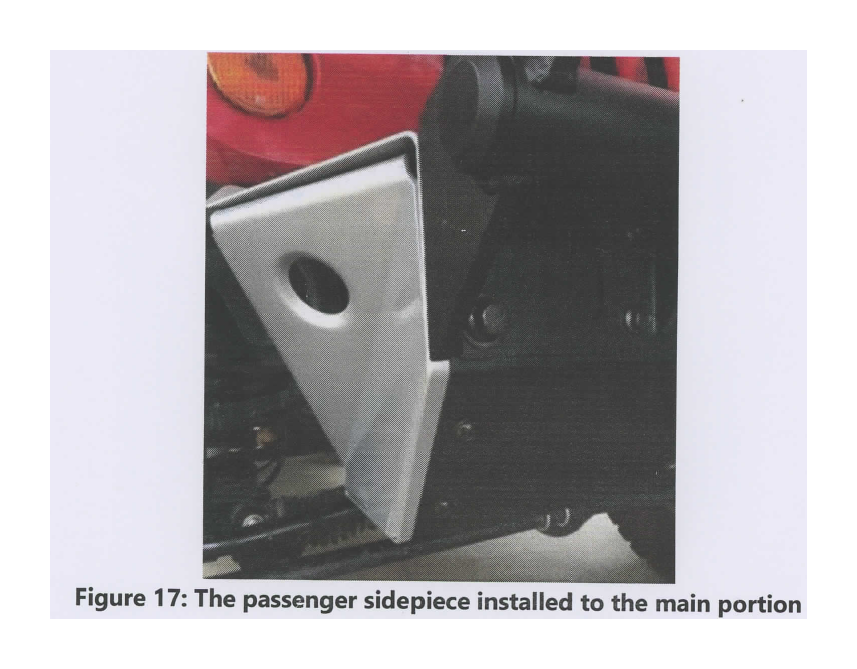
Step 25: To install the sidepieces onto the bumper use (10) M10x1.5x30 Allen bolts, (5) Allen bolts per side, and (10) M10 flat washers. Start with the passenger side; slide the sidepiece into the main portion. Thread the M10x1.5x30 Allen bolts into the open holes. There are 2 bolts on top, 2 on the front, and 1 on the bottom. Tighten bolts to approximately 35 ft-lbs. Repeat for driver side. Figure 17 shows the sidepieces mounted to the main portion of the bumper.
Step 26: To finish the install re-check all bolts to the proper torque.
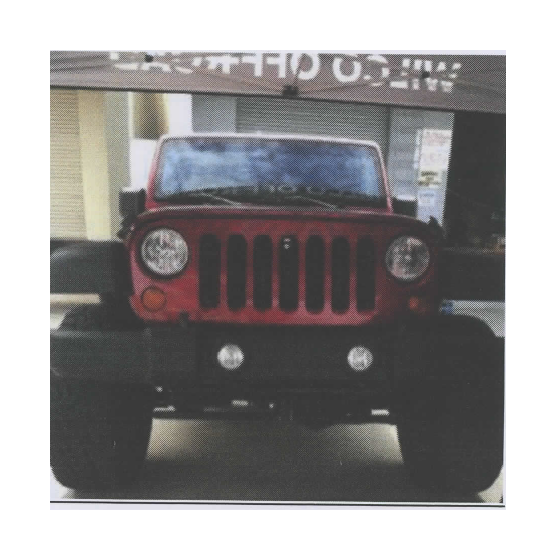
Step 27: You have now successfully installed your Wilco Offroad MC2X bumper! Figure 18 is the final product installed.

Wilco Offroad® Limited Lifetime Warranty
Wilco Offroad offers a limited lifetime warranty on the structure of each product to the original purchaser.
Exclusions:
1. Products that have been abused, crashed, altered, modified, or installed on vehicles other than those approved by Wilco Offroad
2. Cost of the original installation, removal, or reinstallation
3. Damages and shipping charges
4. Latch bushings, safety cable assembly, bolts, nuts, latch pins, tether cables, and thrust washers. (These parts are subject to wear and are not considered defective when worn)
1 Year Powder Coat Warranty
1-year powder coat warranty against manufacture defects. Covers corrosion issues, bubbling, and cracking to the powder coated finish.
Exclusions:
1. Scrapes, scratches, dents, dings, chips, and negligence
2. Damage due to shipping.
3. Accidents, impact by rocks, trees, obstacles, or other aspects of the use environment.
No-Fault Replacement
Wilco Offroad will make replacement parts available to the original owner at a minimal charge in the event of a crash or other non-warranty situation for the life of the product.
Contact Us
For questions about warranty, call 1-877-945-2684 or email [email protected]

