Guaranteed 12/24 Delivery Still Available see item page for details! available on most items - Details

How to Install a Tuffy Speaker & Storage Security Lock Box Set on your 87-18 Jeep Wrangler YJ, TJ, JK & JL
Installation Time
30 minutes
Tools Required
- Electric drill
- 3/8” Drill bit
- Marker or pencil
- Knife
- ½” Socket and ratchet
- ½” Wrench
- ¼” Wrench or Socket and Ratchet
- Silicone sealant (Recommended)

Shop Parts in this Guide
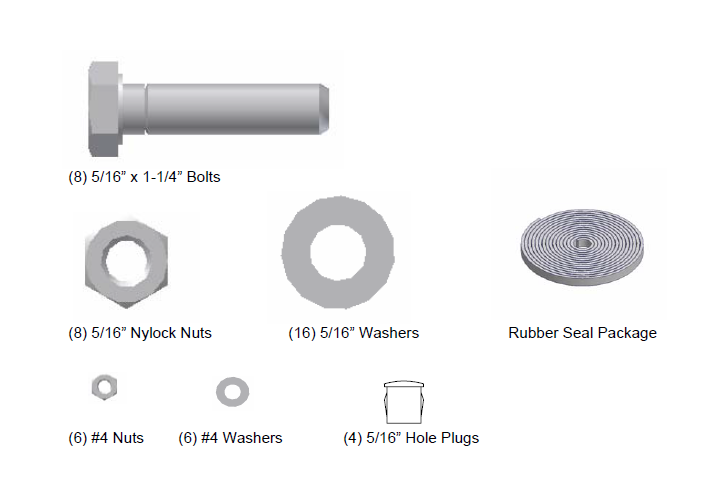
PARTS CHECKLIST

PLEASE READ ALL INSTRUCTIONS THOROUGHLY BEFORE STARTING INSTALLATION.
This section applies to Part # 020 only
1. Bolt your speaker to the Tuffy box by placing the speaker cloth between the speaker and the box and securing with fasteners provided with the speaker.
2. Route speaker wires through either the hole in the bottom of the box or the hole on the side of the box.
3. If you did not route the wires through the hole in the side of the box, plug the hole with the 5/16” plug provided.
4. Connect speaker wires to speaker in accordance to the speaker installation manual.
5. Install rubber seal on lid and check lock operation.
6. Place your Tuffy box in the vehicle on the wheel well, make sure placement of box does not interfere with the movement of the seat or convertible top.
7. Using a marker or pencil, mark any (3) spots through the 3/8” mounting holes in the box.
WARNING!
Make sure that there is nothing under the vehicle that will be damaged by the drill bit when drilling.
8. Remove the box. Cut the carpet at the (4) marked holes. Using a 3/8” drill bit, drill out the (4) marked spots in the floor.
9. It is recommended to use silicone sealant in any holes drilled in the vehicle to prevent rusting.
10. Bolt the Tuffy box to the vehicle using (4)5/16x1-1/4” Bolts, (4) 5/16” Nuts and (8) 5/16” Washers. For security purposes it is best to insert the bolts from the underside of the vehicle up.
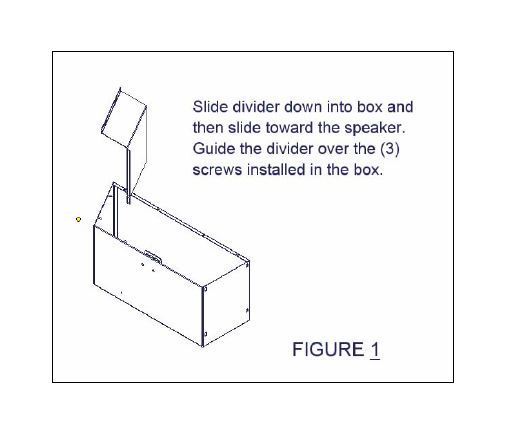
11. Part # 020 only - Slide the divider down and then over the screws inserted in your Tuffy box. Secure the divider to the box using the (3) #4 washers and (3) #4 nuts provided. (See FIGURE 1)
12. Repeat steps for installation of box on the other side of the vehicle.


