3 Days Left! Guaranteed Free Delivery 12/24. Order by 3pm EST available on most items - Details

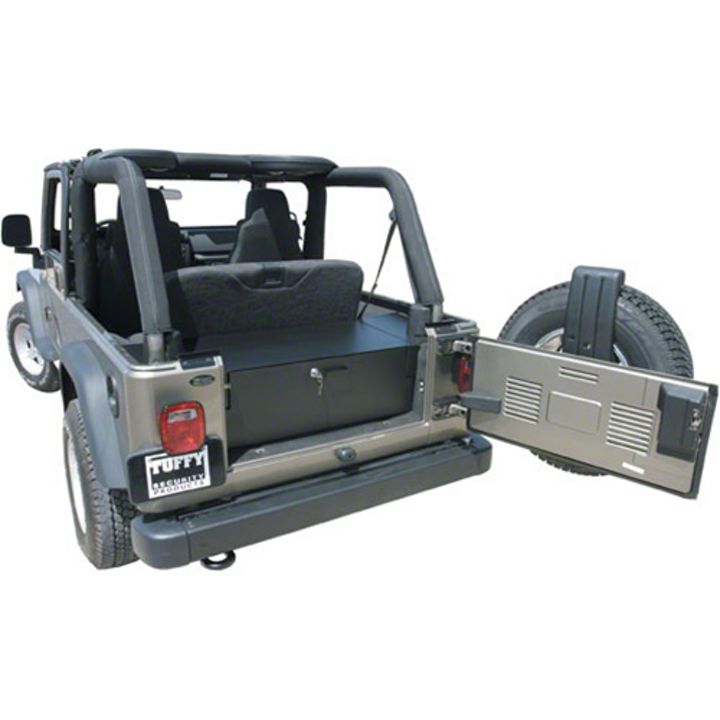
How to Install Tuffy Security Drawer on your 1997-2006 Wrangler

Shop Parts in this Guide
SHIPMENT CONTENTS

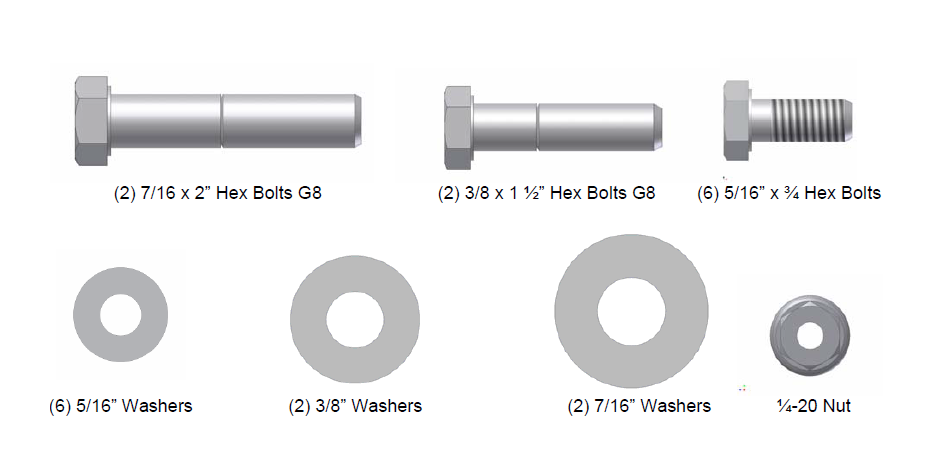
HARDWARE PACKAGE

PLEASE READ ALL SAFETY WARNINGS AND INSTRUCTIONS THOROUGHLY BEFORE STARTING INSTALL
INSTALLATION
NOTICE! DRAWER WILL HAVE TO BE REMOVED FOR INSTALLATION
INSTRUCTIONS FOR REMOVING DRAWER
Before attempting to install your new Tuffy Drawer, it is necessary to remove the drawer from the body. To do this, pull the drawer out as far as it can go then locate the small black plastic stops visible on the ball bearing drawer slides. One of the black stops will need to be deactivated by pressing down and the other one pulled up. Be careful not to break plastic stops. While deactivating the stops pull the drawer out and the slides will separate. When you are finished installing your drawer, line up the slides and push the drawer back in.
1. Install the drawer handle using (2) ¼-20 nuts.
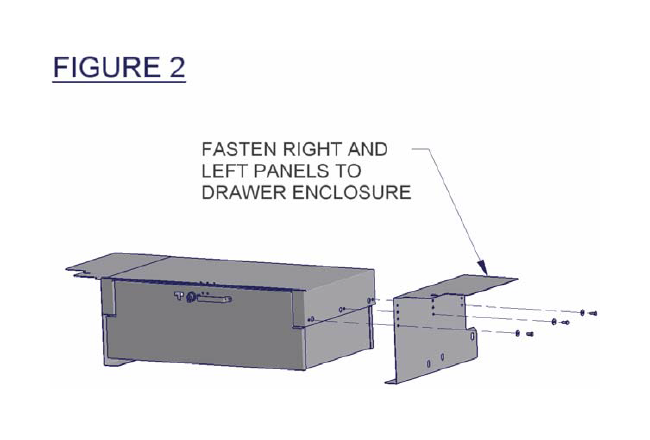
2. Fasten both the right and left mounting panels to the drawer enclosure. ATTENTION: There are four options of mounting hole locations. Use the lowest holes for the minimum clearance under the drawer. Use the highest holes for the maximum clearance under the drawer which will enable the storage of items such as the soft windows. (See Figure 2)

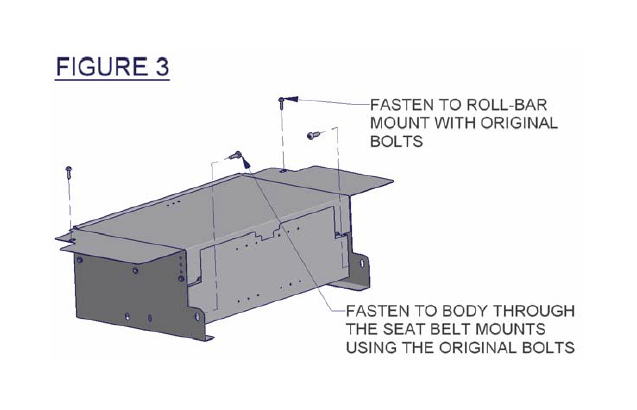
3. Remove the two inside bolts holding the rear down-tube of the roll-bar to the Jeep tub. Save these bolts, you will reuse them.
4. Remove the two seat belt harness bolts located on each side of the Jeep tub. Save these bolts, you will reuse them.
5. Fasten the enclosure to the Jeep tub through the roll-bar mounting holes and the seat belt harness holes using the original Jeep hardware. In some applications a longer bolt with a washer is necessary, in these cases use the (2) 3/8 x 1 ½” bolts and 3/8”
washers on the roll-bar and (2) 7/16 x 2” bolts and 7/16” washers for the seat belt mounts. (See figure 3)

6. Install the rubber seal on the drawer enclosure where the drawer makes contact.
7. Insert the drawer and check sliding and lock operation.
