FREE 1 to 3-Day Delivery on Orders $149+ Details

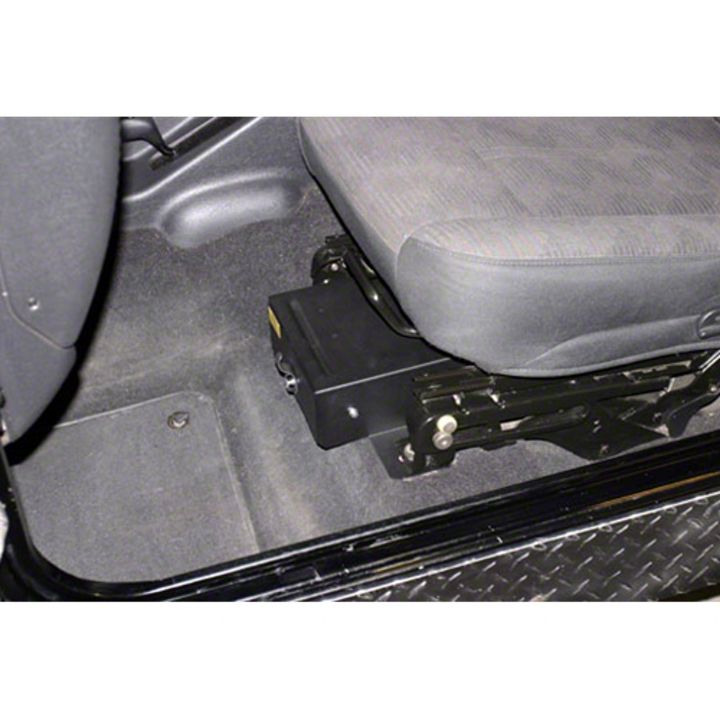
How to Install Tuffy Conceal Carry Drawer w/ Flip Seat on your 1997-2006 Wrangler
Tools Required
- 1/2" Socket and Ratchet
- T-50 Torx socket or wrench (Only required for optionally removing the entire seat)
- 5/64" Allen wrench
- 5/16" Wrench
- Flat head screwdriver
Shop Parts in this Guide
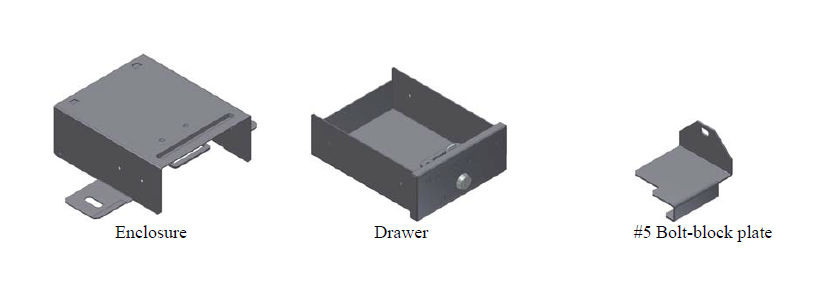
PARTS CHECKLIST
PLEASE READ ALL INSTRUCTIONS THOROUGHLY BEFORE STARTING INSTALLATION.
Warning! Do not operate the vehicle without the drawer locked shut. If left unlocked normal vehicle movements while driving could cause the drawer to open creating an unsafe situation. As a result from maximizing the drawer storage height the seat (forward & aft) re-position lever is very close to the top of the enclosure and can create a pinch point so use caution in adjusting the seat position.
1. Remove the drawer from the enclosure. To remove the drawer from the enclosure, pull the drawer out as far as it can go then locate the small black plastic stops visible on the ball bearing drawer slides. One of the black stops will need to be deactivated by pressing down and the other one pulled up. Be careful not to break plastic stops. While deactivating the stops push the center slide section back into the drawer enclosure off of the front slide section attached to the drawer until they are separated. To reinstall, line up the slide sections and push the drawer in gently, do not force it or it can be damaged.
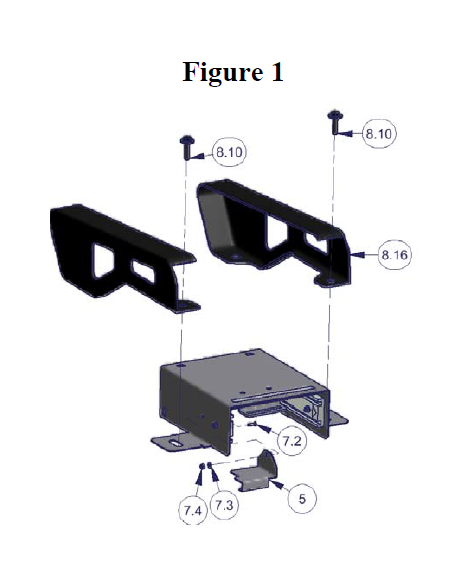
2. Remove the (2) original front mounting bolts #8.10 holding the front of the Drivers side seat to the body. It is not necessary to remove the rear bolts although it does make it easier to slide the Tuffy drawer under the seat brackets. (See Figure 1)
3. Remove the one #7.2 screw, #7.3 washer and #7.4 nut holding the rear of the left slide to the enclosure as illustrated. The floating center slide will need to be positioned to allow access to the #7.2 Allen head screw. This screw will be reinstalled later to attach the #5 Bolt-blocker plate. (See Figure 1)
4. Insert the drawer enclosure under the driver’s seat with the (2) tabs on the enclosure under the original seat mounting brackets. (See Figure 1)
Note: On some vehicles the cable connected to the bottom of the driver’s seat may need to be rerouted. To do this, unplug the cable and in some vehicles pop the cable clamp out of the hole in the vehicle floor using a flat head screwdriver then reroute the cable and plug it back in. Carefully check that the cable will not catch, be pinched or stretched and damaged when the seat is maneuvered all the way forward, back and when flipped up forward.
5. Insert the (2) original front seat front mounting bolts #8.10 and tighten them all the way. Reinstall the rear mounting bolts as well if they were removed previously. (See Figure 1)
6. For additional security install the #5 Bolt-blocker plate by inserting the front flange on the #5 plate so it is sandwiched under the flange on the enclosure and the floor of the vehicle and maneuvering it towards the rear of the vehicle until the holes line up. (See Figure 1)
7. Reinstall the one #7.2 screw, #7.3 washer and #7.4 nut securing the #5 Bolt-blocker plate to the enclosure and the left slide as illustrated. The floating center slide will need to be positioned to allow access to the #7.2 Allen head screw. (See Figure 1)