 FREE 1 to 3-Day Delivery on Orders $149+ Details

How to Install Tuff Country 3 in. Suspension Lift Kit w/o Shocks (07-18 Wrangler JK 2 Door) on your Jeep Wrangler
Installation Time
5 hours
Tools Required
- Torque wrench
- Standard socket set
- Standard wrench set
- Metric socket set
- Metric wrench set
- Tape measure
- Hydraulic floor jacks
- Air chisel
Congratulations on your selection to purchase a Tuff Country EZ-Ride Suspension System. We at Tuff Country EZ-Ride Suspension are proud to offer a high quality product at the industries most competitive pricing. Thank you for your confidence in us and our product.
If you desire to return your vehicle to stock, it is the customers responsibility to save all stock hardware and components.
The Tuff Country EZ-Ride Suspension product safety label that is included in your kit box must be installed inside the cab in plain view of all occupants.
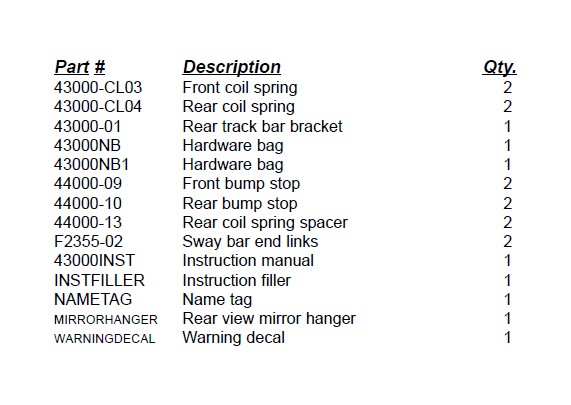
Special note: Before installation begins, it is the customers/installers responsibility to make sure that all parts are on hand. If any parts are missing, please feel free to call one of our customer service representatives @ (801) 280-2777.
Make sure to use loctite on all new and stock hardware associated with the installation of this suspension system.
Important customer information:
Tuff Country EZ-Ride Suspension highly recommends that a qualified or a certified mechanic performs this installation.
It is the responsibility of the customer/installer to wear safety glasses at all times when performing this installation.
It is the customers/installers responsibility to read and understand all steps before installation begins. If you have any questions or concerns, please contact our technical department @ (801) 280-2777. Also, the OEM manual should be used as a reference guide.
This vehicles reaction and handling characteristics may differ from standard cars and/or trucks. Modifications to improve and/or enhance off road performance may raise the intended center of gravity. Extreme caution must be utilized when encountering driving conditions which may cause vehicle imbalance or loss of control. DRIVE SAFELY! Avoid abrupt maneuvers: such as sudden sharp turns which could cause a roll over, resulting in serious injury or death.
It is the customers responsibility to make sure that a re-torque is performed on all hardware associated with this suspension system after the first 100 miles of installation. It is also the customers responsibility to do a complete re-torque after every 3000 miles or after every off road use.
After the original installation, Tuff Country EZ-Ride Suspension also recommends having the alignment checked every 6 months to ensure proper tracking, proper wear on tires and front end components. Tuff Country EZ-Ride Suspension takes no responsibility for abuse, improper installation or improper suspension maintenance.
Important information that needs to be read before installation begins:
The stock wheels will work in conjunction with this suspension system but installing a larger tire on the stock wheels will cause rubbing on the sway bar and the control arms. Tuff Country recommends when purchasing new wheels that you purchase wheels with a 4.5” back spacing or less. Tuff Country recommends a 35” x12.50” tire package. If larger than a 35” x12.50” tire is installed on your vehicle in conjunction with part # 43000; Tuff Country assumes no liability and the warranty will be VOID. Also, the new JK’s have a larger braking system, a minimum of a 16” wheel is required for use in conjunction with the installation of the suspension system.
This Suspension System comes with (1) installation manual and some post installation procedure literature and it is the installers responsibility to make sure that the customer receives the post installation procedure literature. If a customer would like a copy of the installation manual, please have them visit our website at www.tuffcountry.com. Have them go to the customer care section to download these instructions. If you have any questions, please feel free to call us at (801) 280-2777.
New longer front and rear shocks are needed after this suspension system has been installed and the front and rear shocks need to be ordered as a separate part #. If you have not already ordered your front and rear shocks, please feel free to contact Tuff Country or your local Tuff Country dealer and order your new front and rear shocks. Tuff Country recommends installing a 26” fully extended shock in the front and rear.
Before installation begins, Tuff Country EZ-Ride Suspension highly recommends that the installer performs a test drive on the vehicle. During the test drive, check to see if there are any uncommon sounds or vibrations. If uncommon sounds or vibrations occur on the test drive, uncommon sounds or vibrations will be enhanced once the suspension system has been installed. Tuff Country EZ-Ride Suspension highly recommends notifying the customer prior to installation to inform the customer of these issues if they exist.
Please follow instructions carefully:
Before installation begins, measure from the center of the hub, to the bottom of the fender well, and record measurements below.
Pre-installation measurements:

Front end installation:
1. To begin installation, carefully lift the vehicle into the air and support the vehicle with jack stands. Place a jack stand on both the driver and the passenger side. Also at this time, place a pair of hydraulic floor jacks under the front and rear axle. Next, remove the front wheels and tires from both sides.
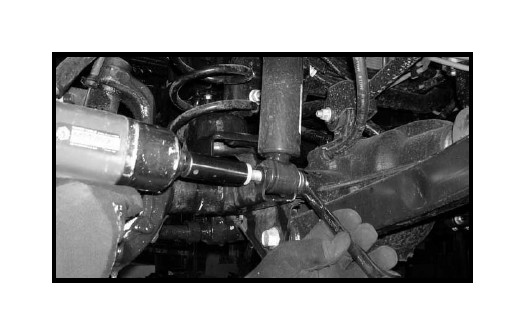
2. Working on the driver side, remove the front sway bar end link from the axle mount and sway bar. Save the lower hardware but the sway bar end link may be discard. Repeat procedure on the passenger side.
3. Working on the driver side, remove the rear sway bar end link from the axle mount and the sway bar. Save the hardware and end link. Special note: the stock rear sway bar end link will be installed in the front of the vehicle. Repeat procedure on the passenger side.
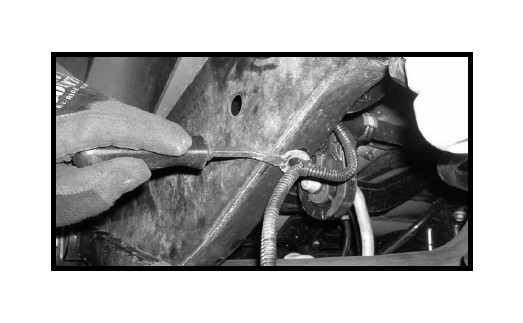
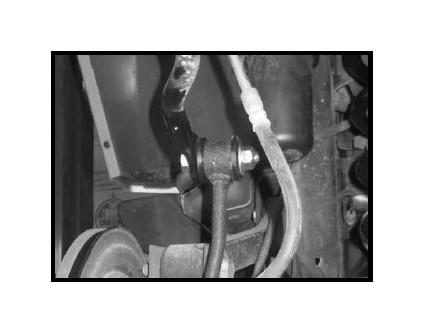
4. Working on the driver side, remove the hardware attaching the OE brake line bracket to the side of the frame rail. Save the hardware and repeat on the passenger side.
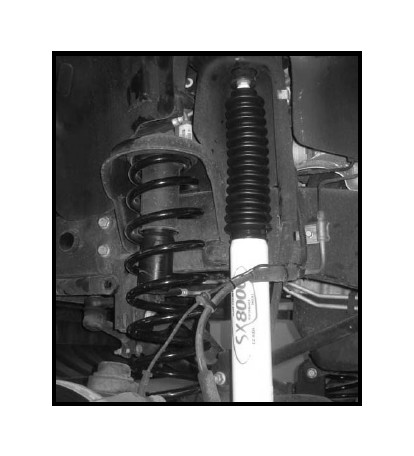
5. Working on the driver side, remove the shock from the vehicle. Save the hardware. The shock maybe discarded. Special note: New longer front shocks are needed after this suspension system has been installed and the shocks need to be ordered as a separate part #. If you have not already ordered your shocks, please feel free to contact Tuff Country or your local Tuff Country dealer and order your new shocks. Tuff Country recommends installing a 26” fully extended shock in the front.
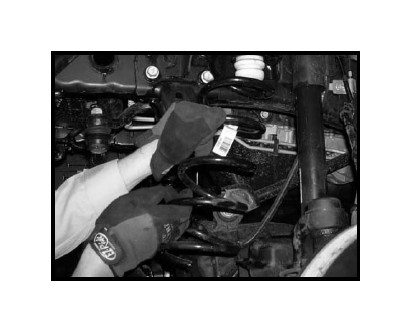
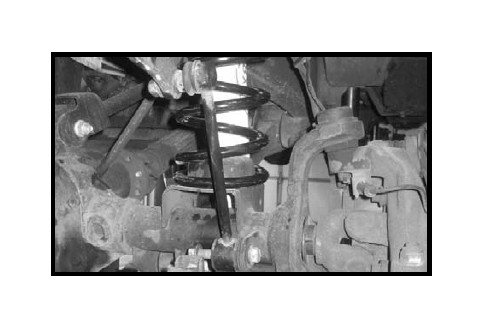
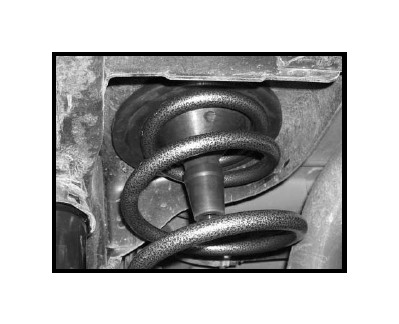
6. Carefully lower down on both hydraulic floor jacks at the same time allowing enough room for the coil springs to be removed remove. Working on the driver side, remove and discard the coil springs. Repeat procedure on the passenger side.
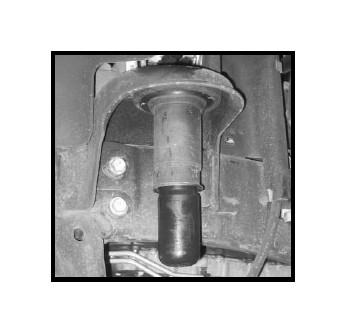
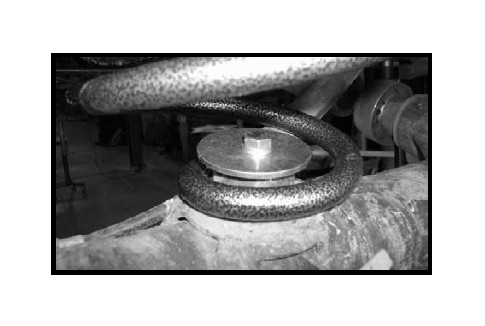
7. Locate the new front bump stops. Working on the driver side, remove and discard the OE bump stop. Install the new extended bump stop into the stock location. Repeat procedure on the on the passenger side.
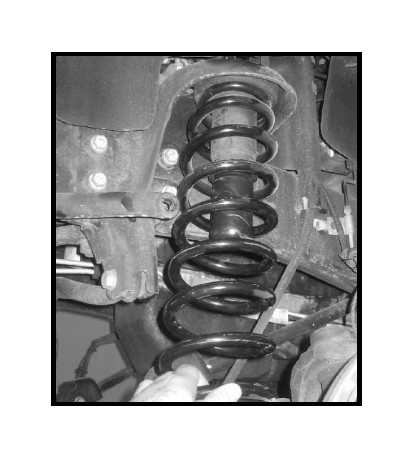
8. Locate the new front coil springs. Working on the driver side, install the new coil spring into the OE location. Carefully raise up on the hydraulic floor jack until the coil spring seats properly into the vehicle. Repeat procedure on the passenger side.
9. Working on the driver side, re-install the OE brake line bracket back to the frame rail using the hardware. Make sure to use loctite and torque to 8 ft lbs. Repeat procedure on the passenger side.
10. Locate the new front shocks. Special note: New longer front shocks are needed after this suspension system has been installed and the shocks need to be ordered as a separate part #. If you have not already ordered your shocks, please feel free to contact Tuff Country or your local Tuff Country dealer and order your new shocks. Tuff Country recommends installing a 26” fully extended shock in the front. Working on the driver side, install the new shock into the OE location. Make sure to use loctite and torque the upper hardware to 18 ft lbs. and the lower hardware to 55 ft lbs. Repeat procedure on the passenger side.
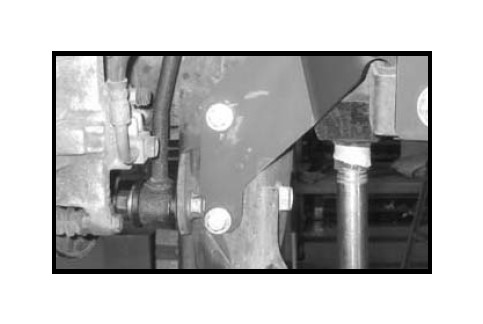
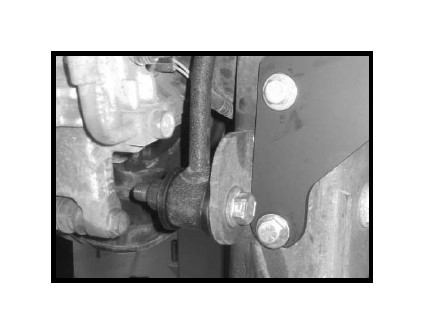
11. Working on the driver side, install the rear sway bar end link into the front location using the OE lower hardware and the stock upper hardware. Make sure to use loctite and torque the upper and lower hardware to 55 ft lbs. Repeat procedure on the passenger side.
12. Check and double check and check again to make sure all steps have been performed properly with the front end.
13. Install the front tires and wheels.
Front end installation complete.
Rear end installation:
14. Working on the driver side, remove and save the shock hardware. The shock maybe discarded. Special note: New longer rear shocks are needed after this suspension system has been installed and the shocks need to be ordered as a separate part #. If you have not already ordered your shocks, please feel free to contact Tuff Country or your local Tuff Country dealer and order your new shocks. Tuff Country recommends installing a 26” fully extended shock in the rear. Repeat procedure on the passenger side.
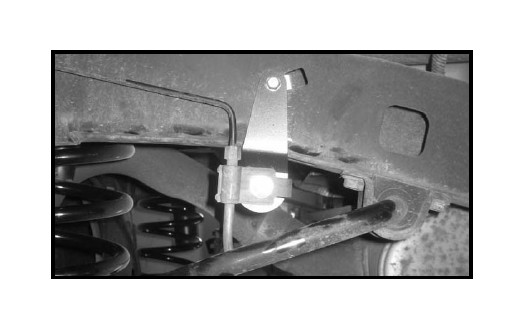
15. Working on the driver side, remove the OE brake line bracket from the side of the frame rail. Save the stock hardware. Repeat procedure on the passenger side.
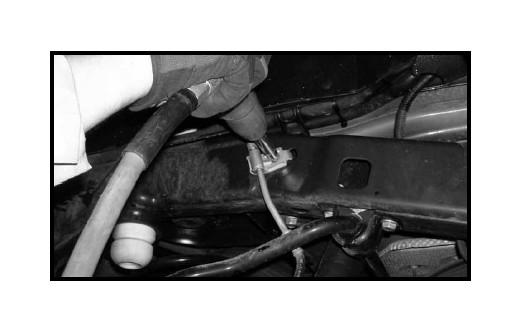
16. Working on the driver side, carefully remove the ABS line clip from the bottom of the frame rail. Repeat procedure on the passenger side.
17. Working on the driver side, remove the OE bump stop and discard. Repeat procedure on the passenger side.

18. Locate the new rear bump stops. Working on the driver side, install the new rear bump stop into the stock location. Repeat procedure on the passenger side. Special note: using some lithium base grease will help make installation easier.
19. Working on the driver side, remove the track bar from the track bar location and save the hardware.
20. Carefully lower down on both hydraulic floor jacks at the same time allowing enough room to remove the rear coil springs. Working on the driver side, remove the coil spring from the stock location and discard. Also, remove the upper coil spring isolator and discard. Repeat procedure on the passenger side.
21. Locate the new rear coil spring isolator. Working on the driver side, install the new isolator into the stock upper location. Repeat procedure on the passenger side.
22. Locate the new rear coil springs. Working on the driver side, install the new rear coil springs into the stock location and raise up on the hydraulic floor jack until the coil spring seats properly into the OE location. Repeat procedure on the passenger side.
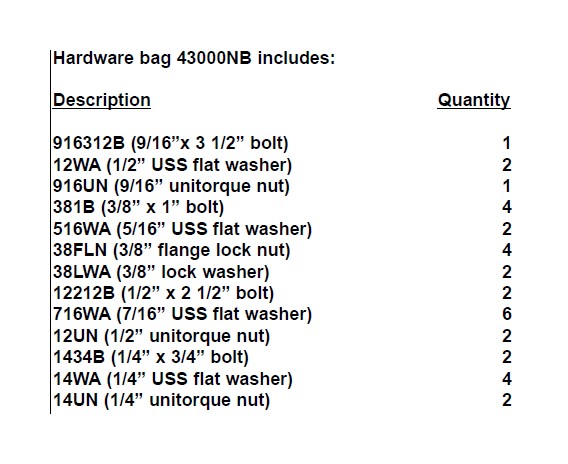
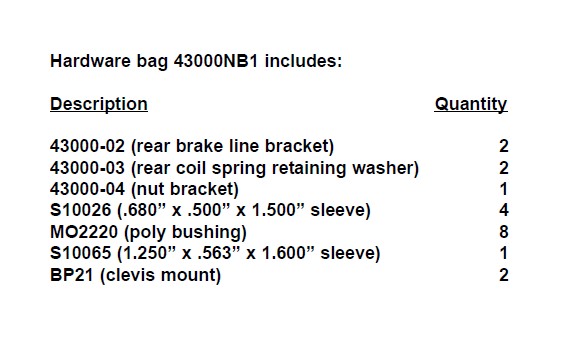
23. Locate (2) 3/8” x 1” bolts, (2) 3/8” lock washers, (2) 3/8” flange nuts from hardware bag 43000NB. Also, locate (2) rear spring retaining washers & (1) 43000-04 nut bracket from hardware bag 43000NB1 Working on the driver side, attach the new rear coil spring retaining washer on the bottom inside of the new coil and secure using the new 3/8” x 1” bolt and hardware and nut bracket. Make sure to use loctite and torque to 18 ft lbs. Repeat procedure on the passenger side.
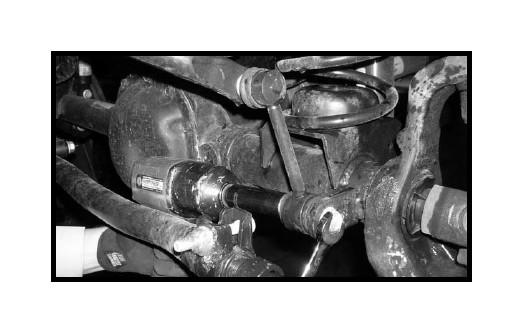
24. Locate the new track bar relocation bracket. Locate (1) S10065 sleeve from hardware bag 43000NB1. Also, locate (1) 9/16” x 3 1/2” bolt, (2) 1/2” USS flat washers and (1) 9/16” unitorque nut from hardware bag 43000NB. Install the new track bar bracket into the OE location and secure using the new hardware into the OE location. Do not tighten at this point.
25. Locate (2) 3/8” x 1” bolts, (2) 5/16” USS flat washers and (2) 3/8” flange nuts. Make sure that the newly installed track bar bracket is sitting square in the vehicle and using the new track bar bracket as a guide, carefully drill (2) 3/8” holes into the driver side OE shock bracket. Secure the newly installed track bracket to the shock bracket using the new hardware. Make sure to use loctite and torque to 18 ft lbs.
26. Install the track bar to the newly installed track bar bracket using the OE hardware. Make sure to use loctite and torque to 85 ft lbs. Move back to the newly installed 9/16” x 31/2” bolt securing the newly installed track bar bracket into the OE location and add some loctite and torque to 105 ft lbs.

27. Locate the new rear sway bar end links. Locate (8) poly bushings and (4) S10026 sleeves from hardware bag 43000NB1. Install the new bushings and sleeves into the new end links. Special note: Make sure to use a fair amount of lithium or moly base grease before installing the new bushings and sleeves into the end links. This will increase the life of the bushing as well as help prevent squeaking.
28. Locate (2) 7/16” USS flat washers from hardware bag 43000NB. Also, locate the OE lower sway bar hardware. Working on the driver side, install the new end link to the lower sway bar mounting location using the OE hardware and (1) 7/16” USS flat washer on the nut side of the hardware. Make sure to use loctite and torque to 65 ft lbs. Repeat procedure on the passenger side.
29. Locate (2) 1/2” x 2 1/2” bolts, (4) 7/16” USS flat washers and (2) 1/2” unitorque nuts from hardware bag 43000NB. Working on the driver side, install the new end link to the inside of the sway bar and secure using the new 1/2” hardware. Make sure to use loctite and torque to 85 ft lbs. Repeat procedure on the passenger side.
30. Locate the new rear shocks. Special note: New longer rear shocks are needed, if you have not already ordered your new rear shocks, please contact Tuff Country or your local Tuff Country dealer and order the proper shocks. Tuff Country recommends using a 30” fully extended nitrogen gas shock. Also, locate (2) new rear clevis mounts from hardware bag 43000NB1. Once the new shock boots have been installed, install the new clevis mount into the upper bushing in the upper eyelet. Special note: Make sure to use a lithium or moly base grease prior to inserting the new bushings and sleeves into the new lower eyelet of the new shock. This will increase the life of the bushing as well as prevent squeaking.
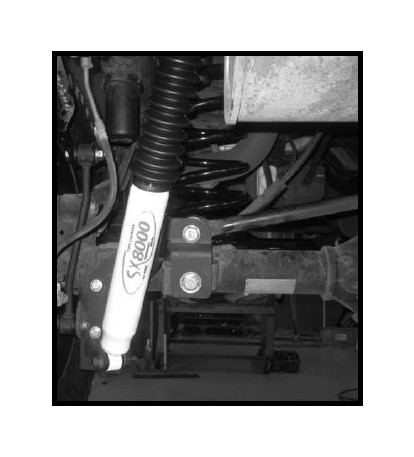
31. Working on the driver side, install the new shock into the stock location and secure using the stock hardware. Make sure to use loctite and torque the lower mounting hardware to 75 ft lbs and the upper mounting hardware to 18 ft lbs. Repeat procedure on the passenger side.
32. Locate (2) new rear brake line relocation brackets from hardware bag 43000NB1. Also, locate (2) 1/4” x 3/4” bolts, (4) 1/4” USS flat washers and (2) 1/4” unitorque nuts from hardware bag 43000NB. Working on the driver side, install the new brake line relocation bracket to the OE frame rail using the OE hardware. Make sure to use loctite and torque to 8 ft lbs. Install the stock bracket to the newly installed brake line bracket and secure using the new 1/4” hardware. Make sure to use loctite and torque to 10 ft lbs. Repeat procedure on the passenger side.
33. Remove the hydraulic floor jacks from under the rear differential.
34. Working on the driver side, re-install the stock ABS clip to the bottom of the OE frame rail. Repeat procedure on the passenger side.
35. Install the tires and wheels and carefully lower the vehicle to the ground.
36. Check and double check to make sure that all steps were performed properly. And then check them again.
Congratulations, installation complete!
Special note: After the completion of the installation, Tuff Country EZ-Ride Suspension recommends taking the vehicle to an alignment shop and having a proper front end alignment performed.
Tuff Country EZ-Ride Suspension recommends that a complete re-torque is done on all bolts associated with this suspension system. It is the customers responsibility to make sure that a re-torque is performed on all hardware associated with this suspension system after the first 100 miles of installation. It is also the customers responsibility to do a complete re-torque after every 3000 miles or after every off road use. Neglect of following these steps could cause brackets to come loose and cause serious damage to the suspension system and to the vehicle.
This Suspension System comes with (1) installation manual and some post installation procedure literature and it is the installers responsibility to make sure that the customer receives the post installation procedure literature. If a customer would like a copy of the installation manual, please have them visit our website at www.tuffcountry. com. Have them go to the customer care section to download these instructions. If you have any questions, please feel free to call us at (801) 280-2777.
If you have any questions or concerns, please feel free to contact Tuff Country or your local Tuff Country dealer

