FREE 1 to 3-Day Delivery on Orders $149+ Details

How to Install Teraflex Swaybar Disconnects w/ 2-6 in. lift on your Wrangler
Installation Time
30 minutes
Tools Required
- Basic mechanics tool set
- 3/8”-16 Tap and Handle

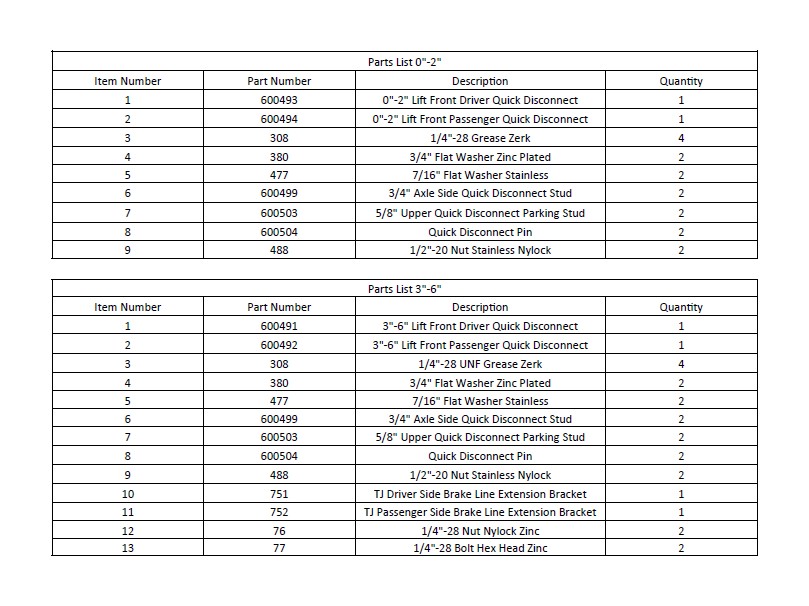
Shop Parts in this Guide
Important Notes:
Prior to beginning this or any installation read these instructions to familiarize yourself with the required steps and evaluate if you are experienced and capable to personally perform these modifications. A factory service manual should be used in conjunction with these installation instructions.
We recommend greasing every 3000 miles or after going though water.
These links are designed to be connected when on road. Failure to connect on road will cause drastic changes in the handling characteristics. When off-roading never disconnect just one link of the disconnects. Both links must be disconnected when in use. Failure to do so can cause the premature failure of the links, pins, and studs, voiding all applicable warranties.
Refer to the parts list to ensure that all necessary components and hardware has been included. If any parts are missing please contact your local TeraFlex dealer for assistance.
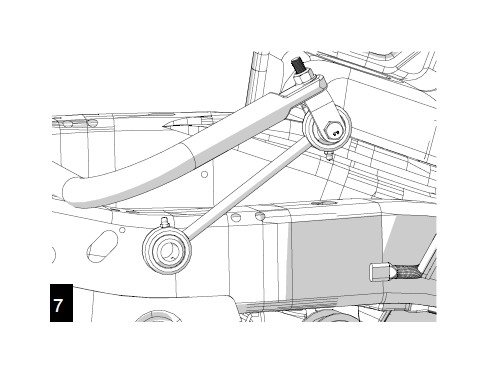
FRONT REMOVAL
1. This install can be performed with the vehicle on the ground, just turn the tires to gain better access.
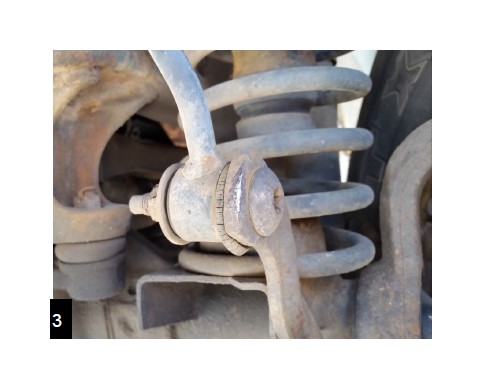
2. Remove the upper link nuts using a 15mm. With a metal hammer, strike the sway bar near the link to release the taper. Use a ball joint separator if necessary.

Remove the lower bolt with an 18mm and a T55 torx.
FRONT INSTALLATION
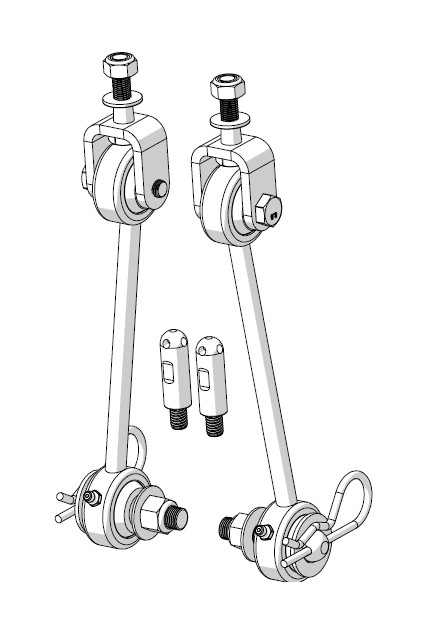
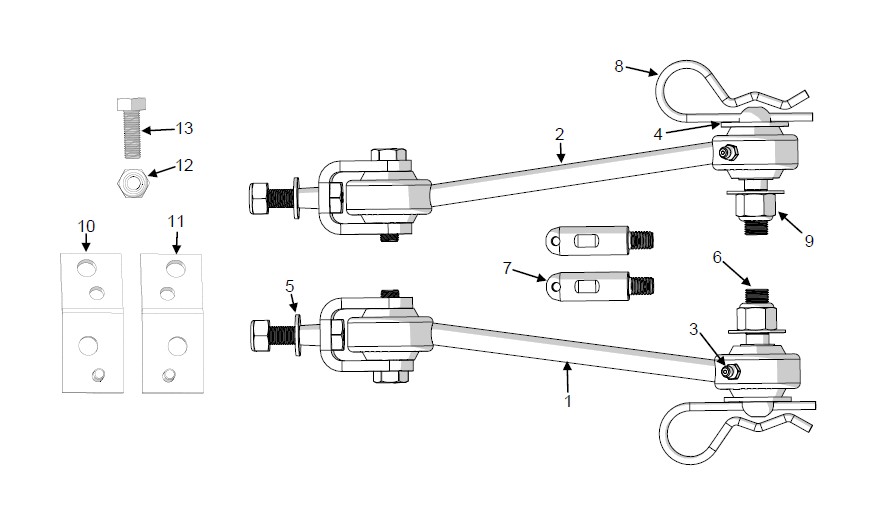
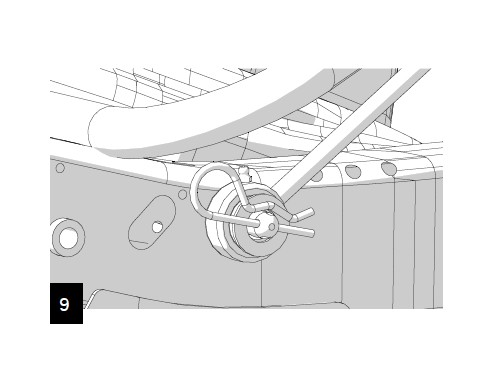
Identify the left and right side quick disconnect. One way to tell is that the head of the bolt will point away from the frame in the final position. Install the washer and nut and tighten with a 9/16”. Torque to 45 ft-lbs.
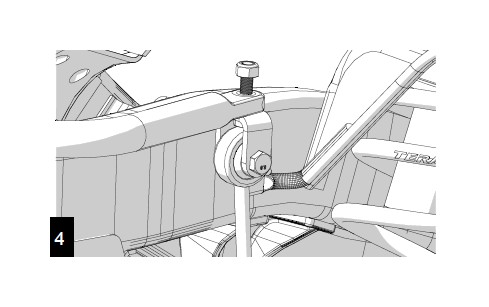
Install the stud into the axle bracket from the inside. Torque to 60 ft-lbs. Orient the pin for easy access.
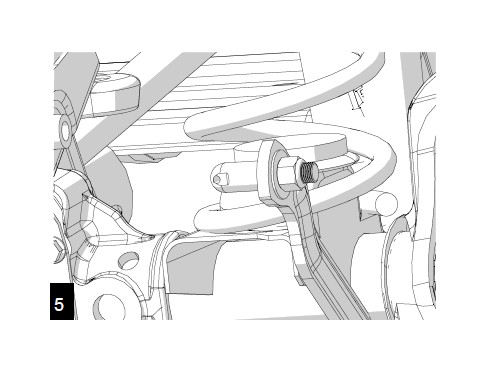
Slide the polyurethane bushing over the bullet and secure with a washer and pin. Lubricating the pin may help get the link on.
Using the connected sway bar link, determine the proper location for the securing stud. Make a mark on the frame.
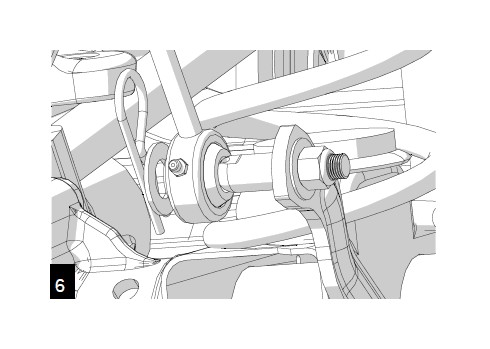
Using a 3/8”-16 tap, thread the frame and install the provided link pin. Use thread locker.

Push the link onto the frame stud, this will provide a guide for the pin position install on the other side.
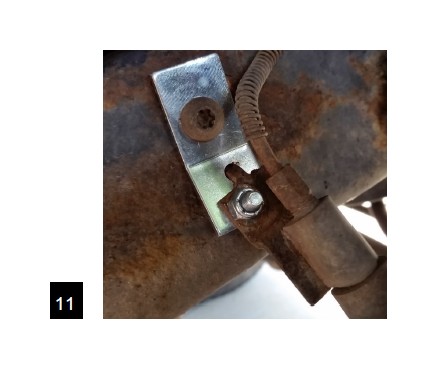
Remove the existing brake line frame bracket with a T40 torx. With a new 1/4” bolt in the lower bracket hole, index the new bracket with the frame holes and tighten to 25 ft-lbs.
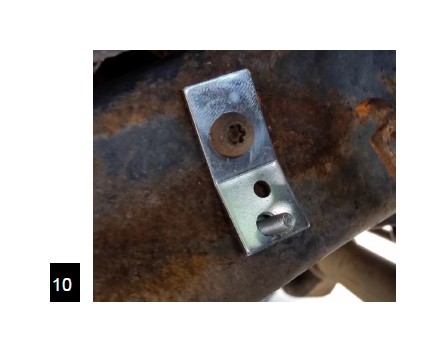
Using the supplied 1/4” nut and bolt, secure the factory bracket to the new bracket.
Important Notes
When off-roading, never disconnect only one link. Both links must be disconnected. Failure to do so can cause premature failure of the links, pins, and studs, voiding all applicable warranties.
Maintenance
We recommend greasing the joints every 3000 miles or after going through water. Keeping the links greased will help ease removing and engaging the links.