 FREE 1 to 3-Day Delivery on Orders $149+ Details

How to Install Teraflex Steering Stabilizer Relocation Kit for 1-5/8 in. Tie Rod (07-18 Jeep Wrangler JK) on your Jeep Wrangler
Installation Time
2 hours
Tools Required
- Basic Metric Mechanics Tool Kit
- 5mm Allen Socket/Torque Wrench
- Blue Loctite
- Tape Measure
- Jack and Jack Stands
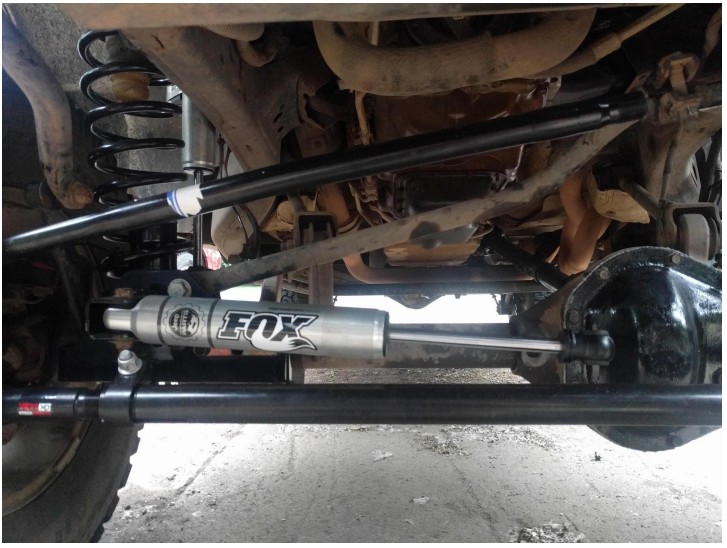
Most important aspect to installation is lateral location of stabilizer shock mount on tie rod to avoid overextending or bottoming out your stabilizer shock. If replacing the mount only and maintaining the existing shock and shock placement, mount should be installed in the same location and with the same orientation as the old mount. If utilizing the relocation option with this kit, measure lateral movement from previous mount placement, and shift tie rod mount placement by the same distance. If replacing shock or tie rod at this time, DO NOT assume that the lateral location will be the same as existing, half an inch off can destroy your shock.
Installation Instructions:
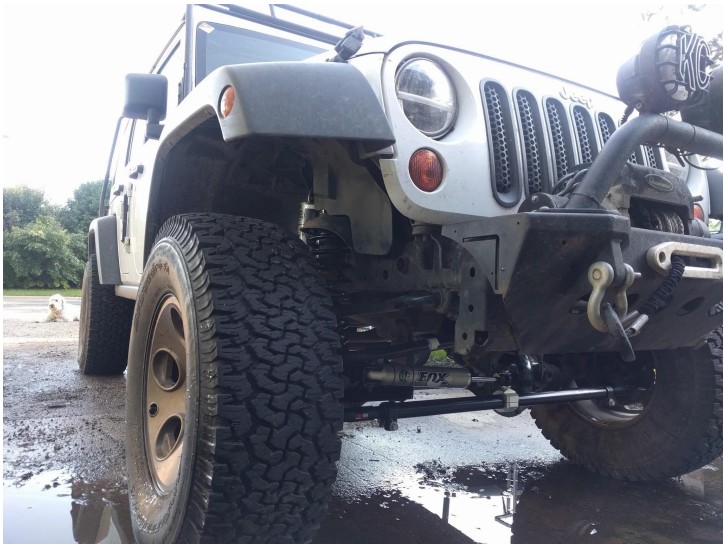
1. Raise vehicle from frame, support with jack stands. This gives you maximum clearance to access tie rod
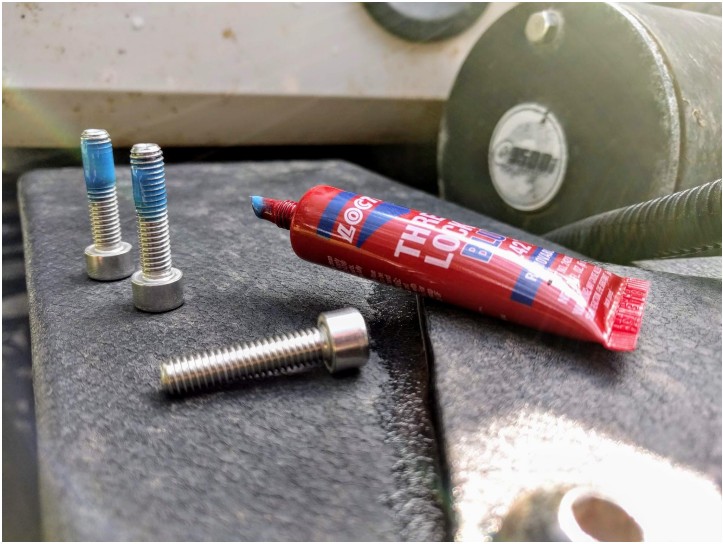
2. Apply Blue Loctite to threads of all 4 allen head bolts and 2 allen head set screws. It is not necessary to apply Loctite more than halfway up the threads.
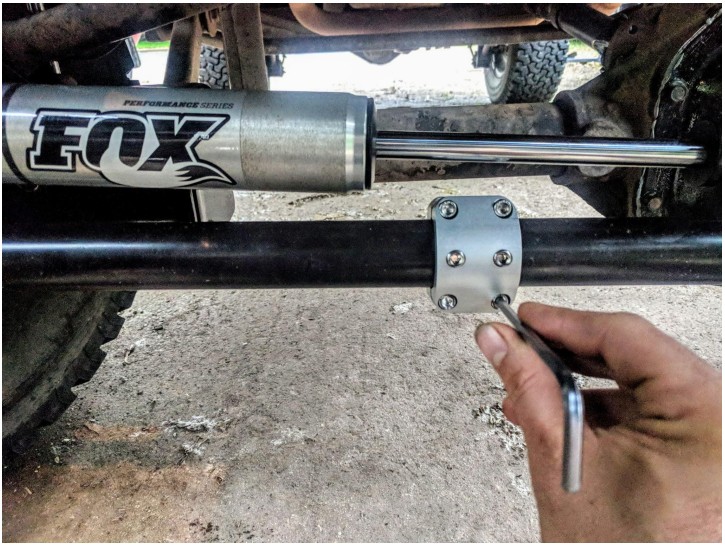
3. Loosely install all 6 hex head fasteners in mount, being careful not to contact tie rod with set screws at this point.
4. If utilizing relocation bolt included with this kit, remove existing track bar mounting bolt and replace with shock relocation stud. Reuse OEM nut and torque track bar bolt to 125 ft lbs. Follow manufacturers included instructions for relocation process before continuing to step 5 in this guide. If retaining existing shock location option, continue on to step 5 immediately.
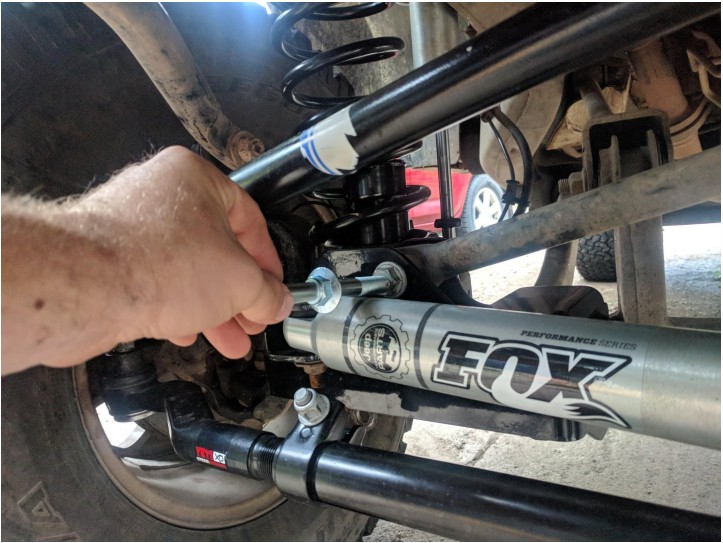
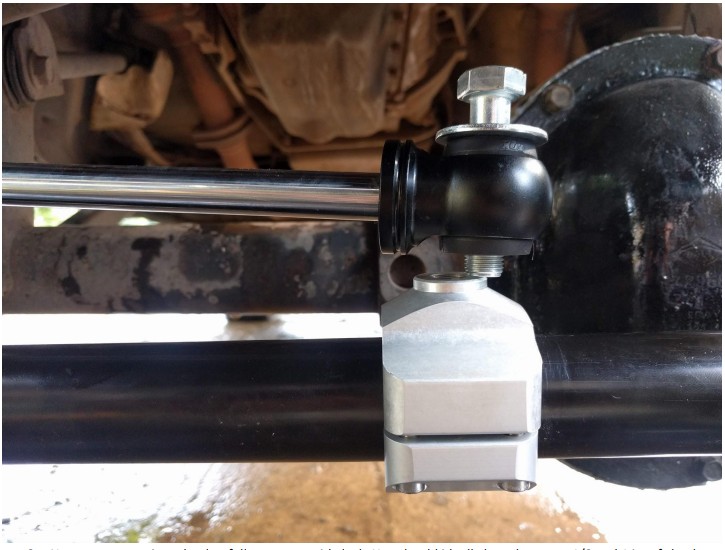
5. If replacing mount only, locate mount with stud in same orientation and location as existing. If installing new tie rod or shock, or utilizing relocation bolt included with this kit, you will need to experiment at this point to locate ideal location on tie rod. My preferred method for determining location is to allow shock to fully decompress (extend), then with steering at full driver side lock, mark a position on the tie rod between 1/2 - 1 inch to the passenger side of shock eye. This insures that you will not overextend the shock on full lock. Apply Blue Loctite before installing 19mm bolt through shock eye with washers top and bottom, tighten in mount until snug but not torqued. Manually compress shock to align mount with your mark on tie rod. Tighten 4 mount allen bolts until snug enough to prevent mount from sliding/rotating on bar.
6. Now rotate steering wheel to full passenger side lock. You should ideally have between 1/2 and 1 in. of shock shaft visible. This insures that you cannot bottom out the shock on full lock.
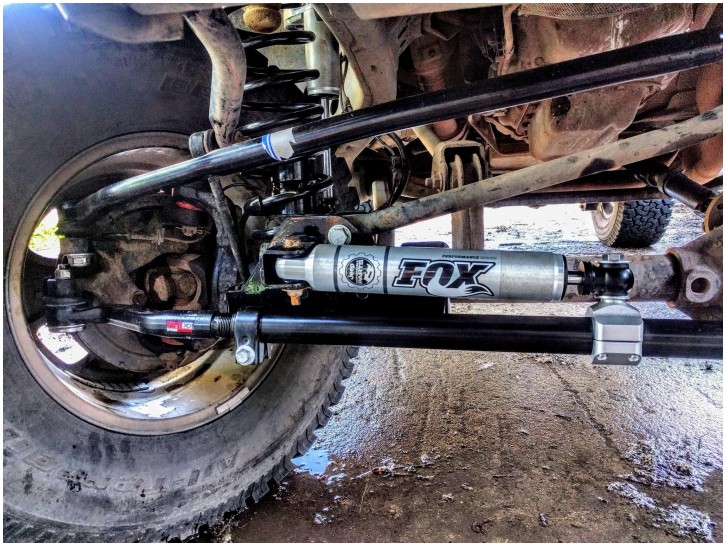
7. It may be necessary to repeat steps 5 & 6 and adjust the mount location more than once to find center. Once the clearances are within those specs, verify that the shock mount is rotated to a position on the tie rod to keep the shock as level as possible throughout it’s stroke. This will vary anywhere from on top of the tie rod to directly under it, depending on shock mounting location. Have a second person SLOWLY turn the steering wheel lock-to-lock and verify that there is no rubbing or binding at any point in the shock cycle. Now using 5mm allen socket and torque wrench, tighten 4 corner bolts to 6 ft-lbs, then tighten set screws to 15 ft-lbs. Tighten 19mm shock mount bolt to 47 ft-lbs. You’re Done!
Installation Instructions Written by ExtremeTerrain Customer Robert S. 7/16/2019

