FREE 1 to 3-Day Delivery on Orders $149+ Details

How to Install Teraflex Steel Braided Brake Lines - Complete Set on your Wrangler

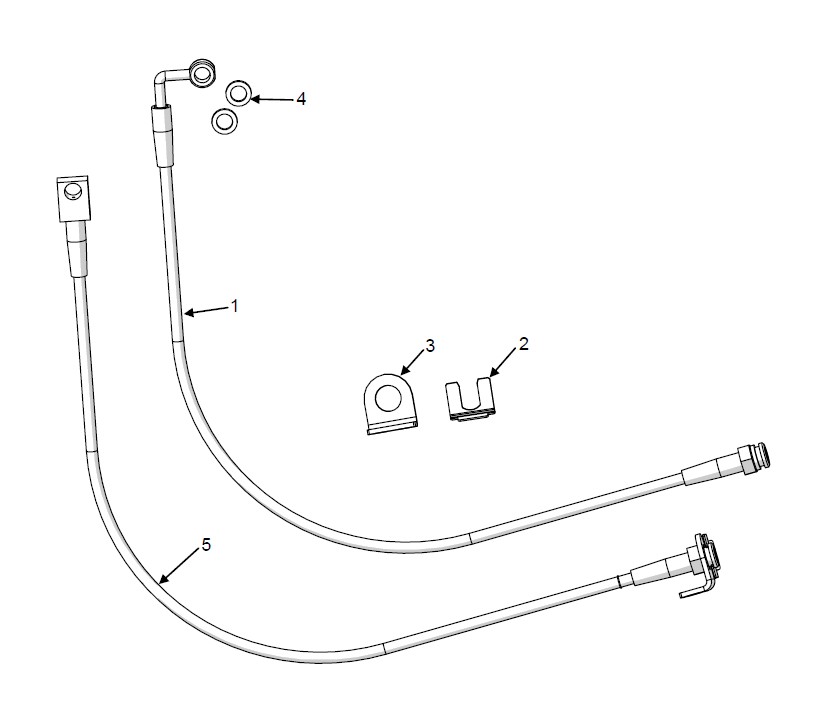
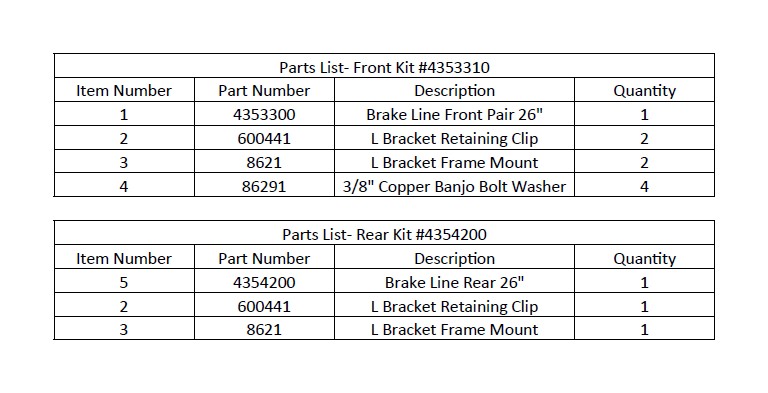
Shop Parts in this Guide
Important Notes:
Prior to beginning this or any installation read these instructions to familiarize yourself with the required steps and evaluate if you are experienced and capable to personally perform these modifications. A factory service manual should be used in conjunction with these installation instructions.
Refer to the parts list to ensure that all necessary components and hardware has been included. If any parts are missing please contact your local TeraFlex dealer for assistance.
FRONT REMOVAL
1. Park the vehicle on a level surface and set the parking brake. This installation can be done with the vehicle on the ground. Turn the tires to gain better access to brake components.
2. Remove the shocks from the axle using a 13mm. Remove the ABS lines at the frame if equipped. Break loose the hard line from the soft brake line with a 10mm before removing the frame bracket with a T40 torx.
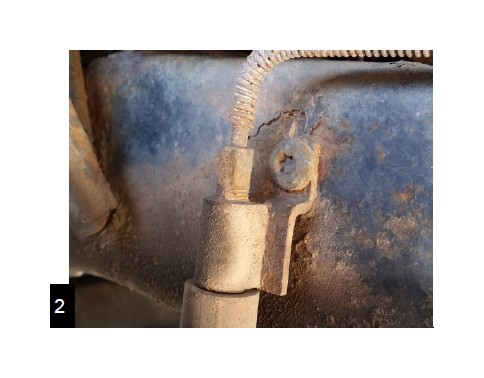
Remove the factory lines from the caliper with a 9/16”. Save the banjo bolt, discard the old washers.
FRONT INSTALLATION
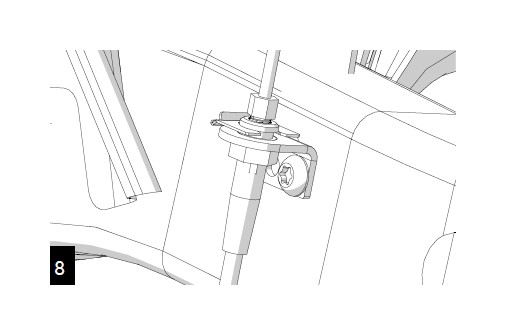
Mount the new L bracket to the frame with the original torx bolt.
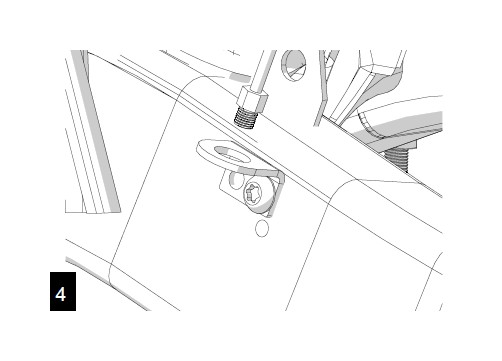
Insert the new line through the bracket and install the clip. Hand tighten the hard line into the new line.
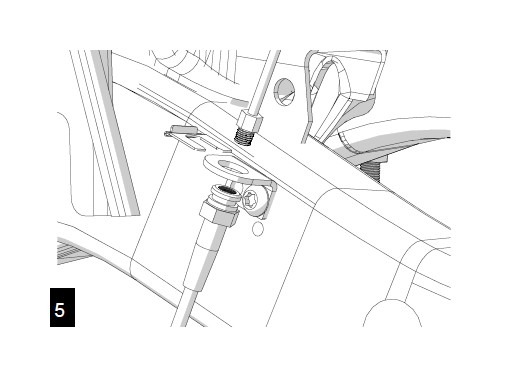
Install one of the copper washers on each side of the banjo fitting and reuse the origional banjo bolt.
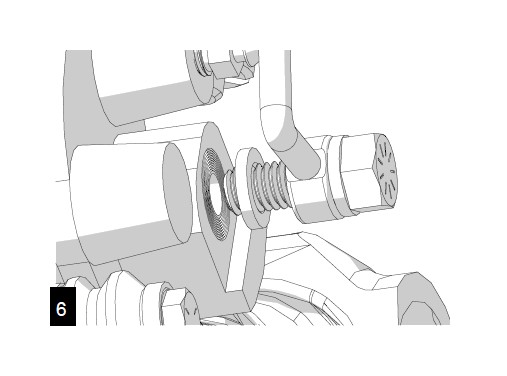
Orient the brake line as shown and torque the banjo bolt to 23 ft-lbs.
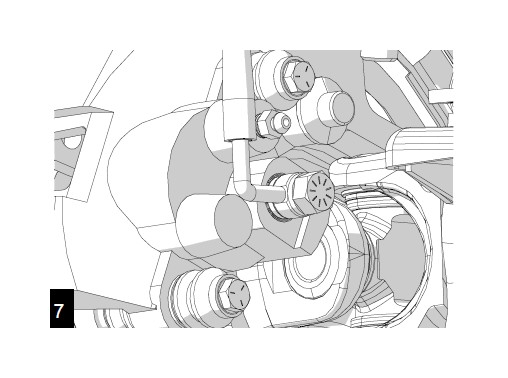
Make sure the line will not snag on any components when the suspension moves and when the tire turns. Then torque the hard line to 12 ft-lbs. If you are only installing the front, bleed the brakes using standard bleeding procedures.
REAR REMOVAL
9. Be sure that the vehicle is supported so that you may safely work beneath. You may need to raise the vehicle for better access. See factory service manual for safe support locations.
10. Use a 10mm end wrench and break loose the brake line before removing the frame bracket with a T40 torx.
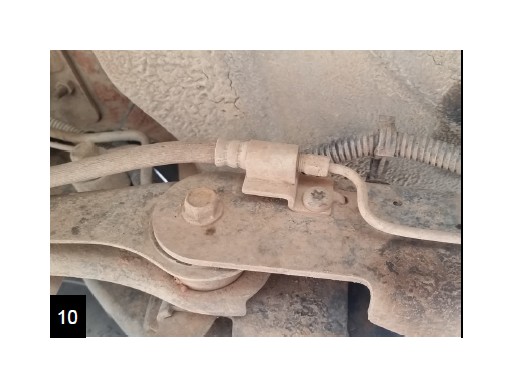
Remove the bracket from the upper control arm with a 15mm.
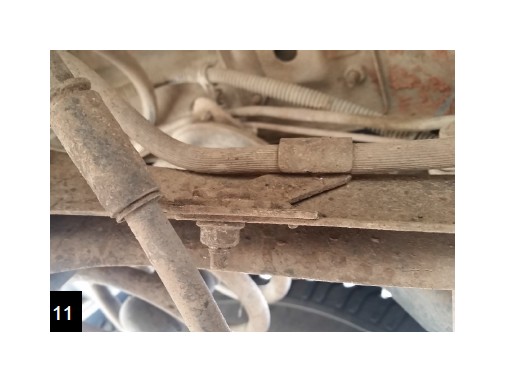
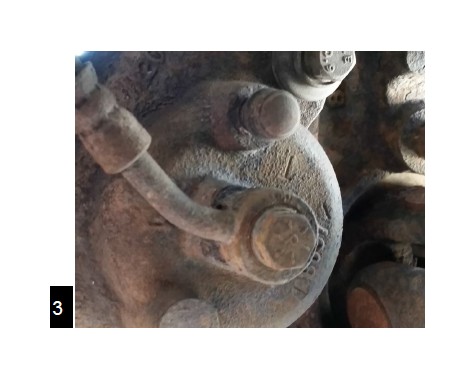
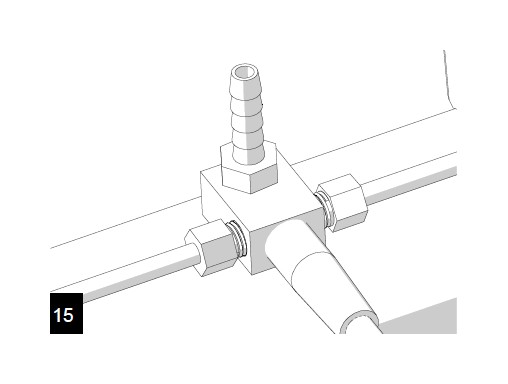
Disconnect the two hard lines at the T on the axle housing. The breather is used as the brake line retainer. Remove with a 9/16”.
REAR INSTALLATION
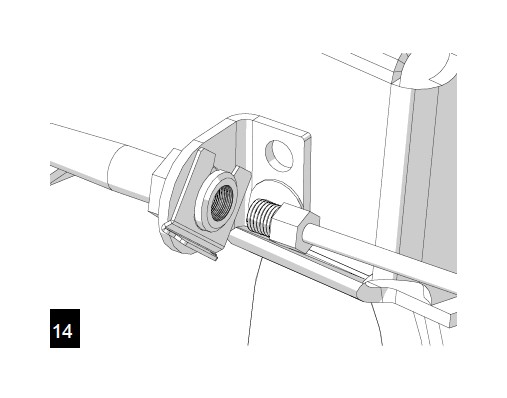
Install the new L bracket onto the frame with the original torx bolt. Slide the new line though the bracket and install the clip.
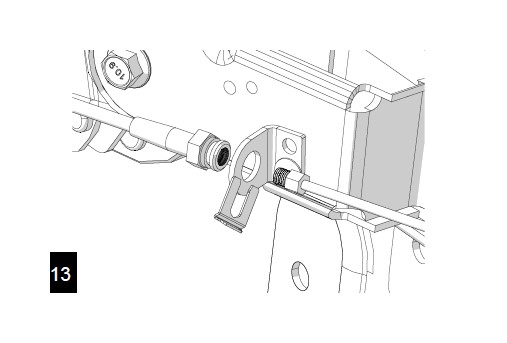
Hand tighten the hard line into the new line.
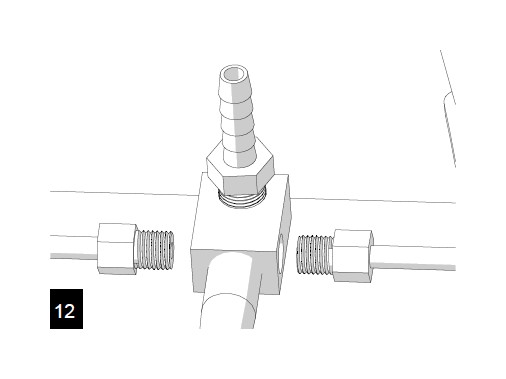
Install the T end of the line to the axle with the breather tube. Reinstall the hard lines into the T. Torque to 12 ft-lbs.
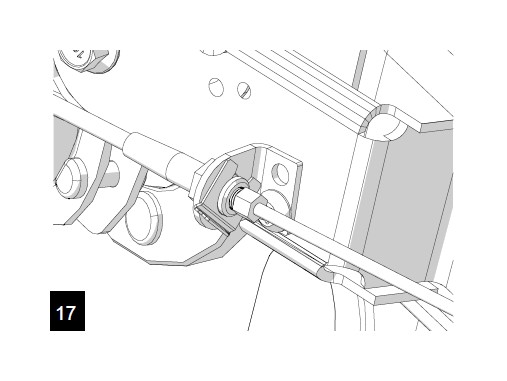
16. Mount the new line into the bracket on the control arm and gently pinch the bracket shut with a pair of pliers. Be careful not to pinch too tightly.
17. Tighten the hard line into the new line at the frame. Torque to 12 ft-lbs.
18. Bleed the brakes using standard bleeding procedures.