 FREE 1 to 3-Day Delivery on Orders $149+ Details

How to Install Teraflex Rear Utility Cargo Rack - Silver on your Wrangler
Installation Time
2 hours
Tools Required
- Ratcheting Socket Wrench
- 10 mm Socket
- Torque Wrench
- Optional: thin screw driver or spare allen wrench to support opposite side of rack during Jeep installation.

Shop Parts in this Guide
Notes: This is an easy installation, but it takes a couple of hours because of the amount of hardware.
Installation Instructions:
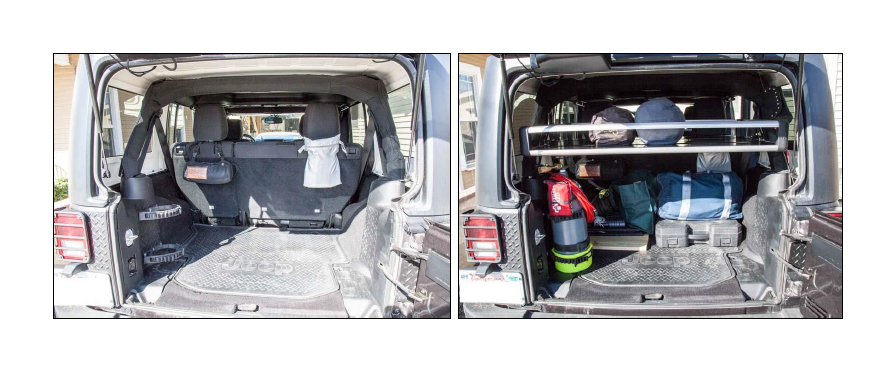
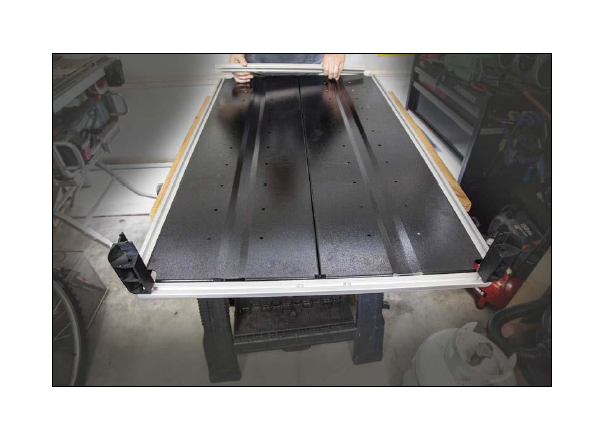
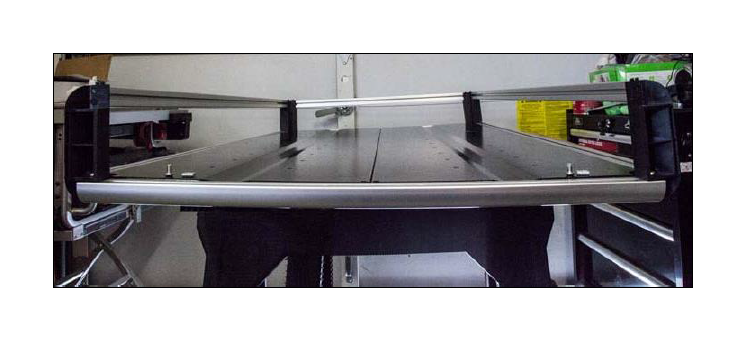
1. Before & After:
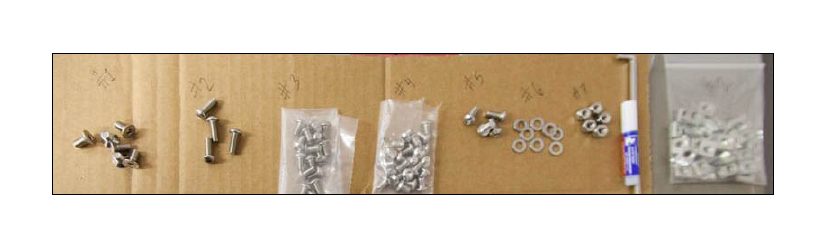
2. To make assembly quicker, sort, take stock of, and label the TeraFlex supplied hardware, 4mm stubby hex allen wrench, and removable thread locking compound off to one side.
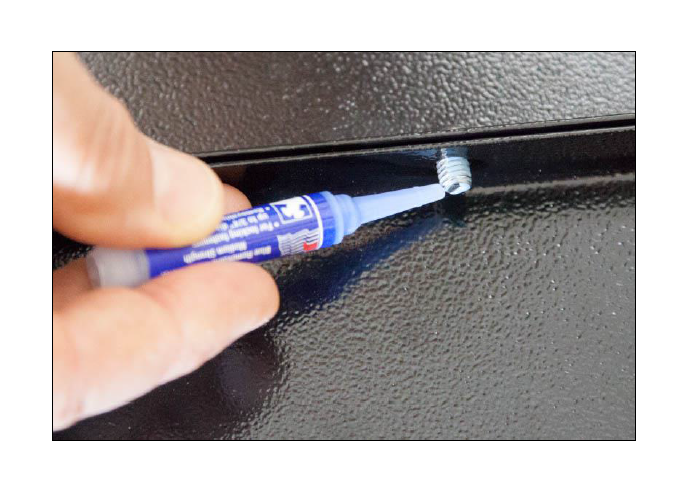
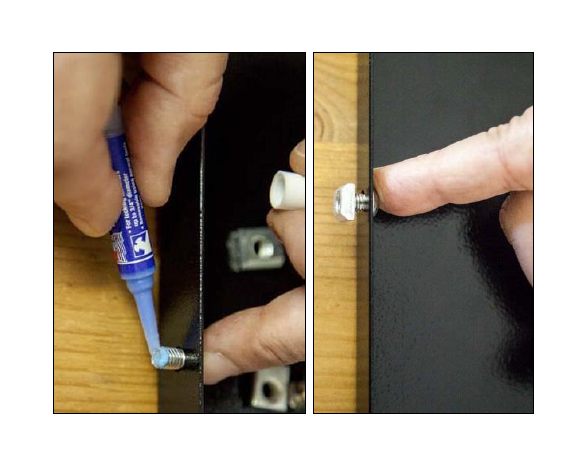
3. Cover a large, flat surface with a non-abrasive material to prevent scuffing the cargo rack components. Place the two bottom panels of the cargo rack face down and side-by-side lengthwise, so the bent edges of the panels are pointing upward. Insert five #333 bolts through the pre-drilled holes to join the two panels together in the center. Apply supplied thread locking compound to the threaded side of each of the five bolts.
4. Using the supplied allen wrench and a 10 mm socket with ratcheting socket wrench, attach five #709 nuts to the #333 bolts and make snug. Torque each to 5 ft-lbs.
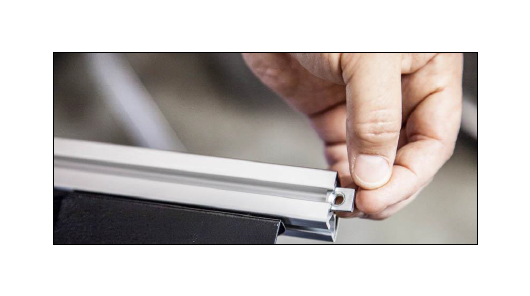
5. Insert 18 #333 bolts through each of the pre-drilled holes along the perimeter of the conjoined panels. The bolt heads should be facing the center of the panels. Apply thread locking compound and loosely attach one #651390 T-Nut to each of the bolts with the beveled side of the T-Nut facing out.
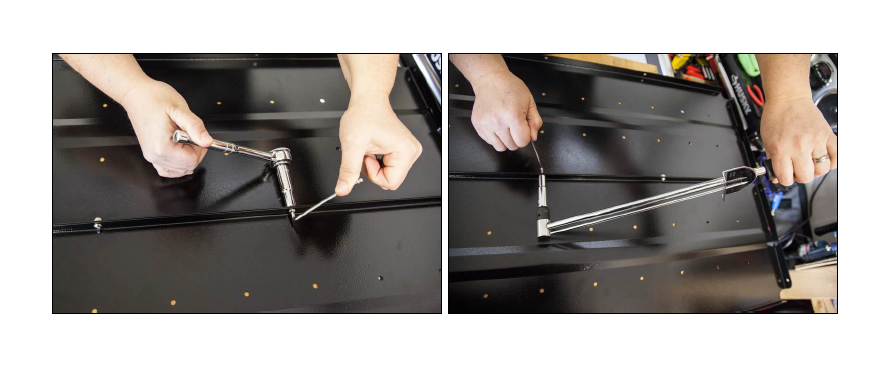
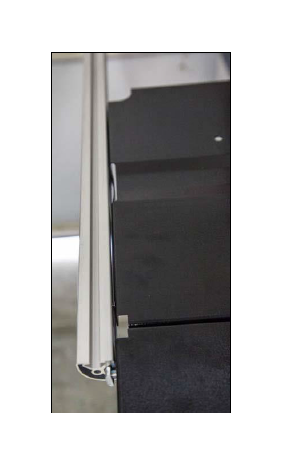
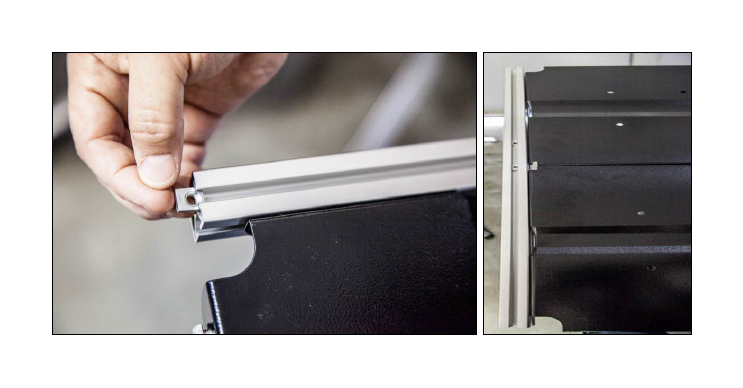
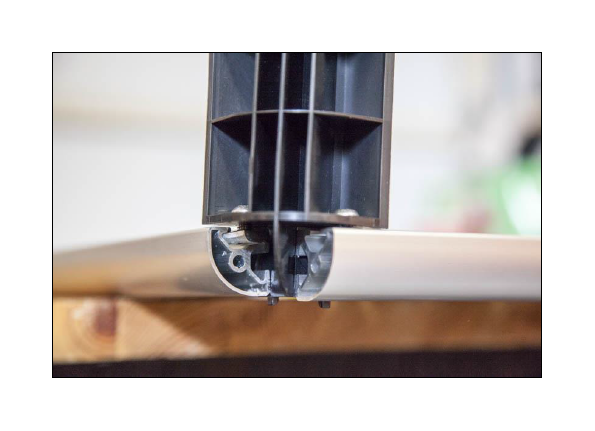
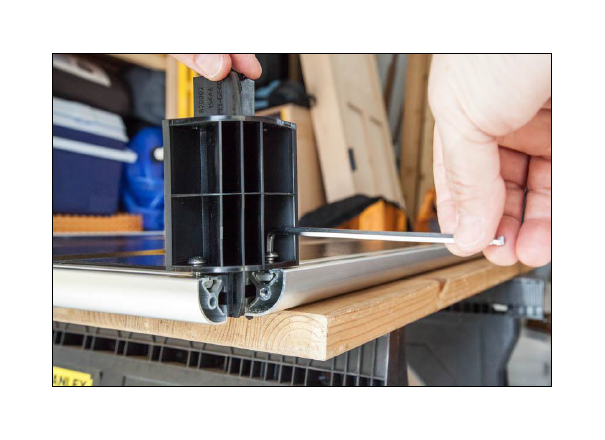
6. Flip the panels over. Orient one of the shorter #820004 rails with one channel facing the beveled T-Nuts and the other channel facing up. Attach the rail by sliding each of the T-Nuts into the side channel of the rail. If the rail binds, loosen the T-nuts and/or reach under the panels to hold the bolt heads against the panel edge to create a larger gap for the rail.
7. Once the rail is attached, slide two T-Nuts into the top channel, positioning them near the middle of the rail, for future use.
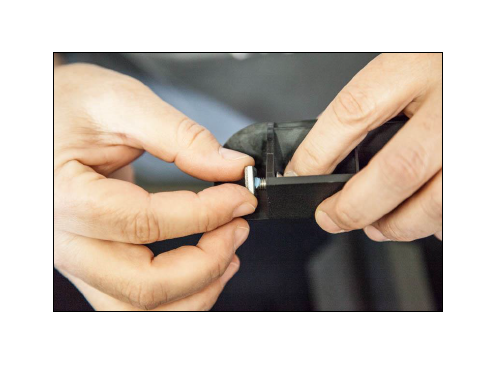
8. Insert one #332 bolt into each of the two lower, pre-drilled holes of the #820002 composite corners. Apply thread locking compound and loosely attach one #651390 T-Nut to each of the bolts with the beveled side of the T-Nuts facing away from the composite corner body.
9. Slide one T-Nut from each composite corner into the top channel of the installed short rail with the bolt heads facing away from the cargo rack panels.
10. Orient one of the longer #820003 rails with one channel facing the beveled T-Nuts and the other channel facing up. Attach the rail by sliding each of the T-Nuts into the side channel of the rail. If the rail binds, loosen the T-nuts and/or reach under the panels to hold the bolt heads against the panel edge to create a larger gap for the rail. Slide the rail onto the second T-Nut from the composite corner. Repeat install process for second long rail.
11. Orient the second short #820004 rail with one channel facing the beveled T-Nuts and the other channel facing up. Slide the rail into place by inserting the T-Nuts into the side channel. Once the rail is attached, slide two T-Nuts into the top channel, positioning them near the middle of the rail, for future use.
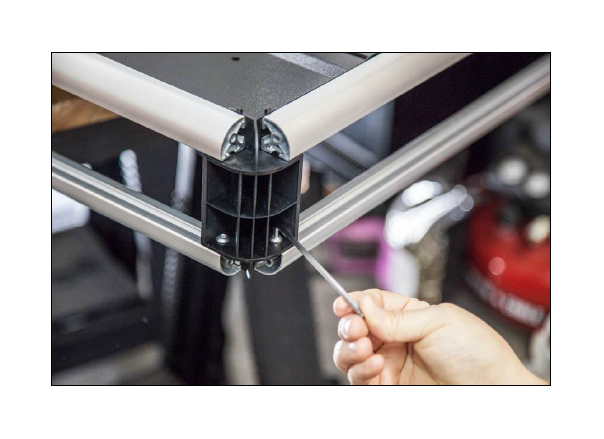
12. Attach the remaining two #820002 composite corners by inserting a #651390 T-Nut into each end of the exposed upper channel rails (total of four).
13. Insert one #332 bolt into each of the two lower, pre-drilled holes of the #820002 composite corners. Apply thread locking compound. Adjust rails and corners to ensure they are square and evenly spaced. Using the supplied allen wrench, tighten all panel and composite corner bolts. Torque to 5 ft-lbs.
14. Insert one #332 bolt into each of the pre-drilled upper holes of the composite corners. Apply thread locking compound and loosely attach one #651390 T-Nut to each of the bolts with the beveled side of the T-Nuts facing up. Orient the remaining short and long rails with one channel facing the interior of the cargo rack and the other channel facing down. Slide each rail into place by inserting the T-Nuts into the bottom channel.
15. Flip the cargo rack upside down so the just installed rails are resting on the large flat surface. Square up corners and tighten all eight bolts. Torque each one to 5 ft-lbs.
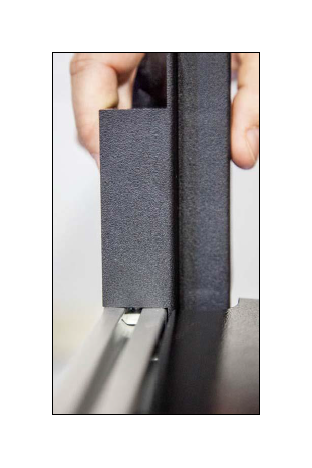
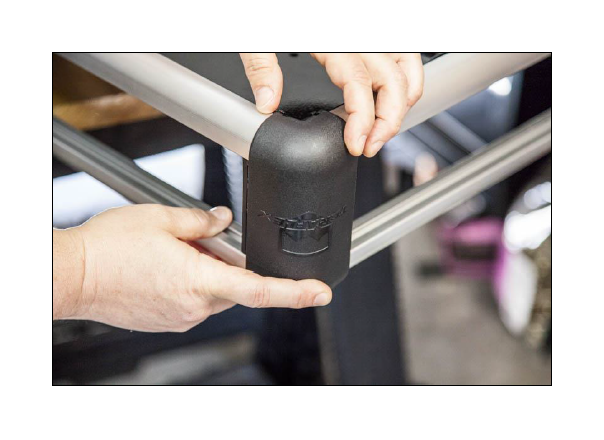
16. Attach the 4 #820001 composite corner covers by aligning two clips on one side and then rolling the cap toward the other set of clips until the cover snaps into place. If you’re having difficulty attaching the covers, verify the cargo rack rails are square and try again.
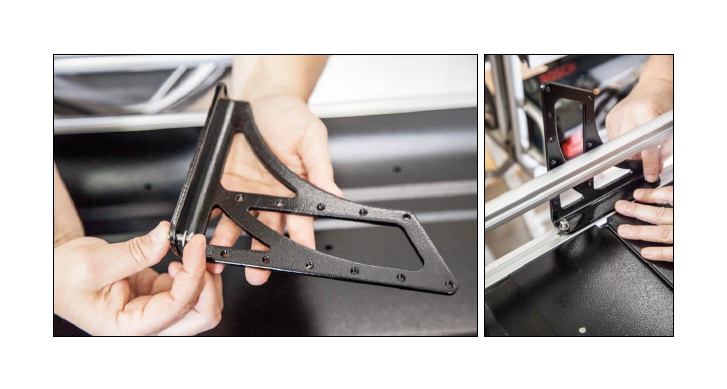
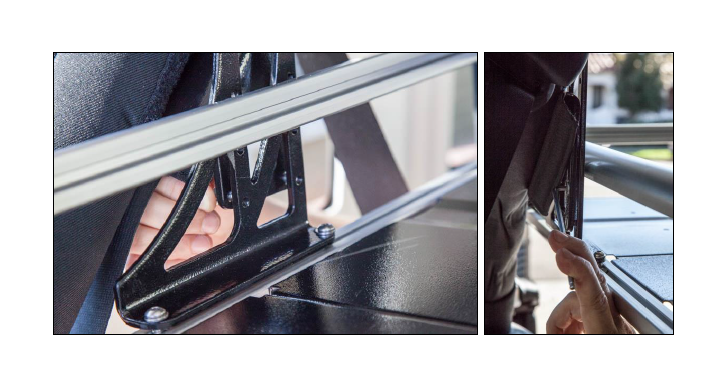
17. Flip the cargo rack upright. Insert one #331 bolt through a #708 washer, then insert hardware combo through the base holes of the driver side #820028 mounting bracket. Attach to pre-positioned T-Nuts in short rail. Apply thread locking compound. Position each bracket so the upper portion of the bracket is on the outside of the cargo rack rail. Using the allen wrench, loosely attach the bracket. Do not tighten. Repeat the process for the passenger side #820029 bracket, ensuring the brackets are facing in the same direction.
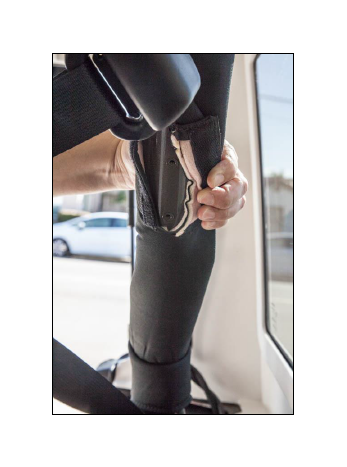
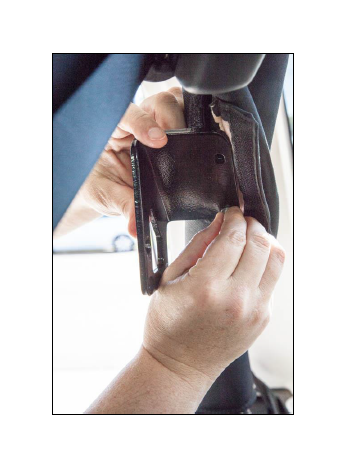
18. In the cargo area of the Jeep, locate the Velcro opening approximately halfway up the rear driver side sport bar. Peel back the Velcro to expose the factory installed nutserts.
19. Insert one #407 bolt through a #708 washer, then insert hardware combo through base hole of the driver side #820030 roll cage bracket. Repeat for second hardware combo and bolt hole. Apply thread locking compound. Position bracket so the hanging portion of the bracket is facing the inside of the Jeep cargo area and the shorter portion of the roll cage bracket is facing the rear of the Jeep. Using the allen wrench, loosely attach the bracket. Do not tighten. Repeat the process for the passenger side #820031 bracket, ensuring the brackets are facing in the same direction.
20. Position the rack in between the sport bar mounted brackets. Lift one side to desired height and temporarily insert a screw driver or other “holding device” through a set of the pre-drilled mounting holes of both brackets to hold that side of the rack in place. Repeat process for the other side of the rack.
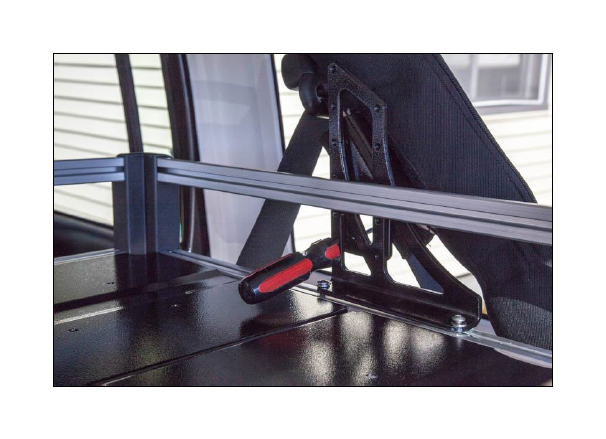
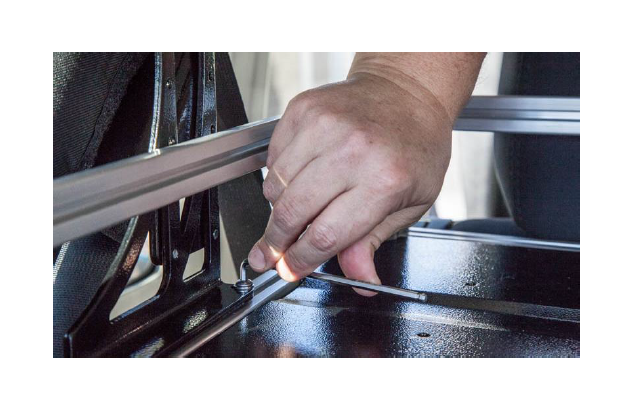
21. Apply thread locking compound to three #330 bolts and insert them through the pre-drilled, pre-threaded mounting holes of the roll cage bracket on the driver and passenger sides. Ensure the rack is level. Using the allen wrench, tighten all of the bolts. Torque each to 5 ft-lbs.
22. Position the rack front to back to desired location within cargo area, ensuring there is at least a ¼” gap between the rack and the back of the rear Jeep seats. Using the allen wrench, tighten the cargo rack bracket bolts. Torque each to 5 ft-lbs.
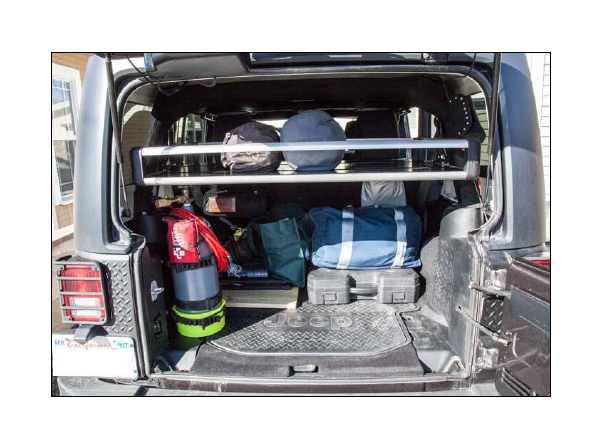
23. Load up the cargo rack and cargo area of the Jeep and hit the trails!
Installation Instructions Written by ExtremeTerrain Customers Rhea and Valerie Lovan 02/22/2017
