
How to Install Teraflex Low 231 HD Transfer Case-23 Spline Short Input on your 1997-2006 Wrangler
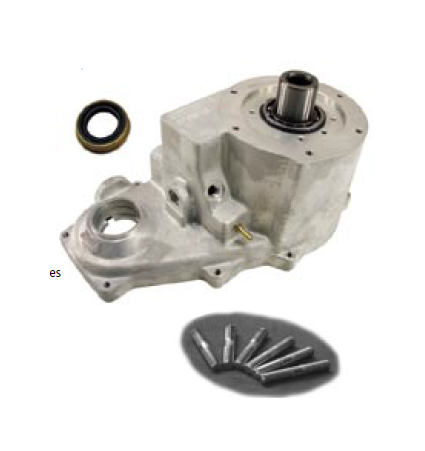
Before assembly make sure that your Tera Low231 kit includes:
1- Oil seal (front output)
1- 231 case assembly containing-
Heavy-Duty Case
4.0:1 Planetary assembly
Input shaft bearings
Input shaft and snap rings
Vent fitting
1- Automatic Transmission seal
extension (Automatics only)
6- studs
Stop! Read this before beginning installation.
Some older automatics require a transmission seal extension (Part #Tl621). Please check for this part in your kit prior to installation. If it is not included in kit you can order it from your local distributor or from Tera directly at (801) 288-2585.
Cherokees equipped with automatic transmissions take a different Tera LOW 231 with a different 23 spline input. For Cherokee automatics order Part #002174300 (old Part #LOW231-23XJA).
High RPM Warning
Do not exceed 2500-3000 RPM for sustained periods of time when using the Low231 in low range.
Avoid high engine speeds when using the Low231 in low range in 4th or 5th gear with manual transmissions or with high gear automatics. This is common when driving in snow, mud, or sand. Because the gears are turning 50% faster and with the high gear ratio, it is possible for input speeds to reach 6500 RPM and cause damage to the transfer case.
We recommend using a lower gear in high-range for higher speeds rather than running the Low231 at extreme RPM’s.
Break-in Procedure for the Tera Low231
One characteristic of a compound planetary unit, such as the Tera Low231, is the associated gear noise. Following installation of the Low231, you will likely hear noise caused by the gear configuration. This is to be expected of the new gear system and can be reduced by following some simple break-in or adjustment guidelines.
Run the vehicle in low-range. A good day on the trail should be sufficient for the gears to quiet down. Running the vehicle in low-range in a parking lot while accelerating and decelerating will also help quiet the gears.
The planetary gears idle in all positions except low-range. The more low-range use the gears experience, the quieter they become in all positions.
231J Overview
The model 231 transfer case is a part-time transfer case with a built-in low-range reduction gear system. It has three operating ranges, plus a neutral position. The stock transfer case provides a ratio of 2.72:1 for increased low-speed torque capability. The Tera Low231 low-range system provides a low-range reduction ratio of 4.0:1 for even more low-speed torque capability.
Operating Ranges
The 231J transfer case has three operating ranges, which are two-wheel drive high, four-wheel drive high, and four-wheel drive low. The Tera Low231 changes only the four-wheel drive low range. Two-wheel drive range is used for on-road & highway operation. The four-wheel drive ranges are for off-road operation or when the vehicle is driven on paved road surfaces covered by snow, ice or similar low traction elements. The Tera Low231 range is for added low-speed control in extreme terrain.
Shift Mechanism
Transfer case operating ranges are selected with a floor mounted shift lever. The shift lever is connected to the transfer case range lever by an adjustable linkage rod. Range positions are marked on the shift bezel cover plate. The shift mechanism is unchanged with the Tera low231. A synchronizer assembly in the transfer case allows the unit to be shifted between the two and four wheel high ranges while the vehicle is in motion. This is also known as ‘shift on the fly’. Only vehicles with a disconnect front axle have a synchronizer.
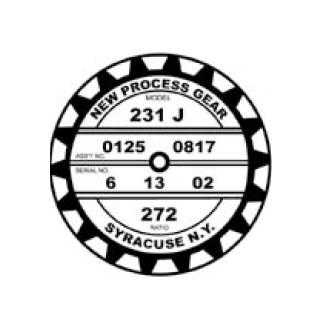
Identification
A circular ID tag is attached to the rear case of each model 231 transfer case. The ID tag provides the transfer case model number, assembly number, serial number and low range ratio. The transfer case serial number also represents the date of build. For example, a serial number of 6-13-02 would represent June 13, 2002. The Tera Low231 will fit only NP231 (231J) transfer cases. With NP241, 242, 245, 249, and NV247 modifications to the factory case can be made by arrangement with Tera Manufacturing.
Disassembly
1. Drain the fluid from the transfer case.
2. Remove the front and rear drive shafts.
3. Support the transmission with jack stands.
2. Remove the transfer case from the vehicle. (Refer to the factory manual if additional assistance is needed with this step.)
3. Remove the front yoke.
4. Remove the speedometer gear assembly from the speedometer gear housing.
5. On 84-96 XJs and all YJs, remove the three bolts that connect the tail housing to the speedometer gear housing. Pry the tail housing off, and remove the snap ring. Unbolt the speedometer gear housing from the back half of the transfer case and pry it free.
6. On 97-02 XJs and all TJs, pry the dust shield from the mainshaft. Remove the snap ring and spacer.
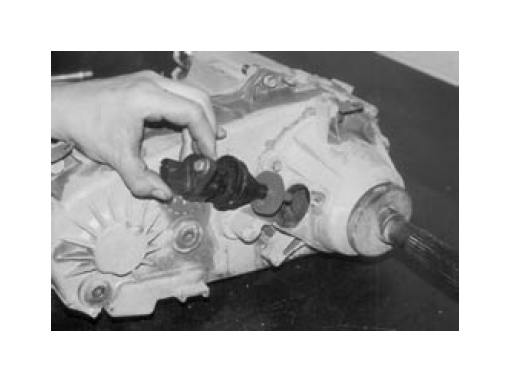
7. Pry the oil seal from the speedometer gear housing, and remove another snap ring. Unbolt the speedometer gear housing from the case half and pry it free.
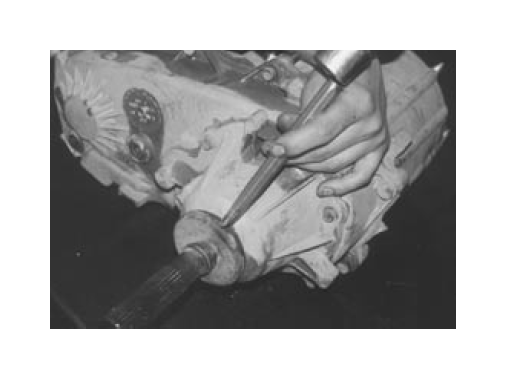
8. Carefully remove the oil pump. Separate it from the strainer, be sure that the O-ring stays in the pump assembly.
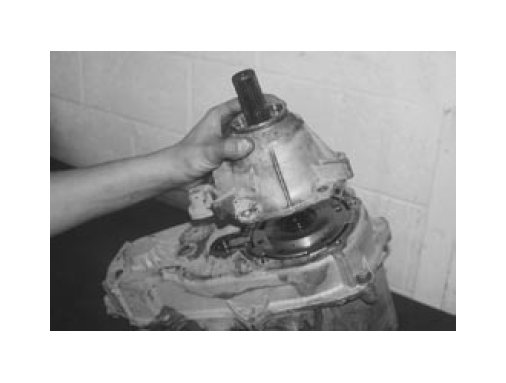
Note: Remember the order in which the oil pump came off. A common mistake that is made during re-assembly is to install the oil pump on the inside of the transfer case. This is incorrect. This will break off the four mounting tabs on the pump. As the above picture shows the oil pump is installed on the outside of the case, and inside the speedometer gear housing.
9. Remove the bolts attaching the rear case to the front case. Identify the bolts and the washers used at the dowel bolt locations. These bolts are longer and must be placed back in the exact location they came from.
10. Separate the rear case from the front case using screwdrivers. Insert the screwdrivers into the slots cast in the case ends. Then gently pry upward to break the sealer bead and separate the case halves. If the two alignment dowels did not stay in the rear case you should push them in the rear case at this time.
Caution: Do not pry against the sealing surfaces of the retainer or rear case. The surfaces could be damaged, resulting in a leaky case.
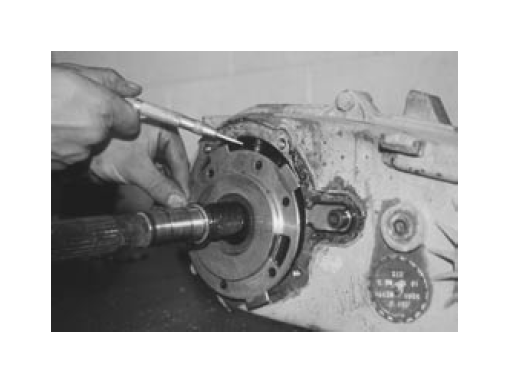
11. Remove the mode spring (48).
12. Tap the front output shaft (23) upward with a rubber mallet to free it from the front output shaft bearing.
13. Remove the front output shaft (23), drive chain (27) and mainshaft (30) as an assembly.
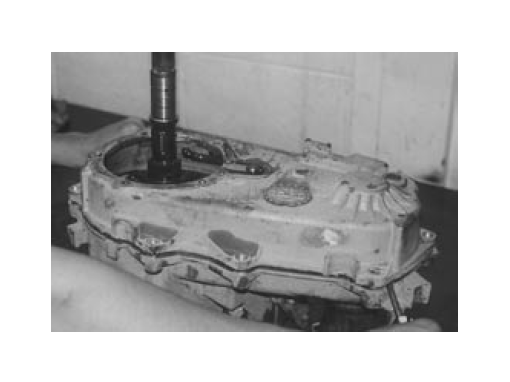
14. Remove the mode fork and shift rail (47), and the synchro sleeve from the front case as an assembly.
15. Slide the range fork pin out of the slot in the sector (42), remove the range fork (41) and shift hub (13) as an assembly.
16. Remove the shift detent pin, spring, and plug (20).
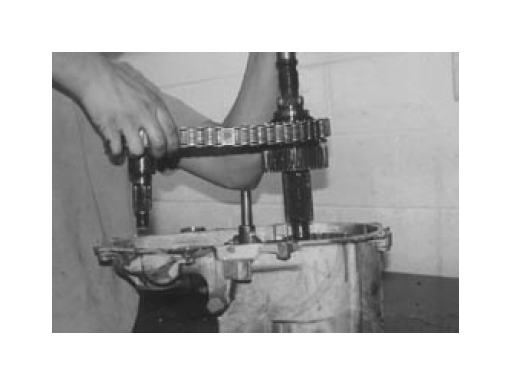
Note: In step 15 if a 3/4” wrench fits the plug, you will need to acquire the new larger detent parts. The following numbers are OEM Jeep part numbers for the larger pieces.
53008217 Detent pin
53008218 Spring
53008216 Plug
4338956 O-ring
17. Unbolt the range lever from the housing.
18. Slide the shift sector from the case. (42).
19. Remove the sector shaft bushing and O-ring (43) and save them.
20. Remove the shift indicator switch (4). This may be an electric switch or a vacuum switch depending on the year and model of the Jeep. Most Cherokees do not have a switch in the front case. If you are working on a Cherokee disregard this step. Make sure the O-ring seal stays with the switch.
21. Turn the case over and remove the four bolts holding the front bearing retainer cap together.
22. Remove the front bearing retainer cap (2). Carefully pry the retainer loose with a screwdriver in the pry point cast into the retainer.
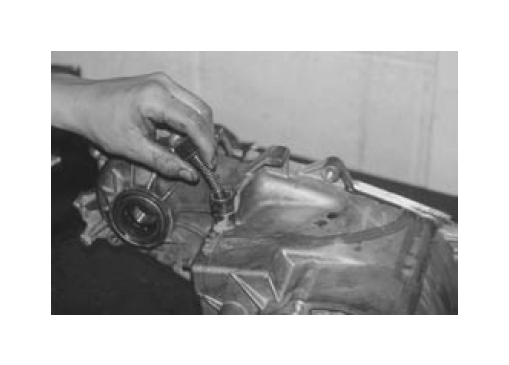
23. Remove the front output oil seal.
24. Remove the bearing snap ring with a flat head screwdriver.
25. Tap the bearing out of the case with a plastic mallet.
Inspection/Preparation
26. Now that all of the needed parts have been removed from the factory transfer case housing, take the new Heavy-Duty Tera Low231 case housing and prepare for assembly.
27. Clean all parts that are going to be re-used thoroughly. Clean all mating surfaces with brake parts cleaner. Inspect all parts for wear. Grease all bearings,seals and O-rings prior to installation to prevent dry-start.
28. Clean the oil strainer carefully. Do not try to clean it by blowing it out with pressurized air. This will force particles deeper into the strainer, and will blow holes in it. Spray it with brake parts cleaner, wiping it occasionally to remove the particles. Repeat this process until it is free of contaminants.
Reassembly
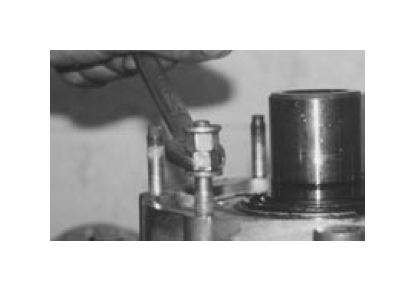
29. Install new studs using double nuts.
Note: a simple way to install the stud is with double nuts. Thread two nuts on a stud and tighten them against each other with a wrench. Repeat procedure for each stud.
30. Using the new Tera front case half install the front output shaft bearing, make sure that it is fully seated. Install the bearing snap ring (21).
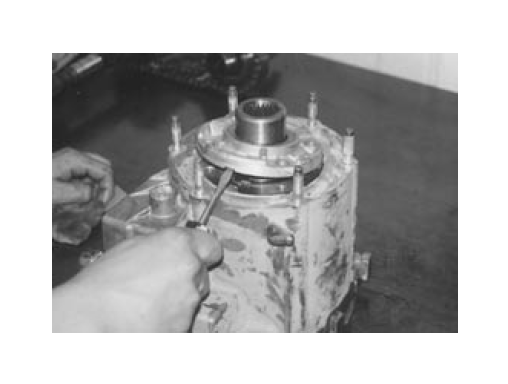
31. Install the supplied front output oil seal.
32. Starting from step #23, reverse each procedure back to step #1. On all sealing surfaces use a 1/8” bead of silicone sealant to properly seal the surface.
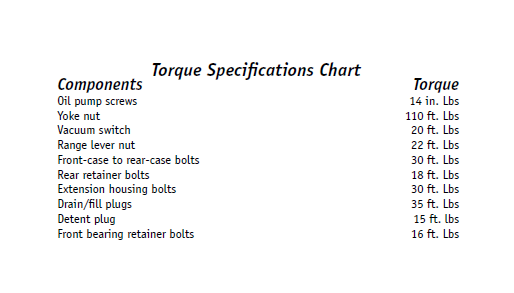
33. Use the torque specifications chart to tighten bolts to their proper torque rating.
34. When filling the transfer case with oil use DEXRON®III, or higher grade automatic transmission fluid. It is important that the oil level in the transfer case be kept up to the fill plug hole. If you have any transfer case leaks you should fix them before proceeding to drive the vehicle. If the transfer case is driven with inadequate oil the planetary gears will be the first to seize.
35. Drain and replace the transfer case oil after the first one thousand miles, and before three thousand miles.
