FREE 1 to 3-Day Delivery on Orders $149+ Details

How to Install Teraflex JK Flip Drag Link Only Kit on your Wrangler
Installation Time
1 hours
Tools Required
- Basic mechanics tool set
- Mallet or dead blow hammer
- Welder
- Wire Brush
- Grinder or Wire Wheel
- Cut off wheel
Important Notes:
Prior to beginning this or any installation read these instructions to familiarize yourself with the required steps and evaluate if you are experienced and capable to personally perform these modifications. A factory service manual should be used in conjunction with these installation instructions.
This kit requires 4”-6” of lift for proper clearance.
This kit requires welding. A professional certified welder is always a good option if you have any doubts about your welding ability.
A full alignment should be performed after installation. We recommend taking it to your local ASE Certified auto shop.
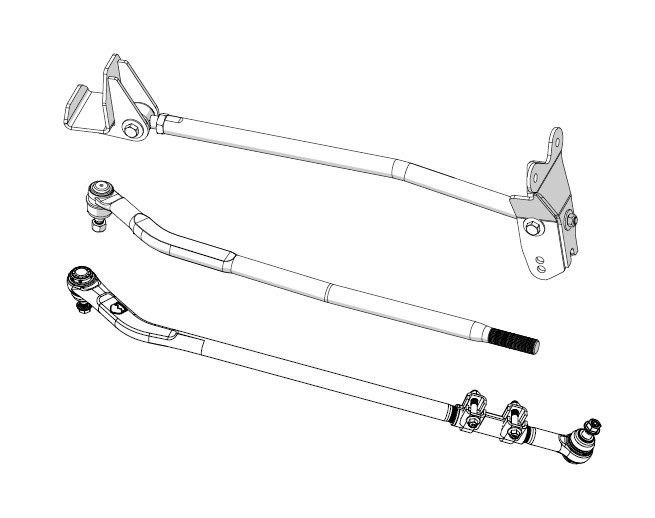
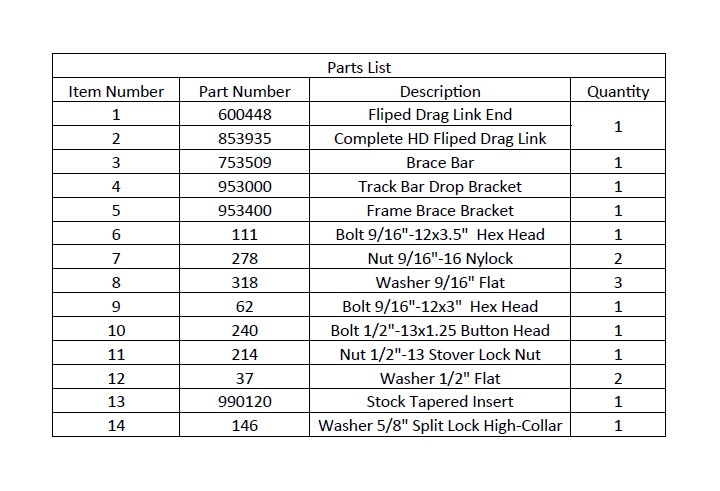
Refer to the parts list to ensure that all necessary components and hardware has been included. If any parts are missing please contact your local TeraFlex dealer for assistance.

Remove the track bar from the axle and frame side using a 21mm. Lift the Jeep and support the frame with jack stands. Remove front wheels.
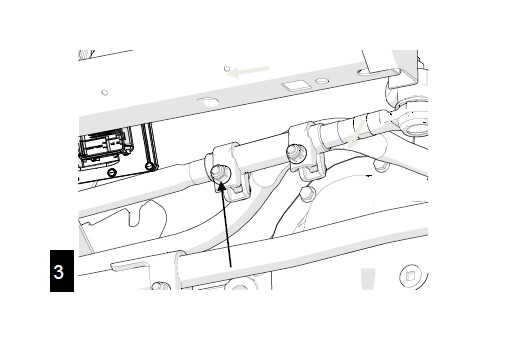
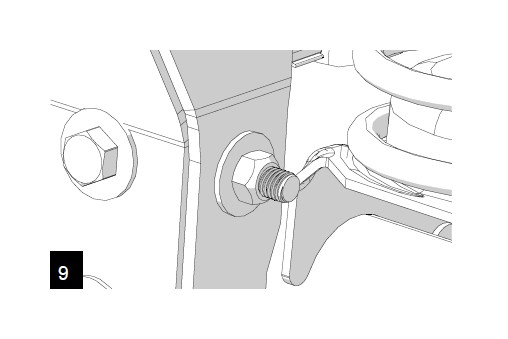
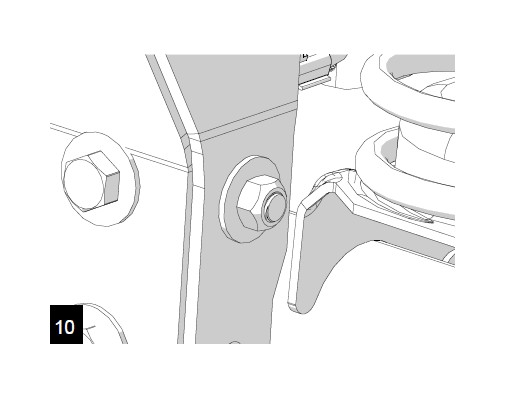
Remove the factory drag link at the knuckle by loosening the 21mm castle nut and hitting the face of the knuckle with a hammer. This will break the taper loose. Then remove the nut.

If you purchased the premium drag link, see step 4. Loosen the drag link side of the adjuster sleeve with a 15mm. Remove the drag link. The threads are left hand, so you will need to turn it clockwise to remove it.
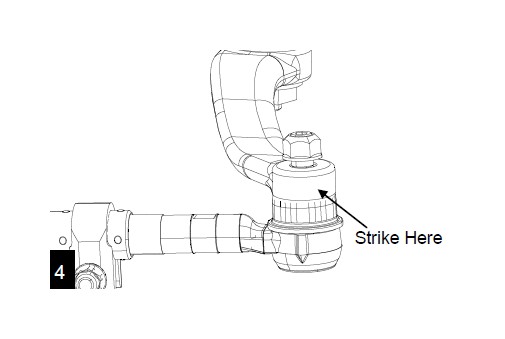
If you purchased the premium drag link as part of this kit, remove the drag link completely. Loosen the nut at the pit-man arm and strike the face with a metal hammer to release the taper. Remove the nuts and the drag link.
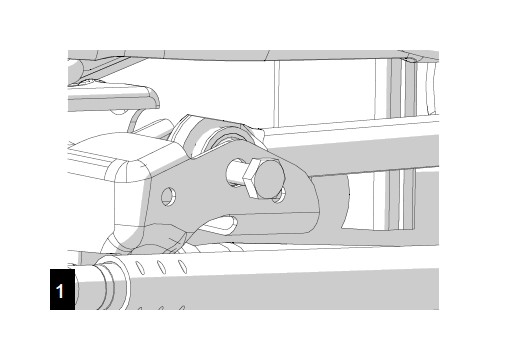
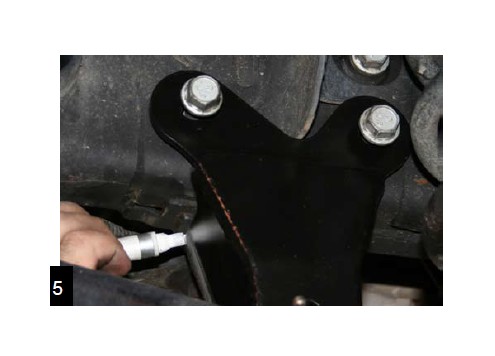
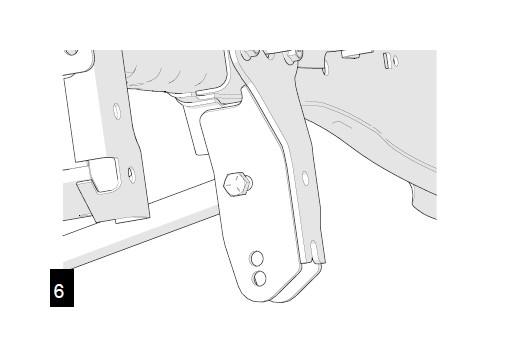
With an 18mm remove the two lower steering box bolts. Install the new drop bracket and tighten the bolts. Mark the bracket front and back for welding.
Place the new frame brace bar with the fixed end side into the factory trackbar location with the bend of the bar up-wards. Insert a 9/16”x3.5” bolt into the top hole.
Loosely install the frame side bracket bar using a 9/16 bolt. Position the brace bracket against the frame and mark for welding prep.
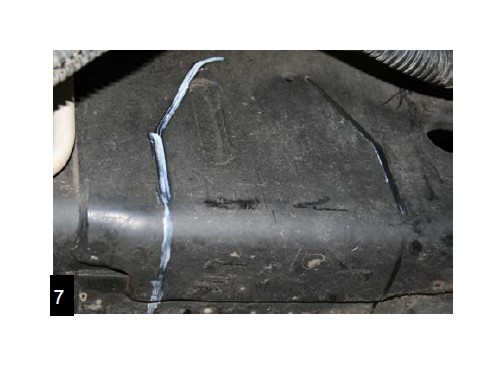
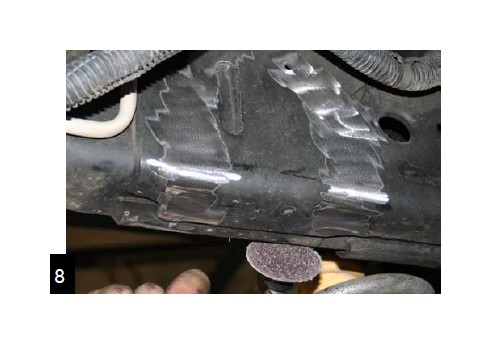
When the desired location is established, remove and prep the brackets and frame for welding. Clean the frame and brackets with a sand pad or wire wheel. Clean surfaces are crucial to a good structural weld.
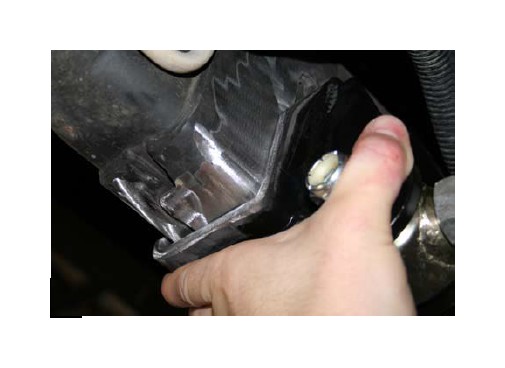
Reinstall the brackets. Install the 1/2” button head bolt from the inside of the factory bracket through the Teraflex track bar bracket so the head of the bolt is on the inside. Torque to 65 ft-lbs. Torque steering box bolts to 87 ft-lbs.
Cut off exposed bolt past the nut with a cut off wheel.
The brackets should be flush against the frame and the cross bar should not be at a bind.
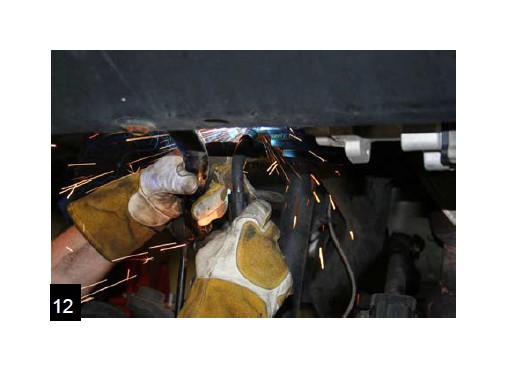
With the brace bar removed, final weld the frame bracket as well as the drop bracket at the steering box.
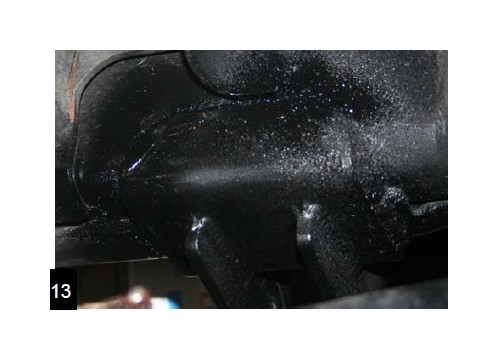
Remove any paint that has been damaged by heat and clean all welded surfaces with a wire brush. Prime and paint all welded or raw metal surfaces.
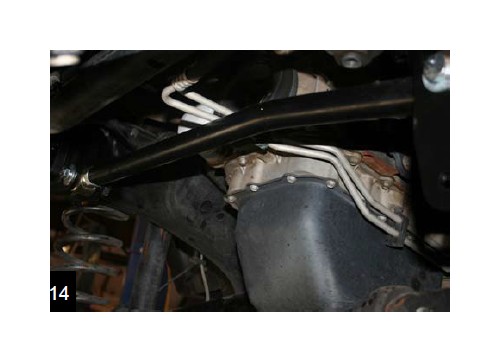
Reinstall the brace using the supplied hardware. The 3.5” bolt is used in the drop bracket and the 3” is used in the frame brace bracket side. Tighten the jam nut with an 1 1/4”.
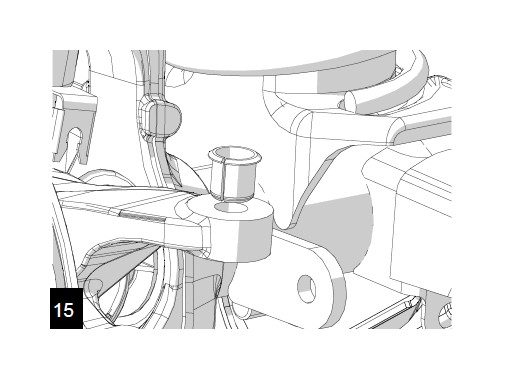
Using a 13/16” drill bit, drill out the knuckle and tap the new taper sleeve in from the top. Be sure to drill straight.
Install the new heavy flip drag link into the adjusting sleeve. 41” from eye to eye is a good starting length. For premium complete drag links see step 17.
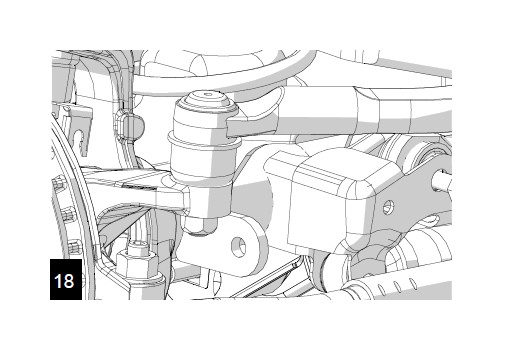
Install the drag link end closest to the adjustment sleeve into the pitman arm. Torque lock nut to 77 ft-lbs (105 Nm)

Install the new drag link to the knuckle. Flip drag link end applications require using a lock washer as a spacer between the nut and the knuckle. Full replacement flip drag links do not. Torque to 65 ft-lbs. Re-torque all ball joints after 200 miles.
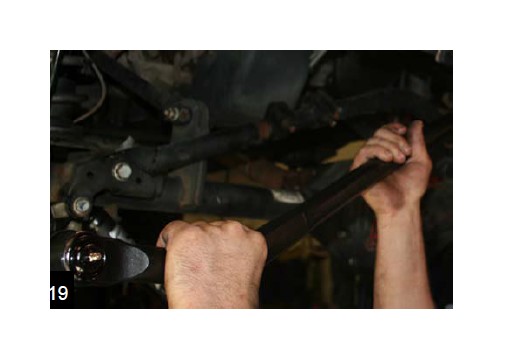
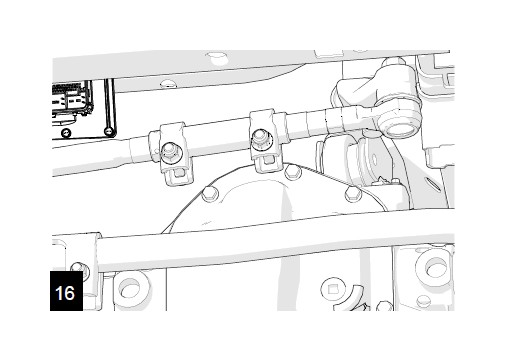
19. Install the track bar. Use the hole on the frame side bracket that positions your track bar parallel to your drag link. Torque both sides to 125 ft-lbs.
20. Reinstall and torque the wheels and tires to 95-115 ft-lbs. Lower the Jeep and do a quick track bar adjustment. The axles should be centered under the vehicle. Torque the adjustment sleeve bolts to 26 ft-lbs.
Verify steering wheel adjustment with a test drive. If the axle is centered under the Jeep, make your final steering wheel adjustments with the drag link adjusting sleeve. Torque ad-justment sleeve bolts to 26 ft-lbs.