 FREE 1 to 3-Day Delivery on Orders $149+ Details

How to Install Teraflex Front Swaybar Disconnects w/ 0-2.5 in. Lift on your Wrangler

Shop Parts in this Guide

This product should be disconnected prior to off-roading. When disconnected, please store the disconnect arms, washers, hitch pins, and spacers in a secure place until the time they are reconnected.
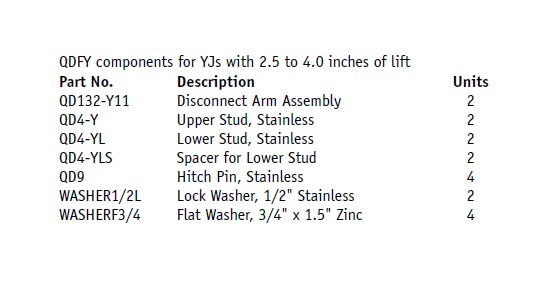
Please check all components prior to beginning installation.
1. Remove the stock sway bar links.
2. Locate the lower stainless steel mounting stud. The lower stud has four holes in the rounded end and has a threaded center.
3. Check the threads where the sway bar links originally connected. Be sure that the threads are in good condition prior to attempting to attach the stud to the mount.
4. Install the lower stud over the threaded mount.
5. Tighten the stud securely. Note: It is highly recommended to use loctite on the stud.
6. Position the upper stainless stud so that the threaded portion goes through the end of the sway bar and points to the inside of the vehicle. The rounded portion of the stud should point to the outside of the vehicle.
7. Fasten the upper stud to the sway bar using the 1/2” nut and lock washer included with the kit. Hint: A hitch pin inserted into the end of the stud will make it easier to secure the stud while properly tightening the nut.
8. Place the metal spacer on the lower stud before attaching the disconnect arm assembly.
9. Connect the arm to the upper and lower studs. Note: Be sure that the grease zerks on the lower end of the disconnect point to the rear of the vehicle. The eyelets of the quick disconnect arms are slightly offset. The lower portion of the disconnect arm should be nearer the outside edge of the vehicle.
10. Secure arms in place using the 3/4” flat washers and hitch pins.

