FREE 1 to 3-Day Delivery on Orders $149+ Details

How to Install Teraflex Emergency Brake Cable on your Wrangler

Shop Parts in this Guide
Z-Box Component List
1-Left Z-Box
1-Right Z-Box
4- 7/16”x3.75” Bolts
4- 7/16” Lock Nuts
8- 7/16” Flat Washers
Think safety first when installing your new Revolver Z-Boxes. The Revolver Z-Boxes you are about to install were designed specifically for the Jeep YJ.
Note: Installation of this kit requires removing the factory spring mounts. This step is very difficult to reverse. Be sure before proceeding.
WARNING TO DRIVER
This vehicle has been modified to enhance off-road performance and as a result may handle differently than a factory equipped vehicle, extreme care must be used to prevent loss of control or roll over during sharp turns or abrupt maneuvers. Failure to drive safely may result in serious injury and/or death. Do not drive this vehicle unles you are familiar with its unique handling characteristics and are confident of your ability to maintain control under all driving conditions. please remember to wear your seat belts, reduce speeds, and always drive safely.
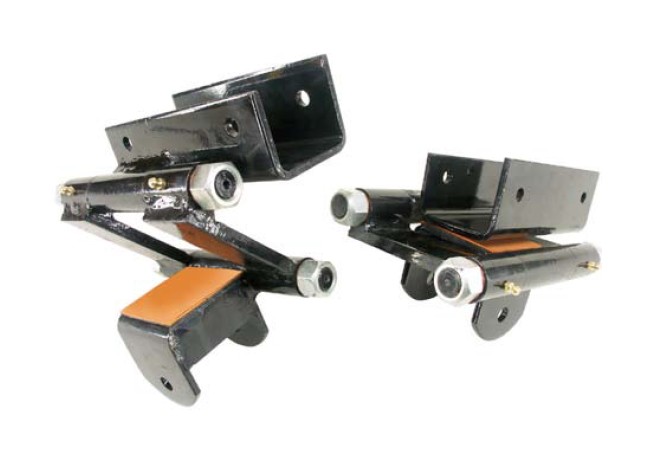
Part Identification
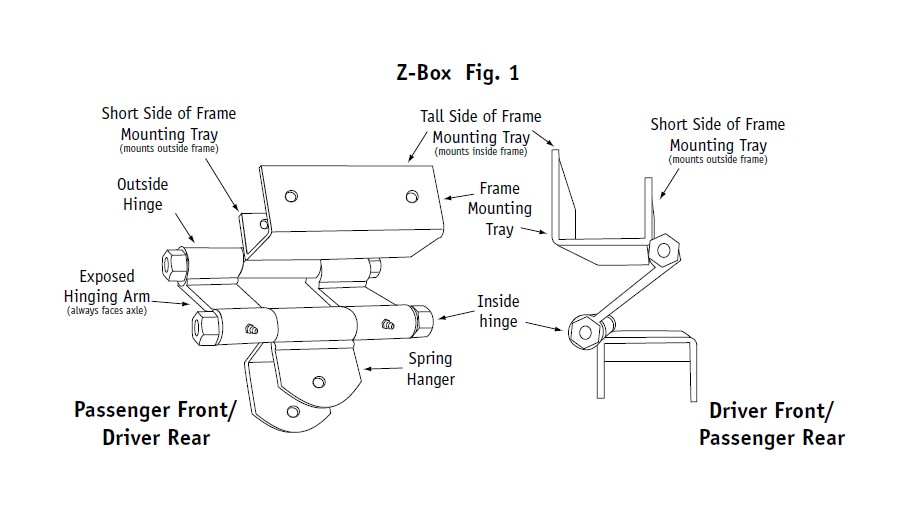
Because the same Z-Box parts used on the front axle are also used on the rear axle, it is important to properly identify the left and right for the front and rear applications before starting installation. Figure 1 identifies the basic features of the Z-Box. It should help identify the proper position for mounting the Z-Box.
Note: The same components used for the front can be used on the rear, but they would be used on opposite sides of the vehicle. For example, the Z-Box on the Front Driver’s side would also fit the Rear Passenger’s side and the Front Passenger’s side would fit the Rear Driver’s side.
There are two methods for identifying the left side from the right side:
Method 1 - Compare the hinge position to both the frame mounting tray and the spring hanger. The hinge on the frame mounting tray (refer to Figure 1) will always be positioned on the outside of the frame. NO EXCEPTIONS. Likewise, the hinge on the spring hanger is always positioned towards the center of the vehicle.
Method 2 - Compare the two sides of the frame mounting tray (refer to Figure 1). Notice that one side of the frame mounting tray is taller than the other. The short side of the mounting tray attaches to the outside of the frame.
Note: When closed, one side of the Z-Box is covered by the frame mounting tray while the other is exposed. (Refer to Figure 2.) The exposed end of the hinging arm ALWAYS points toward the axle.
Installation
Be sure that you are committed to this installation before removing your spring mounts.
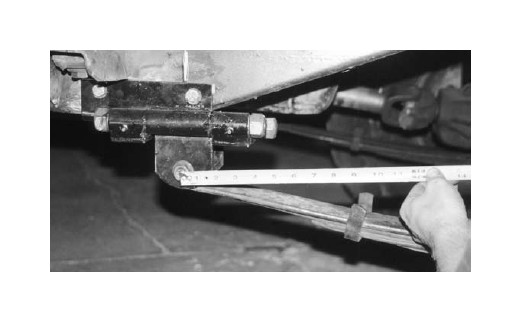
1. Measure the distance betweeen the center of the spring mount and a fixed point on the frame. Write this measurement down. You will need it to properly position the Z-Box. We suggest measuring from the shackle mount opposite the spring mount.
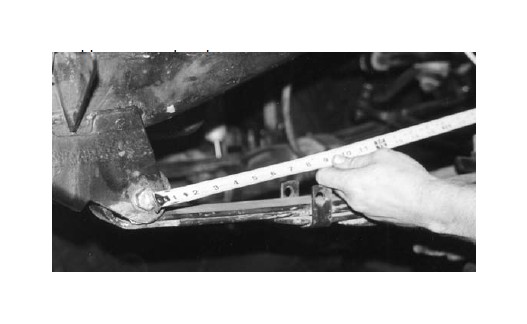
Note: The primary goal is to install the Z-Box in the exact position as the original spring mount to avoid any complications with alignment.
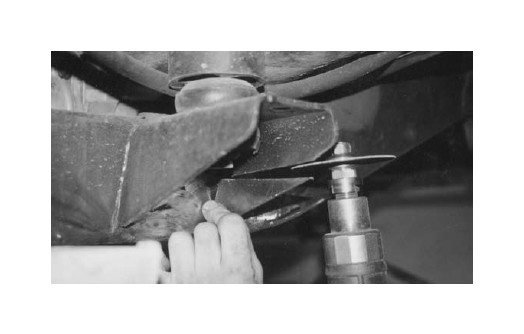
2. Remove (grind, etc.) the factory spring mount from the frame.
Note: The front side body mounts will need to be trimmed in order to install the Z-Box to the frame. One possible method is shown in the next photograph.
3. Use a floor jack to apply light pressure to the Z-box so that it will stay closed while it is on the frame.
4. Use a hammer to tap the Z-box into proper position. Measure from the same fixed point from Step 1 to the hole of the Z-Box’s spring hanger. Adjust as necessary so that your new measurement is the same as the measurement from Step 1.
5. Position the Z-box on the frame so that when it is closed, the Z-box spring mounting location will be positioned exactly where the original spring mount was.
6. Mark the frame through the two 7/16” holes on the outside of the frame tray for later drilling.
7. We recommend drilling the inside and outside frame holes while the Z-Box is secured in place by the jack for proper fit. Please use caution.

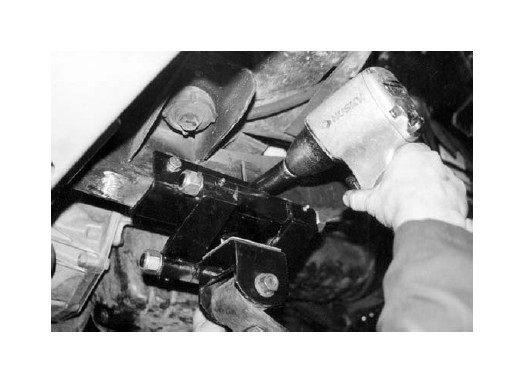
8. Mount the Z-Box using two 7/16” x 3-3/4” bolts and nuts.
Note Some customers may benefit from also stitch welding the mounting tray to the frame. In such cases, avoid continuous welds as they will weaken the frame.
9. Attach the spring to spring hanger using the stock bolt.
10. GREASE THE Z-BOXES BEFORE & AFTER USE. They will seize if not maintained properly.
11. Repeat this procedure to install the Z-Box on opposite side.
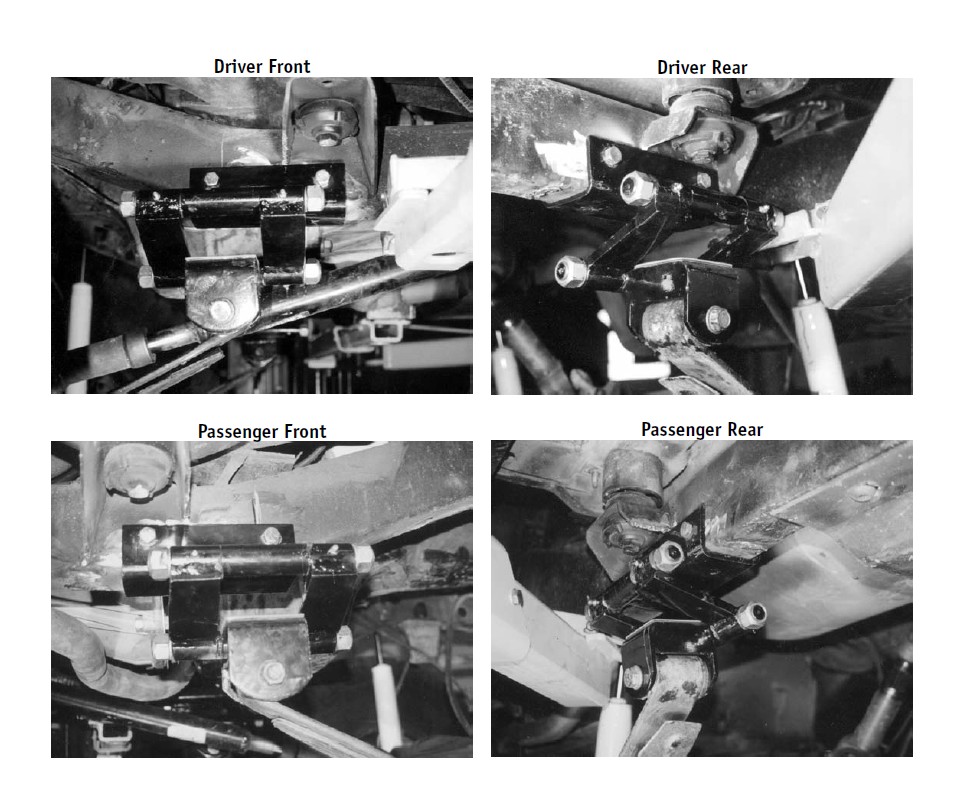
Individual Installation Photos