 FREE 1 to 3-Day Delivery on Orders $149+ Details

How to Install Teraflex 2.5 In Lift Kit w/o Shocks (07-17 Wrangler JK 2 Door) on your Jeep Wrangler
Installation Time
4 hours
Tools Required
- Box Cutter/Knife
- 6mm Allen Wrench
- 10mm Socket
- 13mm Socket
- 15mm Socket
- 16mm Socket
- 18mm Socket
- 19mm Socket
- 7/16” Wrench
- 5/16” Wrench
- 1/2” Wrench
- 5/8" Wrench
- Crescent Wrench
- Torque Wrench
- Interior Clip Tool
- Vehicle Jack
- Jack Stands
- Coil Spring Compressors (optional)

Shop Parts in this Guide
Installation Instructions:
1. Carefully open the box using a box cutter or knife and ensure all hardware is present.
2. Begin by working on the rear of the vehicle.
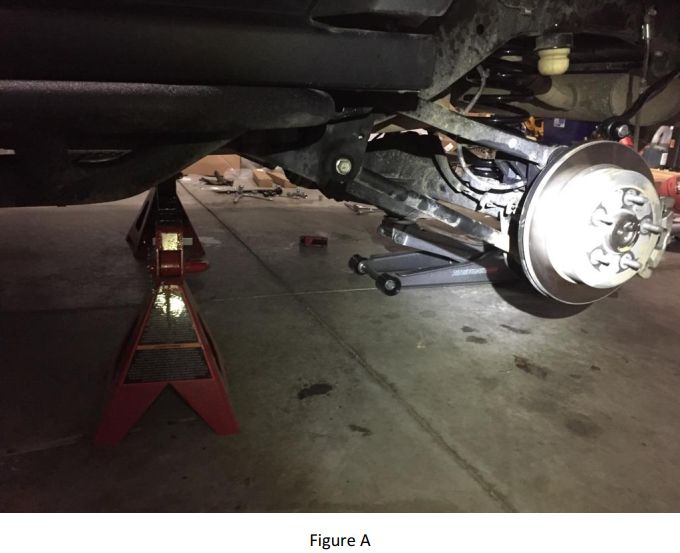
3. Remove wheels on the vehicle and support the rear axle with a jack, as well front parts of the frame with jack stands (Figure A).
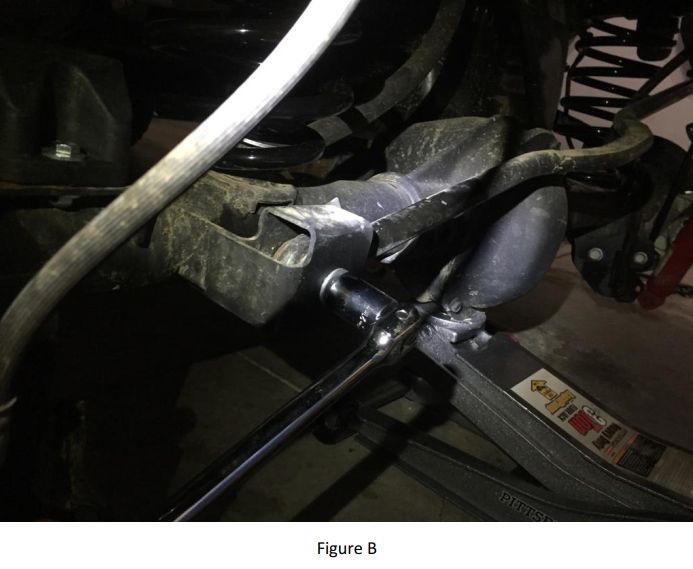
4. Remove the rear track bar from the axle using a 21mm socket (Figure B).
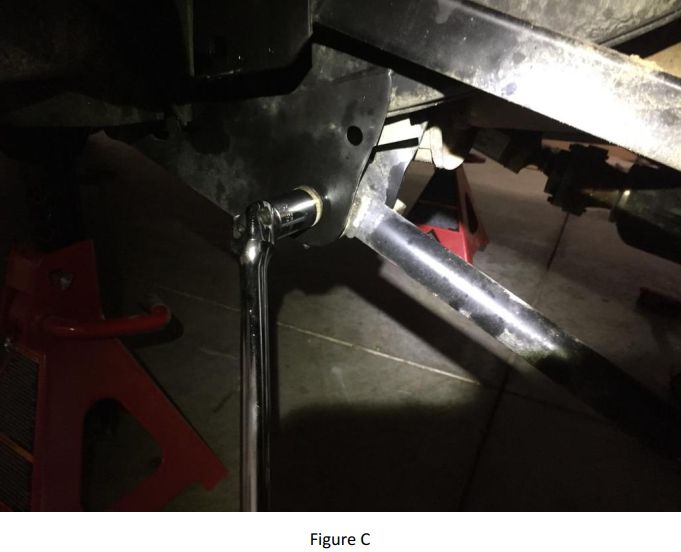
5. Loosen all bolts on the rear control arms using a 21mm socket (Figure C).
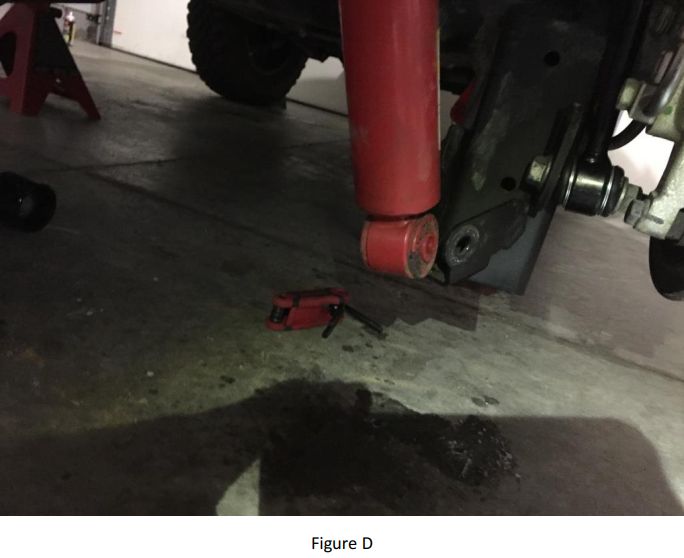
6. If you are using shock extensions or new shocks: Remove the entire rear shocks, beginning at the bottom, using an 18mm socket (Figure D).
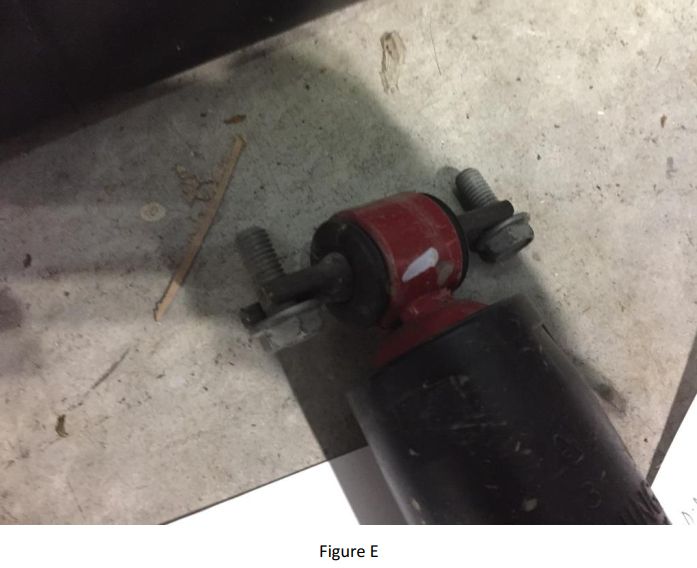
7. If using shock extensions or new shocks: Remove the upper nut, retainer and grommet from the top of the shock with a 16mm socket (Figure E).
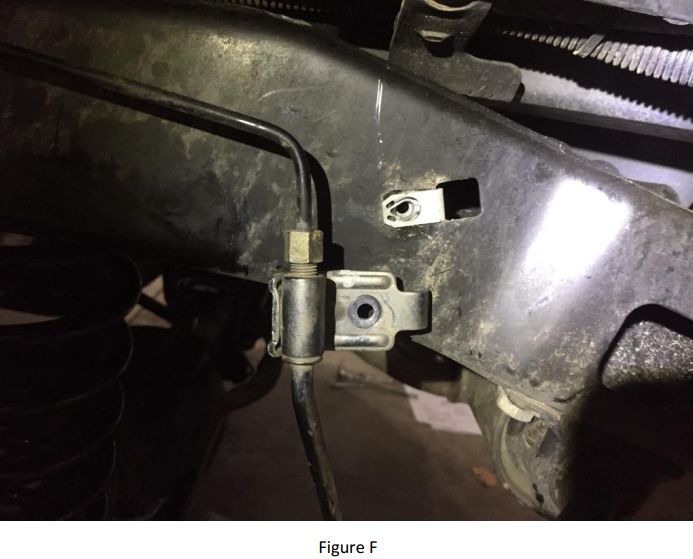
8. Check the ABS and brake lines near the ends of the rear axle, as well as the breather hose near the differential cover to ensure they are not tight before lowering the rear axle in Step 9. If the brake lines seem tight, remove the bolt holding the bracket using a 10mm socket (Figure F).
9. Lower the jack under the rear axle enough to provide space to remove the rear coils (Figure G).

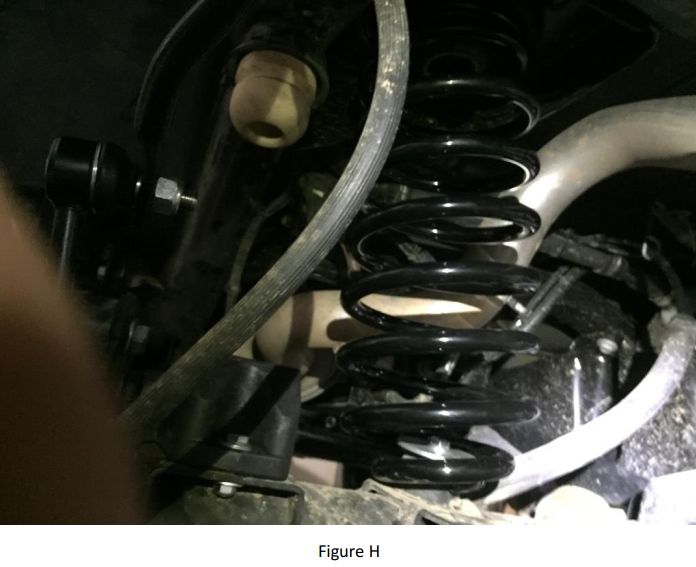
10. Place the new rear springs where the factory springs were, reusing the factory spring isolators (Figure H).
11. Using the jack, raise the axle high enough to reinstall the lower shock bolts (Figure I). Torque to 56 ft-lbs.

Figure I
12. Place the retainer on the lower spring pads and install the 3/8" bolt and lock washer through the spring retainers and spring pads (Figure J). Install by placing a nut into the provided tool and sliding the tool underneath the spring pad from the front of the axle and threading the bolt into the nut. Torque to 30 ft-lbs

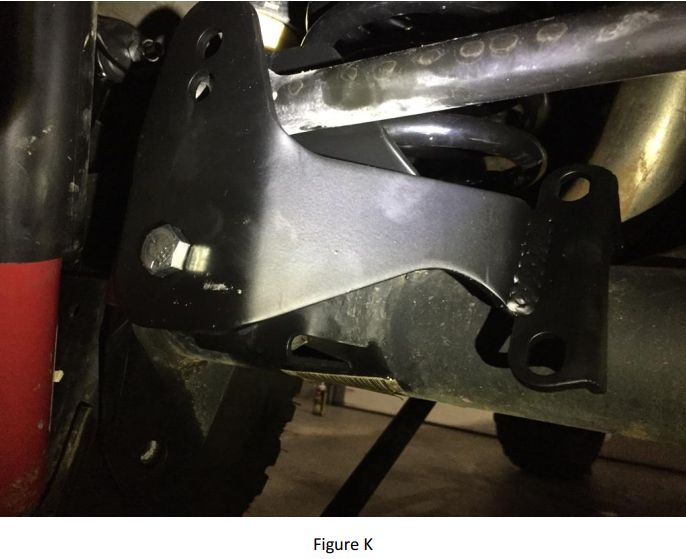
13. Place the rear track bar bracket over the factory bracket and line the holes up with the lower control arm bolt (Figure K). Remove the lower bolt using an 21mm socket.
14. Using the provided sleeve as a spacer, install the ½"x3.5" bracket bolt with washers on both sides and a locknut using a crescent wrench and 19mm socket. Torque to 75 ft-lbs.
15. Secure the U-bolt around the axle and into the bracket using a 19mm socket (Figure L). Torque to 45 ft-lbs.
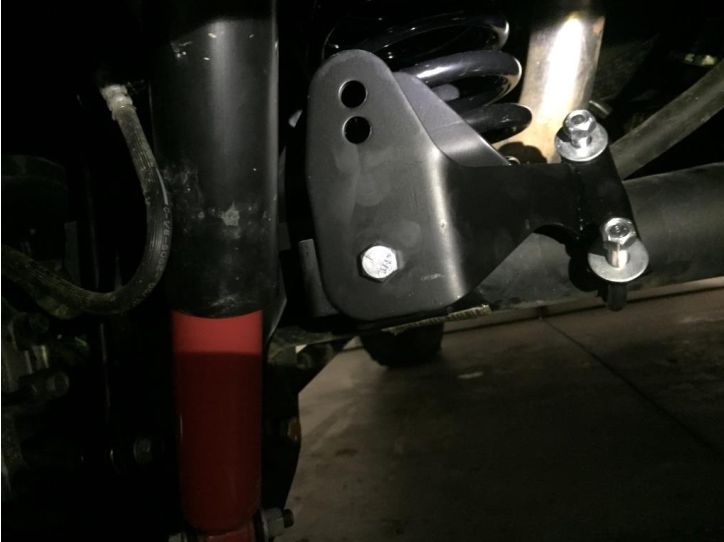
Figure L
16. Reinstall lower control arm bolts but do not tighten until vehicle is back on the ground.
17. Remove the bolts holding factory rear sway bar links to the axle brackets using an 18mm wrench on one side and an 18mm socket on the other. Using a 19mm wrench or crescent wrench to hold the stud from turning and an 18mm socket to remove the nut, remove the link from the sway bar on both sides.
18. With factory links removed, install the swivel end of the link into the sway bar from the outside. Install the new lock nut using a 19mm wrench and a 6mm Allen wrench (Figure M). Torque to 66 ft-lbs.

19. Reinstall factory hardware, along with two provided washers, on the lower end of the link (provided washers should be on both sides of the bushing). Toque to 75 ft-lbs.
20. Install the supplied brake line re-locator bracket to the frame using the 10mm factory bolt. Torque to 48 ft-lbs. Using a 7/16" wrench and supplied hardware, bolt the brake line to the re-locator bracket, including a washer on both sides (Figure N). Torque to 120 in-lbs (note, not ft-lbs). Press the brake line against the frame to avoid
contact with sway bar links during suspension travel. Reconnect the breather tube to the axle.

21. Place supplied rear bump stops on factory pad with the top "shelf" facing the front of the vehicle. Secure using the provided bolts and washers (Figure O) using a 13mm wrench and ½" wrench. Torque to 25 ft-lbs.

Figure O
22. Prepare to install the remaining kit on the front end of the vehicle by re-locating jack stands accordingly on the frame and placing the car jack beneath the axle on the front end.
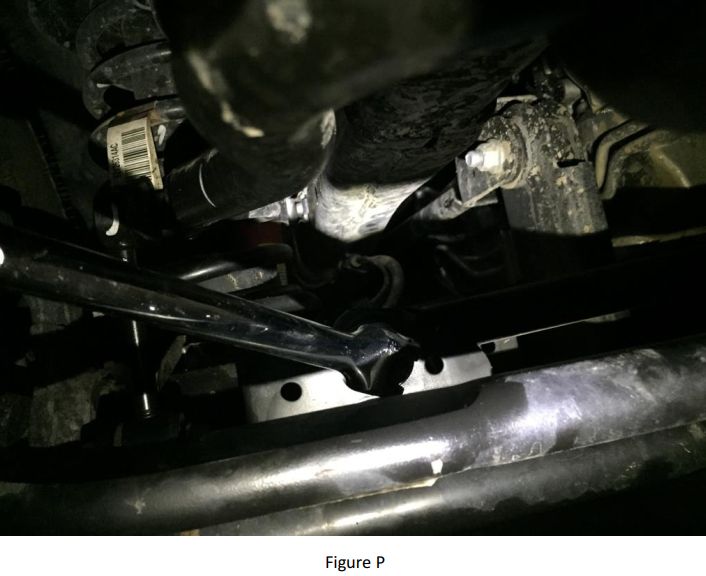
23. Remove the bolt holding the front track bar in place at the axle using a 21mm socket (Figure P) and loosen the bolt holding the front track bar in place on the other side.
24. Remove the front brake line brackets using a 10mm socket (Figure Q) to create enough slack in the line to lower the front axle. Disconnect the breather tube from the front axle, as well.

25. Remove the bolt from the bottom of both front shocks using an 18mm socket on both ends (Figure R).

Figure R
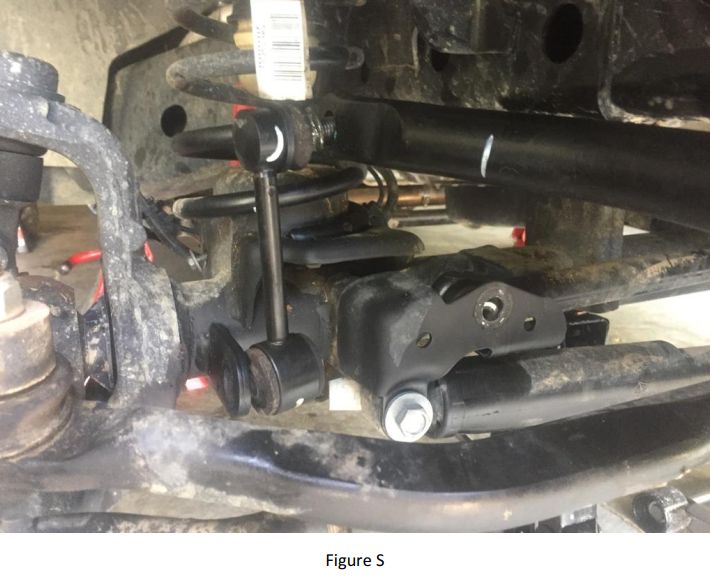
26. Disconnect the front sway bar end links on both sides using an 18mm socket and crescent wrench (Figure S).
27. Lower the front axle enough to remove the front coil springs on each side. If unable to create enough droop in the suspension, consider using coil spring compressors (not provided) (Figure T).

28. Finish removing the front shocks by using a 5/8" wrench on the top of the shock. If the shock spins, use a crescent wrench to hold the rear section of the shock, below the bushing, in place.
29. Remove the factory bump stops from both sides of the front-end suspension.
30. Insert the factory bump stops into the supplied bump stop extensions and apply grease to the top nub of the bump stop extensions.
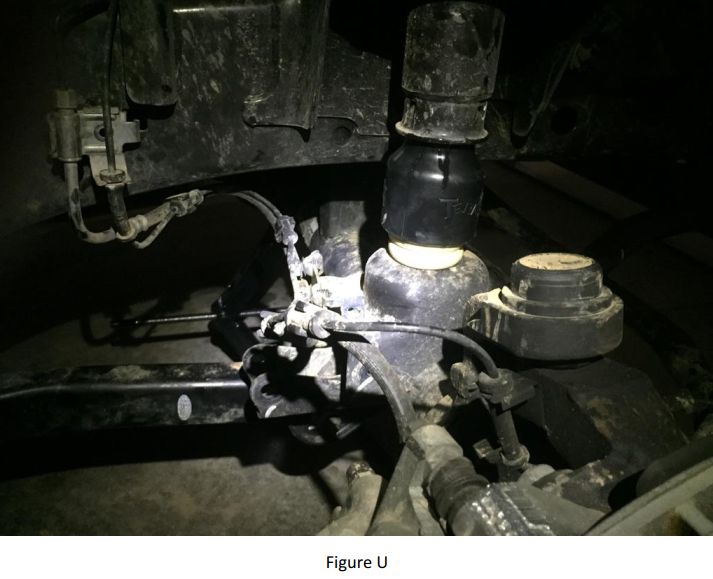
31. The bump stop extensions (and re-inserted factory bump stops) must be reinstalled where the factory bump stops were just removed; however, this requires quite a bit of force to do. Place the bump stop extension against the axle and use the jack to raise the axle until the bump stop extension is pressed firmly back into place
(Figure U) and then raise the axle on the other end to insert that bump stop extension, as well.
32. Install the new front coil springs on both sides. Due to the extended bump stop now in place, either lower the axle even further than was required to remove the factory coil springs or use coil spring compressors (not supplied) and ensure that the tight wrap is on top and, once installed, the coil is seated into the lower spring perch correctly (Figure V).

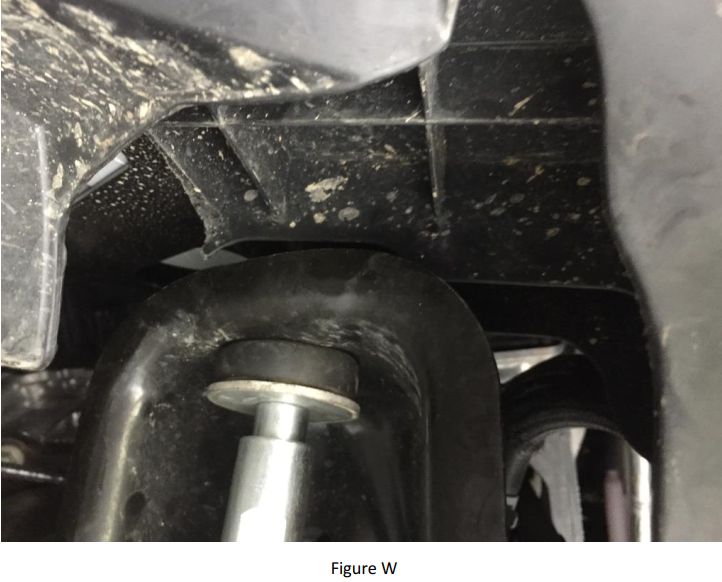
33. Install front shocks (either factory shocks with extensions installed, not provided, or new, lift-length appropriate shocks). Insert factory bolt through the bottom of the shock and shock mount then slide the upper shock through the existing mounting hole (Figure W). Tighten down the factory nut to 20 ft-lbs or until about 1/8" of the bushing begins to crush. Torque the bolt on the bottom of the shock to 56 ft-lbs.
34. Using the rear factory sway bar links which were removed during the rear install, attach sway bar links in the front, keeping the sway bar on the inside of the axle mount and on the outside of the sway bar end (Figure X). Torque top and bottom bolts to 75 ft-lbs.

35. Reconnect factory brake line (and ABS line) clip using 10mm socket unless using brake line extensions, in which those should be installed at this point (not included). Reconnect the breather tube to the axle.
36. Reinstall all wheels to the vehicle.
37. Lower the vehicle back to the ground. Reconnect front track bar at the axle using the same factory bolt. Retighten bolt on at the frame end, as well. Torque both bolts to 169 ft-lbs.
38. Retighten control arm bolts. Torque lower control arm bolts to 169 ft-lbs. Torque upper control arm bolts to 102 ft-lbs.
Installation Instructions Written by ExtremeTerrain Customer J. Sandlin 08/02/2017
