FREE 1 to 3-Day Delivery on Orders $149+ Details

How to Install Synergy Weld-On Rear Track Bar Bracket (07-18 Wrangler JK) on your Jeep Wrangler
Installation Time
2 hours
Tools Required
- Basic simple hand tools.
- 4-1/2” Angle Grinder or similar cutting tool
- Corresponding metal cutting cut-off wheels
- Grinding wheels
- Sanding discs
- A Sawzall, Torch or Plasma cutter could also be used to cut off brackets
- Welding device. Mig is preferred but Tig or Stick are acceptable as well.

Shop Parts in this Guide
GENERAL NOTES:
These instructions are also available on our website; www.synergymfg.com. Check the website before you begin for any updated instructions and additional photos for your reference.
This heavy duty bracket kit is meant to replace the factory axles brackets on a stock (3.150” diameter) or similar sized axle tube. These components can fit on many size tubes with slight modification.
The installation of this bracket kit requires complete removal of the factory axle brackets. An experienced fabricator / welder is recommended to properly install this bracket.
PARTS LIST:
8072-01 JK Weld-On Rear Track Bar Bracket
8072-02 JK Rear Weld-On Bump Stop Bracket
8072-03 JK Weld-On Rear Upper Control Arm Bracket
8072-04 JK Weld-On Rear Lower Control Arm Bracket Kit
8098 JK Rear Axle Spring Pad
INSTALLATION:
1) If installing the complete axle bracket kit, we strongly recommend removing the entire axle housing from the vehicle. This makes cutting of the old brackets much easier.
2) Cut brackets off from one side of the housing only. In other words, only cut the brackets off from the driver side first. That way the passenger side can be used for reference.
3) Cut brackets off in the following order:
Track Bar bracket
Coil Spring Perch
Bump Stop Bracket
Upper Control Arm Mount
Lower Control Arm Mount
4) Removal of track bar bracket, coil spring perch and bump stop bracket is straight forward. Cut at the top of the weld and be careful not to cut into the axle tube.
5) Removal of the upper control arm mount is slightly more in depth due to its geometry.
6) We find it easiest to remove the bracket in 2 pieces. First, make 2 cuts at the top of the welds and one cut down the side of the stock bracket as shown.

7) Finish cutting the bracket off by cutting at the top of the weld and removing the last piece. Grind the welds smooth.
8) Remove the lower control arm bracket.
9) Grind smooth all welds and prep axle tube for welding
10) Begin installing the new components. Install one component at a time, taking careful measurements as you go. Tack all components first and reinstall in vehicle prior to fully welding.
11) Take note of the dimensioned CAD drawing at the end of these instructions for bracket placement. Use this drawing primarily during set-up of the axle brackets.
12) Begin by marking the center line of the axle. Approximately 32.70” from the wheel mounting surface (WMS).
13) Work from the center of the differential out.
14) Tack 8098 Spring Perch on first. Use the dimensions in the 8072-REF drawing for placement in relation to center line. Set angle by either matching the factory angle on the other side of the axle tube or rotate the spring mount forward to the desired angle to prevent spring bow.
On a 4 dr JK, you typically want to rotate it forward about 10 deg.
On a 2 dr JK, you typically want to rotate it forward about 15 deg.
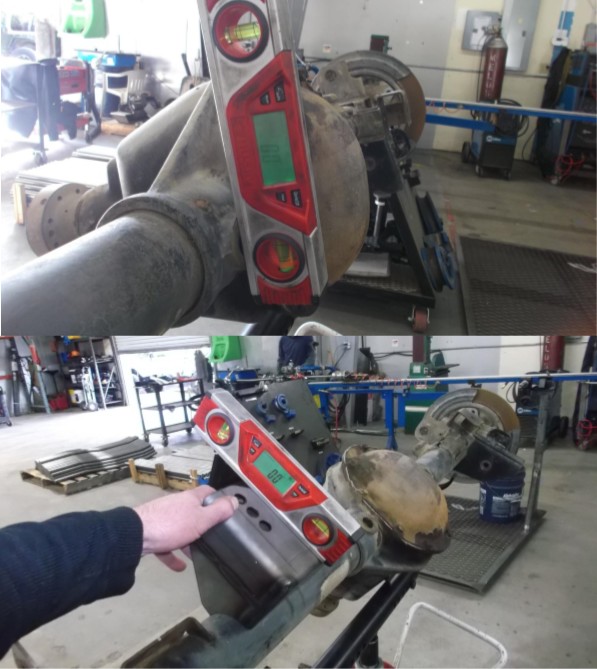
15) Tack the 8072-01 track bar bracket on next. Use the dimension in the 8072-REF drawing for placement in relation to center line. 17.50” to center of track bar mounting hole to center of axle.
16) Level the back face of the track bar bracket to the diff spreader flats on the back of the differential.
Installation is Complete