 FREE 1 to 3-Day Delivery on Orders $149+ Details

How to Install Synergy Rear Track Bar Bracket (97-06 Wrangler TJ) on your Jeep Wrangler
Installation Time
1 hours
Tools Required
- Basic simple hand tools
- Torx bits (T-55)
- trim removal tool / pry bar
- Drill with 5/16” metal cutting drill bit, or step drill
- Quality jack and jack stands
GENERAL NOTES:
These instructions are also available on our website; www.synergymfg.com. Check the website before you begin for any updated instructions and additional photos for your reference.
This bracket is designed to center the rear axle with 3 inches of lift and a factory rear track bar. For lifts over 3 inches of lift, use in conjunction with PPM-8156 TJ/LJ adjustable rear track bar.
A CV style rear driveshaft for lifts over 3 inches is recommended. PPM-8168 is for use with a CV style rear driveshaft.
A minimum of 2” rear bump stop extension, PPM-8162-20 (2.0”) or PPM-8162-30 (3.0”) to prevent the track bar from contacting the tub at full bump.
The instructions below show installation of 8168 TJ Rear Track Bar Bracket. Installation of 8160 bracket is identical.
PARTS LIST:
8168 – TJ REAR TRACK BAR BRACKET (WITH CV REAR DRIVESHAFT)
(1) 816801 TJ Rear Track Bar Bracket (for use with CV rear driveshaft)
(1) U-bolt 2-5/8” diameter, 4” long
(1) 815802-01 TJ Rear Track Bar Bracket spacer
(2) 3/8-16 UNC Nylock Nut
(2) 3/8” flat washer
(2) ½-13 UNC hex head bolt 2.75” long
(2) ½-13 UNC Stover Nut
(4) ½” flat washer
(1) 5/16-18 UNC hex head bolt, 3/4” long
(1) 5/16-18 UNC Stover Nut
(1) 5/16” flat washer
8160 – TJ REAR TRACK BAR BRACKET (WITH OEM REAR DRIVESHAFT)
(1) 816001 TJ Rear Track Bar Bracket (for use with stock rear driveshaft)
(1) U-bolt 2-5/8” diameter, 4” long
(1) 815802-01 TJ Rear Track Bar Bracket spacer
(2) 3/8-16 UNC Nylock Nut
(2) 3/8” flat washer
(2) ½-13 UNC hex head bolt 2.75” long
(2) ½-13 UNC Stover Nut
(4) ½” flat washer
(1) 5/16-18 UNC hex head bolt, 3/4” long
(1) 5/16-18 UNC Stover Nut
(1) 5/16” flat washer
INSTALLATION:
1) Begin by removing the factory track bar bolt at the frame.
2) With factory bolt removed, raise the vehicle and support it using jack stands to allow the rear suspension to hang free.
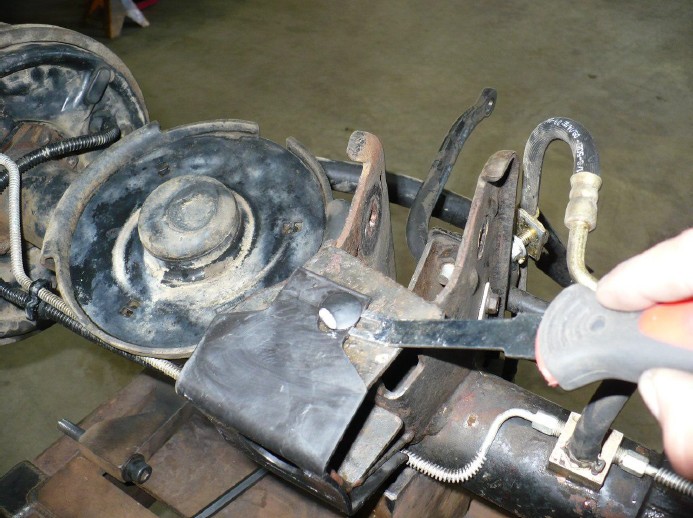
3) Remove the track bar bolt at the axle. On most models, this will be a T-55 torx head bolt. Remove the track bar.
4) With track bar removed, use a small plastic trim removal tool or prybar to remove the plastic protective cover from the factory track bar bracket.
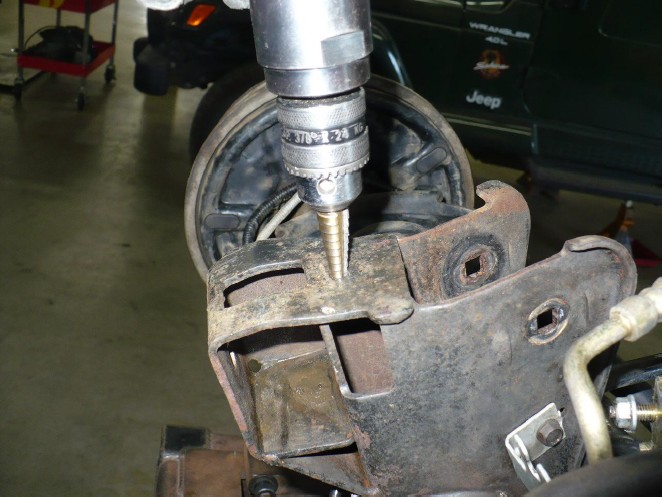
5) Next, open up the top push pin hole on the factory track bar bracket to 5/16”. A quality step drill works great for this. Clean up any rough edges after drilling.
6) Next, locate the ABS wiring tab located on the axle, near the upper control arm mount on the driver side.
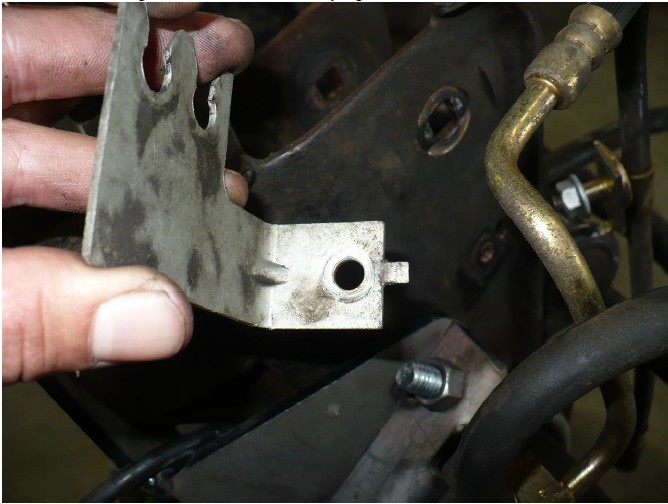
7) Remove the wiring clipped into this bracket, and remove from vehicle. Flatten the indexing tab as shown. After flattening, reinstall but do not fully tighten attachment bolt.
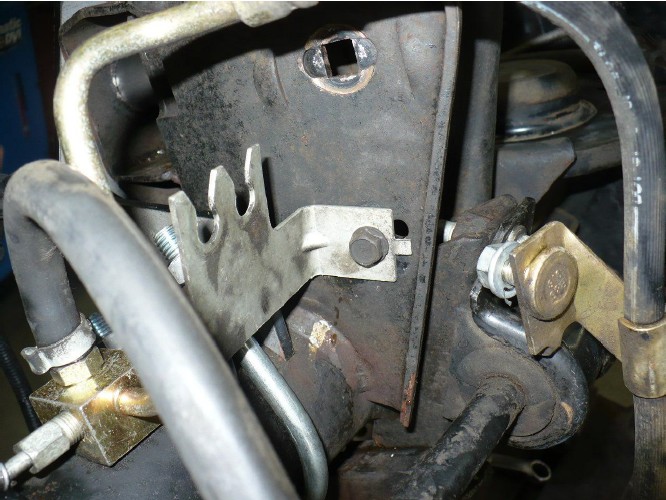
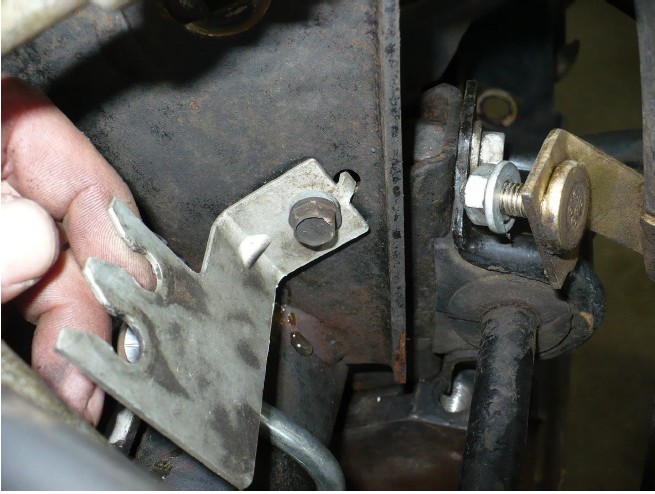
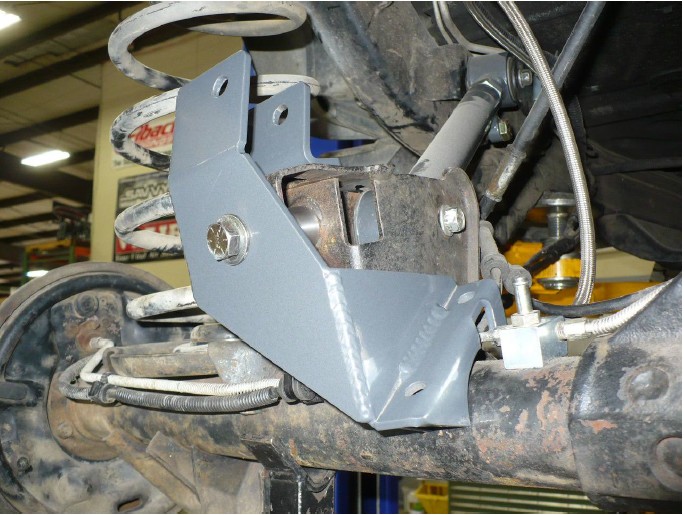
8) Install bracket as shown. Be sure to use 815802-01 track bar bracket spacer in the factory location as shown to prevent factory mount from crushing when bolt is tightened. Use one of the ½-13 UNC x 2.75” long bolts included in the kit. Be sure to use a washer under the bolt head. Install washer and stover nut on back side, but do not tighten at this time.
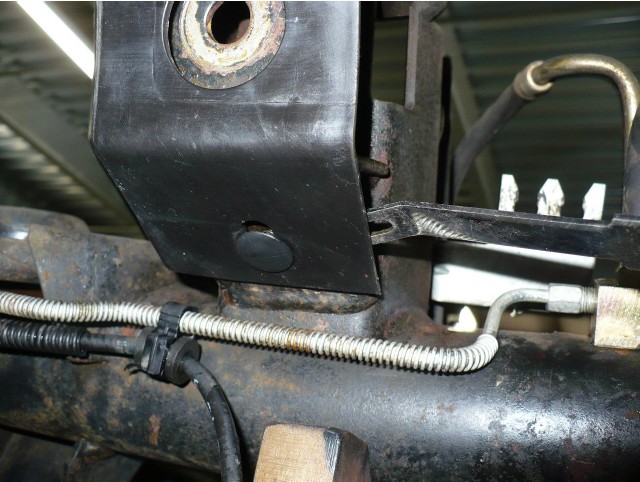
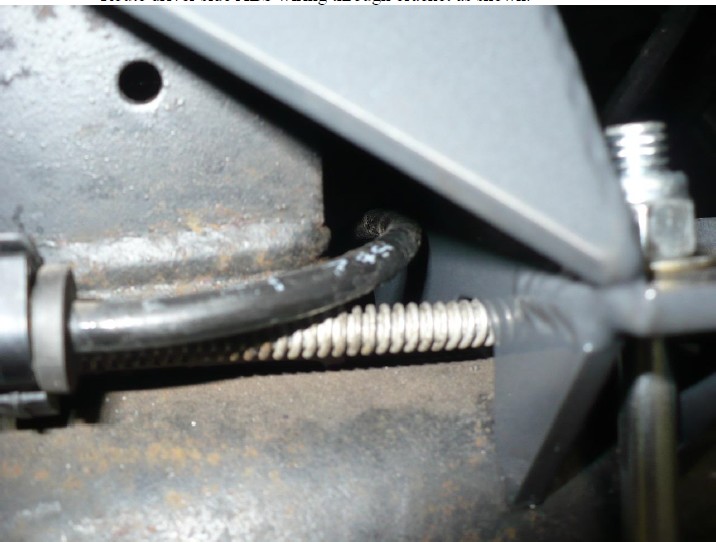
9) Note, the brake line is designed to run through the inner and outer notch as shown.
Route driver side ABS wiring through bracket as shown.
10) Install 5/16-18 UNC x ¾” long bolt included in the kit as shown. Use a washer under the bolt head. Start stover nut on bottom, but do not tighten at this time.
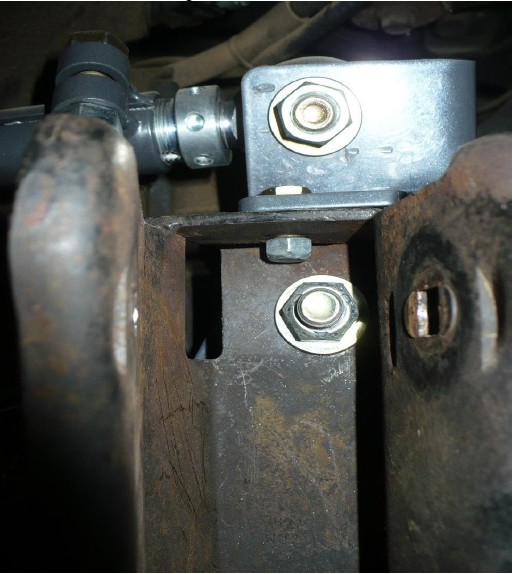
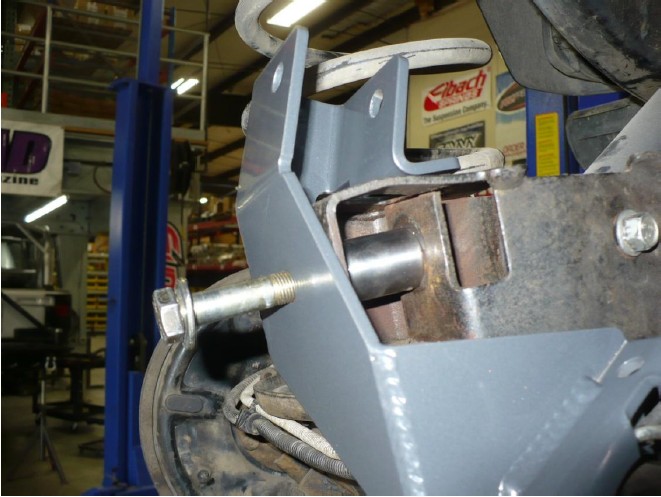
11) Next, install U-bolt. Use a washer under the nut. Snug down all hardware. Do not fully tighten. Once all hardware is snug. Torque as follows:
3/8-16 UNC nylock nuts for U-bolt – 30 ft-lbs.
5/16-18 UNC bolt / stover nut – 24 ft-lbs.
½-13 UNC track bar bracket bolt – 80 ft-lbs.
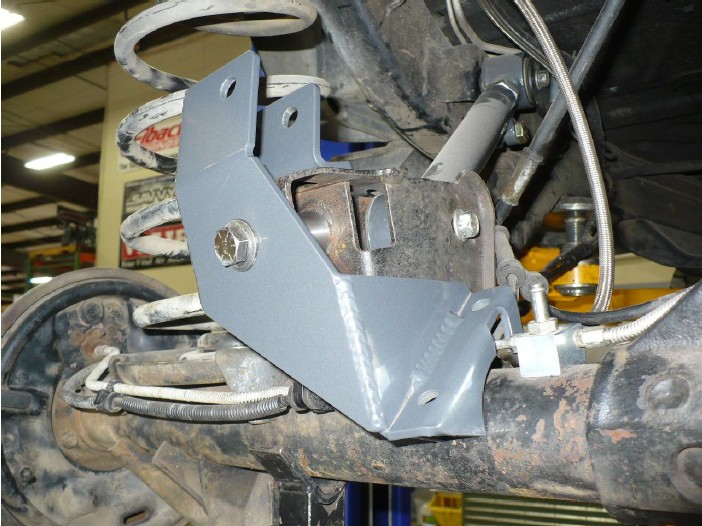
12) Route ABS lines as shown using the factory bracket. Orient bracket so ABS lines are not stretched or kinked. Tighten the 10mm bolt securing the bracket to the upper control arm mount once satisfied with fitment.
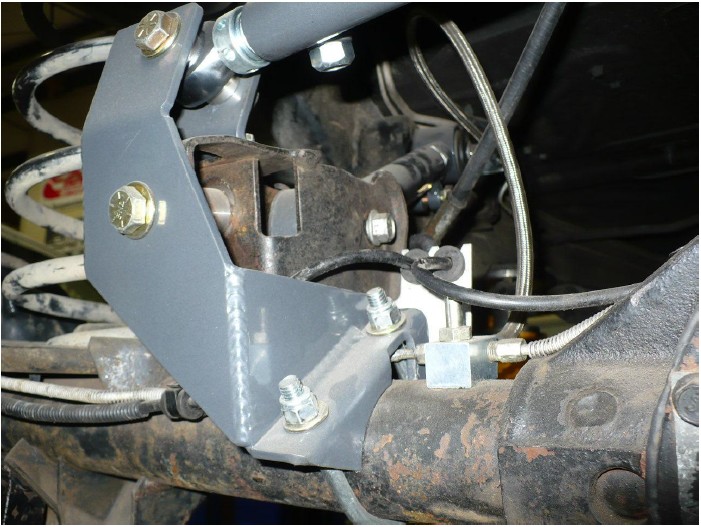
13) Reinstall track bar using the OEM torx bolt if the factory track bar is retained. If using an aftermarket Synergy track bar, use the other ½-13 UNC x 2.75” long bolt provided in the kit and torque to 80 ft-lbs. Again, use a washer under both the bolt head and the stover nut as shown above.
14) Lower to ground and recheck all torques after 100 miles of driving.
Installation is Complete

