 FREE 1 to 3-Day Delivery on Orders $149+ Details

How to Install Synergy Rear Long Travel Upper Shock Mount (07-18 Wrangler JK) on your Jeep Wrangler

Shop Parts in this Guide
GENERAL NOTES:
• These instructions are also available on our website at www.synergymfg.com Check the website for any updated instructions and additional photos for reference.
• Bracket is designed to be bolted on but can be welded on as well if desired.
• Installation will require moderate cutting and drilling. A 4.5” cut off wheel, drill and basic hand tools are required for installation.
• This bracket is designed to be used in conjunction with PPM-8078 JK Rear HD Lower Shock Mount for optimum ground clearance and suspension travel.
• This installation can be done with the vehicle on the ground sitting on its tires. However it is easier to install with the vehicle jacked up in the air and the suspension drooped out.
• When installing shock mounts / shocks, we strongly recommend the removal of coils and cycling of suspension to determine correct bump-stop spacing as to prevent damage to both shocks and shock mounts due to premature bottoming.
• The installation of this bracket will require modification of the factory exhaust or replacement with a cat back system that relocates the muffler to a different location from stock.
1. For 07-11 models, we recommend AFE Exhaust P/N 49-46226.
2. For 12 models, we recommend AFE Exhaust P/N 49-46222
• This bracket relocates the upper shock mount up and back thus putting slightly more angle on the rear shocks. Change in ride quality is possible due to the change in mounting locations, note that a shock re-valve may be needed to retain the same ride quality as before.
PARTS LIST:
• 2 - PPM-8086 JK R LT UPPER MOUNTS
• 2 - 1/2-13 UNC x 1" long bolt
• 2 – 1/2-13 UNC flange nut
• 2 - 1/2" flat washers
• 4 - 5/16-18 UNC x 1" long bolt
• 4 -5/16-18 UNC Flange nut
• 4 - 5/16" Flat washer
• 4 - 3/8-16 UNC x 1.25" long bolt
• 4 - 3/8-16 UNC Stover nut
• 8 - 3/8" Flat washer
• 2 – M10 x 1.50 Stover Nut (only used if kit is being used in conjunction with
PPM-8070 Bar Pin Eliminator Kit.
INSTRUCTIONS:
1) Begin by removing the rear shocks from the vehicle. Retain the factory upper shock bolts as they will be reused in the installation of the new shock mount.
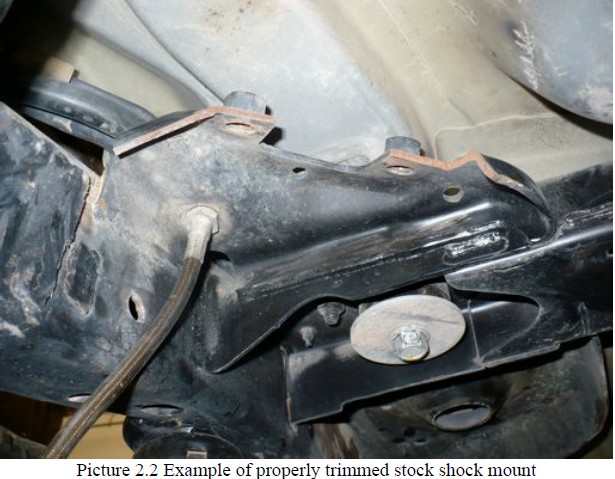
2) Next, start marking out the areas to be cut out of the stock shock mount. Note- exact cut is up to installer, but for new shock mount to fit, the upper bent lip of the stock mount must be removed for new mount to sit flush. Additionally, the frame side tie in of the stock shock mount must be trimmed / removed.
Picture 2.1 below is a reference cut diagram.
Picture 2.2 below is a finished example of properly trimmed stock mount.

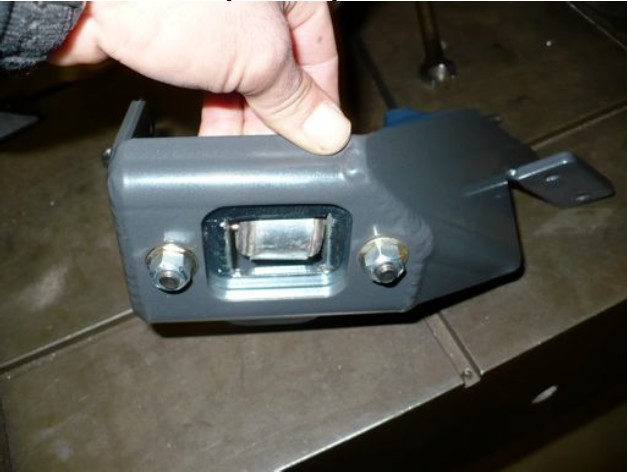
3) Once trimmed, fit the new PPM-8086 LT Upper Shock mount into place by bolting it on using the factory shock bolts as shown below.
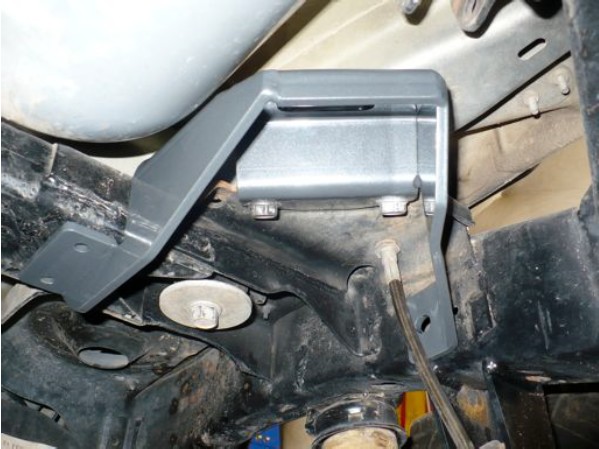
4) Dbl check that the stock shock mount is adequately trimmed so that the new mount sits flush on the stock mount.
5) Once satisfied, mark the holes to be drilled out to fully bolt on the new mount.
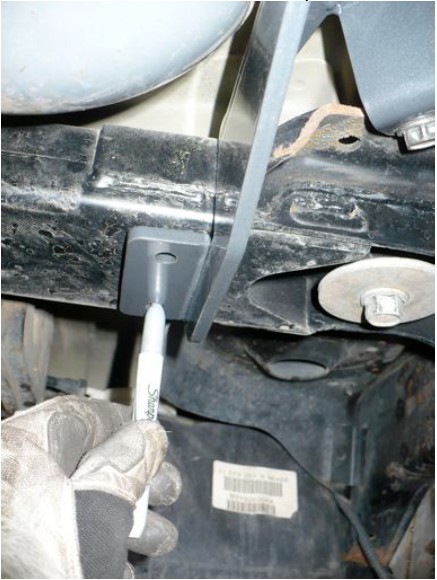
6) Once marked, remove the shock mount and drill the 2 holes on the crossmember to 5/16” or slightly larger (11/32” is recommended). Drill the hole on the frame to ½” or slightly larger (17/32” is recommended).
7) After drilling, this is a good time to apply a fresh coat of paint to the stock shock mount area since the cutting and drilling will have left exposed metal that will be prone to rusting.
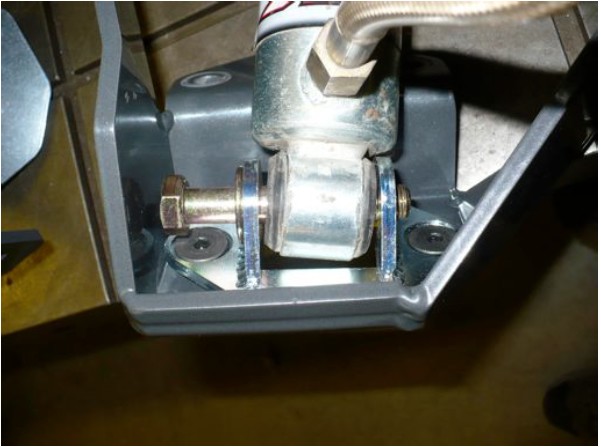
8) Next reinstall the new upper shock mount. Install the bolts as pictured.
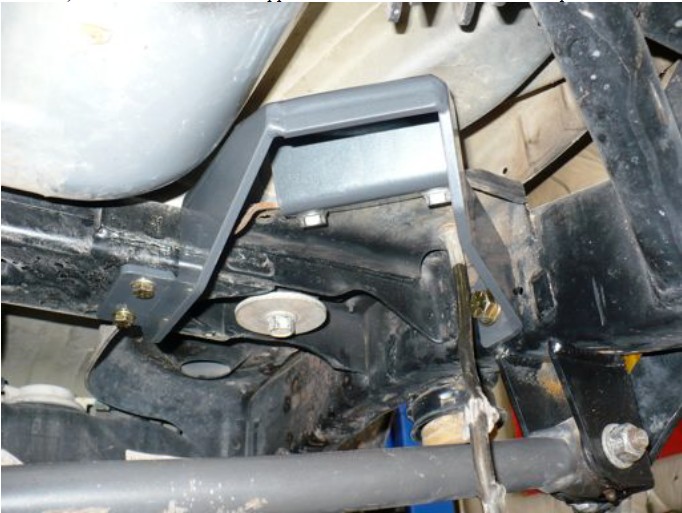
9) Use a washer under the head of each bolt, the 5/16” flange nuts go on the inside of the cross-member, while the ½” flange nut goes inside the frame rail as shown.

10) Torque the bolts as follows:
5/16”-18 cross-member bolts = 24 ft-lbs
½” – 13 frame bolt = 80 ft-lbs
Stock Upper Shock bolts = 37 ft-lbs.
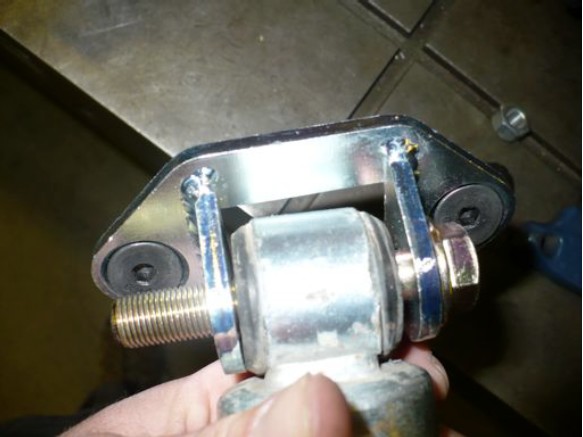
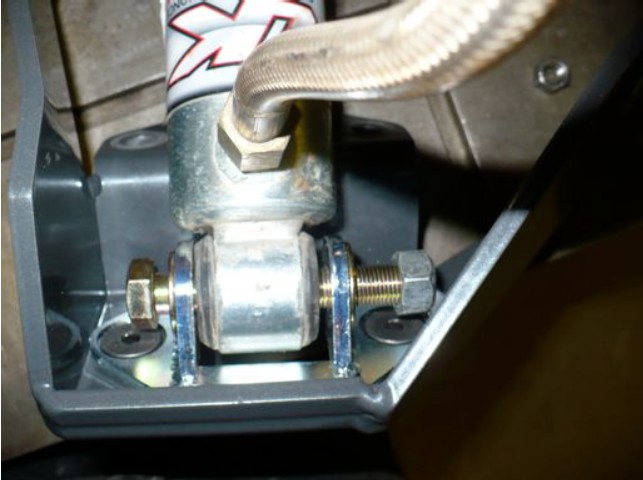
11) Next, install the shock into upper shock mount. Orient the 3/8-16 x 1.25” long bolts as shown below with nut on the bottom side. Use a washer under both the bolt head and under the stover nut.
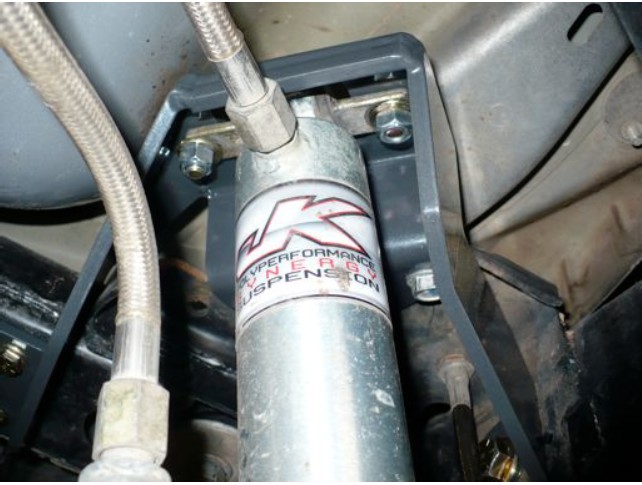
12) Torque upper shock bolts to 40 ft-lbs. Reinstall lower shock bolt and accordingly. Stock bolt; torque to 56 ft-lbs. ½-13 UNC bolt included with PPM-8078 HD Lower Shock mount; torque to 75 ft-lbs.
13) Lower vehicle to ground and recheck bolts after 100 miles of driving.
The following instructions are for installing PPM-8070 Bar Pin Eliminatior kit in conjunction with PPM-8086 JK LT Rear Upper Shock Mount.
• Installation pictures are taken with 8086 LT upper mount off the vehicle for clarity, but install should be done once PPM-8086 is installed in vehicle. (Just after step 10 above)
• If doing this installation, use the M10 x 1.50 stover nuts included with the PPM- 8086 LT upper shock mount.
A. Begin by installing the ½-20 UNF hex head bolt in the shock and PPM-8070 shock mount as shown below. Be sure to install a ½” flat washer under the head of the bolt. Also, place the M10x1.5 flat head socket head cap screws in the mount as well.
B. Next, install the shock / shock mount assembly into the PPM-8086 JK LT Upper shock mount in the vehicle.
C. Now, install the M10 x 1.5 stover nut on the top of the shock mount. Be sure to use a 3/8” flat washer under the nut as pictured below. Note, the ½” shock bolt will need to be slid from one side of the mount to the other in order to get an allen wrench on the M10 x 1.5 cap crews. Torque to 30 ft-lbs.
D. Lastly, install a ½” flat washer and ½-20 UNF stover on the shock bolt as pictured below and torque to 80 ft-lbs.
E. Install lower shock bolt on vehicle following factory instructions or those corresponding with that of the lower shock mount being used.
F. INSTALLATION COMPLETE
