 FREE 1 to 3-Day Delivery on Orders $149+ Details

How to Install Synergy Motor Mount Kit (87-06 4.0L Wrangler YJ & TJ) on your Jeep Wrangler
Installation Time
2 hours
Tools Required
- Basic simple hand tools.
- 4-1/2” angle grinder with grinding / sanding disc
GENERAL NOTES:
These instructions are also available on our website; www.synergymfg.com. Check the website before you begin for any updated instructions and additional photos for your reference.
These motor mounts are a bolt on installation for YJ, XJ, and TJ Jeeps with the 4.0L inline motor.
PARTS LIST:
8251 YJ / XJ / TJ MOTOR MOUNT
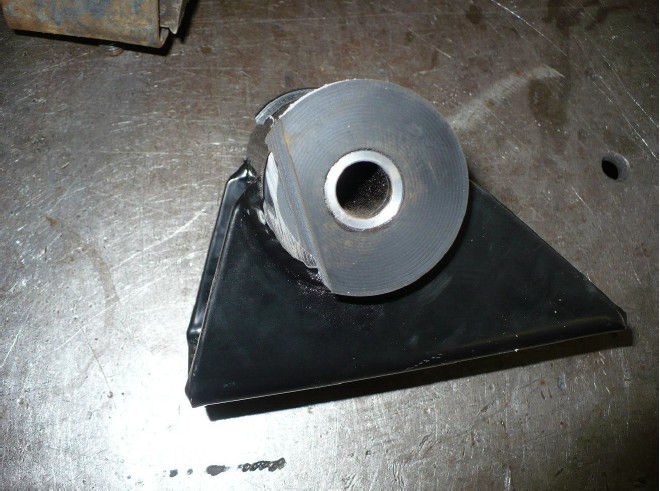
(2) 825101 YJ / XJ / TJ 4.0L motor mount (assembled w/ bushings and inner sleeve)
(2) 3/8-16 UNC x 1.0” long bolts
(2) 3/8-16 UNC stover nuts
(4) 3/8” flat washers
INSTALLATION:
1) Installation of this motor mount kit is best done one side at a time. These instructions cover an install on a 1989 Jeep XJ. Installation will start on the driver side of the vehicle.
Start by removing the factory air box.
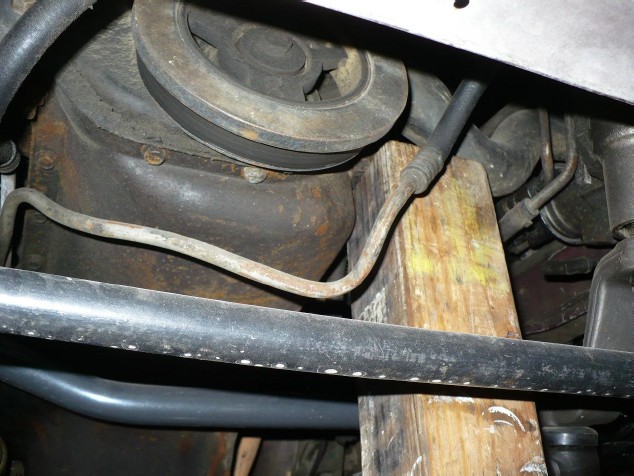
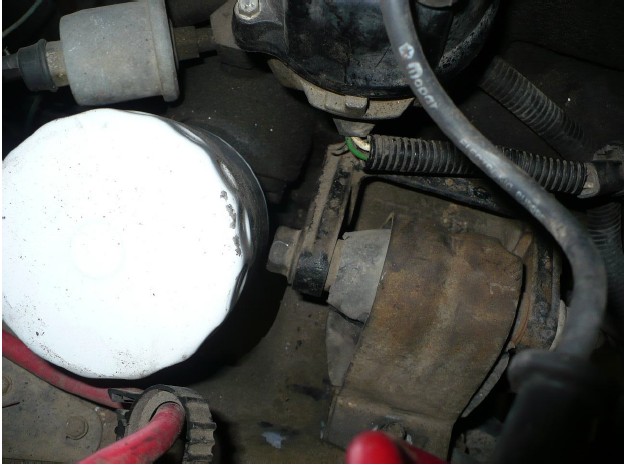
Use an engine crane of jack with a block of wood to safely take some weight off one side of the motor. See picture below.
2) Remove the factory motor mount. Retain all hardware.
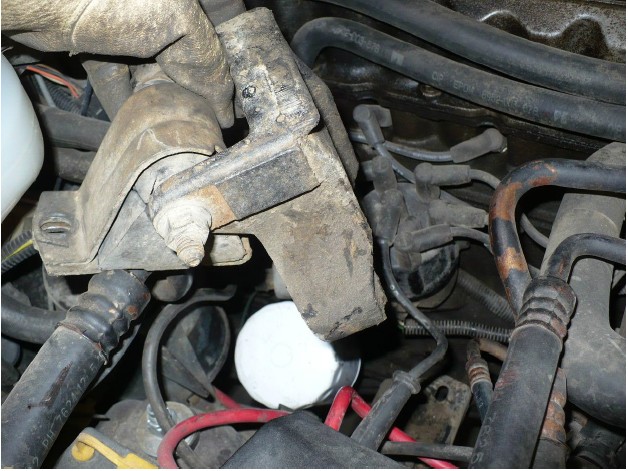
3) With factory motor mount removed, test fit the new 825101 motor mount.
Note, on some models there will be a ridge on the factory motor bracket which will prevent the bolt hole from lining up. The ridge is labeled in location A below.
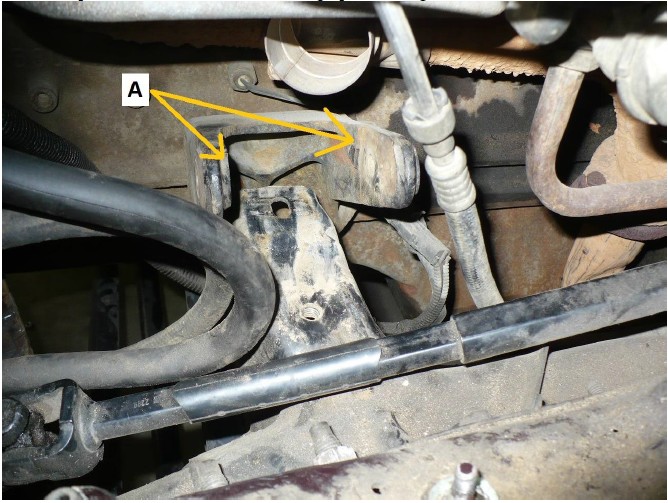
4) If this ridge is present, use a 4-1/2” angle grinder or similar tool to either grind down the ridge for fitment, or remove some bushing material from the new motor mount to allow for fitment.
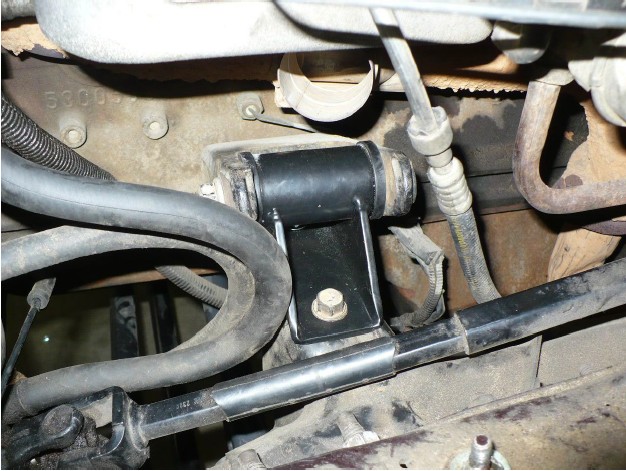
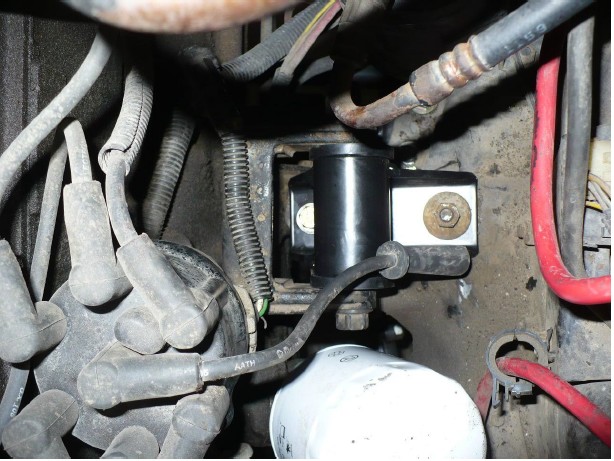
5) Install the 8251 motor mount as shown below. Use the OEM through bolt / hardware. Use the factory bolt for the threaded hole at the outer attachment point and use the 3/8-16 UNC x 1.0” long bolt provided for the inner attachment point. Use a washer under both the bolt head and corresponding stover nut for the inner attachment point.
6) Snug all hardware down, but do not fully tighten at this point.
7) Now move onto the passenger side. Reposition the floor jack to the passenger side of the vehicle to safely support the motor.
8) Due to oil filter location on some early models, the motor mount and motor bracket assembly will need to be removed as a unit due to the oil filter preventing the bolt from being removed.
9) Remove the attachment bolts at the block and remove the assembly. Retain all OEM hardware for motor bracket.
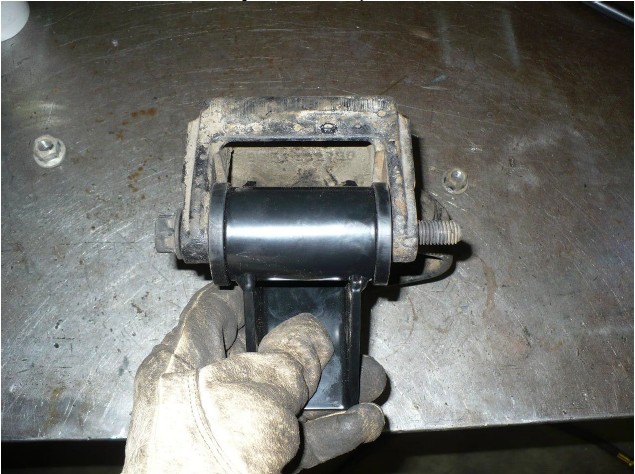
10) With bracket removed from vehicle, replace the factory motor mount with the 825101 motor mount.
11) Reinstall assembly onto vehicle and reattach motor mount bracket to engine block using the bolts removed in step 9. Start all hardware attaching the engine bracket to the block.
12) Install the OEM nut / washer on the outer attachment point where the stud is. Use the 3/8-16 UNC x 1.0” long bolt for the inner attachment point. Use a washer under both the bolt head and corresponding stover nut.
13) Snug down all hardware on the drivers side and torque to the following specifications:
Motor mount to chassis: 35 ft-lbs
Motor mount through bolt: 48 ft-lbs
Motor mount bracket to engine block: 40 ft-lbs.
14) Reinstall any components removed for installation.
15) Re-check bolt torques after first 100 miles of driving.
Installation is Complete

