
How to Install Synergy Front High Clearance Long Arm Lower Control Arms (07-18 Wrangler JK) on your Jeep Wrangler
Installation Time
3 hours
Tools Required
- Basic simple hand tools.
- A plasma cutter, oxy-acetylene torch, grinder with a cut off wheel or sawzall.

Shop Parts in this Guide
GENERAL NOTES:
These instructions are also available on our website; www.synergymfg.com. Check the website before you begin for any updated instructions and additional photos for your reference.
The installation of these control arms are to be used in conjunction with Synergy 8031 JK Front Long Arm Frame Brackets.
PARTS LIST:
8033 – Jeep JK Front High Clearance Long Arm Lower Control Arms
(1) 8033-01-L Jeep JK Front High Clearance Long Arm Lower Control Arm, Left Side
(1) 8033-01-R Jeep JK Front High Clearance Long Arm Lower Control Arm, Right Side
8035 – Jeep JK Front Long Arm Upper Control Arms
(1) 8035-01-L Jeep JK Front Long Arm Upper Control Arm, Left Side
(1) 8035-01-R Jeep JK Front Long Arm Upper Control Arm, Right Side
INSTALLATION:
INSTALL FRONT LOWER CONTROL ARMS
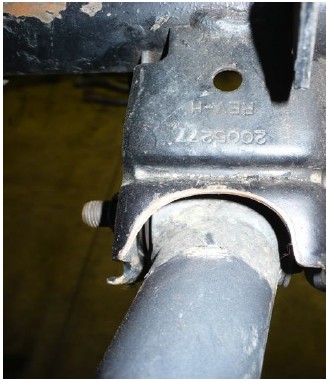
1) Trim the top of the axle bracket as shown for clearance for the new arms.

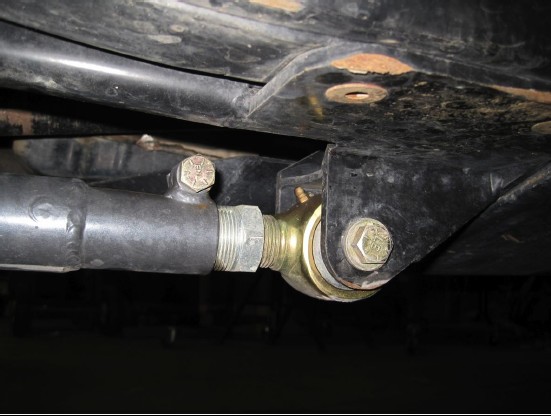
2) Preset the length of the lower control arms to 31-5/8” center to center of the bushing by turning the adjuster sleeve. This is just a starting measurement, final control arm length with be set during the alignment. Turn the Johnny joint so that the grease fitting is adjacent to the adjuster pinch bolt. Make sure the left and right control arms are the same length.
3) Install the new control arms with the bend upward and inward, away from the tire and ground. Use the original factory bolts. The left and right arms are different so make sure they are on the correct side. The bushing goes at the axle end and the Johnny Joint goes at the frame end with the pinch bolt and grease zerk on the top.

4) Hand-tighten the control arm bolts, wait until the end of the installation and the jeep is sitting at ride height before you torque these bolts.
5) Tighten the factory control arm bolts to 125 ft-lbs. Once final length adjustments are made, be sure the Johnny joints are neutral at ride height and tighten the pinch bolt to 80 ft-lbs. Put a wrench on the adjuster sleeve at this time and try to move the adjuster. Make sure pinch bolt has adequately clamped onto Johnny Joint shank so that the adjuster is not movable. If movable, increase torque on pinch bolt but do not exceed 90 ft-lbs.
INSTALL FRONT UPPER CONTROL ARMS
6) Preset the length of the upper control arms to 25” center to center of the bushing by turning the adjuster sleeve. This is just a starting measurement, final control arm length with be set during the alignment. Make sure the left and right control arms are the same length.
7) Install the new control arms with the flex joint at the frame end and the adjustable end at the axle. Position the arms so the pinch bolt is on top of the control arm. Reuse the factory mounting bolts at the axle end; use the new ½” bolts, washer and nuts at the new frame brackets. Use a washer under the head of the bolt but not under the nut.
8) Hand-tighten the control arm bolts, wait until the end of the installation and the jeep is sitting at ride height before you torque these bolts.
9) Tighten the control arm bolts to 90 ft.-lbs., however make sure the vehicle is at ride height before tightening the bushing end of the control arms. Once final length adjustments are made, tighten the pinch bolt to 80 ft-lbs. Put a wrench on the adjuster sleeve at this time and try to move the adjuster. Make sure pinch bolt has adequately clamped onto the shank of the control arm yoke so that the adjuster is not movable. If movable, increase torque on pinch bolt but do not exceed 90 ft-lbs.
Installation is Complete

