 FREE 1 to 3-Day Delivery on Orders $149+ Details

How to install a Synergy 2/4 Door Front Grab Handle Set on your 07-18 Jeep Wrangler JK; 2018 Jeep Wrangler JL
Installation Time
20 minutes
Tools Required
- 13mm socket & ratchet with extension
- #2 phillips screw driver
- 3/16" allen wrench
- T-15 Torx bit / driver
- 1-3/8" hole saw with ¼" pilot bit and quality drill
- Dremel / die grinder & file

Shop Parts in this Guide
GENERAL NOTES:
- It is helpful when installing the grab handles to remove the front hard top section or to fold back the front soft top section.
- The grab handle kit is a bolt on installation but you do have to trim some plastic interior trim.
Installation
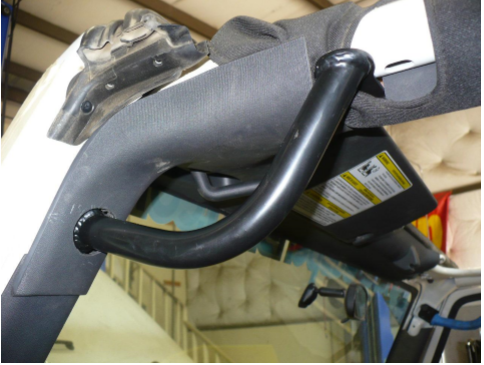
1. Reference the photo below for the completed installed part before beginning.
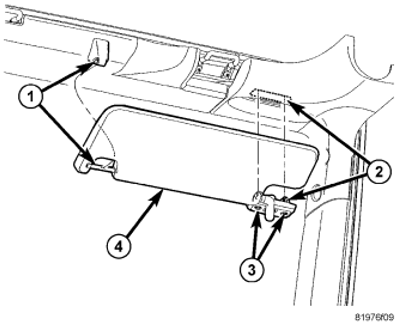
2. Remove the two vertical screws (3) that attach the windshield visors(4) Use a T-15 Torx bit for removal.
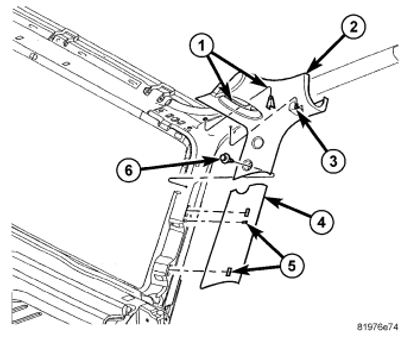
3. Remove the A-pillar trim (2). Remove the push pin fastener (6) by unscrewing the center with a phillips head screw driver, then pull the push pin out. Pull the retaining clip (3) using a trim stick or equivalent tool.
4. Remove the side bar padding cover.
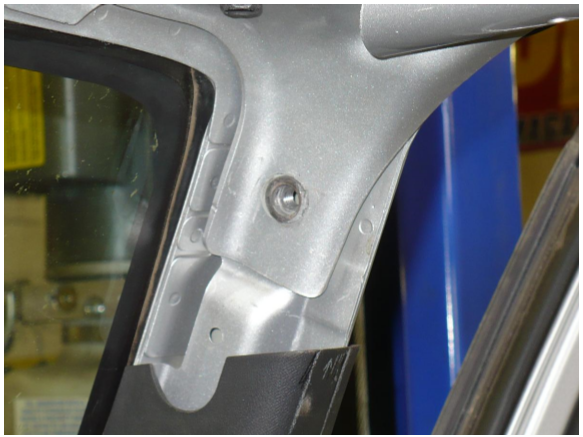
5. Remove the lower side bar bracket bolt in the windshield. Use a 13mm socket.
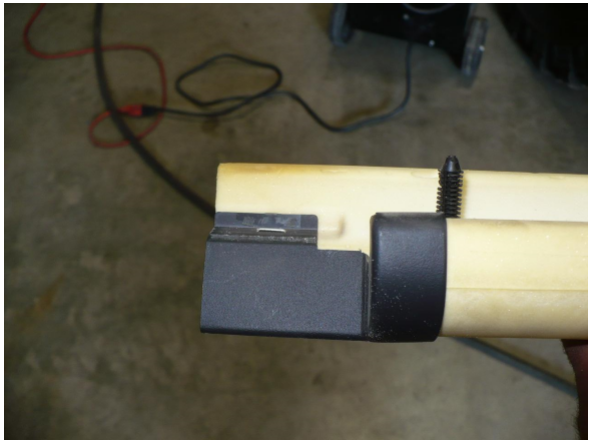
6. Test fit the grab handle to this hole using the factory bolt. Note, the grab handles are L & R specific. The angle bracket end of the grab handle attaches to the windshield and the flat end attaches to the windshield support bar with the J hook just in front of the hole for the soft top door surround. You will have to trim the windshield support bar padding to clear the handle and J hook.

7. Mark a center hole on the upper A-pillar trim. Mark 2” from the bottom lip, and 1-3/4” from the outer edge.
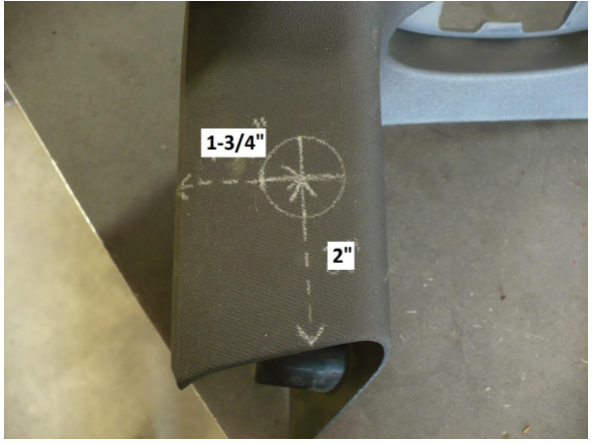
8. Drill a 1-3/8” hole in this location.

9. Clean up edges with a file to remove any burrs or remaining plastic left from hole saw.
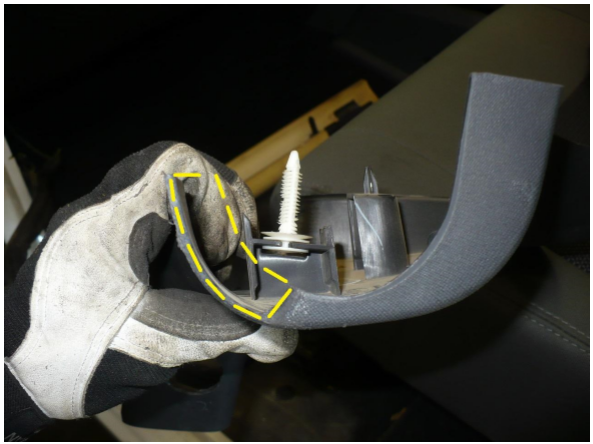
10. Next, cut the section of the A-pillar trim outlined below.

11. The section removed is shown with a dashed yellow line.
12. Slip the J-Hook side of the grab handle through the hole cut in step 8. Slip from the back / inside of the Apillar trim. See image below.
13. Install the grab handle and A-pillar trim simultaneously.
14. Begin by bolting the grab handle to the windshield using the factory bolt removed in step 5. Do not fully tighten at this time, simply snug into position.
15. Fasten A-pillar trim back to the vehicle by lining up the push-pin locations and pressing into position. Reinstall push-pin fastener #6 and corresponding screw insert which was removed in step 3.
16. Reinstall roll bar padding. Position J-hook in approximate area of attachment just forward of the roll bar padding. Pull padding cover into position and slip handle through the opening for the soft top door surround as pictured below.
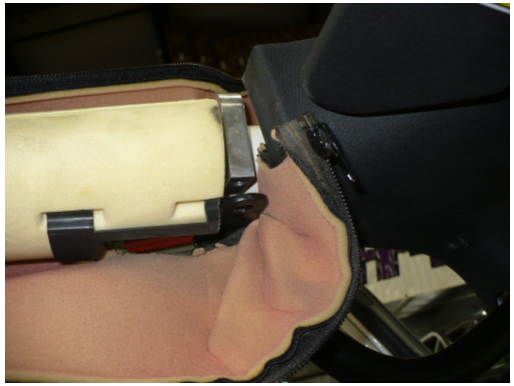
17. Attach grab handle to J-hook with the 5/16” button head screw provided in the kit. Use a 3/16” allen wrench and tighten to 14 ft-lbs. Tighten factory windshield bolt to 14 ft-lbs at this time as well.
18. Zip up roll bar padding and tuck into factory position for a clean finished look.
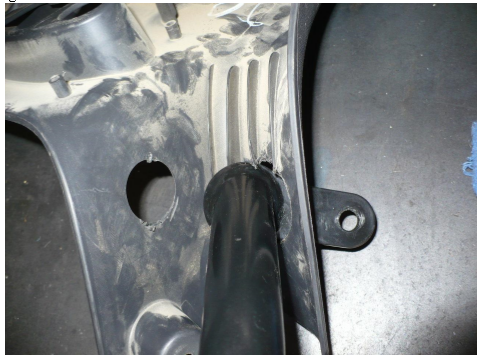
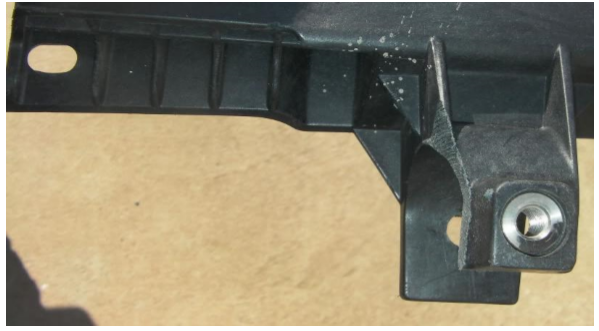
- Note, on soft top equipped vehicles, some will require the upper A-pillar trim to be notched to clear the back of the handle. The picture below shows the removal of 1/8’’ of material for clearance.

19. Installation is Complete.


