 FREE 1 to 3-Day Delivery on Orders $149+ Details

How to Install Synergy Frame Side Front Lower Control Arm Gusset Kit (07-18 Wrangler JK) on your Jeep Wrangler
Installation Time
2 hours
Tools Required
- Basic simple hand tools.
- 4-1/2” angle grinder with sanding disc, or 3” air sander with sanding disc to prep surfaces for welding
- Welder. Mig is preferred, but stick or Tig are acceptable as well.

Shop Parts in this Guide
GENERAL NOTES:
These instructions are also available on our website; www.synergymfg.com. Check the website before you begin for any updated instructions and additional photos for your reference.
This is a weld on gusset kit and should be installed by an experienced welder.
We recommend installing one side at a time.
PARTS LIST:
5022-01 JK, 07-PRESENT, FRONT, LOWER CONTROL ARM BRACKET, GUSSET KIT
(1) 502201-L JK, 07-Present, Front Lower Control Arm Bracket, Welded Gusset, Left
(1) 502201-R JK, 07-Present, Front Lower Control Arm Bracket, Welded Gusset, Right
(2) 502201-03 JK, 07-Present, Front Lower Control Arm Bracket, Gusset Kit, Outer Tab
(2) 502201-04 JK, 07-Present, Front Lower Control Arm Bracket, Gusset Kit, Forward Tab
INSTALLATION:
1) Installation can be done with the vehicle on the ground and control arms in place, however we advise to remove control arms as to not melt suspension joint bushings during welding.
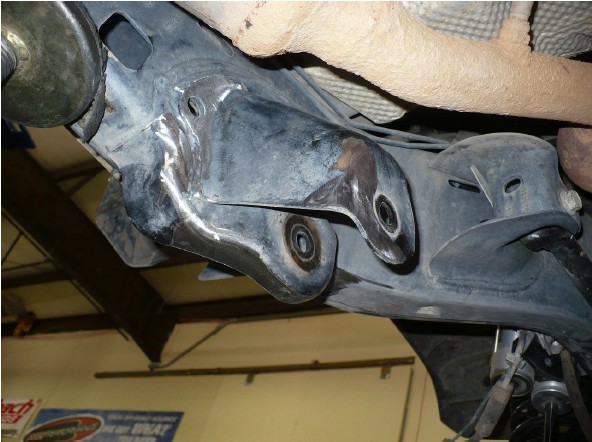
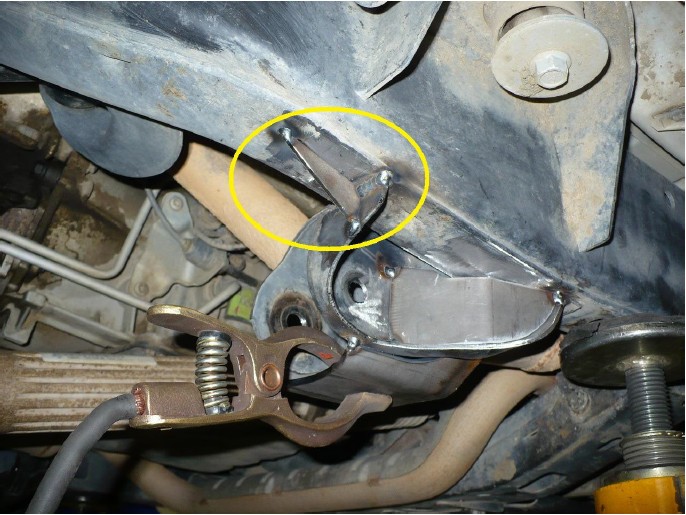
2) Start on the driver’s side. Begin by test fitting gusset plates onto the vehicle and marking which areas need to be prepped for welding.
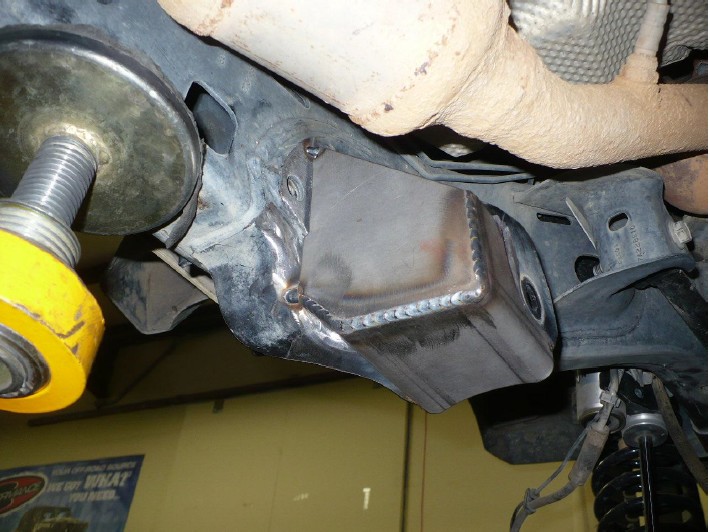
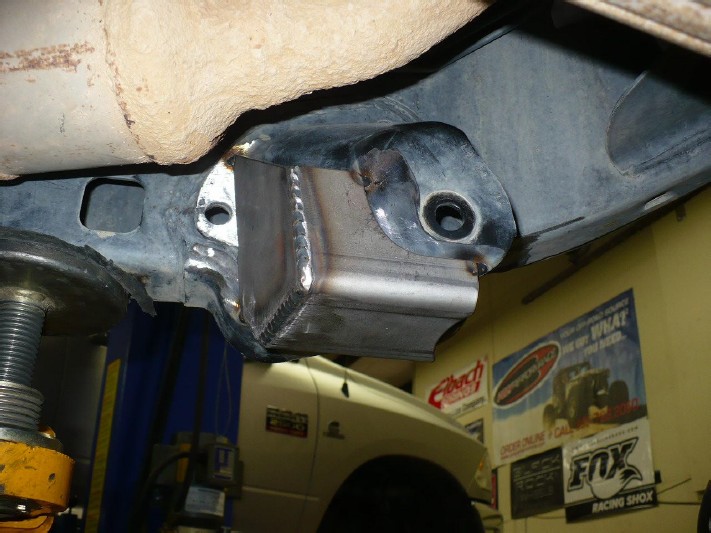
3) Picture below show orientation of gussets.
4) Next, grind or sand smooth all marked areas for clean welding surface.
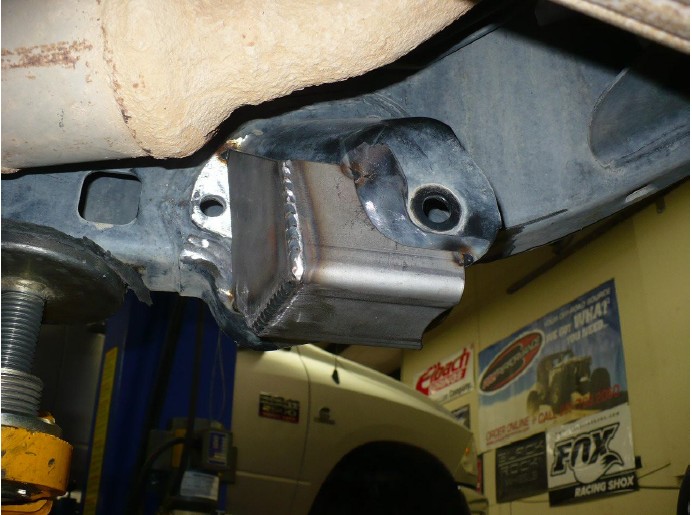
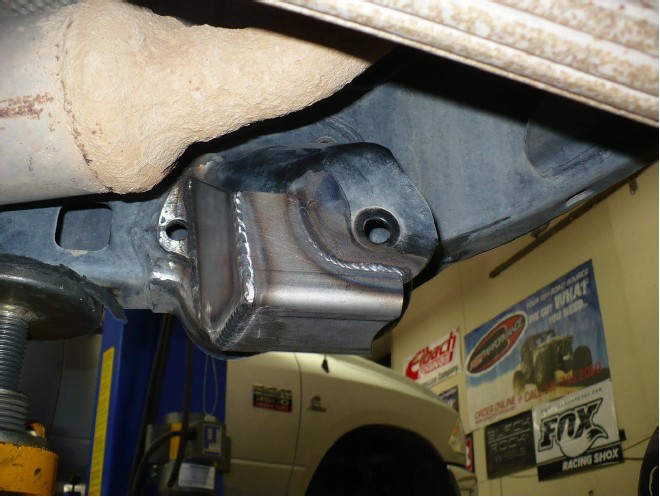
5) After welding surface is clean, tack weld the 502201 Welded Gusset and 502201-03 Outer Gusset plate into place. Be sure to use a level and level the bottom of the 502201 bracket with the bottom of the frame.

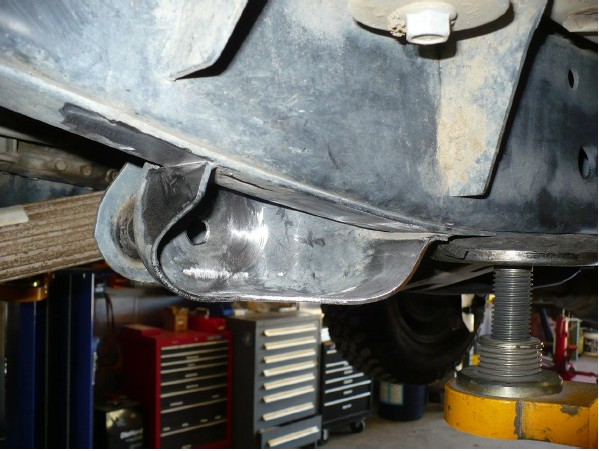
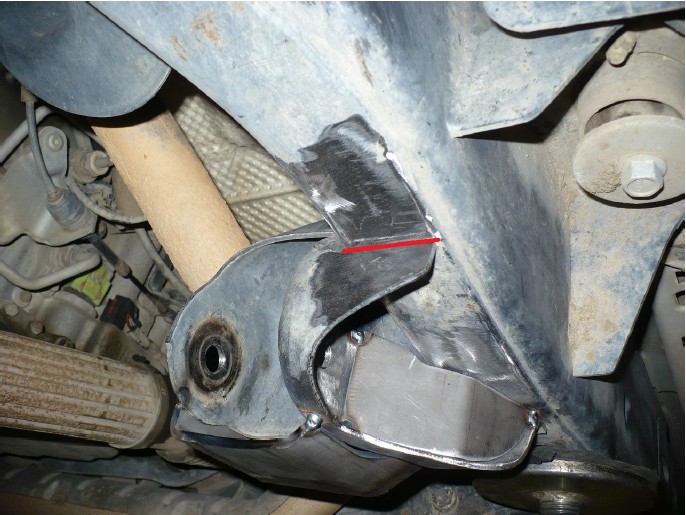
6) Next weld the seam, shown below in red, on the front most part of the stock lower control arm mount.
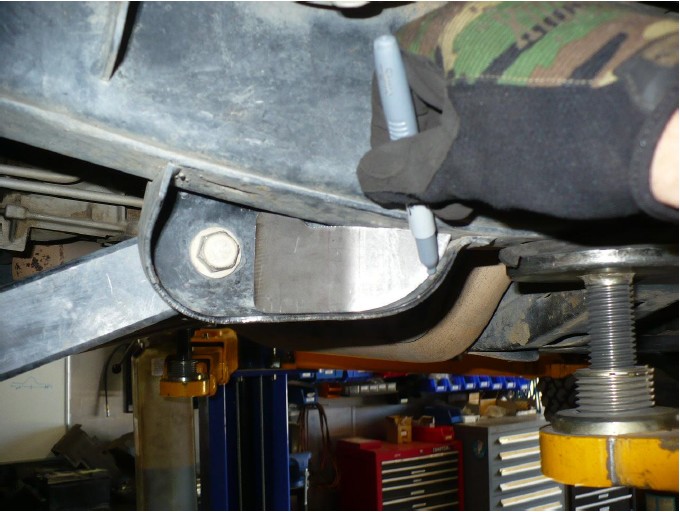
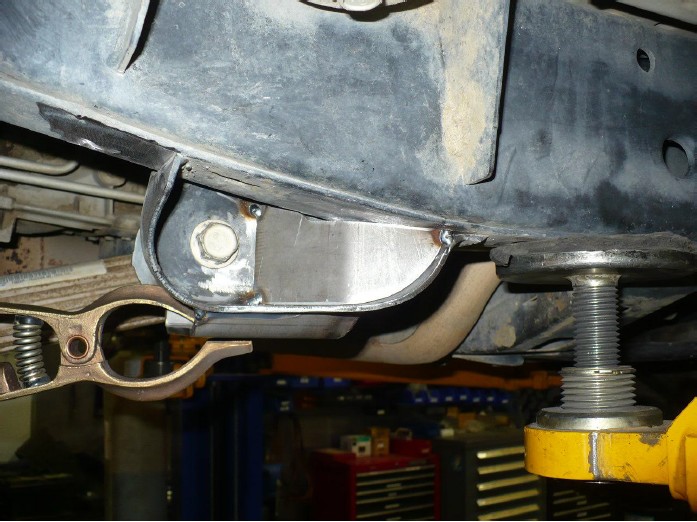
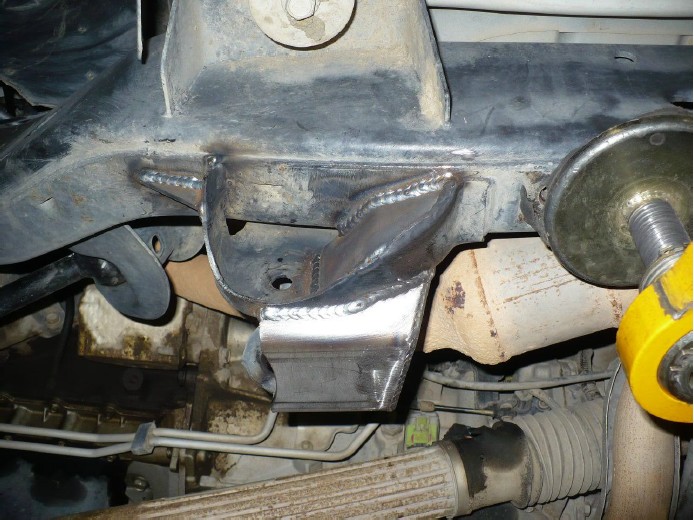
7) Once the seam is welded, tack the 502201-04 gusset tab into to place. The tab should be parallel with the frame of the vehicle. As shown below.
8) After all gussets and tabs are tacked into place, fully weld all seams as shown.

9) Deburr all welds and paint exposed areas of metal to prevent rust.
10) Reinstall any control arms removed for installation of gusset kit and torque to mfg specifications. (125 ft-lbs for OEM, or 9/16” Gr8 hardware.)

Installation is Complete

