 FREE 1 to 3-Day Delivery on Orders $149+ Details

How to Install Synergy Baja Basket on your Wrangler
GENERAL NOTES:
• These instructions are also available on our website; www.synergymfg.com . Check the website before you begin for any updated instructions and additional photos for your reference.
• The installation of this rack requires removal of hard top or rear portion of the soft top. The top can be reinstalled after installation is complete.
• Installation of rack mounts requires cutting four holes in the factory roll cage padding cover.
• Having an extra set of hands to help stabilize and align the rack will make the installation process go smoothly.
• A pair of 5 1/2' long, 2" x 4" pieces of wood is used to level the rack, set height location of mounting clamps and make the installation process easier.
1. Remove the factory hard top or the rear portion of the soft top to gain access to the rear portion of the roll cage.
2. Remove the factory rear seat.
3. Remove rear upper seat belt turning loop.
4. Unzip the factory C-pillar roll cage padding cover and remove C-pillar padding
5. Unpack the 2 door JK Baja Basket and all the included components.
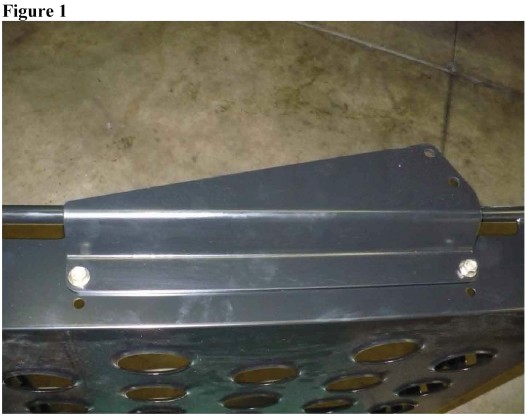
6. Install the two side mounting plates onto the upper side holes of the rack from the inside out. Use the (4) 3/8" x 3/4" bolts, (4) lock nuts and (8) washers. Install a washer under the head of each bolt and under each nut. Torque the bolts to 30 ft-lbs. See Figure 1
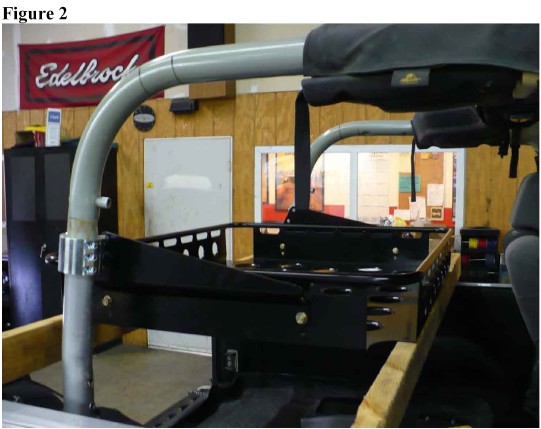
6. With the side mounting brackets installed, first place two 2 x 4" x 5 1/2' pieces of wood across the rear tub of the JK. See Figure 2. Position the wood so the rack rests on the flat surface of the rack, do not place on flared holes. This will level the rack to the preferred installation height.
7. Center the rack between the roll cage.
8. Disassemble the two tube clamp mounting brackets.
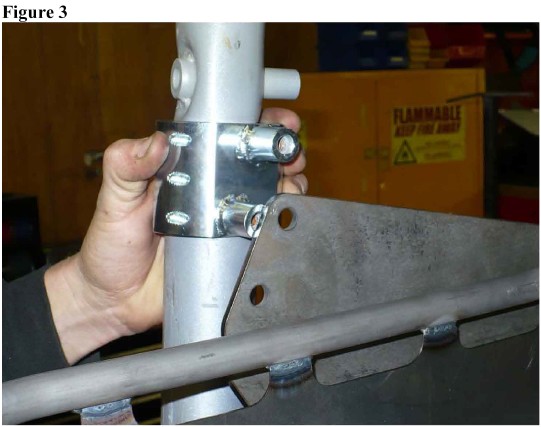
9. Slide the driver side tube clamp down the top of the cage between the rack side mounting plate. See Figure 3
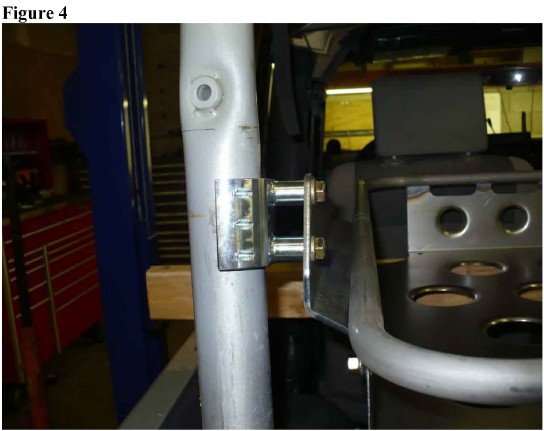
10. Align the tube clamp and rack side mounting plate holes. Install the (2) 7/16 x 1" bolts and a 7/16" lock washer under the head of each bolt. Tighten to finger tight. See Figure 4
11. Repeat steps 9 and 10 for the passenger side tube clamp.
12. With both tube clamp mounting brackets installed, tighten down all four 7/16" bolts on the side mounting plates.
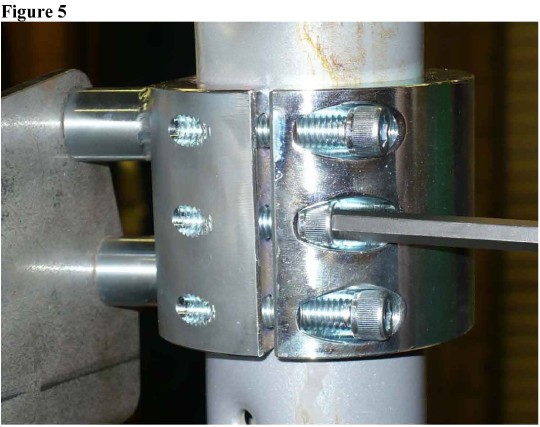
13. Next, install the tube clamp mounting bracket outside clamp to both sides of the roll bar. Use the (6) 5/16 x 1" socket head cap screws and a 1/4" allen wrench. Torque the bolts to 20 ft-lbs in a cross directional tightening pattern. See Figure 5
14. The rack mounting clamp position is now set.
15. With the rack still supported by the 2 x 4" pieces of wood, remove the (4) 7/16" side mounting bolts. Remove the rack assembly and set aside. Now you are ready to mark holes in the factory roll cage padding to make room for the tube clamp mounting studs to poke thought.
16. With the rack removed, pull the factory roll cage cover down over the tube clamp. Zip up the zipper over the tube clamp.
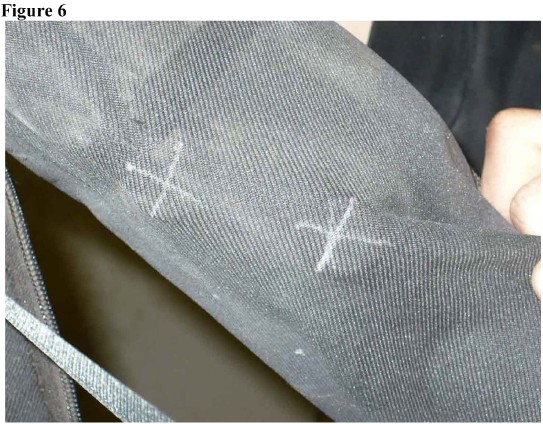
17. Pull the cover tight over the tube clamp studs. With a pencil make two "X" marks for a cut template. See Figure 6
18. Repeat step 16 and 17 for both sides of the vehicle.
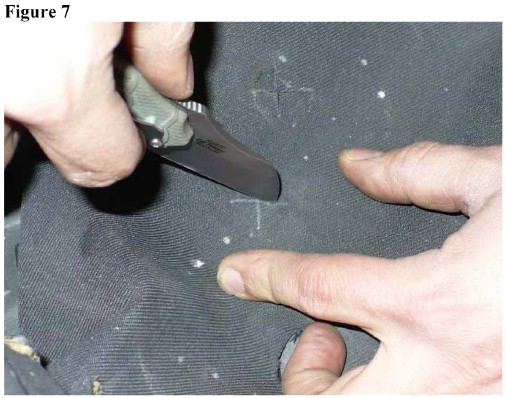
20. Cut along the lines of each "X" mark on the roll cage cover. See Figure 7
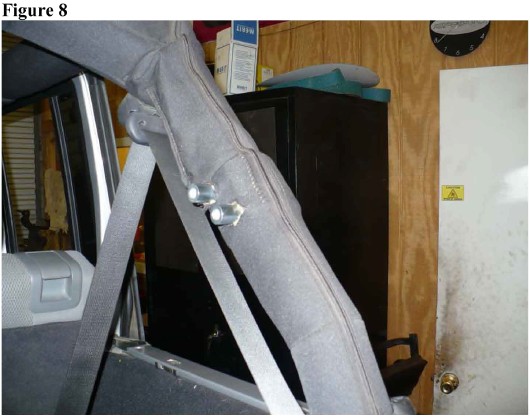
21. Reinstall the roll cage padding. See Figure 8
22. Reinstall the rack using the (4) 7/16" mounting bolts and lock washers. Torque the bolts to 40 ft-lbs.
23. Remove the 2 x 4" wood beams and check to make sure the rack is level. If adjustment is needed, loosen the 7/16" bolts slightly and adjust to the desired position.
24. The rack height can be adjusted by moving the side mounting plate position on the rack to the bottom hole or slide the roll cage clamps up or down on the roll cage tube.
25. The upper seat belt retaining loop can be reinstalled. 26. Soft or hard top can be reinstalled.
