FREE 1 to 3-Day Delivery on Orders $149+ Details

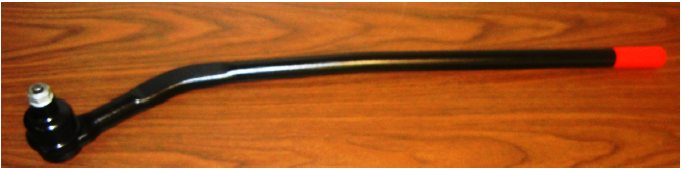
How to Install Steer Smarts YETI HD 26 No Drill Top Mount Outer Draglinke End w/ Griffin Attenuator

Shop Parts in this Guide
IMPORTANT: READ THIS PAGE BEFORE INSTALLATION
Requirements & Special Considerations for 77058001 – Yeti HD 26 JK Draglink Fit and Function
1. Yeti HD 26 JK ball stud is designed to be attached to steering knuckles with stock sized taper holes. If using an aftermarket knuckle, make sure the taper hole has the same dimensions as the stock taper hole. Attaching the linkage to an oversized or undersize knuckle taper hole may cause ball stud failure, or premature socket wear out. This ball stud cannot be installed into aftermarket knuckles with the taper reversed.
2. Torque all nuts as specified throughout instruction and on page 3. EXCESSIVE OVER TORQUE OR UNDER TORQUE COULD CAUSE LINKAGE FAILURE.
Special Considerations
1. It may be necessary to turn the wheels fully right to gain access to the passenger side ball stud nut for tightening. If the clearance gained is insufficient, the passenger side tie rod may need to be disconnected.
2. While tightening the linkage ends into position, make sure the top of the boot seal positions itself around the head of the ball stud and does not get pinched between the faces of the head and knuckle/pitman arm.
3. A professional wheel alignment is recommended for setting steering wheel alignment after installation.
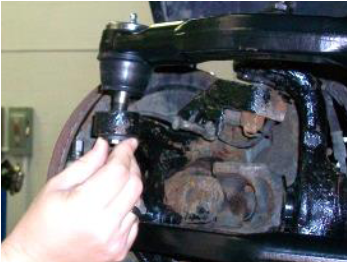
1. Loosen, without removing, the ball stud nut on the draglink outer end using a 21mm socket.
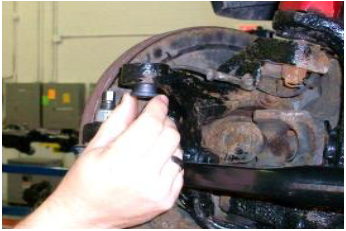
2. Unscrew the nut until the top of the nut is above the end of the ball stud to prevent damage to the ball stud. Using a hammer, break the stud taper loose separating the stud from the knuckle.
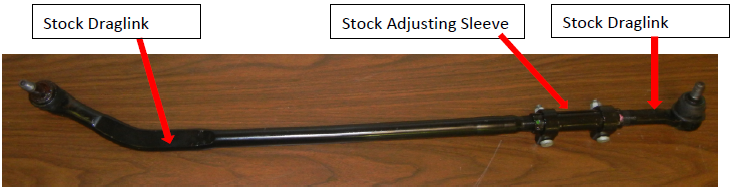
3. Loosen the clamp nuts on the adjuster sleeve using a 15mm socket.
4. Unthread the stock passenger side draglink from the adjuster sleeve.
5. Twist the self-locking tapered sleeve into the bottom of the knuckle mounting hole as shown in Figure 4. (The selflocking tapered sleeve is stored between the seal and the plastic seal shipping protective cover on the JK HD Yeti 26 Draglink)
6. Thread the Yeti HD 26 JK Draglink into the adjusting sleeve until the ball stud can be installed through the knuckle hole from the top side shown in Figure 5 and tighten the nut until the nylock on the nut engages.
7. Hold the hex on the end of the ball stud, using a 10 mm wrench, to keep the stud from turning in the socket while tightening the ball stud nut using a 21 mm wrench. Tighten until approximately 40 ft.-lbs. of torque is achieved. Once the 40 ft.-lbs. of torque is achieved, the nut is to be tightened to 120-130 ft.-lbs. (Very Important) using a 21mm socket.
8. Shorten or lengthen the draglink by turning the adjuster sleeve until steering wheel alignment is set.
9. Retighten the clamp nuts on the adjuster sleeve to 26-30 ft.-lbs. once the steering wheel is aligned.
10. Grease the Yeti HD 26 JK socket until grease purges around the boot seal; wipe off excess grease.