 FREE 1 to 3-Day Delivery on Orders $149+ Details

How to Install Star Fabricating Smart Door Hinges on your 2007-2015 Jeep Wrangler JK
Installation Time
2 hours
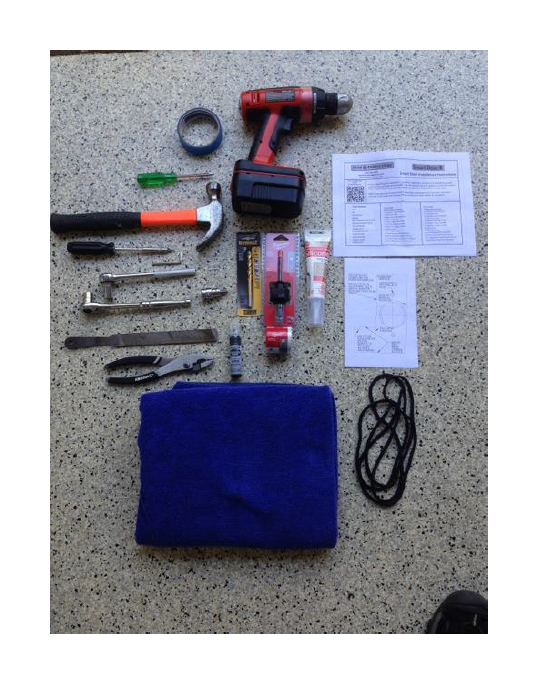
Tools Required
- Tape (any tape works)
- Drill
- Center punch (I used a Phillips head screwdriver)
- Hammer
- Allen wrench 5/32”
- (2) Socket wrenches 13mm (you can manage with one)
- Torx socket T50
- Drill bit 5/16” (bi-metal to drill through steel)
- Bi-Metal hole saw 2”
- Touch up paint (any color works)
- Silicone sealant (any color works)
- Towel or pillow
- Rope or bungee cord
- Metal file
- Pliers
- Vacuum
- Dremel (used to adjust size of drilled holes)
- Telescoping magnet (in case clip on nuts drop into door)
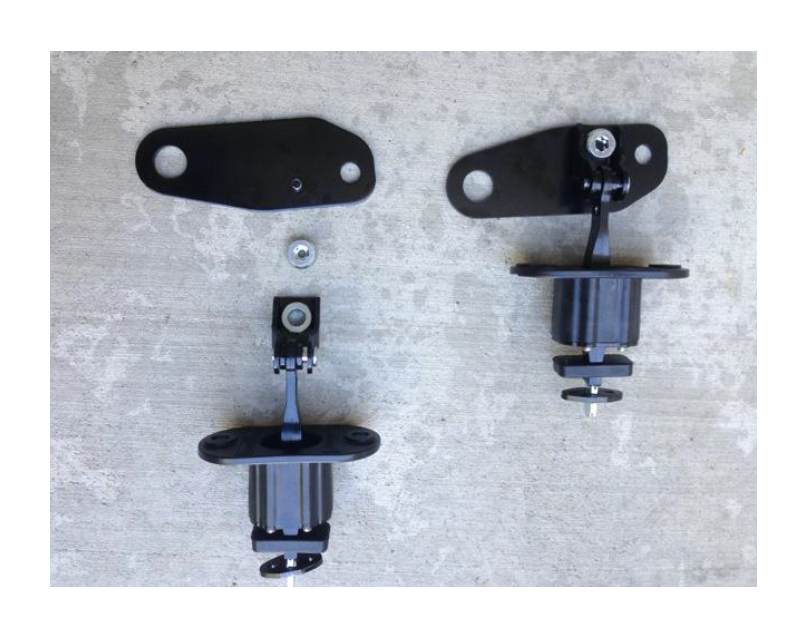
Package Contents:
Driver side Smart door hinge
Passenger side Smart door hinge
Templates
Installation Notes: The Smart Door Hinge has been improved from an earlier model making installation easier. The Smart Strap fabric door extensions are no longer used.
Installation Instructions:
1. Before starting photo.
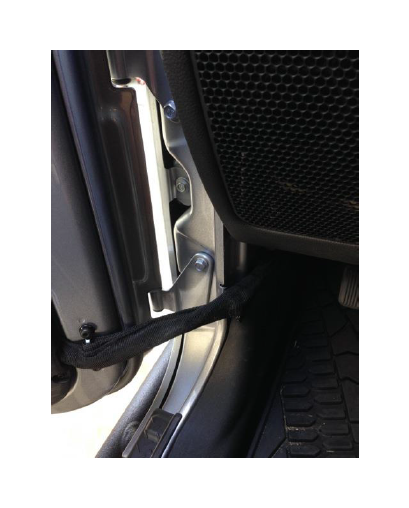
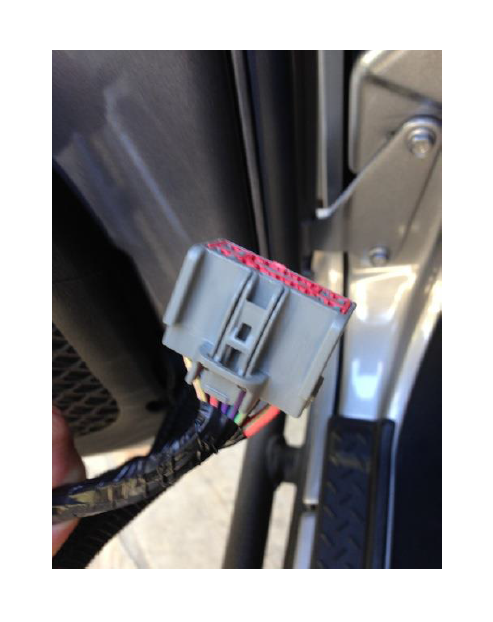
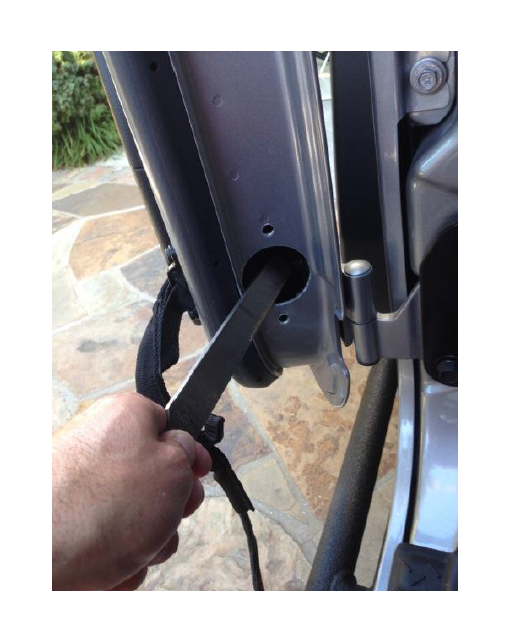
2. Disconnect the electrical connection and fabric door strap.
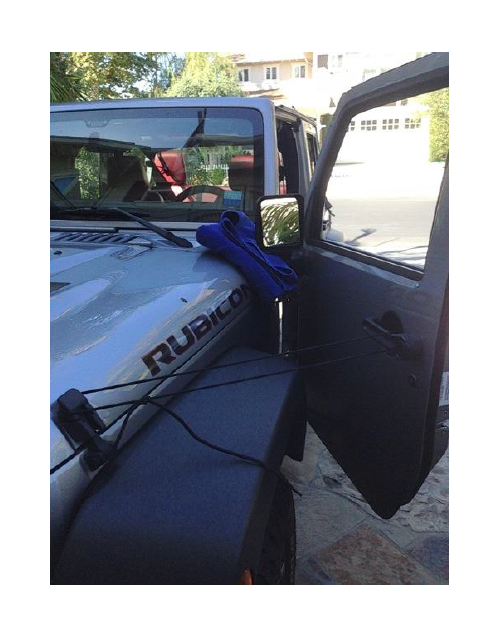
3. Fully open the door and place a towel or pillow between the door and the quarter panel. Secure the door in place with a rope or bungee cord.
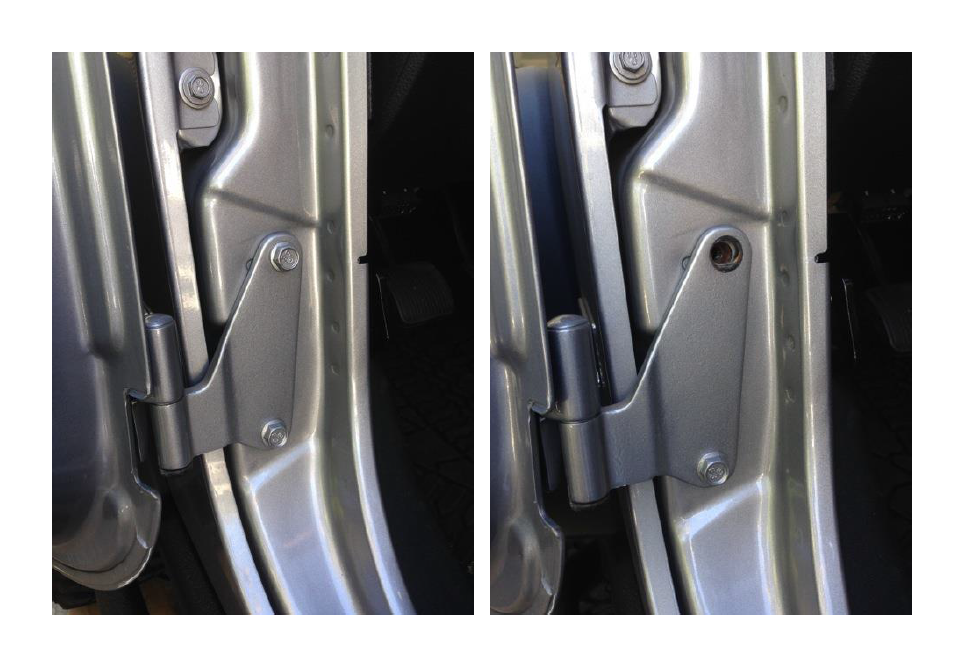
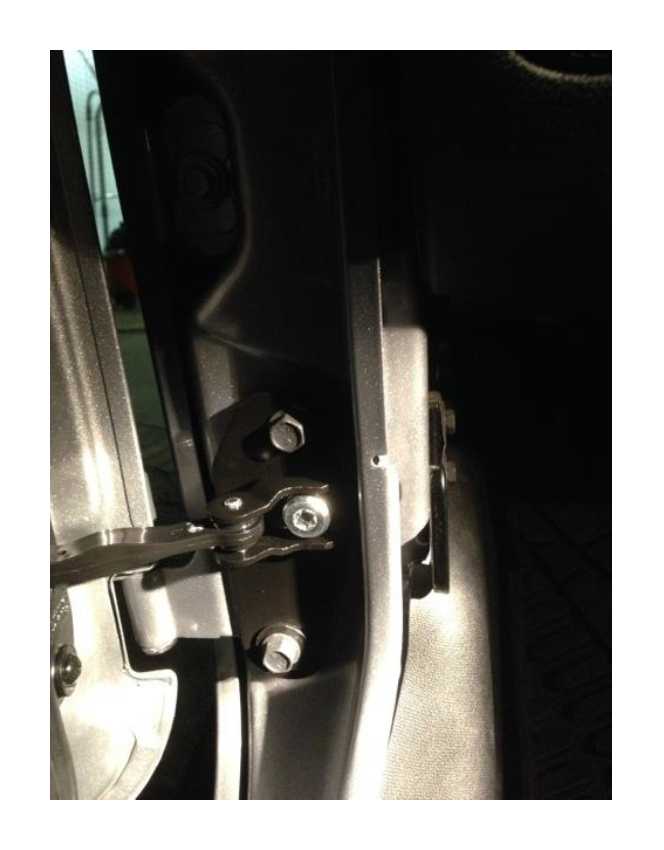
4. Use your Torx Socket T50 to separate the hinge plate from the hinge (left side of photo).
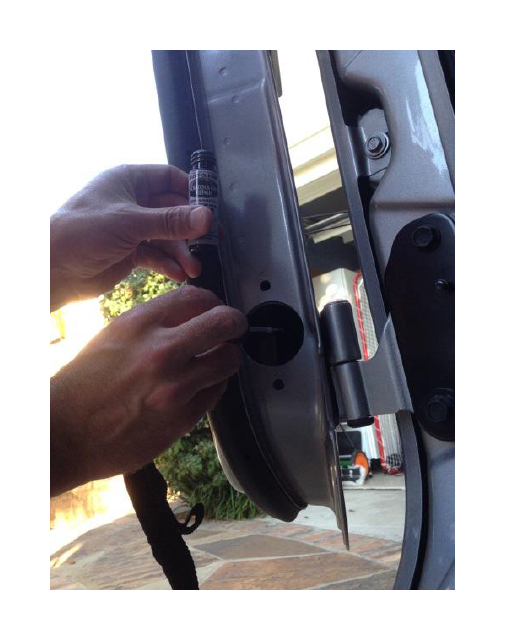
5. Remove the top bolt on the Jeep’s lower door hinge.
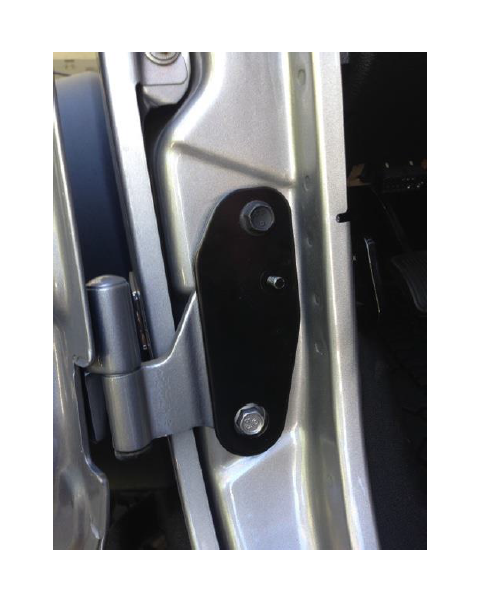
6. Place the Star Fabricating hinge plate over the Jeep’s hinge plate, and secure it in place with the Star Fabricating 13mm replacement bolt. Do not over tighten the bolt – just make sure it is firmly in place. (Optional: If you have a second 13mm socket, you can place it through the bottom hole of the Star Fabricating hinge plate and onto the Jeep’s 13mm lower bolt to keep the Star Fabricating hinge plate in place.)
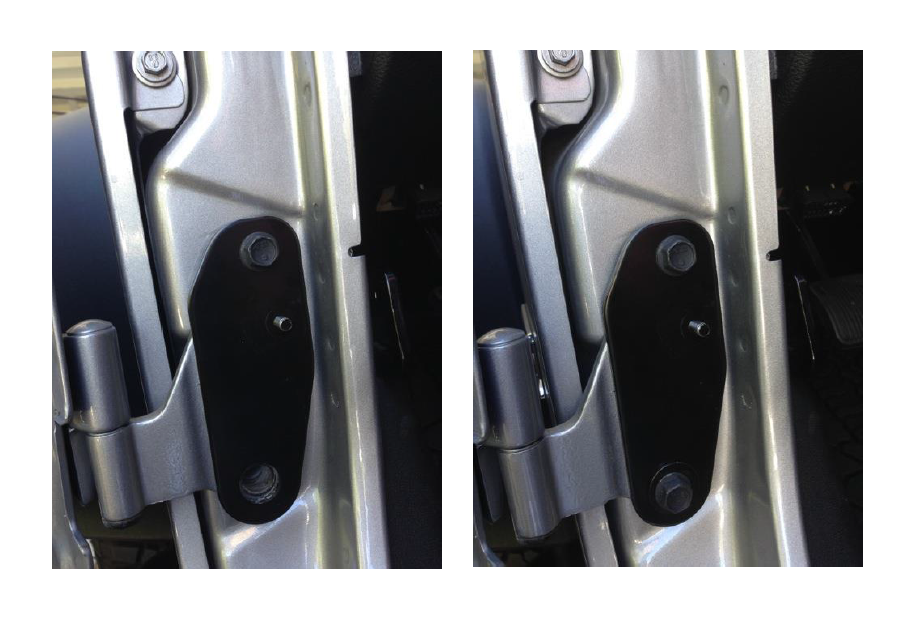
7. Remove the bottom bolt on the Jeep’s lower door hinge. Replace it with the Star Fabricating washer plug and 13mm replacement bolt. Do not over tighten the bolt – just make sure it is firmly in place.
8. Cut out the two door templates very carefully.

9. Fold the template where it says, “Fold up at this edge.” Carefully tape the template in place on the door. Double check that the template is properly positioned at all indicated marks. Ensure that the two-inch circle in the center of the template is centered up on the door wall as this will be where the two-inch hole will be drilled.
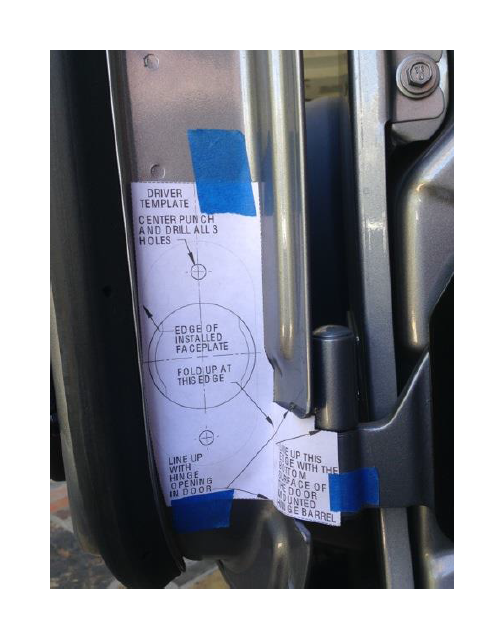
10. Mark the three drilling locations by placing the center punch (or Phillips head screw driver) on the spot and hitting it with your hammer.
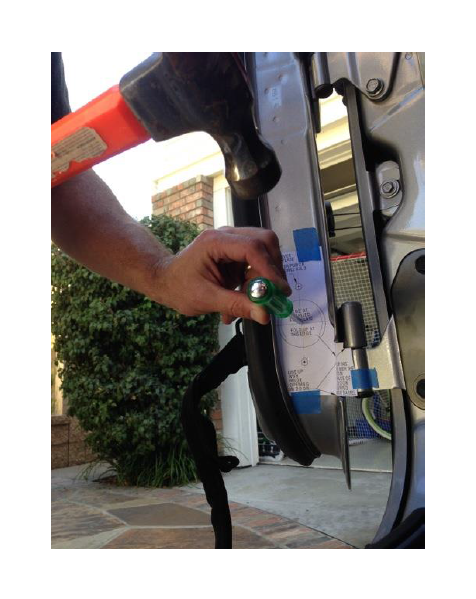
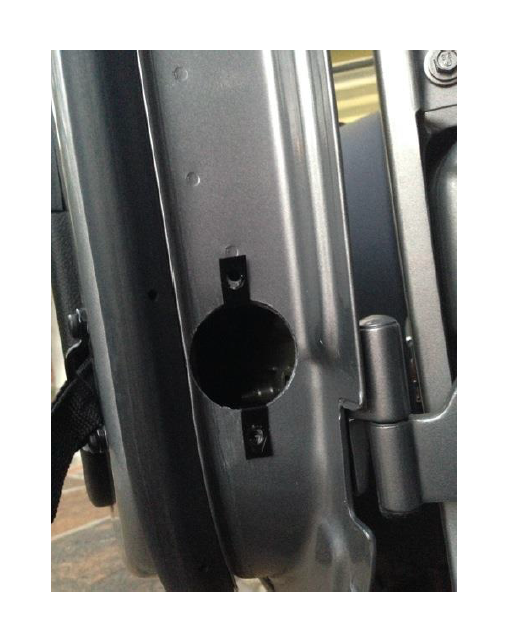
11. Remove the template and drill the two-inch hole in the center marking using the 2” Bi-Metal hole saw. Now Stop! Do not drill the other two holes until you have ensured everything lines up.
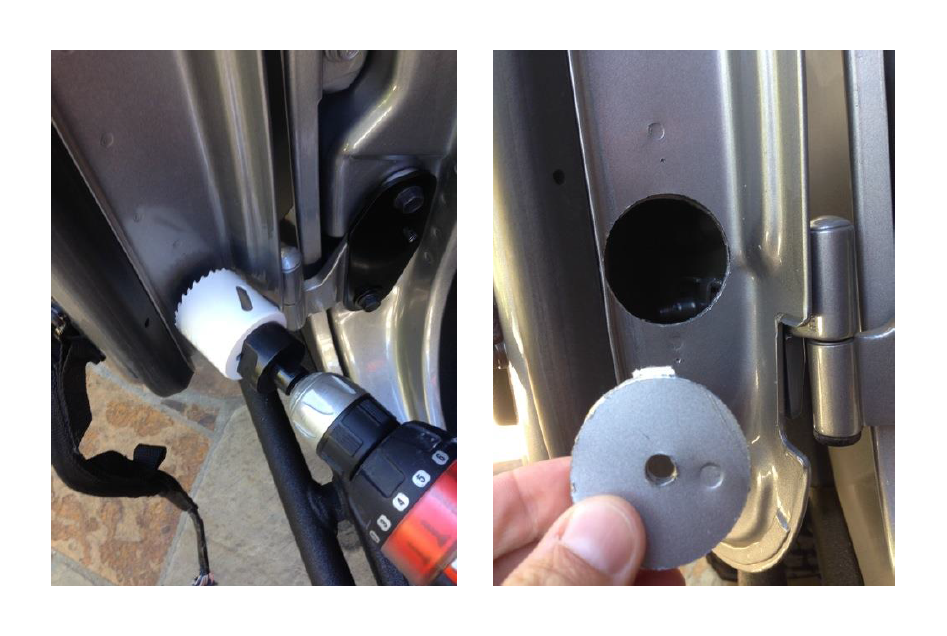
12. Insert the Star Fabricating Smart Door Hinge into the new two-inch hole. Make sure that your marks for the two additional holes are centered up in the openings of the hinge assembly. Assuming that you were meticulous in cutting out the templates, taping them to the door, and marking the drill points with a center punch, your drill markings should be perfectly placed.
13. Remove the hinge assembly and drill the two additional holes using a 5/16” bi-metal drill bit.

14. (Optional Step) File the rough edges of the openings and vacuum up the metal shavings.
15. Use touch up paint on all three openings to seal the raw metal and prevent rusting later on. Allow the touch up paint to dry.
16. Attach the clip on nuts to the upper and lower holes. I accidentally dropped one of the nuts into the door, but retrieved it using a telescoping magnet. If the clips are too tight, pry them open a bit with pliers and a regular screwdriver.
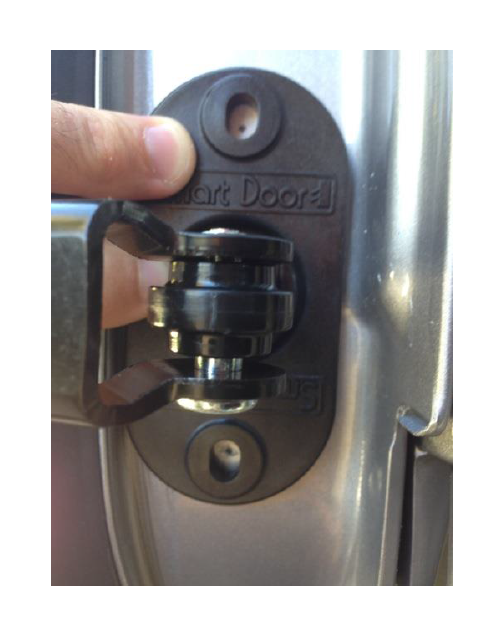
17. Test to make sure the nuts, door holes, and hinge assembly all line up properly before final tightening. Insert the hinge assembly into the hole, ensuring the when doing the left door that the “L” is facing up. Likewise, when doing the right door, make sure that the “R” is facing up.
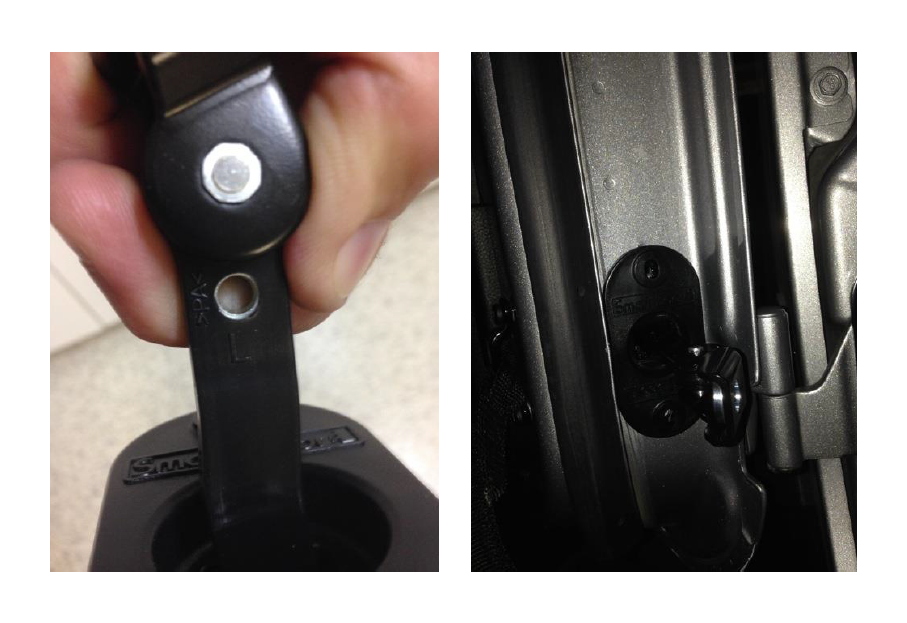
18. Use the 5/32” Allen Wrench to tighten the 1” screws into the hinge assembly holes and the clip on nuts. This was the trickiest and most challenging part of the installation. If the screws do not align properly with the opening on the clip on nut, you will not be able to secure the hinge assembly. I tried using different angles (top to bottom or bottom to top), and I was able to get the screws in on the first door.
On the second door, I needed to use a Dremel with a grinding head to make the holes a bit larger so that the screws and the clip on nuts would align. Do not tighten the screws – just make sure that they will tighten properly when you are ready for that step.
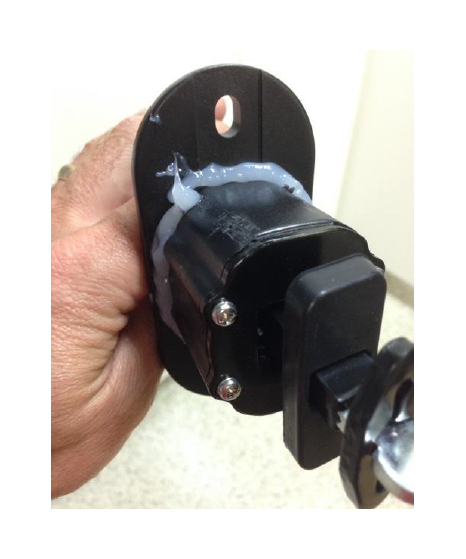
19. Once you are sure that the screws and nuts will properly align, remove the screws and the hinge assembly. Place a bead of Silicone sealant completely around the hinge’s backside to create a water tight seal.
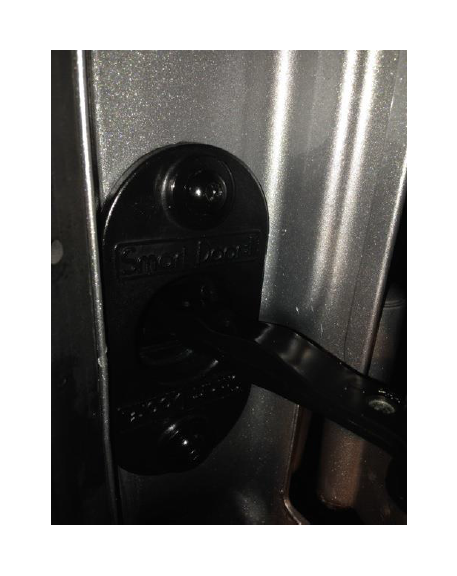
20. Insert the hinge assembly into the hole, ensuring the when doing the left door that the “L” is facing up. Likewise, when doing the right door, make sure that the “R” is facing up. Use the 5/32” Allen Wrench to tighten the 1” screws into the hinge assembly holes and the clip on nuts. Tighten firmly, but not to full strength yet.
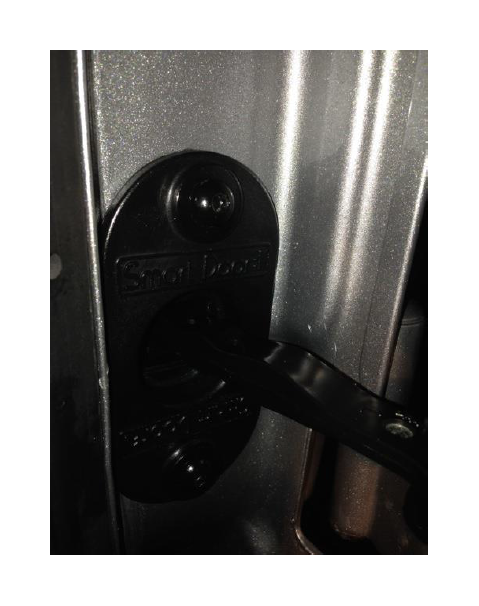
21. Secure the pivot arm of the hinge assembly to the hinge plate by replacing the Torx nut and using your Torx Socket T50 to tighten it. Do not over tighten the nut until you have tested the door to make sure that it opens and closes properly without binding. Do not force the door – make adjustments to ensure smooth operation.
22. Once you have confirmed that the door opens and closes smoothly without binding, then securely tighten all five screws/bolts. Congratulations! One door complete, one to go!

Installation Instructions Written by ExtremeTerrain Customer Paul Deutsch 10/13/2014
