FREE 1 to 3-Day Delivery on Orders $149+ Details

How to Install Snyper Gas Tank Skid Plate (07-18 Wrangler JK 4 Door) on your Jeep Wrangler
PROCEDURE
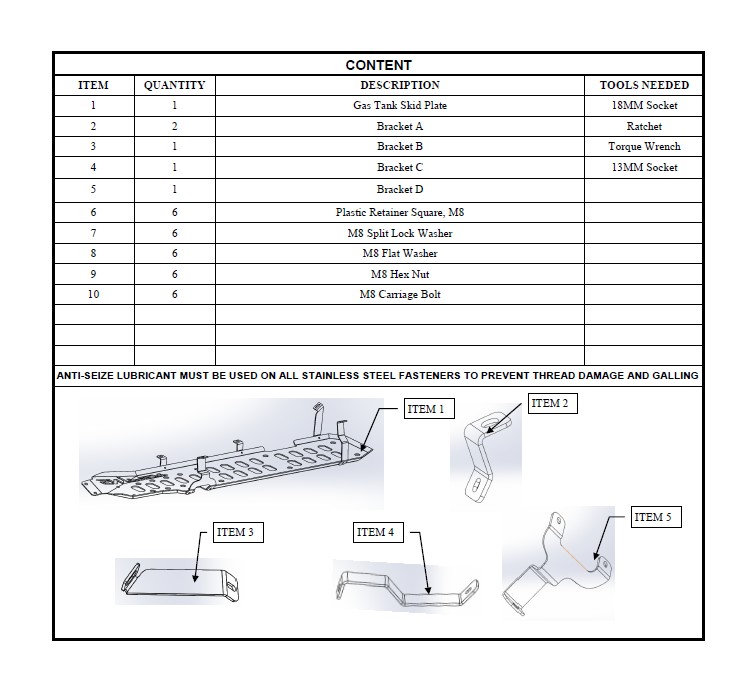
1. Remove contents from box, verify if all parts listed are present and free from damage.
Carefully read and understand all instructions before attempting installation.
WARNING. GAS TANK IS MOUNTED BY BOLTS USED TO INSTALL THIS SKID PLATE. PLEASE DO NOT REMOVE ALL BOLTS AT ONCE. BRACKETS HAVE TO BE INSTALLED ONE AT A TIME.
(This skid plate can be installed by one person but it is highly recommended to have assistance of a second person.)
Failure to identify damage before installation could lead to a rejection of any claim.
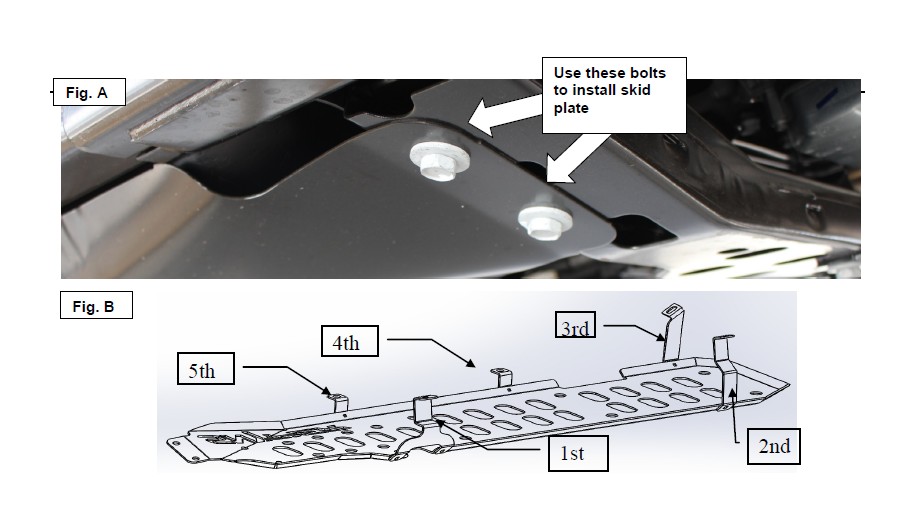
2. Using an 18MM wrench, remove the two bolts that hold the stock gas tank skid plate to the crossmember Refer to Fig. A (Please note that the stock gas tank skid plate will not be removed; your Snyper Skid Plate is designed to be mounted over the stock skid plate.) Using this stock hardware, begin installing your Snyper Skid Plate at this location and thread in these two bolts completely but do not tighten.
2. Proceed to install the brackets using the order in Fig. B. Make sure to install one by one and tighten before removing the bolt for the next bracket. All the stock bolts require an 18MM socket to be removed. When re-installing stock bolts, start threading by hand before using wrench to avoid cross-threading. Torque M8 bolts to 15-17 FT/Lbs and M12 stock bolts to 50-55 FT/Lbs
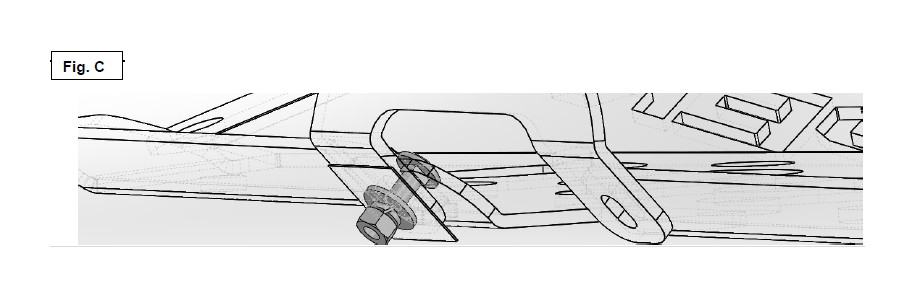
4. Install carriage bolts with the head towards the gas tank and leave loose. Tighten these to the recommended torque at the end. (In case of an impact, the round shape of the bolt will not penetrate the gas tank) . Please refer to Fig.C.
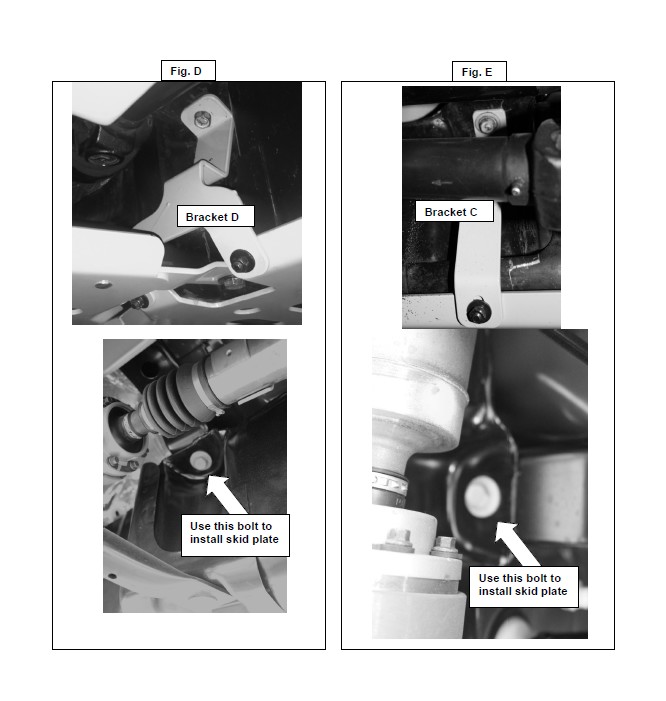
4. Bracket D after installation shown in Fig. D with mounting location shown underneath
Bracket C after installation shown in Fig. E with mounting location shown underneath .
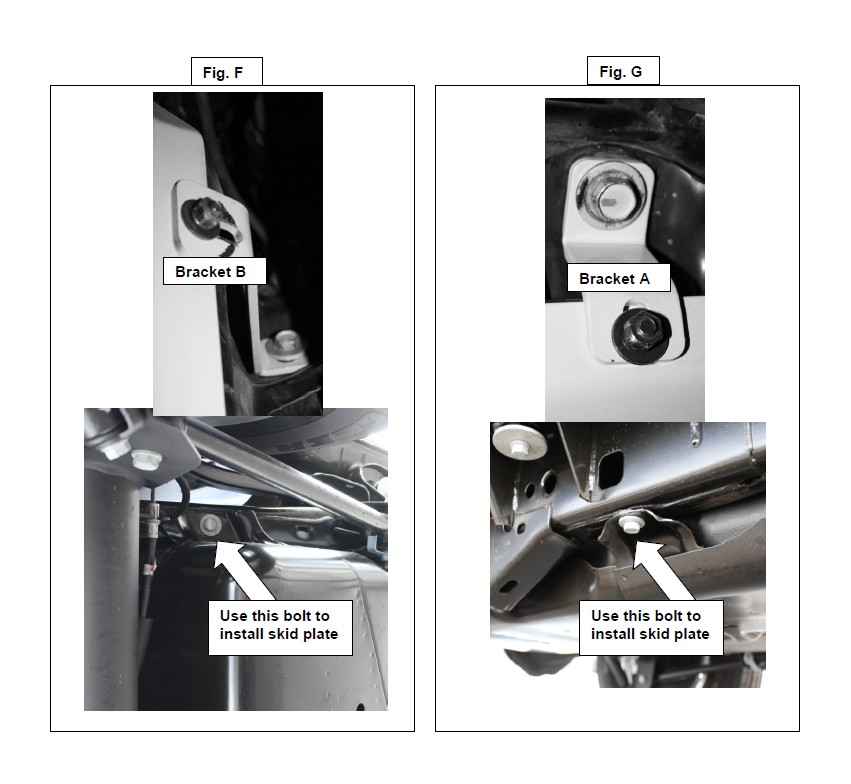
Bracket B after installation shown in Fig. F with mounting location shown underneath .
Bracket A after installation shown in Fig. G with mounting location shown underneath .
CARE INSTRUCTIONS
REGULAR WAXING IS RECOMMENDED. DO NOT USE ANY TYPE OF POLISH OR WAX THAT MAY CONTAIN ABRASIVES.
STAINLESS STEEL PRODUCTS CAN BE CLEANED WITH MILD SOAP AND WATER. STAINLESS STEEL POLISH SHOULD BE USED TO POLISH SMALL SCRATCHES.
GLOSS BLACK FINISHES SHOULD BE CLEANED WITH MILD SOAP AND WATER.
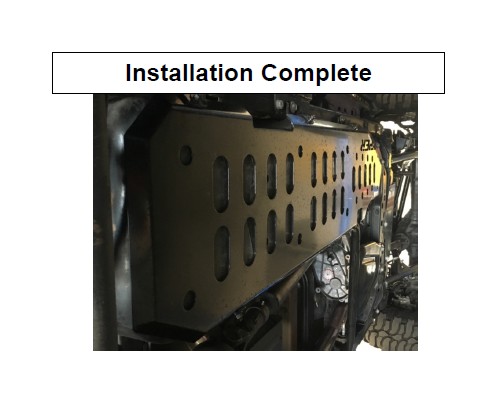
Installation Complete