 FREE 1 to 3-Day Delivery on Orders $149+ Details

How to Install Smittybilt XRC Rock Sliders on your 1987-1995 Wrangler

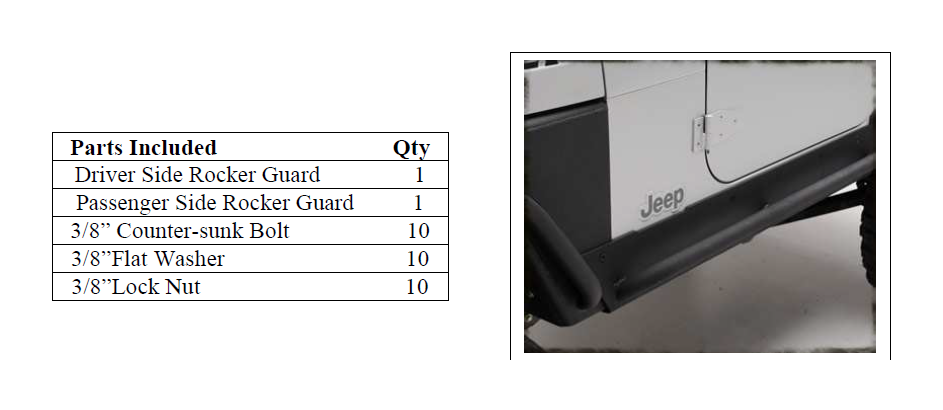
Shop Parts in this Guide
NOTE: Carefully read entire instructions thoroughly before attempting to install this part.
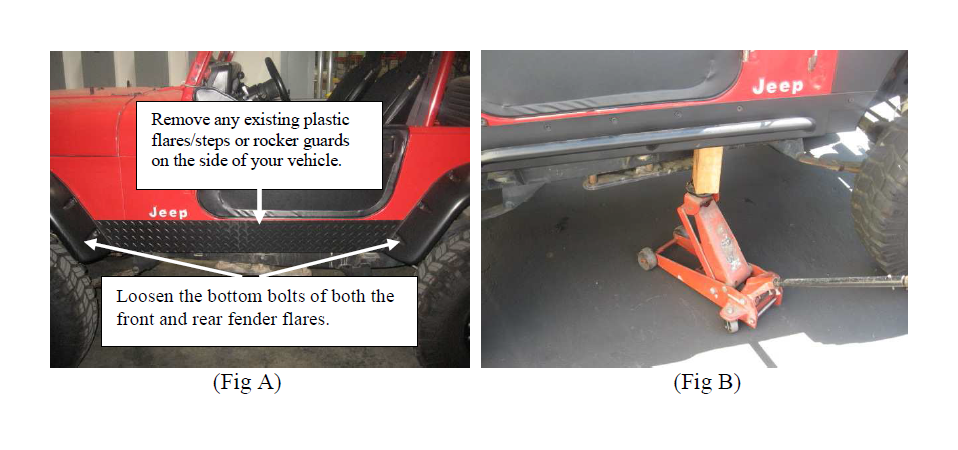
Step 1: Take off and remove any existing flares or rocker guards that you may have on your vehicle. (Fig A) Make sure to clean the side of the vehicle before installing the guards.
Step 2: Loosen the lower bolts on each of the front and rear flares. (Fig A)
Step 3: Remove all of the body mount bolts on the passenger side (or which ever side you begin with) including the front one. Note: Make sure vehicle is on a level surface.
Step 4: Raise the body of the vehicle slightly using a floor jack. Be sure to lift near a body support to prevent any damage to your vehicle. (Fig B)
Step 5: Hold the guard up close to vehicle to identify which body mounts line up with the cut out slots on the bottom of your rocker guard. Set guard to the side and carefully remove the body mounts and sleeves that line up with the slots. (Fig C)
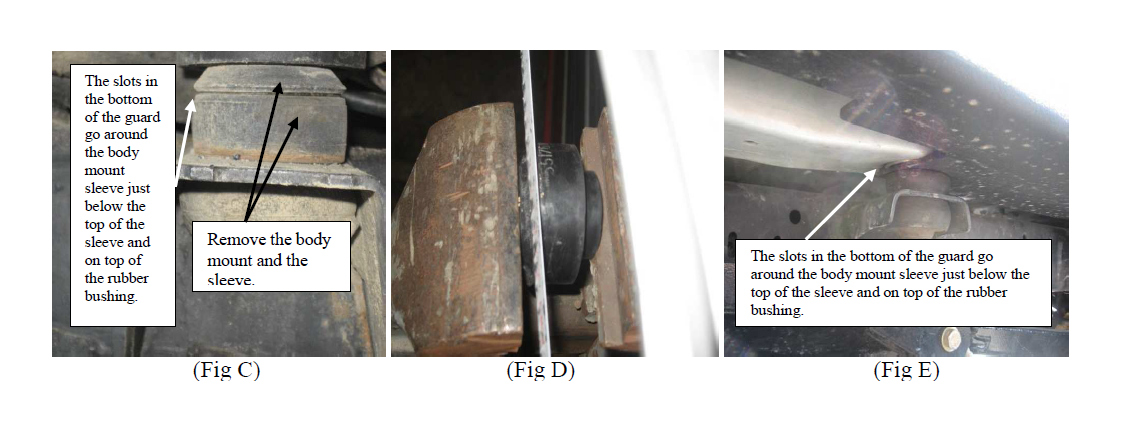
Step 6: Cut 3/16” off the top of each of bushings you removed using a hack saw, grinder or some other cutting tool.( Fig D)
Step 7: Insert bushing and sleeves back into previous frame locations.
Step 8: Position rocker guard up against vehicle, lining up the slots on the bottom of the guard with the body mount bushings. The slots go right under the top of the sleeve and above the rubber bushing. (Fig C, E) Slowly lower the body back down on the frame.
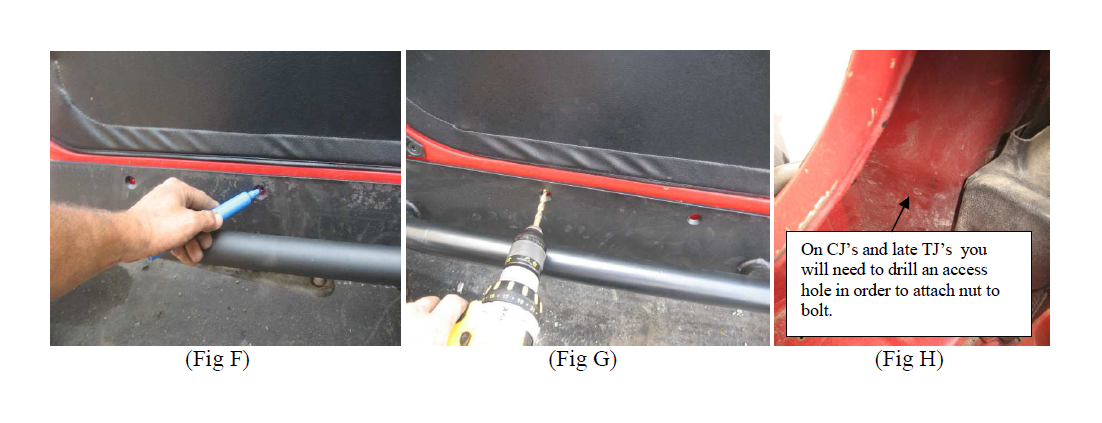
Step 9: Clamp the rocker guard to the body using quick clamps or something similar. Check to see if guard is level. Use a marker or scribe to mark the mounting location along the side of the vehicle. (Fig F)
Step 10: With care, remove the clamps and the rocker guard from the side of your vehicle. (You may have to lift the vehicle body with the floor jack again) Center punch all of the previously marked holes.
Step 11: NOTE: Check to make sure there are no wires or other obstructions on the inside of the body before any drilling. Drill out the marked holes using a 3/8” drill bit. (Fig G) After the holes are drilled clean off any burrs or debris. We recommend using some kind of touch up or clear coat to cover the exposed metal.
Note: On CJ’s and late model TJ’s an access hole will be needed to install the nut on the rear bolt on the corner guard. This can be done by using a 1” hole saw on the inside of the body near the lower seat belt mount.
Step 12: Position the guard back on the vehicle. Hand start the body mount bolts and insert the counter sunk bolts through the rocker guards and attach with flat washer and lock nut on the inside of the vehicle. Once all hardware has been started go back and completely tighten each bolt including the body mount bolts. Note: Be sure to re-install the other body mount bolts that you removed from the side of the vehicle you are working on. Re-install fender flares if previously loosened. Installation is complete; follow same steps for the other side of your vehicle.
CARE AND MAINTENANCE
To protect your investment it is recommended to regularly wash and wax this part. Do not use any type of cleaners that contain abrasives that may damage the finish
of your part.

