FREE 1 to 3-Day Delivery on Orders $149+ Details

How to Install Smittybilt XRC M.O.D. Crawler End Caps - Textured Matte Black on your 07-18 Jeep Wrangler JK; 2018 Jeep Wrangler JL

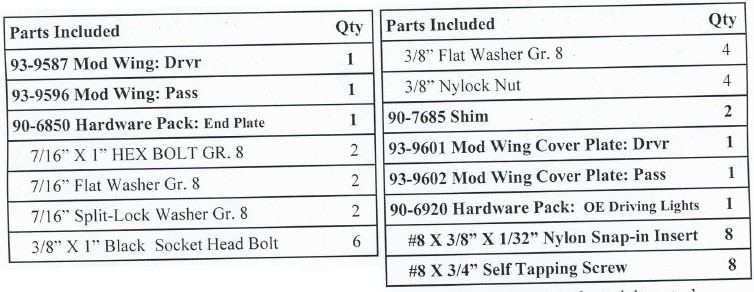
Shop Parts in this Guide
INSTALLATION:
Step 1: Working on one side of the vehicle at a time, unbolt and remove the stainless steel side cover plate (90-7554 drvr and 90-7555 pass), by removing the (3 per side) 3/8" X 1/2" button head bolts.
Step 2: Unbolt the (2 per side) outer 7/16" X 1 1/4" hex head bolt and 7/16" washers that secure the XRC M.O.D. bumper to the frame, and set aside.
Step 3: If Installing OE Driving Lights: Install the (4 per side) nylon snap-in inserts into the square holes on the mod wing (93-9587 drvr and 93-9596 pass). Install OE driving lights into the mod wing and secure to the nylon snap-in inserts using the supplied (4 per side) #8 X 3/4" self tapping screws.
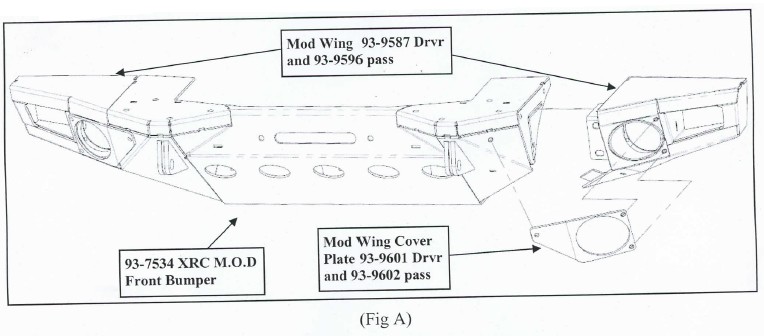
Step 4: Install the mod wing (93-9587 drvr and 93-9596 pass) to the XRC M.O.D. bumper (93-7534) by inserting the tab of the end plate into the slot of the XRC M.O.D. bumper. (Fig. A)
Step 5: Replace the previously removed (2) 7/16" X 1 1/4" bolts and washers back into the outer frame holes, but do not tighten at this time. NOTE: If needed, install the shim plates (90-7685) between the rear of the frame and the front of the end plate tab.
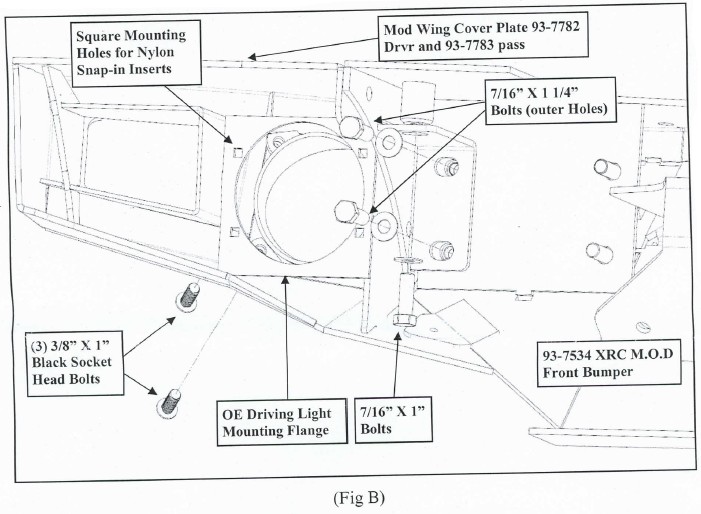
Step 6: Install the mod wing cover plate (93-9601 drvr and 93-9602 pass) to the mod wings and XRC M.O.D. bumper mounting holes. Secure using the (3 per side) 3/8" X 1" black socket head bolts and hardware. (Fig. B)
Step 7: Install (1 per side) 7/16" X 1" hex head bolt, lock washer and hardened flat washer upward through the rear tab of the mod wing (93-9587 drvr and 93-9596 pass). (Fig. B)
Step 8: Align mod wings (93-9587 drvr and 93-9596 pass) with the XRC M.O.D. bumper and torque the 7/16" bolts to 60 ft./lbs. Torque the 3/8" bolts to 45 ft./lbs. (Fig. B)
Step 9: Repeat the same procedure for the passenger side.
Step 10: If driving OE lights have been installed, connect the OE driving light wiring har-nesses.
Step 11: Installation is now complete.
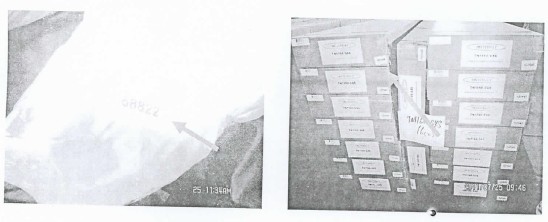
NOTE: Please take time to fill in the information requested below. It is highly recommended to kee'p this with the instructions and warranty information in a safe location. This will help with any warranty or customer service issues if they should arise. Please write down the DOP# that is located on the outside of the box and or on part or hardware box. (Pictured Below)