 FREE 1 to 3-Day Delivery on Orders $149+ Details

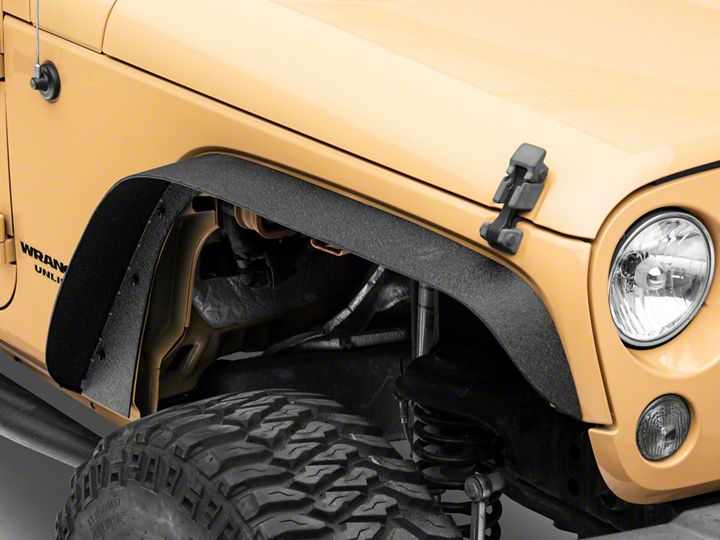
How To Install Smittybilt XRC Fender Flares on your 2007-2016 Wrangler JK
Installation Time
2 hours
Tools Required
- Socket Wrench (10mm socket)
- Pliers (to hold nut in tight spaces)
- Crowbar or Flathead Screwdriver
Shop Parts in this Guide
Lifting vehicle and removing tire is not necessary but does make it more comfortable. Not all holes may align, you may need to use a drill to widen them. Use caution. You may leave the stock inner liners on, it will require more tools to cut and mold them to the Smittybilt XRC Fender Flares.
Installation Instructions:
Front Fender Flare:
1. Start by removing the (5) 10mm bolts that hold the inner liner on. (4) are in plain sight, one is hidden behind the inner liner towards the top. You can pull the liner down for easier access or through the hole on the liner.
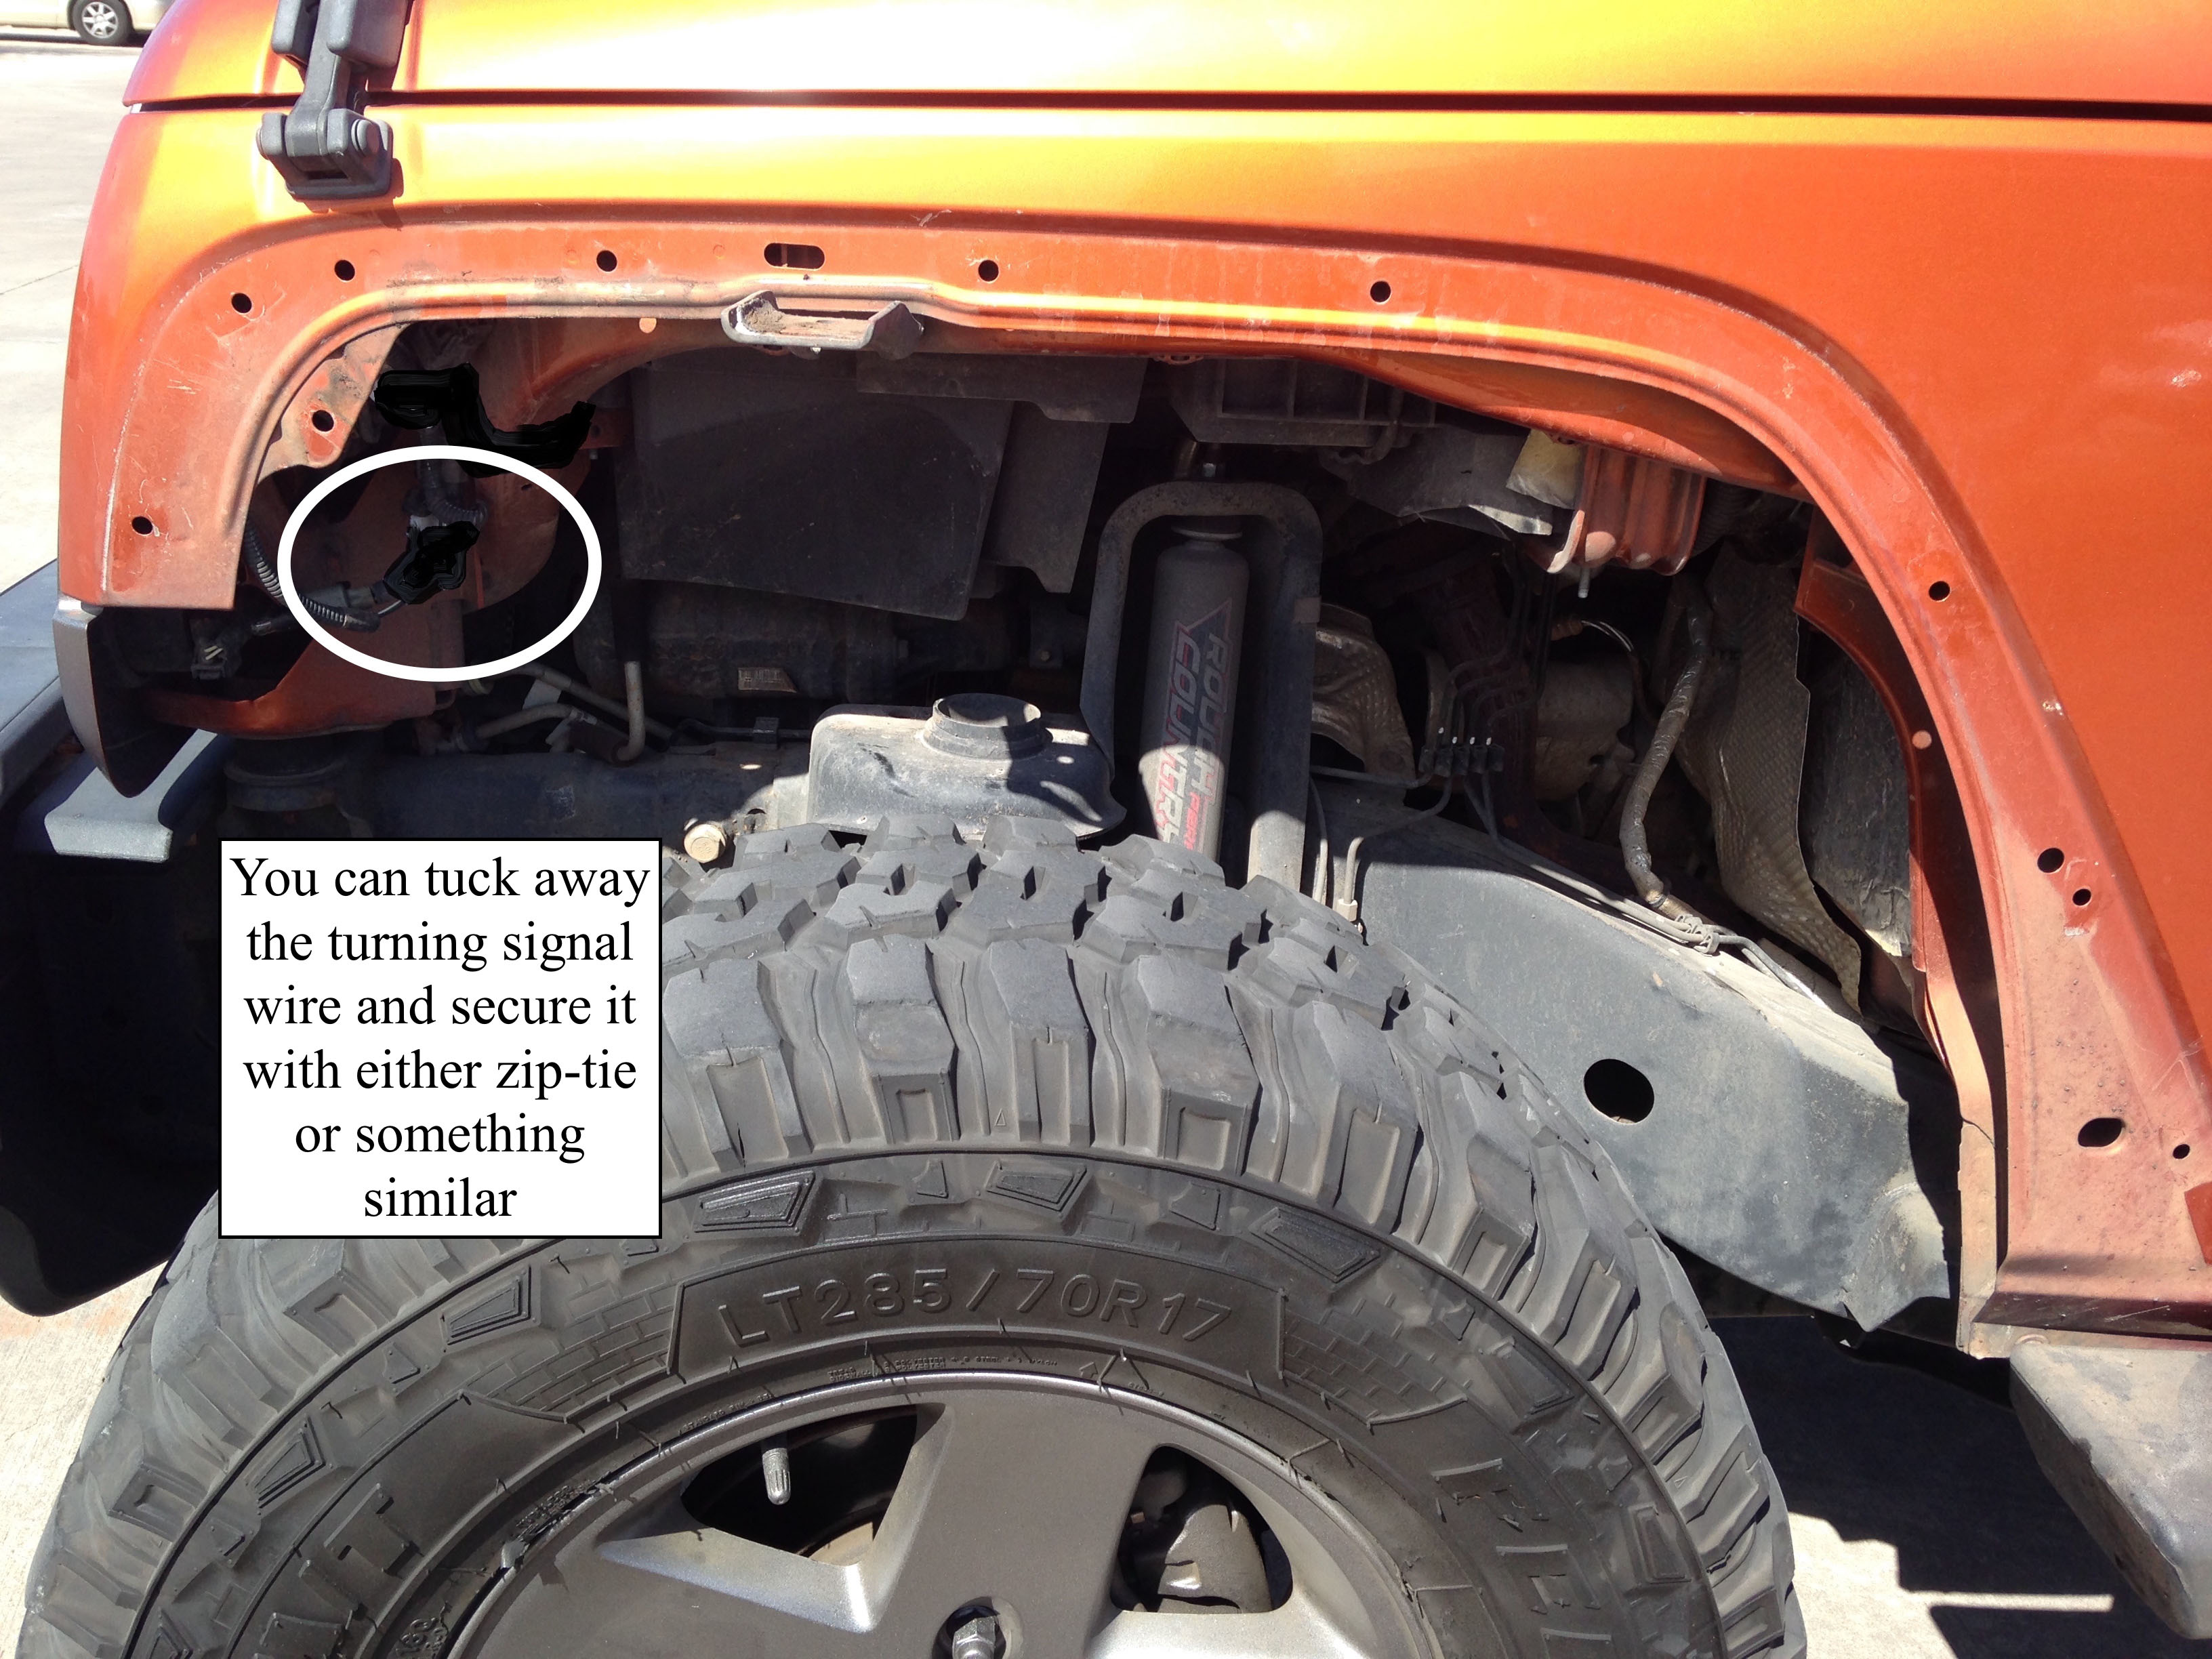
2. Be sure to disconnect the front turning signal plug, just twist and pull. Next, start pulling the fender flare towards you from front to back. You’ll hear loud cracking/popping noises (this is normal), those are the clips breaking (they are disposable). Once off, tuck and secure away the turning signal wire from any interference.
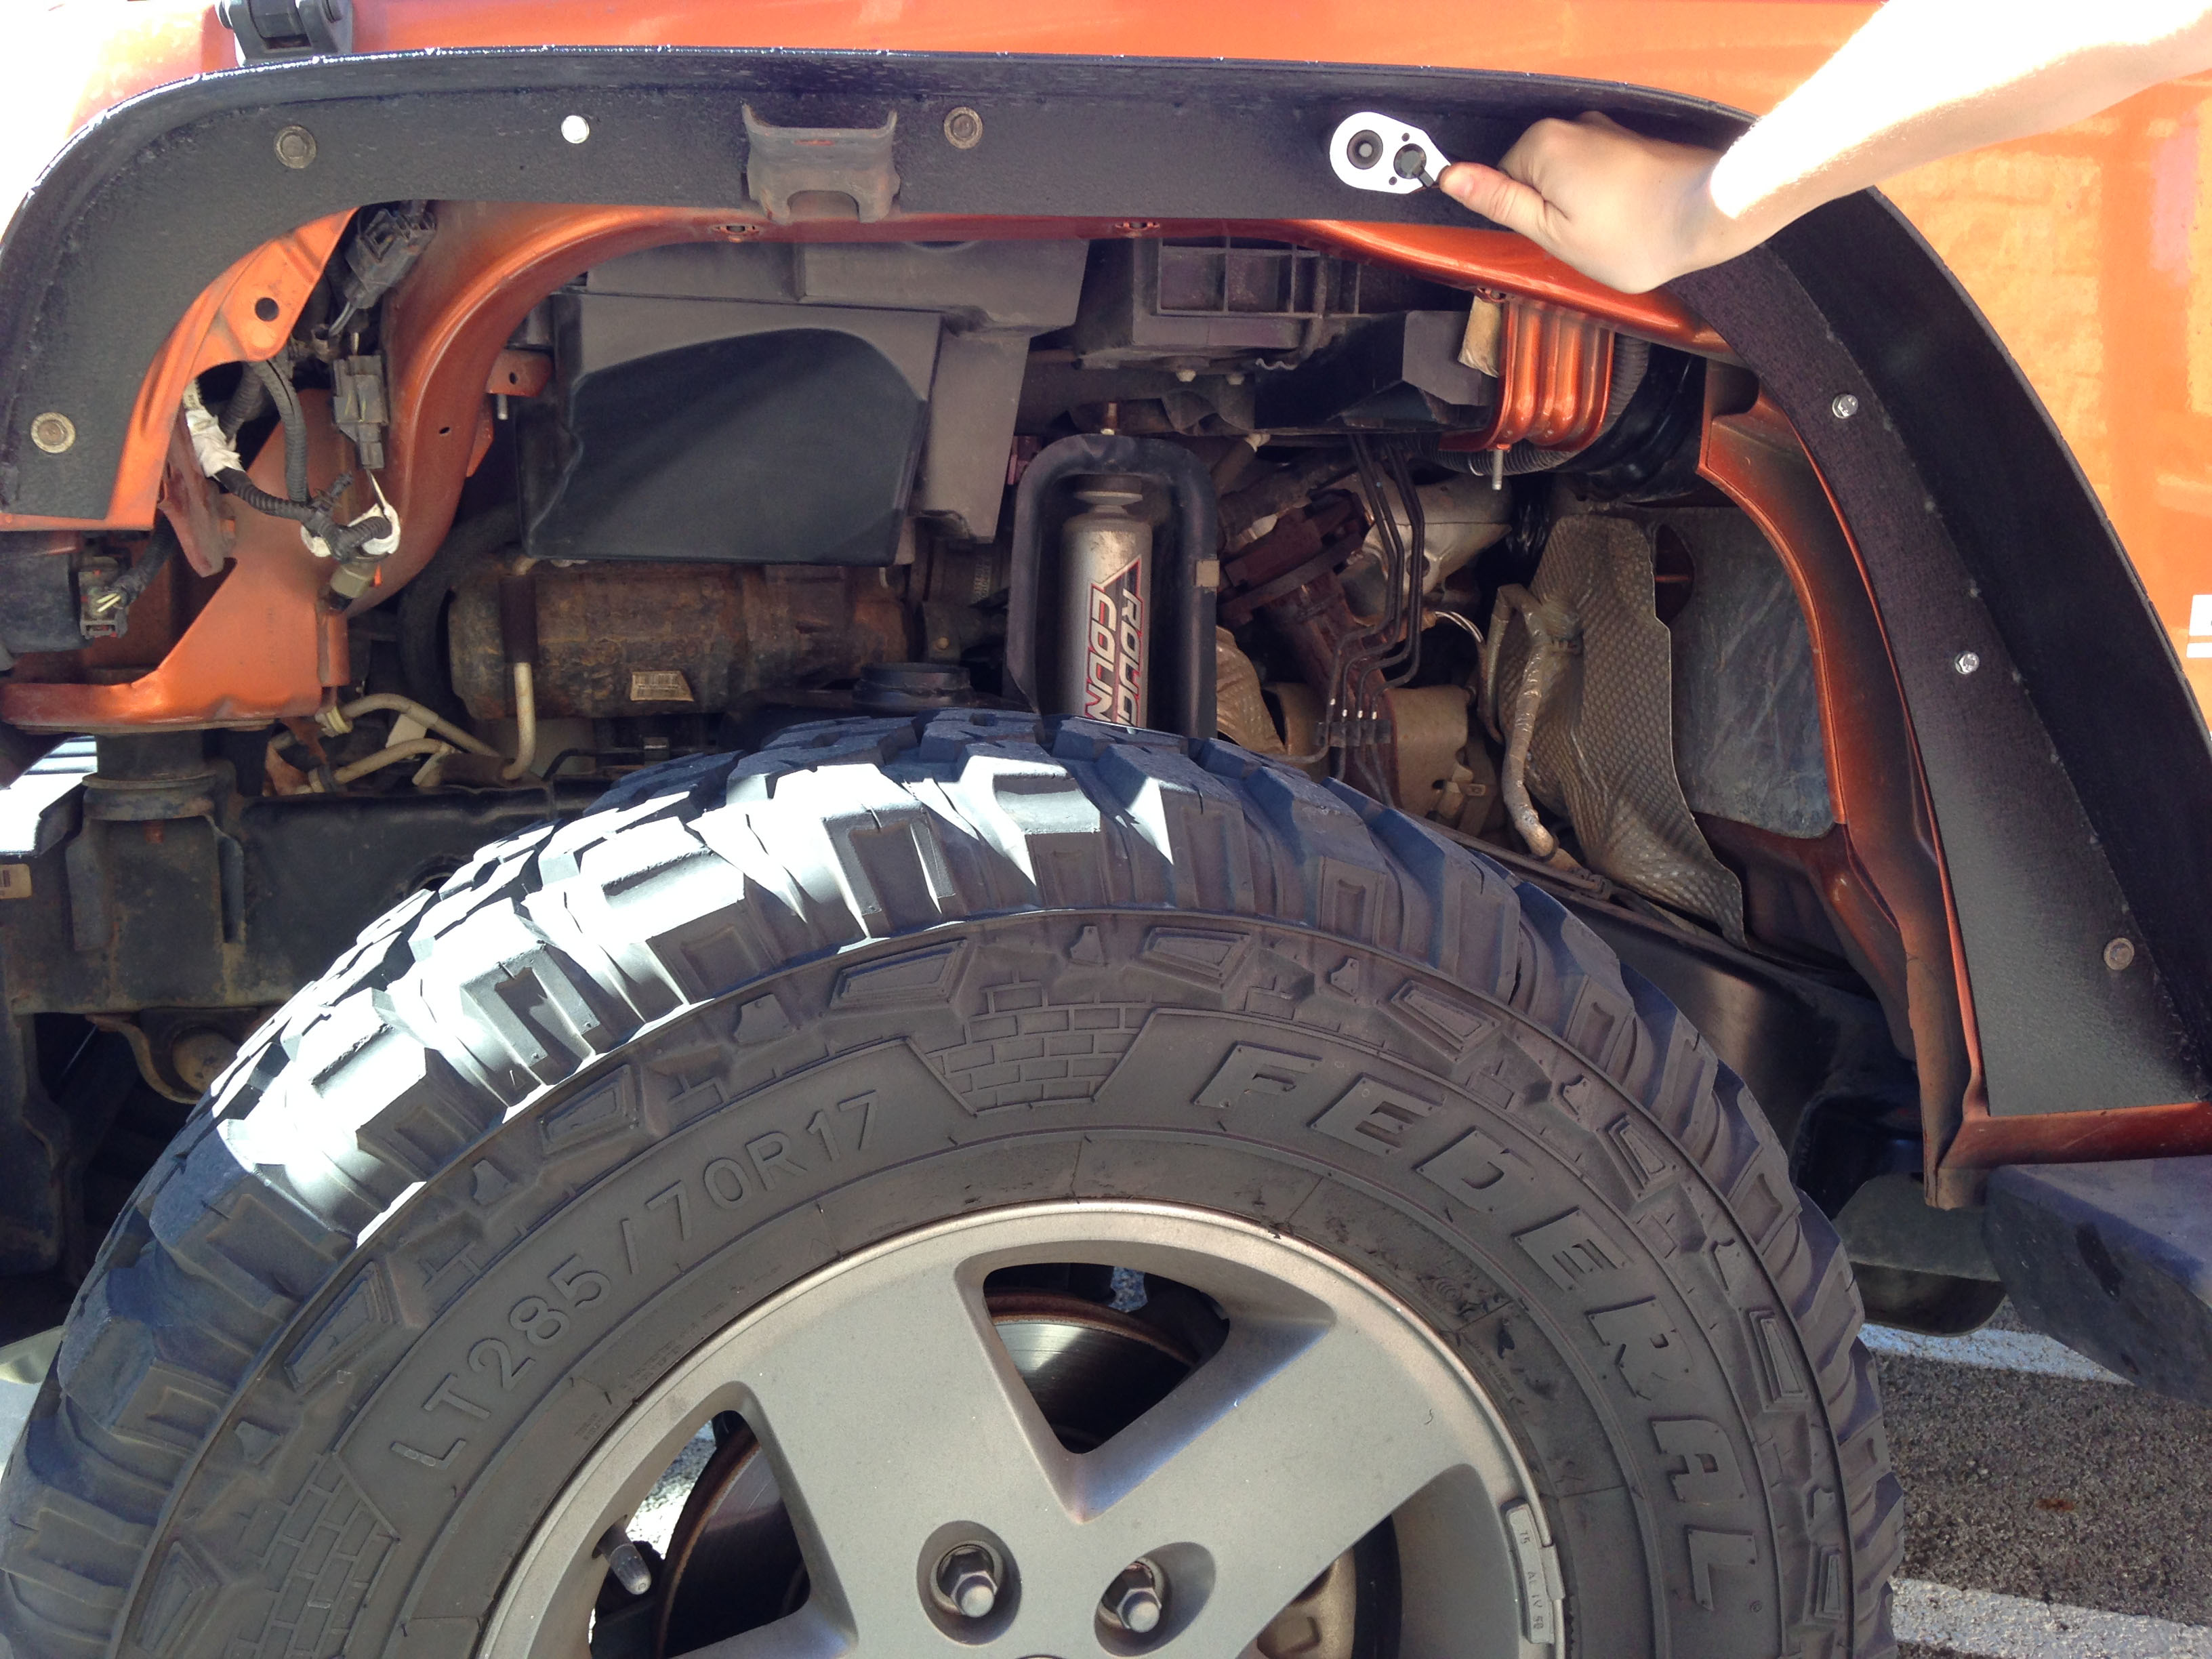
3. Place new flare against the body aligning the holes. Loosely place (8) of the 10mm bolts with (16) washers and (8) nuts. Once in place, go back and tighten all bolts.
Rear Fender Flare:
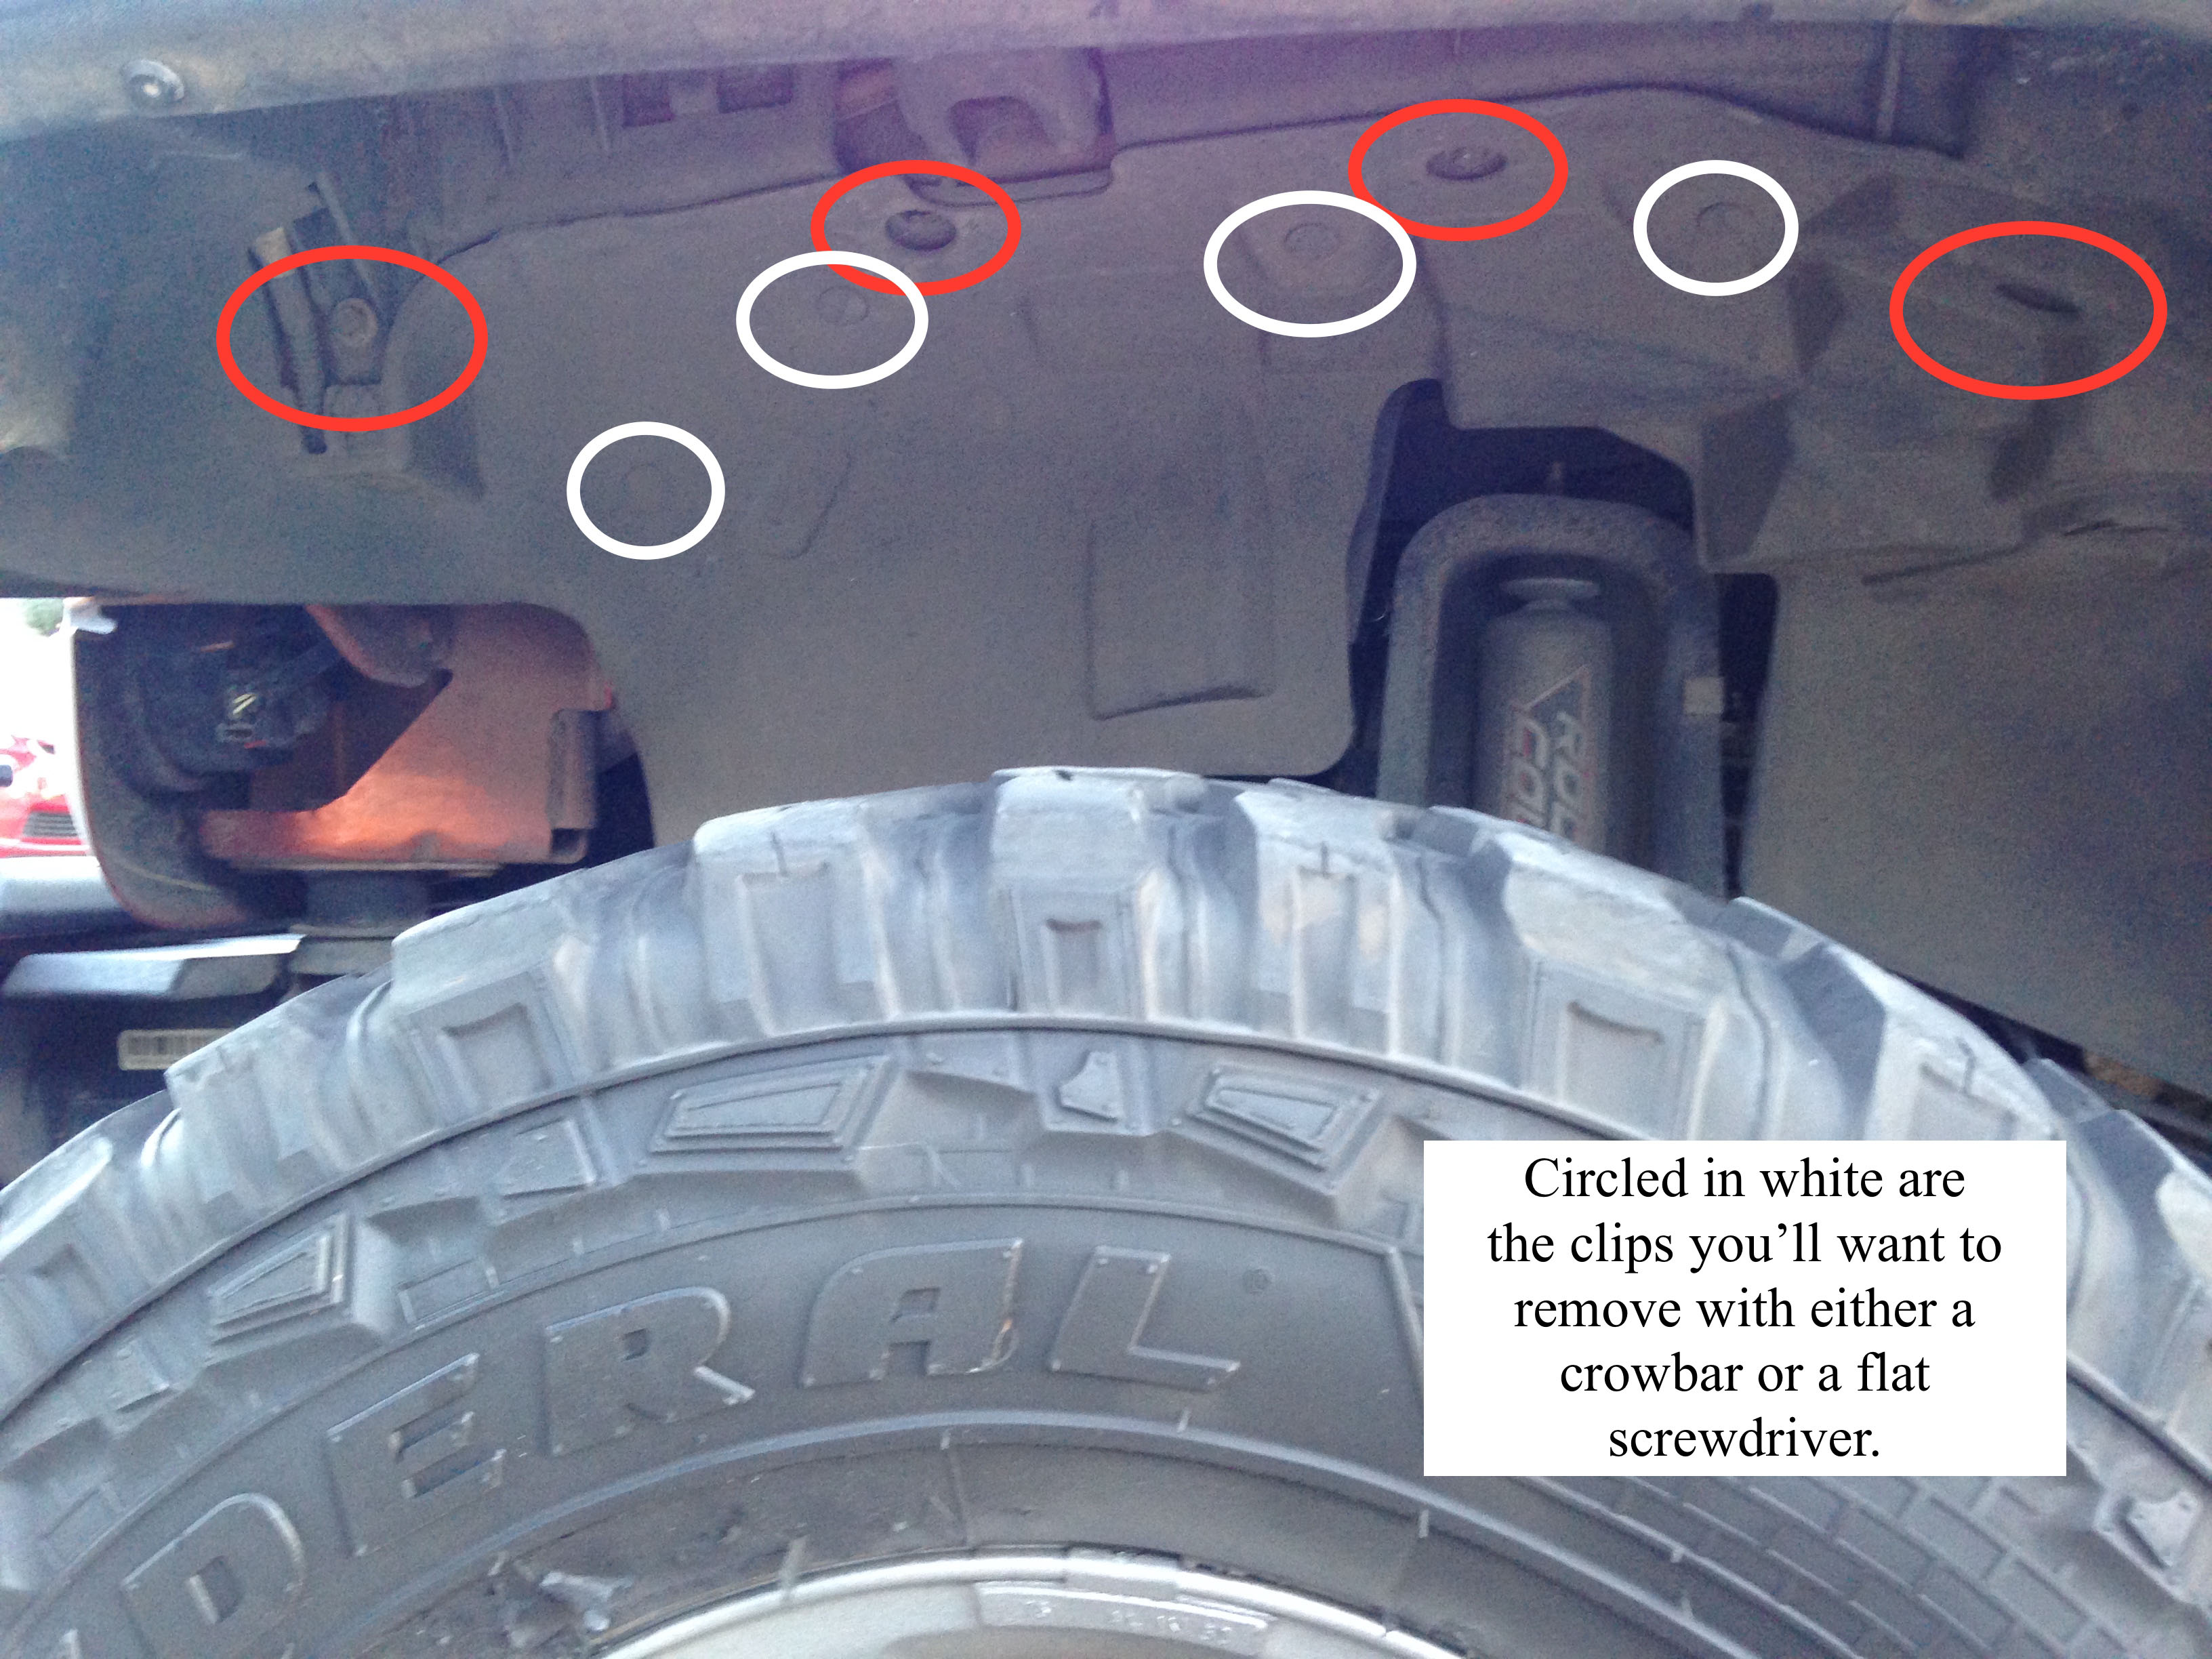
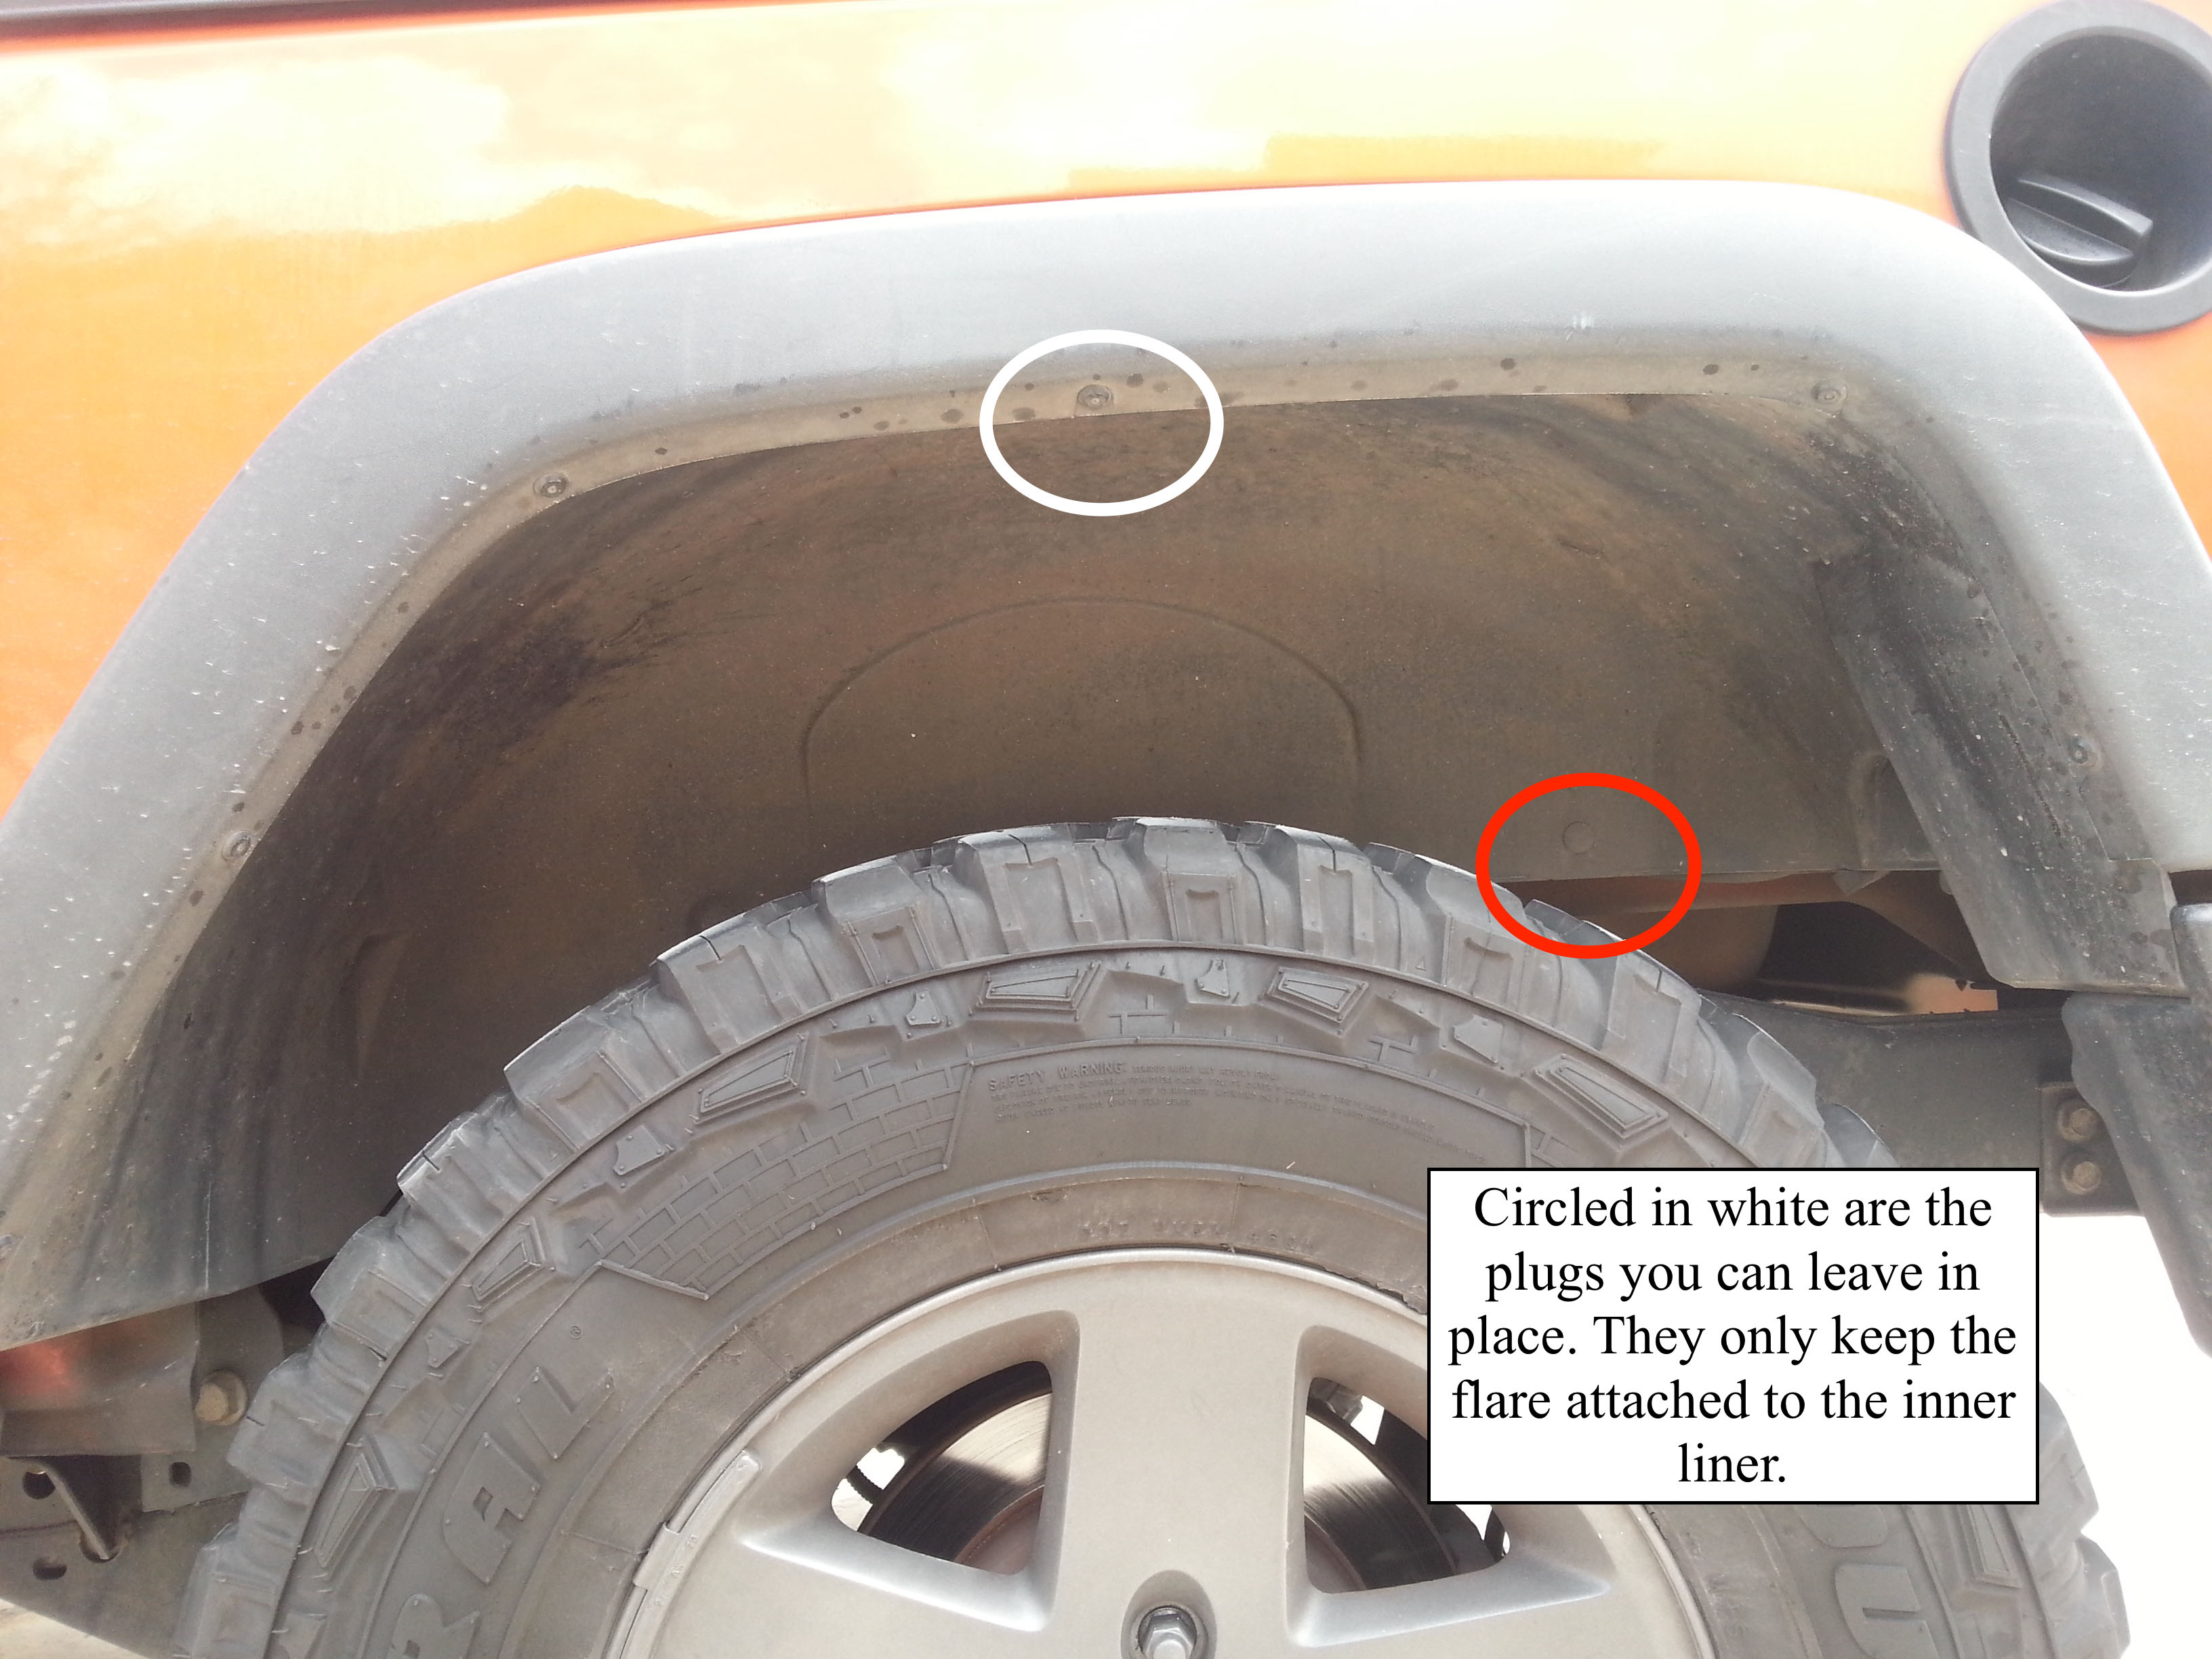
4. With a crowbar or flathead screwdriver, remove the (5) rivets holding on the inner liner.
5. Like Step 2, start pulling the fender flare towards you from front to back. You’ll hear loud cracking/popping noises (this is normal), those are the clips breaking (they are disposable).
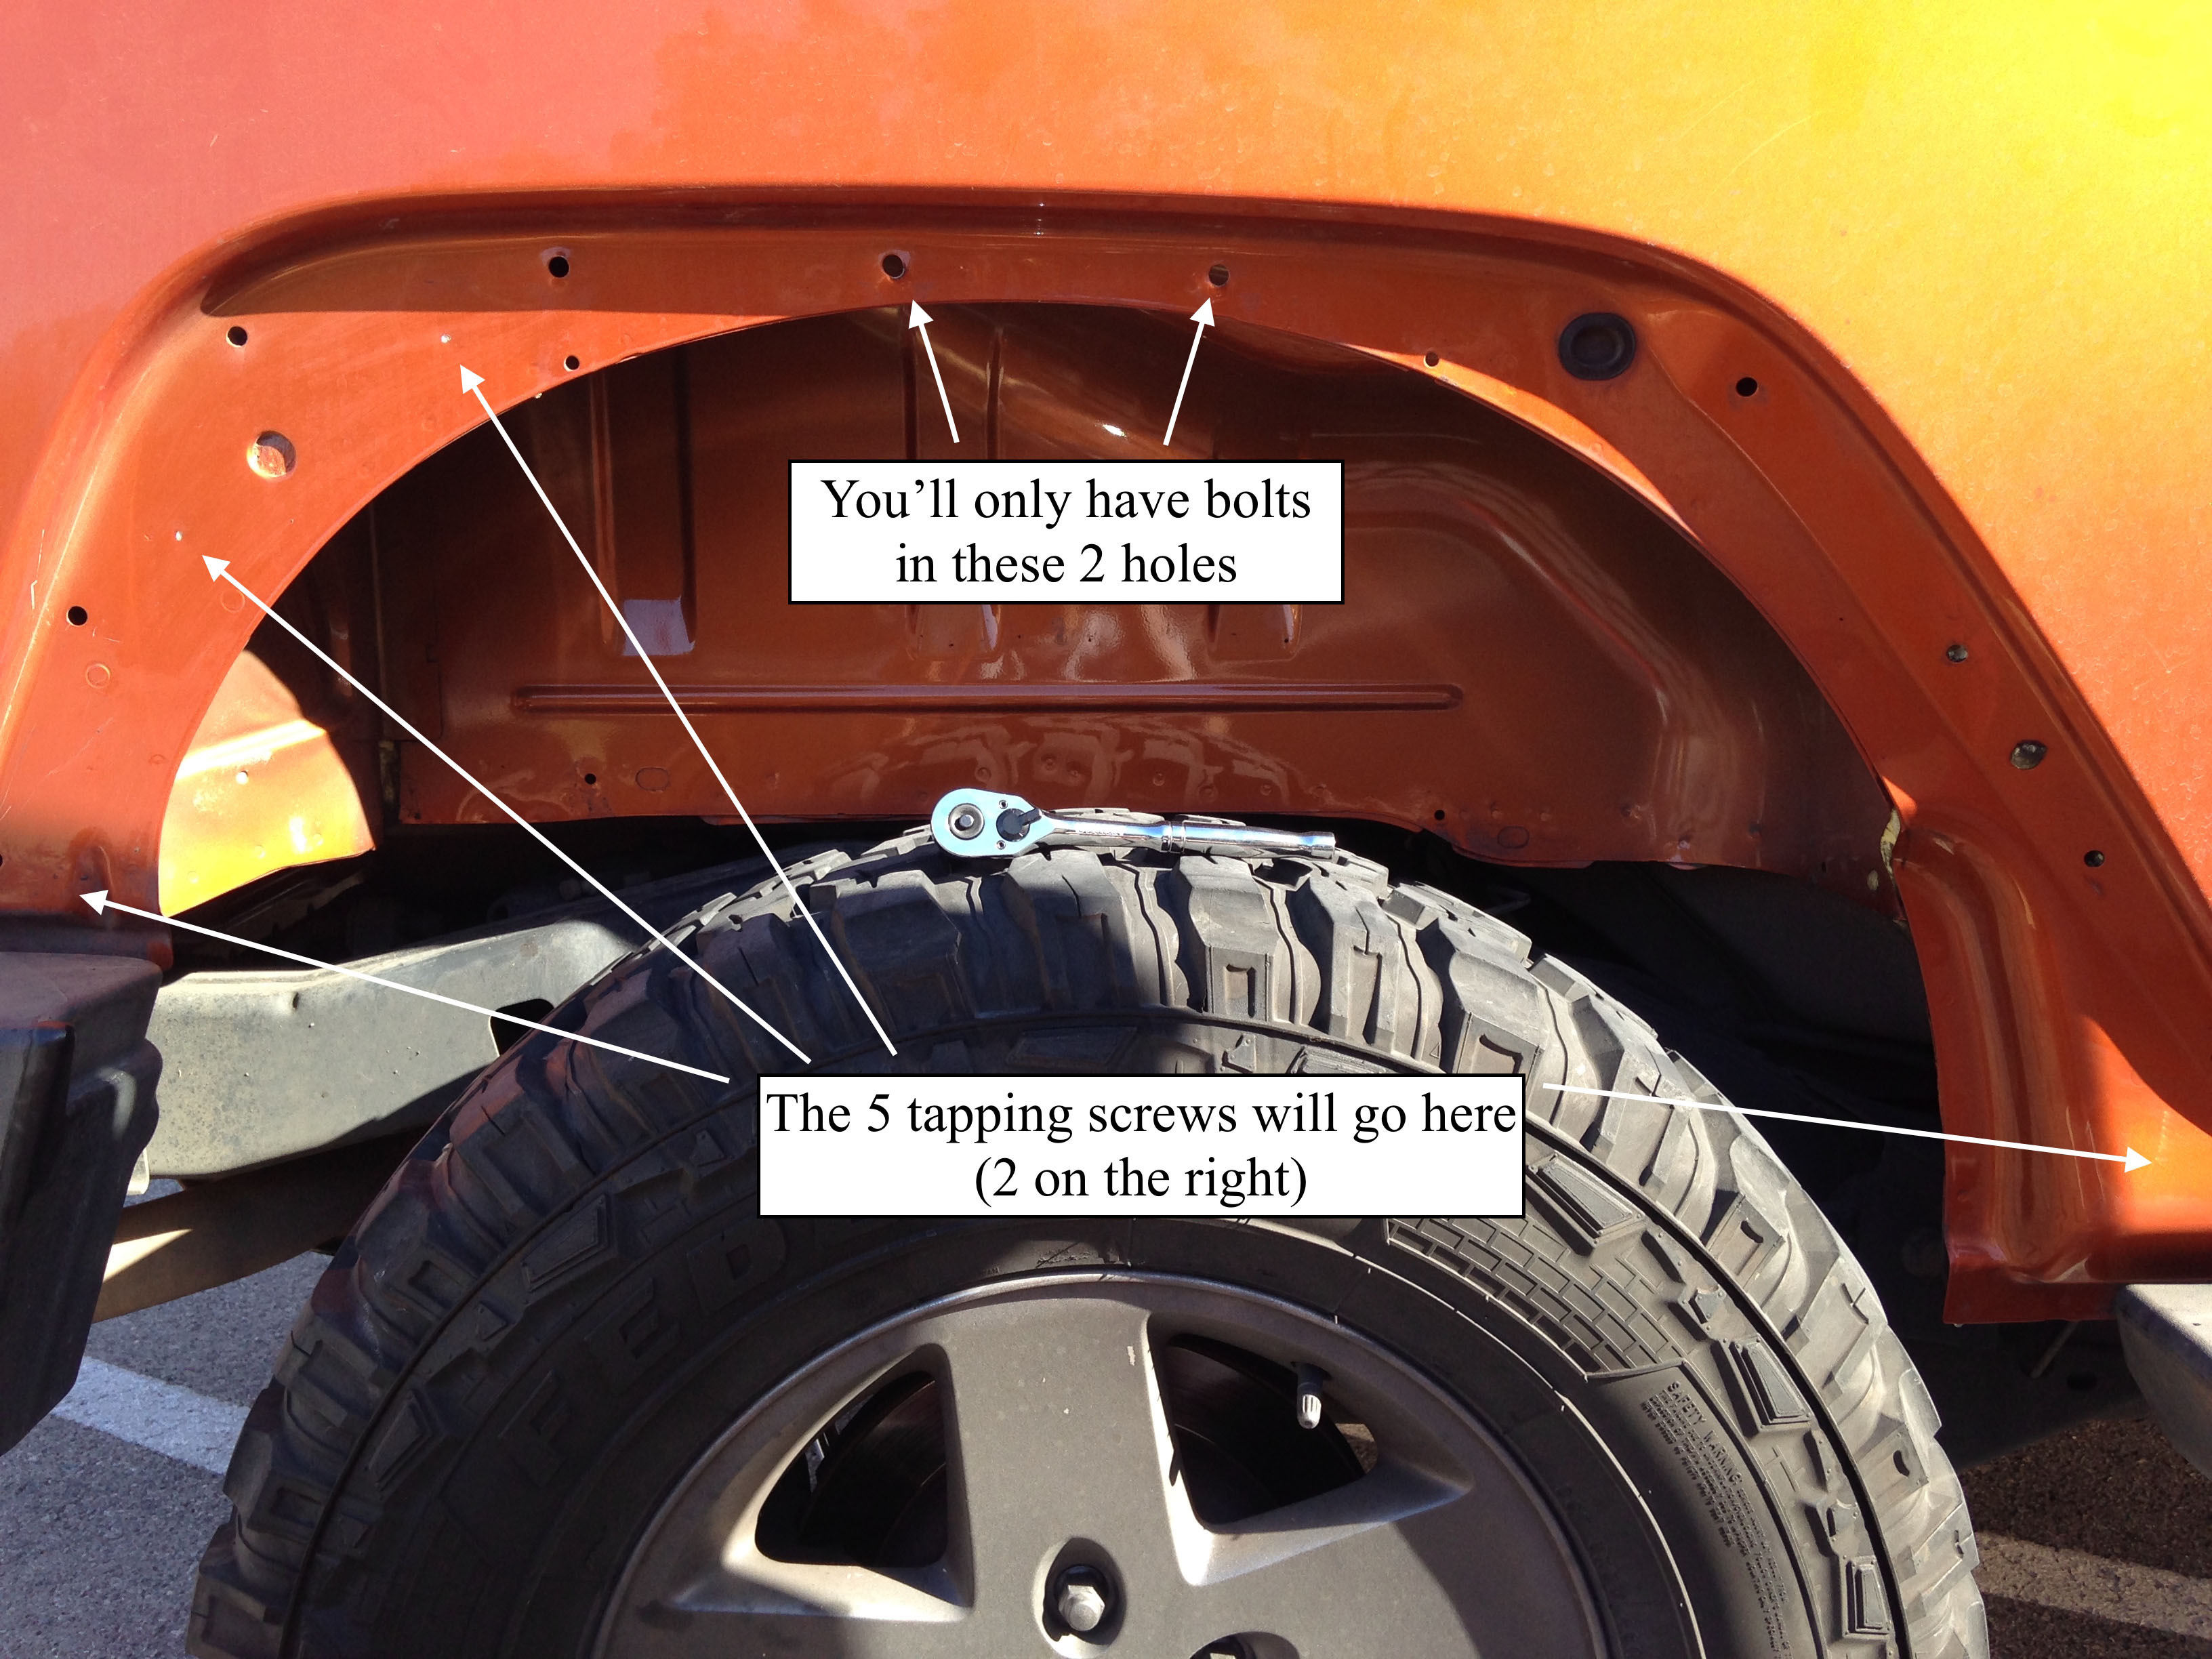
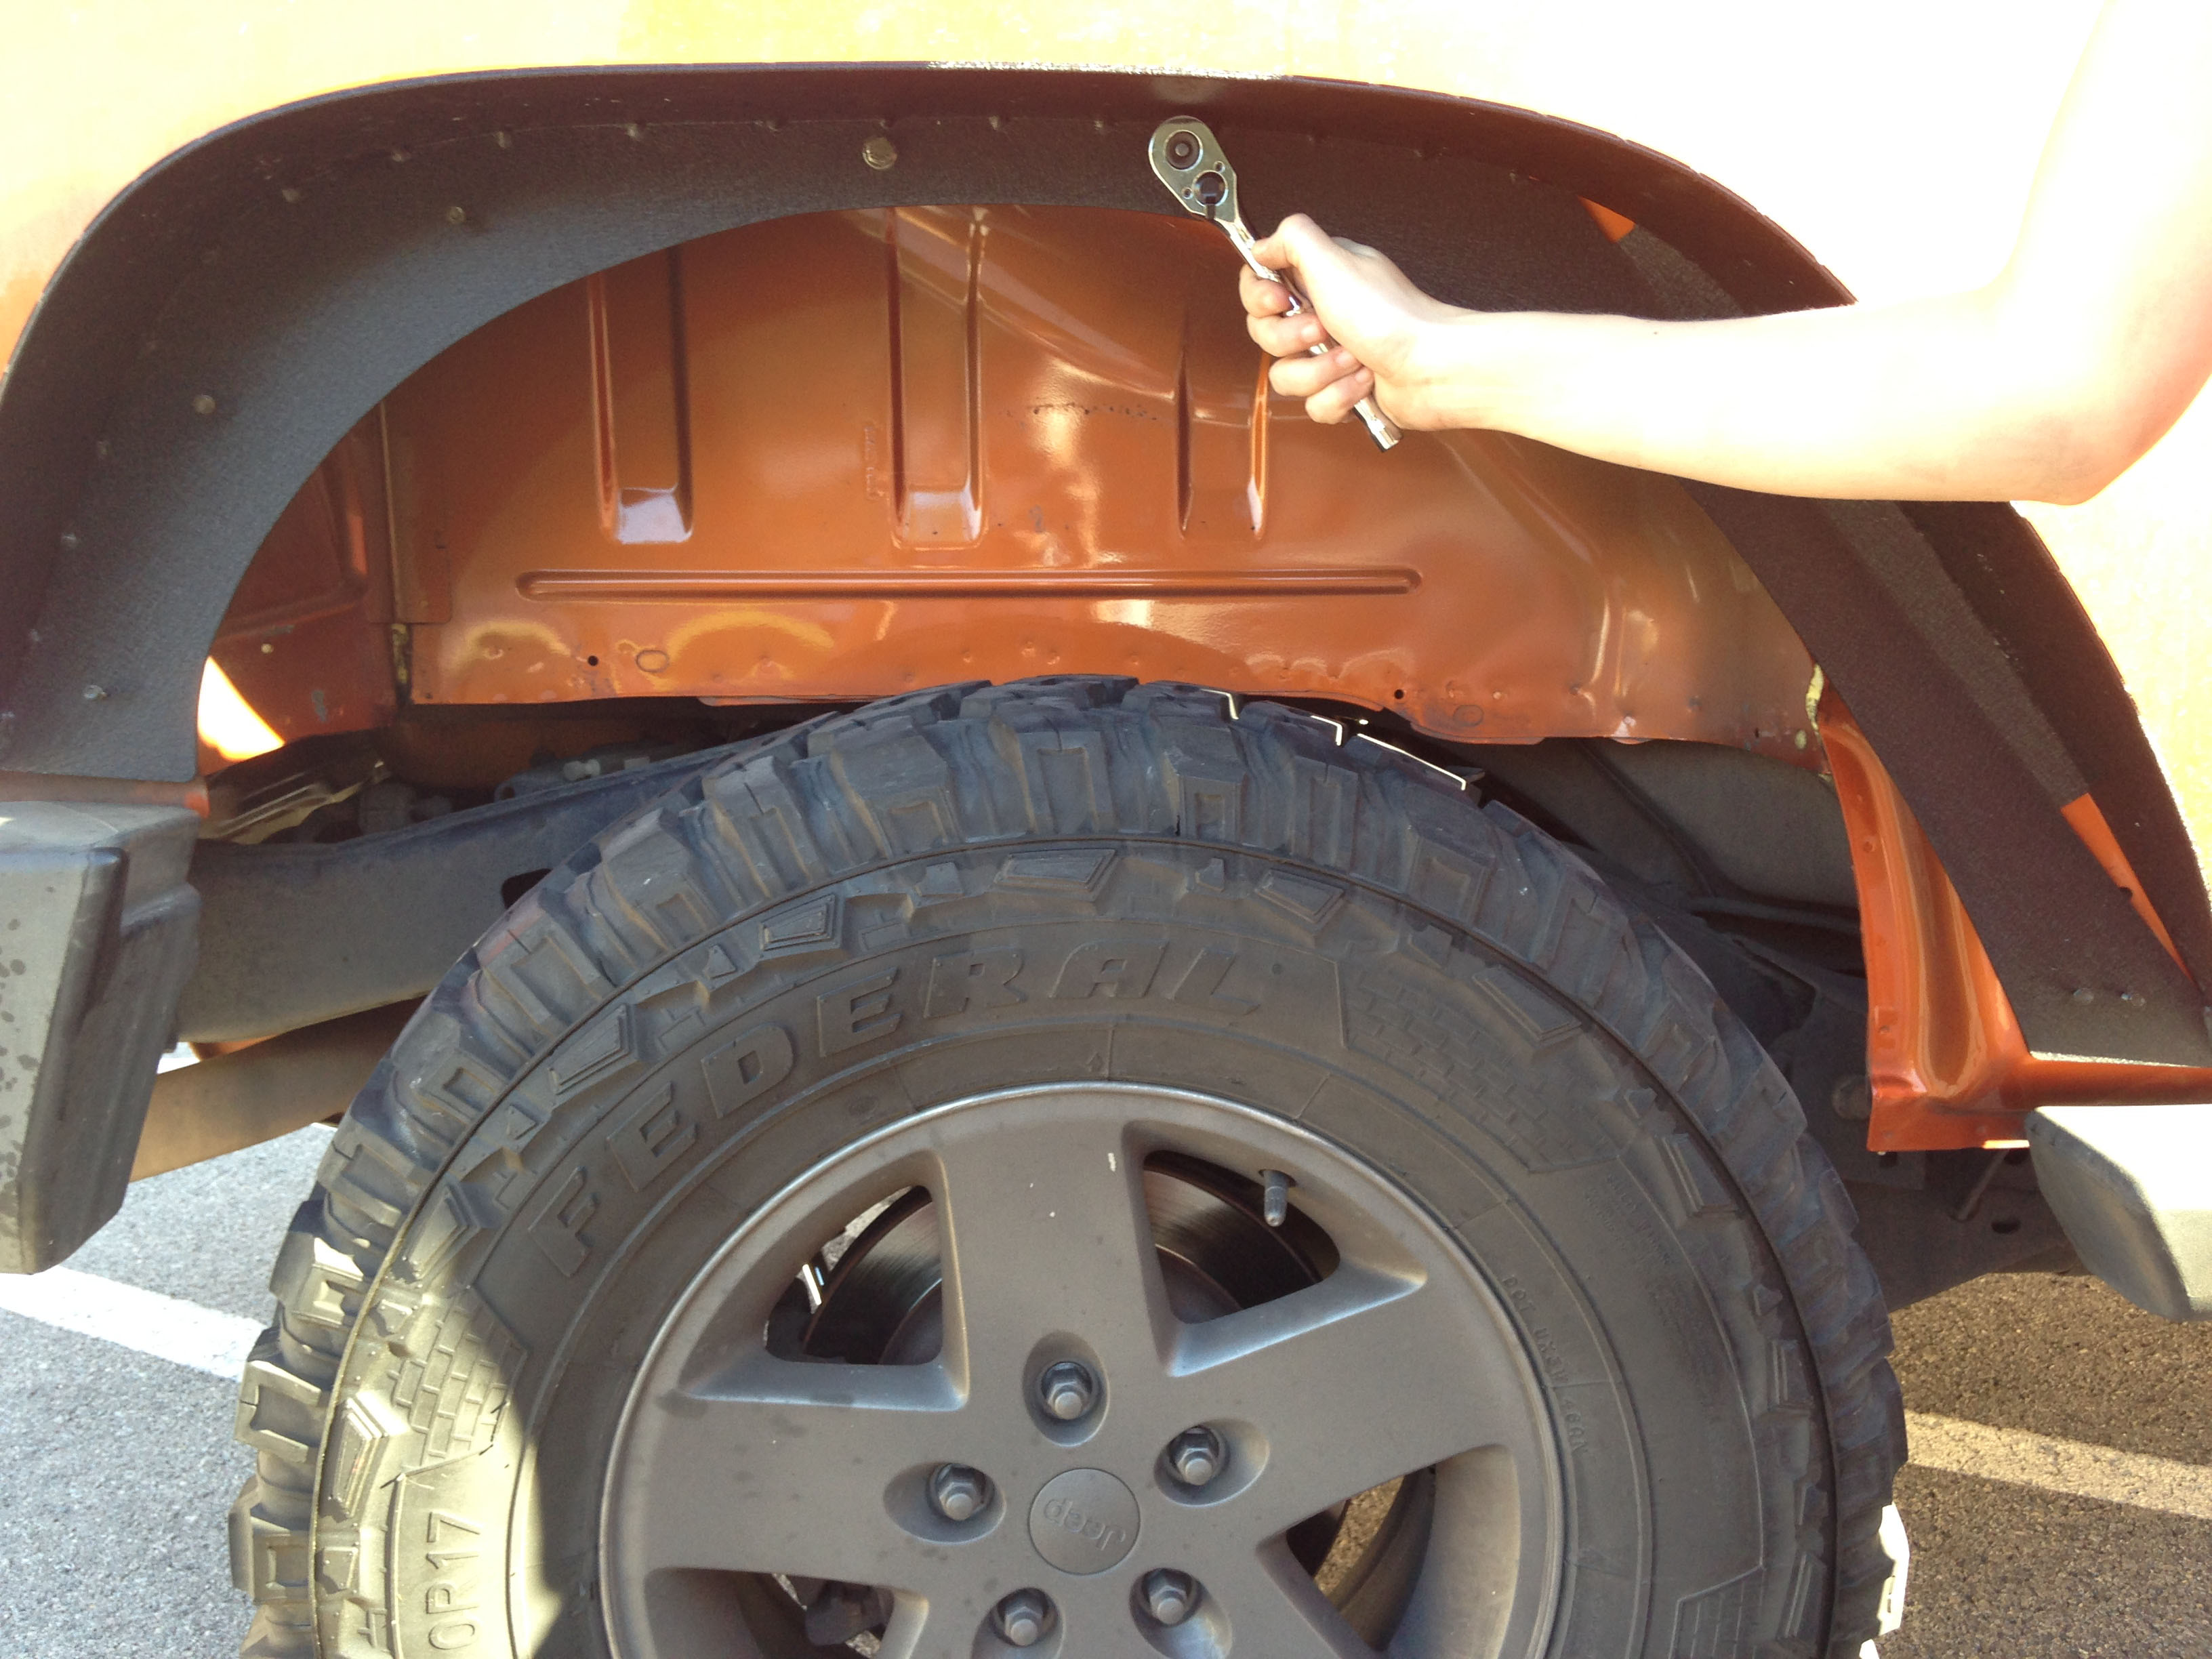
6. Place new flare against the body aligning the holes. Loosely place (2) of the 10mm bolts with (4) washers and (2) nuts. Once in place, go back and tighten all bolts. Use the mounting holes on the new flare as guides for the (5) tapping screws.
Installation Instructions Written by ExtremeTerrain Customer Johana Marroquin 03/1/2016

