 FREE 1 to 3-Day Delivery on Orders $149+ Details

How to Install Smittybilt XRC Armor Front Tube Fenders on your 1987-1995 Wrangler

Shop Parts in this Guide
Please read instructions thoroughly before installing this product. Major modifications are required to install this product and it’s recommended to be done by an experienced mechanic/installer.
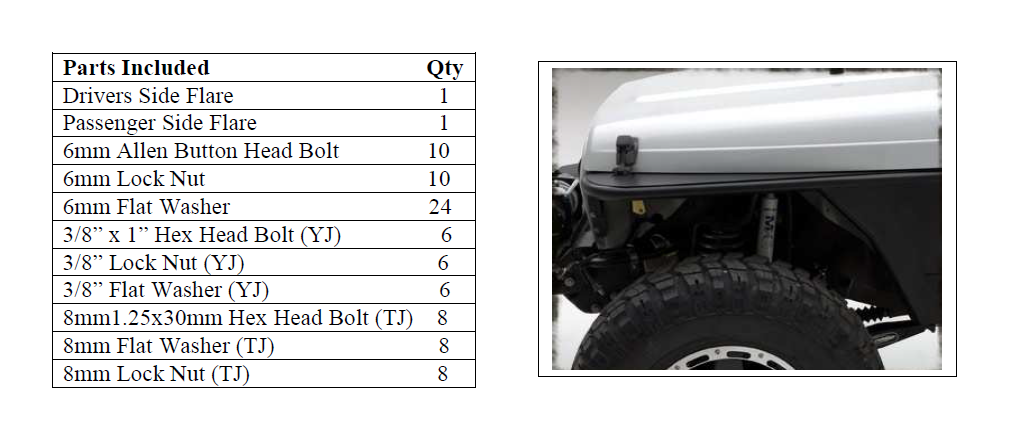
Step 1: Disconnect turn signals and secure wiring back out of the way. Remove the current plastic flares from your vehicle.
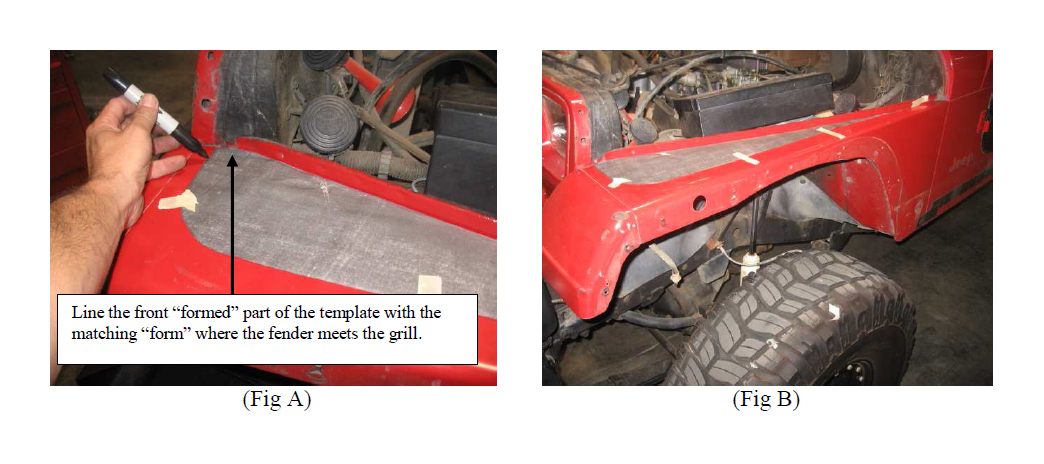
Step 2: Trim the included template out, connect together and set on top of the fender. Place the formed front portion to match the form of the fender where it meets the grille and lay down towards the back of the fender where it meets the body tub/firewall. Use a marker to outline the template on the fender.
Step 3: Remove the bolts that hold the front of the fender to the front grille. (TJ-3) (YJ-5) Fig C
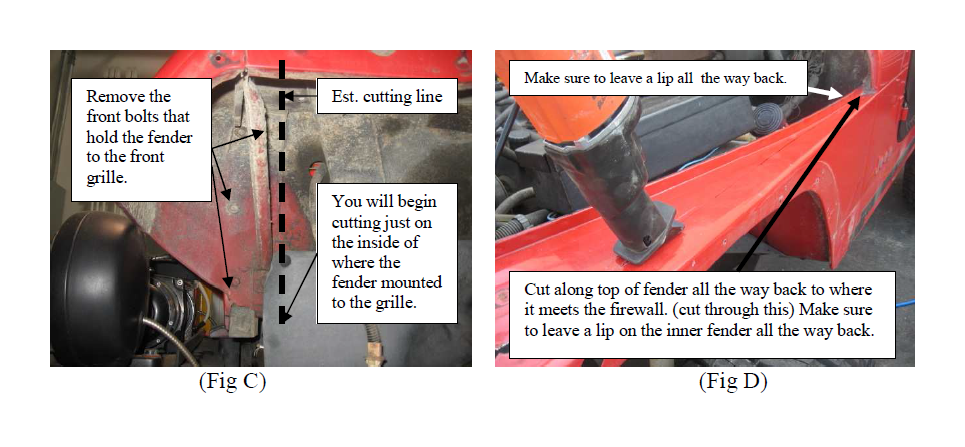
Step 4: NOTE: Use extreme caution before cutting; make sure all wires, cables or any other obstructions are out of the way. Using a sawzall or other cutting tool carefully cut the fender off. You will begin cutting from just behind where the fender mounted to the front grille. (Fig C) You will be cutting from where the fender meets the grille up and along the top of the fender all the way to where the fender mounts to the firewall.(Fig D,E,F) Make sure to leave a lip all the way back to the tub. (Fig D)
Step 5: Measure a straight line up on the inner back portion of your fender. Measure and mark with a marker; in 1” for 97-06 and 1 ½” for CJ’s and YJ’s from the outside edge of the factory fender. NOTE: Use extreme caution before cutting; make sure all wires, cables or any other obstructions are out of the way. Cut this line up. (Fig E, F)
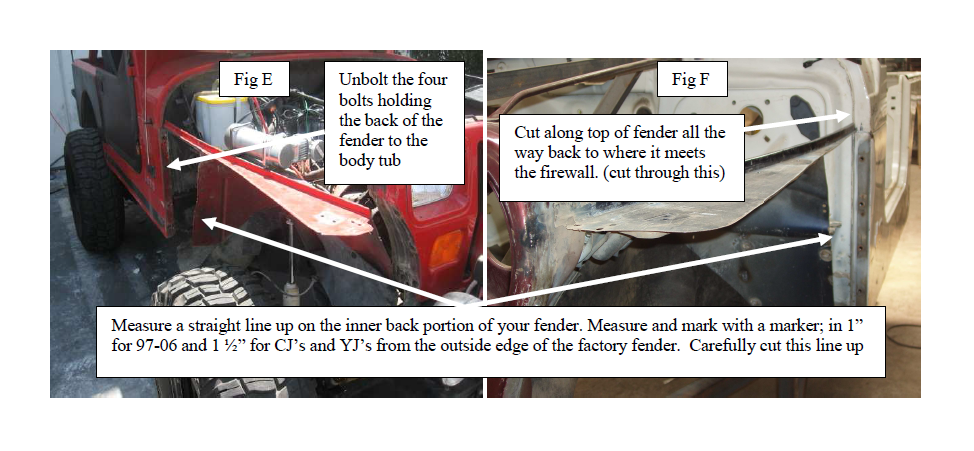
Step 6: Unbolt the four bolts holding the back of the fender to the body tub and remove what is left of (Fig E) Keep these bolts, they will be re-used with the new fender. You should no only have the inside fender left. ( Fig G)
Step 7: Position the fender on your vehicle by placing it over the inner fender (Fig H) and line up the front bracket with the oem grille and loosely attach using the factory bolts previously removed. (Fig J) Line up the rear of the fender with the body tub and loosely attach the previously removed inside bolts. (Fig I) Check to make sure you have a gap underneath between the inner fender and your new fender. (Fig K) If it is rubbing anywhere, use a grinder on the inner fender to grind it down to make clearance for the fender. Due to variance in vehicle tubs if a hole is slightly off you can use a die grinder in order to open up the holes in the fender. Once you have the fender in the correct position tighten the bolts. NOTE: You may need to trim the battery tray so the fender clears.
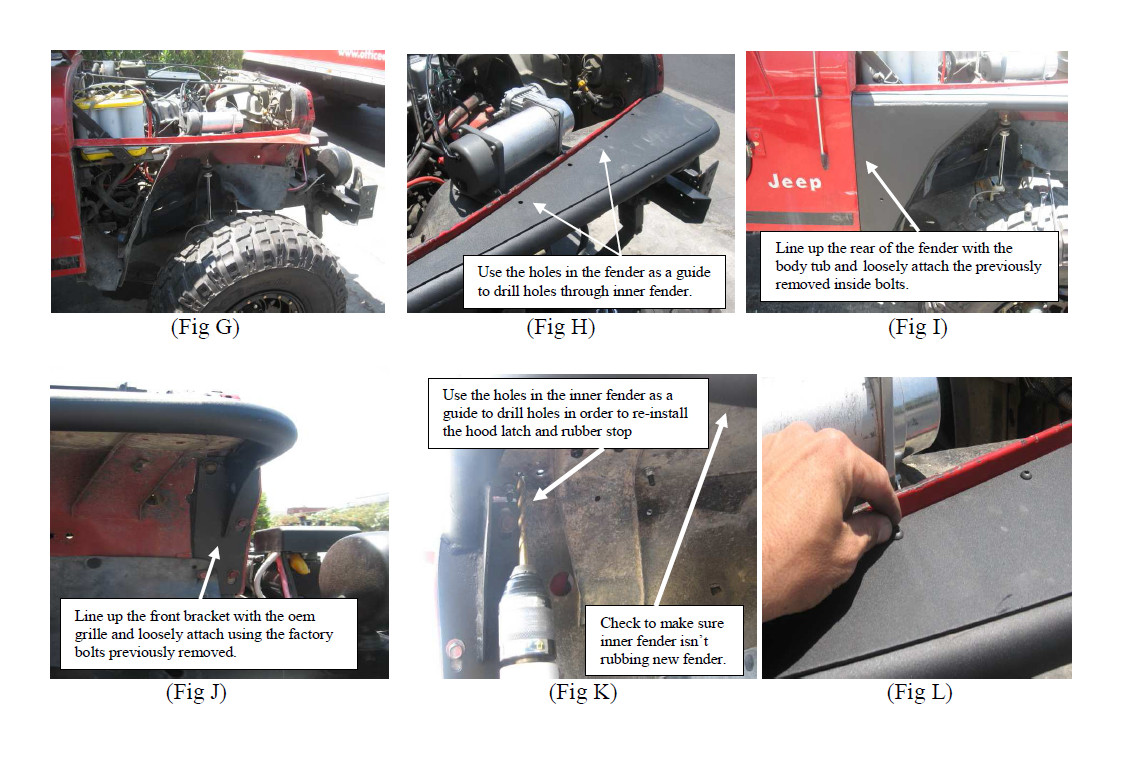
Step 8: Now that you have the front and rear of the fender bolted on, use the holes in the top of the fender as guides in order to install the top bolts. (Fig H) Using a ¼” bit drill through the inner fender and attach using the supplied allen head bolts. (Fig L)
Step 9: Attach the lower inner fender to your new fender
A. On TJ’s you can either reuse the factory hardware or the included 8mm hardware.
B On YJ.s use the holes in the fender as a guide to drill a hole using a 3/8” bit. (Fig M)
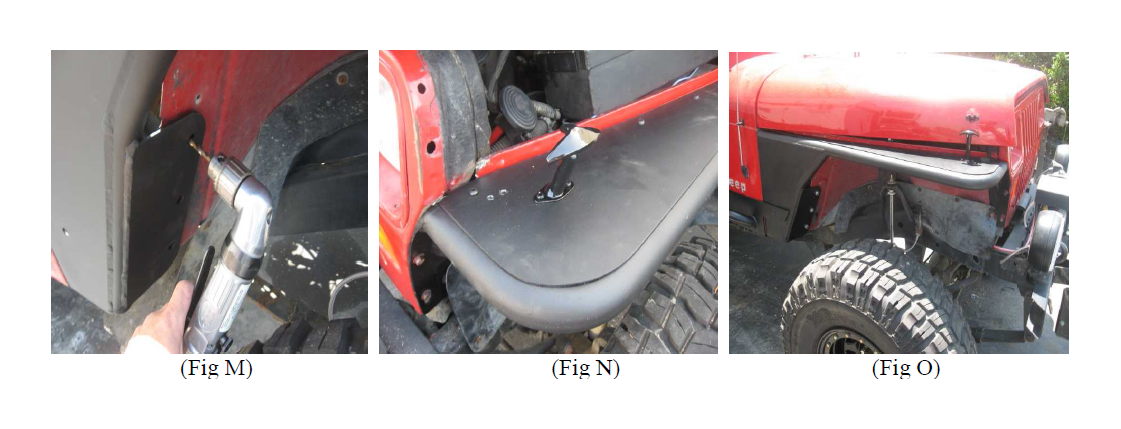
Step 10: Use the inner fender as a guide to drill holes up through the fender for your hood latch and rubber hood stops. (Fig K) Re-install your hood latch and rubber stop. (Fig N) You may need to trim the bottom plugs on the rubber stop and use some kind of adhesive. Installation is now complete. Make sure all hardware is tight.
CARE AND MAINTENANCE
To protect your investment it is recommended to regularly wash and wax this part. Do not use any type of cleaners that contain abrasives that may damage the finish of your part.
