
How to Install Smittybilt Tubular Rear Bumper w/Hitch, Textured Black on your 2007-2013 Wrangler

Shop Parts in this Guide
- Smittybilt Tubular Rear Bumper with Hitch; Gloss Black (07-18 Jeep Wrangler JK)
- Smittybilt Tubular Rear Bumper with Hitch; Stainless Steel (07-18 Jeep Wrangler JK)
- Smittybilt Tubular Rear Bumper with Hitch; Textured Black (07-18 Jeep Wrangler JK)
- Smittybilt Tubular Rear Bumper without Hitch; Textured Black (07-18 Jeep Wrangler JK)
- Smittybilt Tubular Rear Bumper without Hitch; Gloss Black (07-18 Jeep Wrangler JK)

PROCEDURE:
1. REMOVE CONTENTS FROM BOX. VERIFY ALL PARTS ARE PRESENT. READ INSTRUCTIONS CAREFULLY.
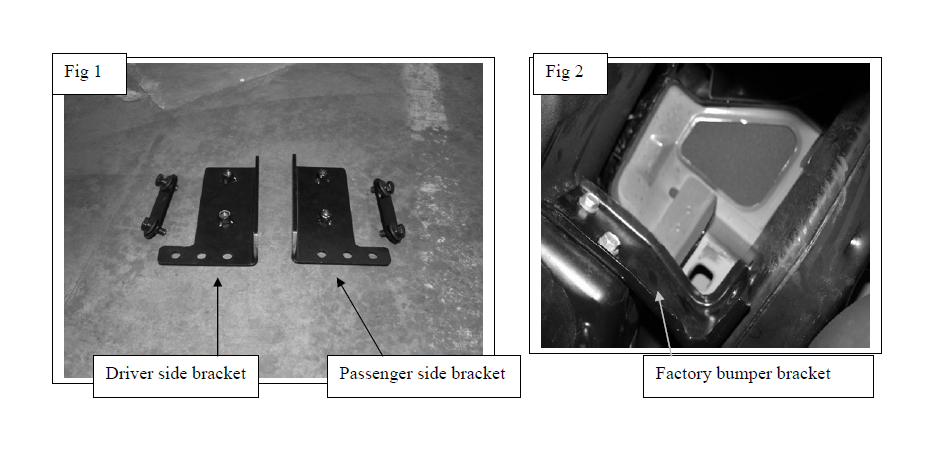
2. Locate, remove and set aside the brackets (Fig 1)
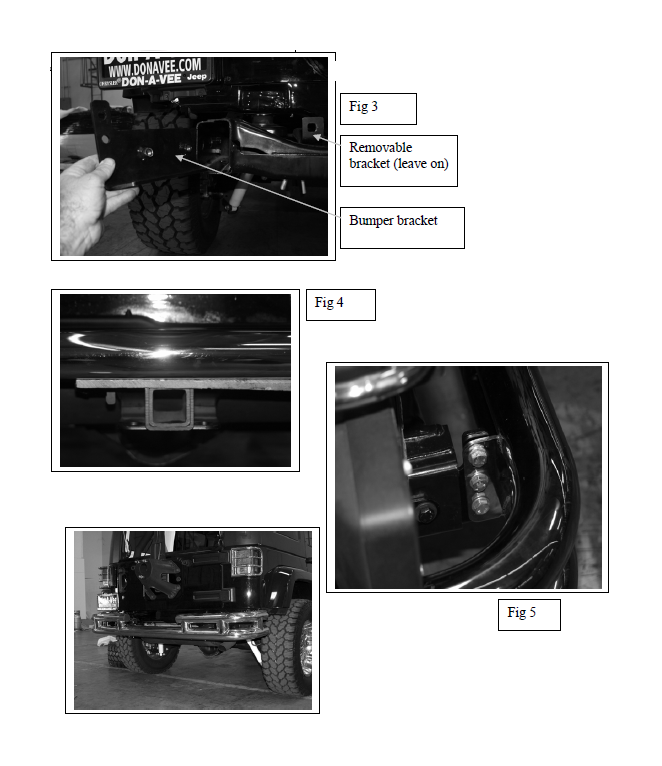
3. Remove factory bumper by removing the side brackets (Fig 2) and the bolts in the removable brackets (Fig 3)
4. Insert the driver side bracket into the frame (Fig 3)
5. Start the two 12MM bolts and thick washers through the bolt plate and into the frame.
6. Repeat the bracket installation on the passenger side of the vehicle.
7. Insert a thin piece of wood between the bumper and the trailer hitch receiver to prevent damage. (Fig 4)
8. Position the bumper in between the two mounts and start the six 12MM bolts, washers and locking nuts. (Fig 5)
9. Level the bumper and tighten all the fasteners. (Fig 6)


Cleaning and Maintenance
To protect your investment, wax this product after installing. Regular waxing is recommended to add a protective layer over the finish. Do not use any type of polish or wax that may contain abrasives that could damage the finish.
For stainless steel: Aluminum polish may be used to polish small scratches and scuffs on the finish. Mild soap, window or glass cleaner may be used also.
For gloss black finishes: Mild soap, window and glass cleaner may be used.
