FREE 1 to 3-Day Delivery on Orders $149+ Details

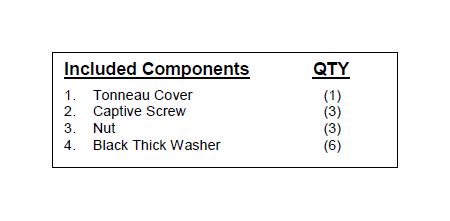
How to Install Smittybilt Tonneau Cover - For OEM Soft Top W/ Channel Mount - Denim Spice

Shop Parts in this Guide
Before You Begin
Thank you for purchasing the Smittybilt Tonneau Cover for 1997-Current Jeep Wrangler. Before you get started, please read the important information listed below:
1. For this Tonneau Cover to fit correctly you must have Soft Top equipment, factory
installed hardware on your vehicle.
2. All Smittybilt Soft tops are pre-fit at the factory. Please note that in order to provide long term fit, Smittybilt designs each top to fit very tight on the initial installation. Please
make sure it is at least 70 degrees F. when you first install this top or it will be very
difficult to install. If you use a hair dryer to warm the fabric, the install will be easier.
3. The Tonneau Cover may seem wrinkled when first installed, this is caused by the fabric becoming wrinkled during shipping. The fabric and the wrinkles will relax after a few days installed on the vehicle.
Warning: this top is designed to protect you from the elements only and is not designed
to keep you inside the vehicle in the event of an accident. Always fasten your seat belt.
IF YOU HAVE ANY PROBLEMS WITH THE INSTALLATION OR PERFORMANCE OF THIS TONNEAU COVER , DO NOT RETURN THE PRODUCT TO THE RETAILER. PLEASE CALL 1-888-717-5797 FOR INSTALLATION HELP. FACTORY TRAINED PERSONNEL WILL BE ABLE TO WALK YOU THROUGH THE INSTALLATION/PROBLEM.
Installation Instructions
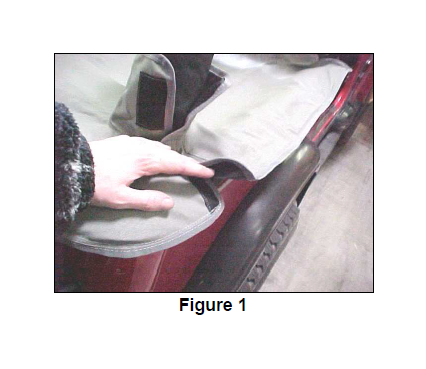
1. Lay the Tonneau over vehicle and wrap around the roll bar at the rear of the vehicle (Figure 1).
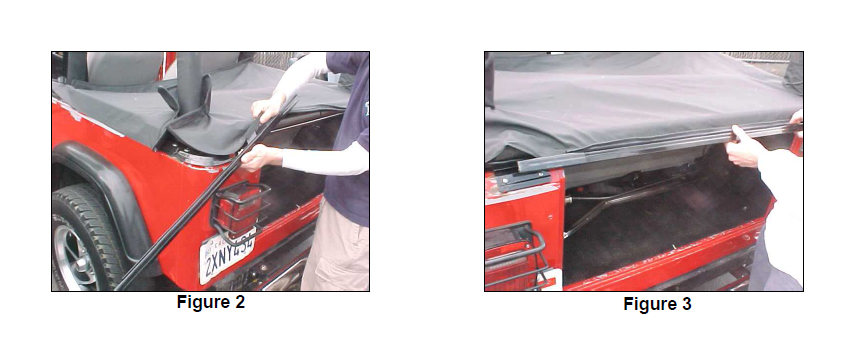
2. Lift flap on rear of Tonneau and slide factory tailgate channel on Tonneau retainer. Insert channel back onto vehicle (Figures 2 and 3).
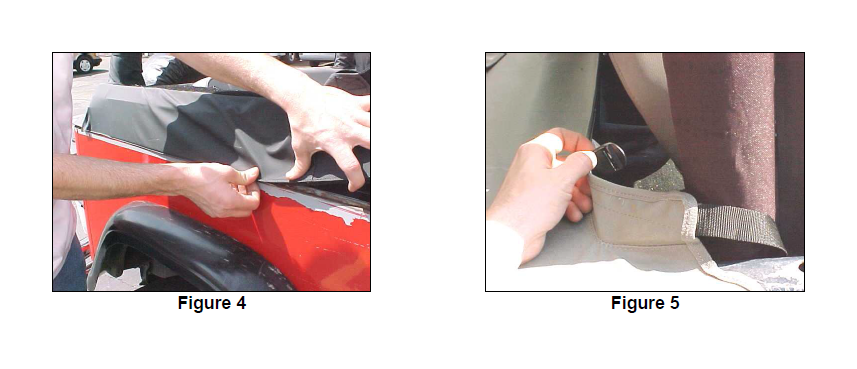
3. Starting at the rear of the vehicle, insert the plastic retainer strip (sewn into Tonneau) into the soft-top channel. Work towards the front pulling the Tonneau forward. Complete for the driver, passenger, and rear sides (Figure 4).
4. Wrap the Flaps at the front of the Tonneau around the roll bar and fasten into buckle (Figure 5).
Wind Breaker to a Tonneau Cover Connection
*Windbreaker not included with Tonneau Cover
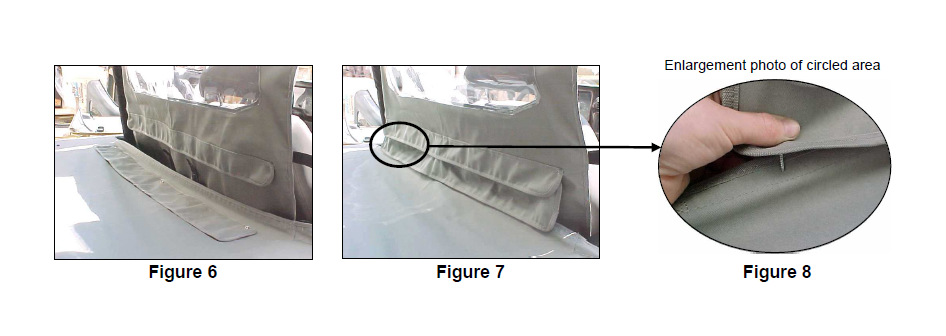
1. Lay the Connector Flap on the Tonneau, attach and line up with the Wind Breaker, then mark spots where the snaps will meet with the captive screws on the Tonneau (Figures 6, 7 and 8).
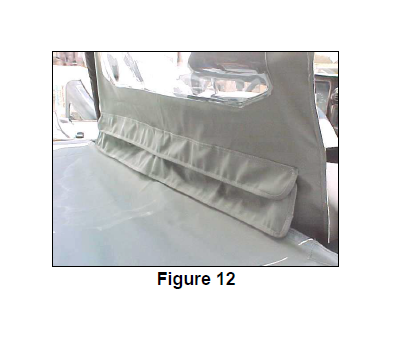
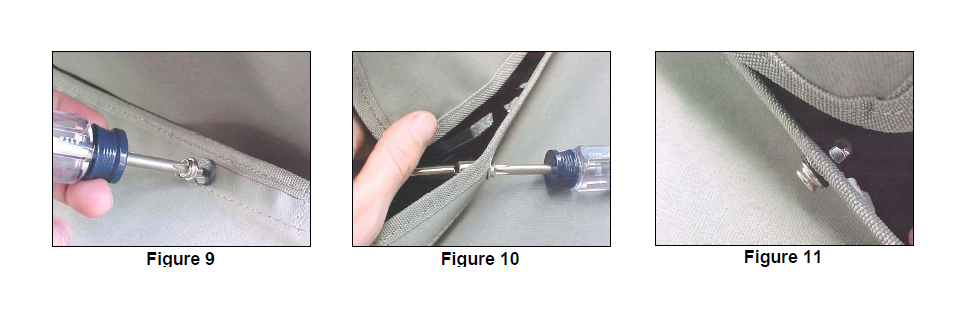
2. Insert the captive screws and secure with the nuts and rubber washers (Figures 9, 10, 11).
3. The Connector Flap is now attached to the Tonneau. Snap together with the Wind Breaker and installation is complete (Figure 12).