 FREE 1 to 3-Day Delivery on Orders $149+ Details

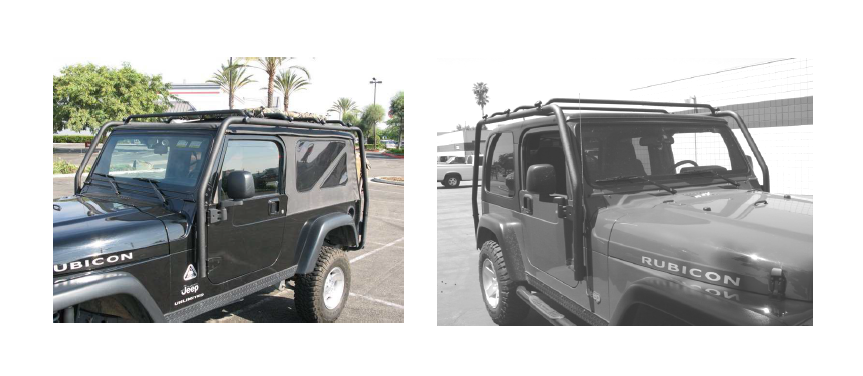
How to Install Smittybilt SRC Roof Rack - 300 lb Rating - Black Textured on your 1997-2006 Wrangler

Shop Parts in this Guide
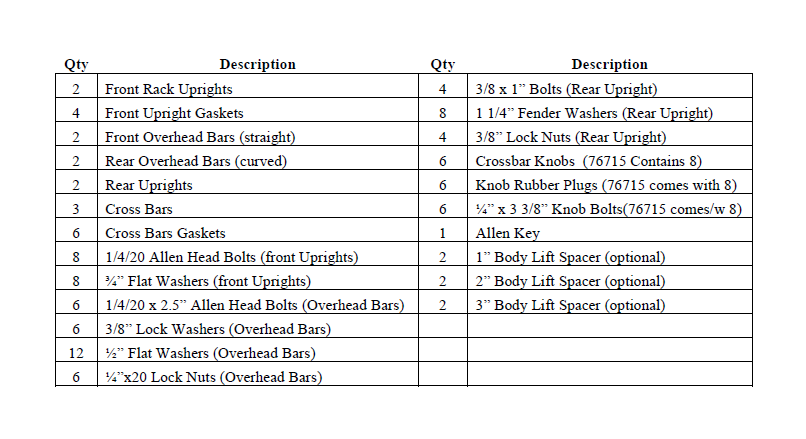
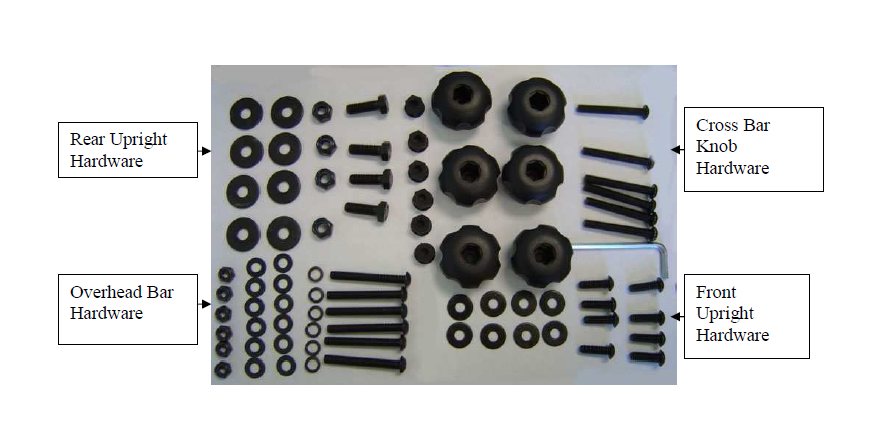
INCLUDED COMPONENTS
IMPORTANT- You are going to have to remove the bolts from your door hinge. DO NOT OPEN THE DOOR WHILE THE BOLTS ARE REMOVED! YOUR DOOR WILL GO OUT OF ALIGNMENT.
Front Upright INSTALATION INSTRUCTIONS
1. Place the adhesive backed gaskets on the front uprights to protect the vehicle from scratches.
2. Remove factory windshield hinge and lower door hinge bolts (only work on one door at a time) It is important that you can enter the Jeep through the opposite door to tighten the lower door hinge without the door moving. (Figure 1).
3. When you remove the lower door hinge a backing plate (figure 2) will come loose. Enter the Jeep from the opposite side to access the plate. You will need it in step 4.
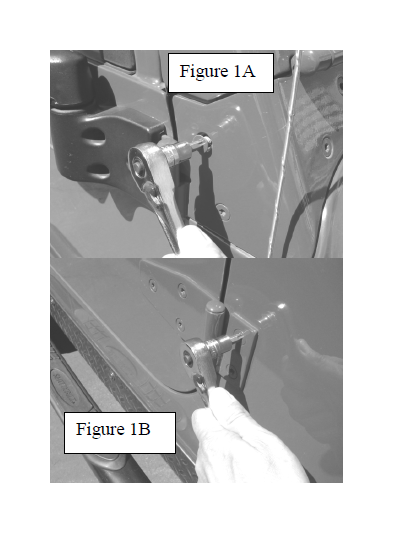

4. Using the supplied front upright 1/4x20 allen bolts and a ¾” flat washer, attach the front upright to the Jeep. You will need a partner to place the factory backing plate (Figure 2) for the lower door hinge in location for you to attach the lower door bolts. (Do not open the door you are working on! Enter from the
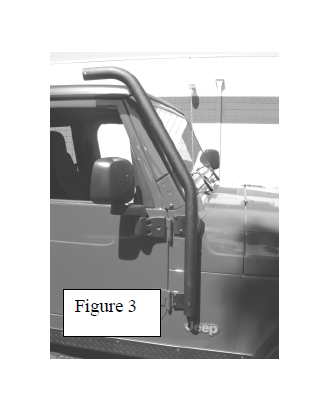
opposite side). Tighten the bolts for the upright and repeat the process for the opposite side. (Figure 3)
5. Remove the factory rear bumper and bolts. (If reinstalling factory bumper proceed to step 16 before
moving on.)
6. Insert the bolts with flat washers through the rear bumper. Do not install the nuts at this time. Just use the bolts to hold the bumper in place.
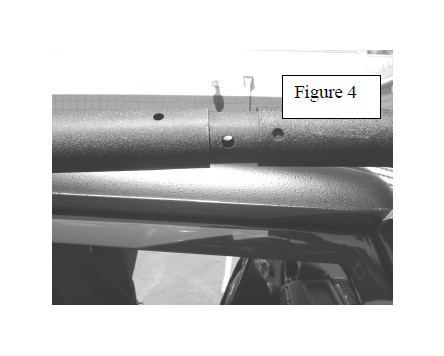
7. Insert the front overhead bar (straight bar) into the front upright. Insert a 1/4/20 x 2.5” Allen Head Bolt with a flat washer, through the bar and the upright. Then place another flat washer, a lock washer and the locking nut on the bar. DO NOT TIGHTEN. Have an assistant hold the bar in place for steps 8&9 (important or you vehicle may get scratched) (Figure 4)
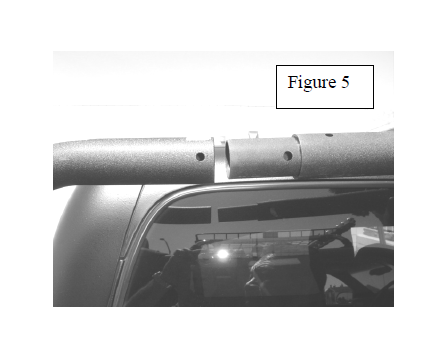
8. Repeat step 5 for the rear overhead bar (curved bar). Do not tighten. (Figure 5)
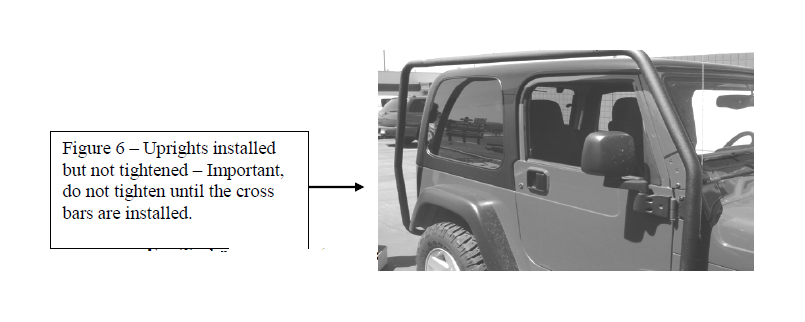
9. Insert the rear upright into the rear overhead bar. Then position the rear upright on the backside of the bumper bolts. Install a flat washer and locking nut on the rear upright bolts. DO NOT TIGHTEN. Install the 1/4/20 x 2.5” Allen Head Bolt with a flat washer, through the upright as in steps 7 & 8. Do not tighten (Figure 6)
10. (Option – Body Lift Spacers) – If your vehicle has a body lift use the supplied spacers to separate the lower upright from the rear overhead bar. 1”, 2” and 3”
spacers are provided.
11. Repeat steps 7-9 for the opposite side.
12. Locate the front cross bar. The front crossbar is shorter than the
middle and rear crossbars. Install the foam gasket to the crossbar ends.
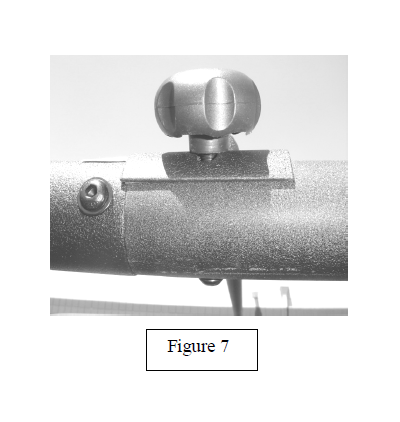
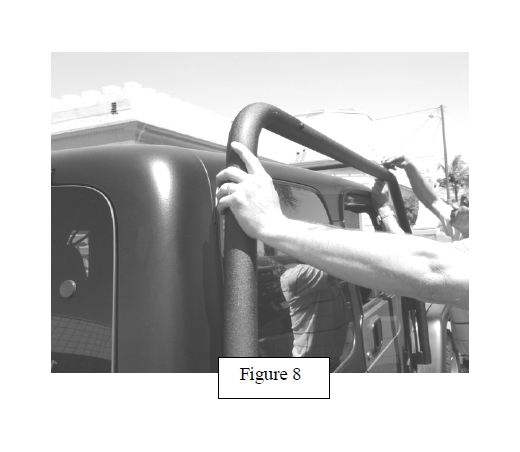
13. Place the front crossbar on the upright. Insert the ¼” x 3 3/8” Knob Bolt through the bottom of upright and through the cross bar. Tighten the bolt with the plastic crossbar knob and allen key supplied. (Figure 7) Repeat on the opposite side. It may be necessary for an assistant to put pressure on the uprights to get
them in the proper location for the cross bars to attach. (Figure 8)
14. Repeat the crossbar installation procedure for the middle and rear crossbars.
15. After all of the crossbars have been attached, center the rack on the vehicle and
tighten all of the bolts. (Double check to make sure all hardware is tight)
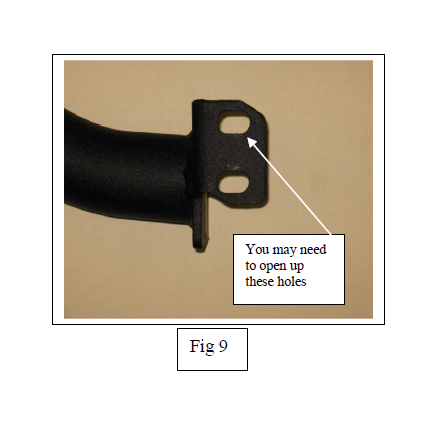
16. If re-using the factory rear bumper, due to the size of the bolts on the factory bumper you may be required to open up the slots on the rear lower uprights slightly. (Fig 9) You will need to remove the plastic end caps as well and you will not be able to re-mount them.
17. Installation is now complete. Note: After driving the vehicle with the rack a few days it is recommended to check all of the bolts for proper tightness. If loose, retighten.
NOTE: To protect your investment, wax this product after installing. Regular waxing is recommended. Do not use any type of polish/wax that contains abrasives that could damage the finish.
