 FREE 1 to 3-Day Delivery on Orders $149+ Details

How to Install Smittybilt SRC Gen2 Front Bumper (07-18 Jeep Wrangler JK) on your Jeep Wrangler
Installation Time
105 minutes
Tools Required
- 1/2” or 3/8” Drive Socket Wrench
- 17mm Socket
- 3/4” Socket
- 5/8” Deep Well Socket
- 4” Socket Extension
- Electric Drill
- 1/2” Drill Bit
- 13/32” Drill Bit
- #2 Phillips Screwdriver
- 3/4” Open End Wrench
- Flat Blade Screwdriver
- Torque Wrench

Shop Parts in this Guide
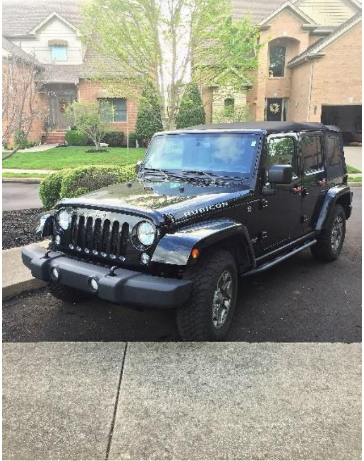
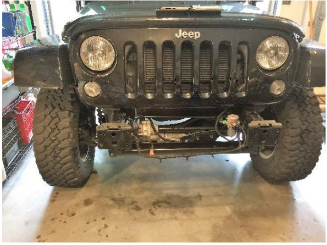
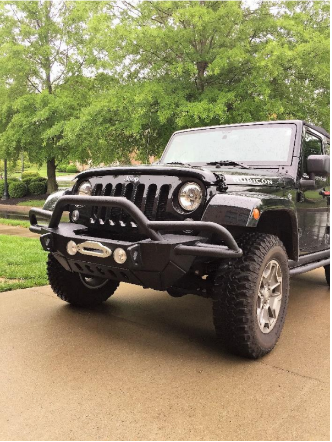
Installation on a 2016 Wrangler JK Rubicon Unlimited (Before Picture)
Installation Instructions:
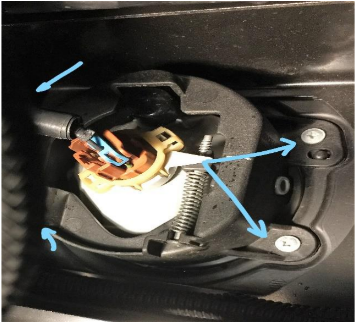
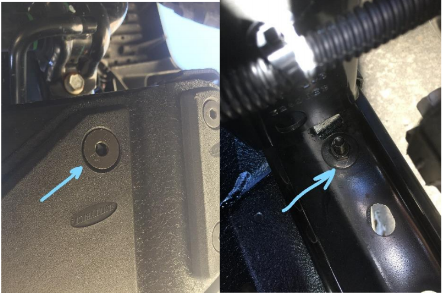
1. Remove the air dam by removing 4 plastic retainer in the front of the bumper with a flat tip screwdriver.
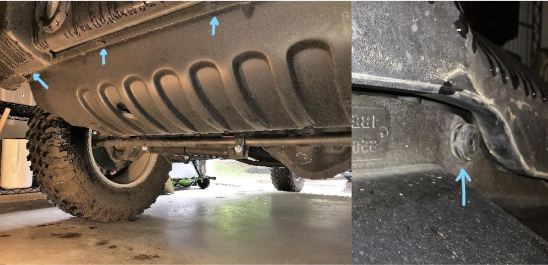
2. Once removed the air dam is able to be pulled down allowing access to the 2 plastic retainers inside the air dam. Remove these retainers also.
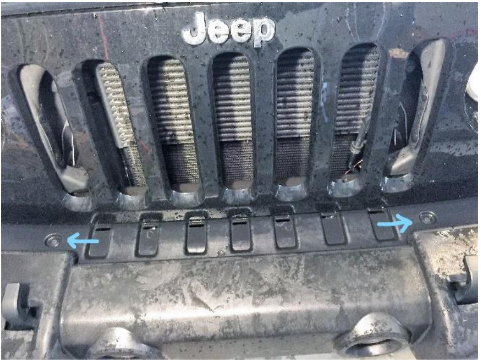
3. Remove upper plastic cover. (The cross tip heads are very fragile, I ended up prying the retainers out and discarding them as they are no longer needed)
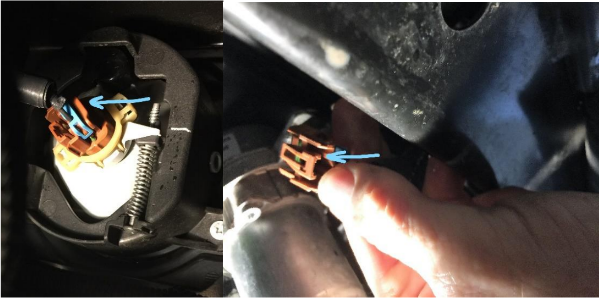
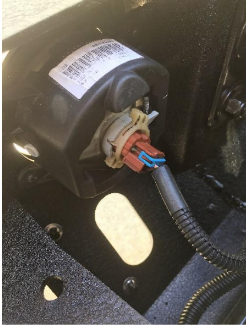
4. Disconnect fog lights by pushing on the brown tab on the connector and gently pull out.
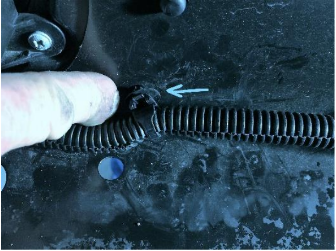
5. Disconnect 4 harness retainers on Fog light wire harness from the bumper using a flat tip screwdriver.
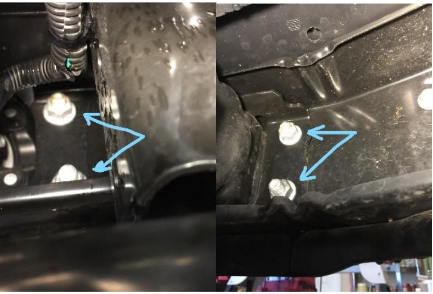
6. Remove 8 bumper retaining nuts. (2 inner and 2 outer mount on each side) with a 17mm socket. (I used a 1/2 “ drive without any need for a breaker bar)
7. Set all of the removed hardware aside, it will not be needed for installation of your SRC Gen 2 bumper.
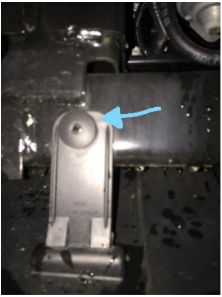
8. Using the factory tow hooks as handles, pull the bumper forward to remove.
9. Remove fog lights by removing 4 retaining screws each light with a #2 Philips.
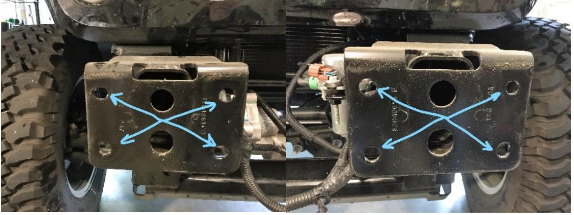
10. Drill out all 4 holes with a 1⁄2” drill bit on both of the bumper mounts.
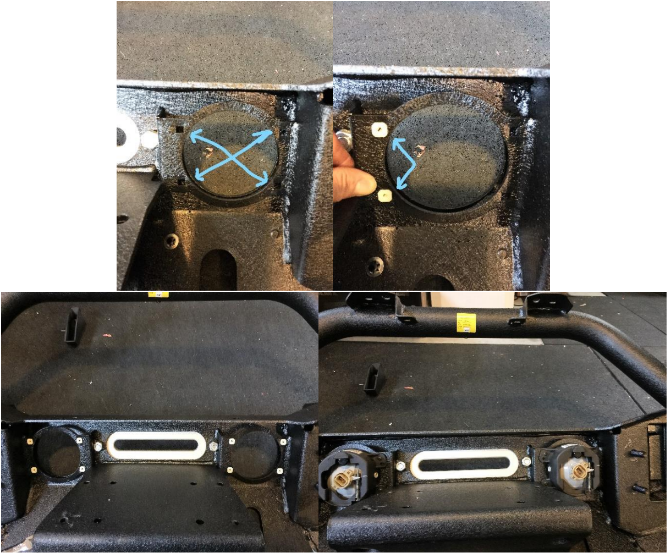
11. At this point I HIGHLY recommend that if you are installing a winch and fog lights do it now. Install the winch fairlead before installing the winch as it is almost impossible to do after the winch is bolted down.
12. Install the OEM fog lights using the supplied hardware and plastic screw plugs with a #2 phillips screwdriver. Press the plastic inserts into the 4 square cutouts around each light cutout. Be careful to not over tighten or the plastic may strip.
13. With the help of a friend or two lift the bumper onto the mounts, align the welded mounts into the inner holes on the bumper attachment plate, and secure the four (4) studs with the supplied nylock nuts and flat washer on the inner attached bolts and tighten with a 3⁄4” socket.
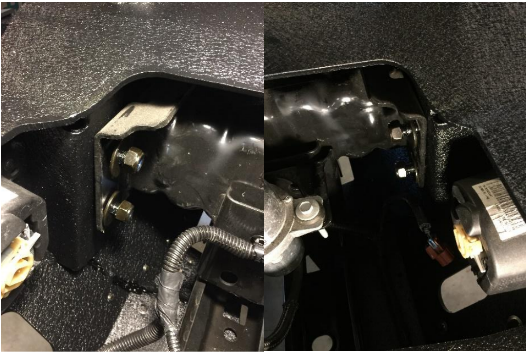
14. From underneath align and install four (4) bolts, flat washer and lock washer into the 4 outer holes of the mounts with a 3/4” socket.
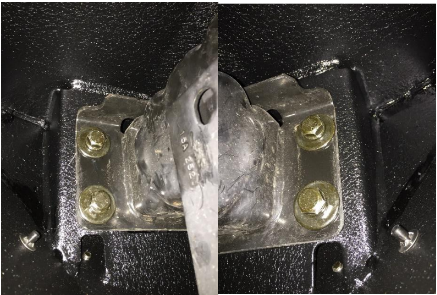
15. Torque 4 Nylocks and 4 Bolts to 60 ft lbs.
16. Use the two (2) outer holes on the bottom of the bumper and if needed drill holes through the cross member with a 13/32” drill bit. (Mine already had the holes there)
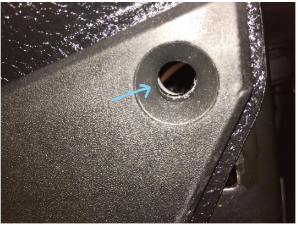
17. Use the M10 counter sunk bolt, washer, and nut using a 5/8” deep well socket and hex key to secure the lower bumper to the cross beam. Use additional washers to fill any gap between the cross member and the bumper.
18. Reconnect the fog light wiring harness.
19. Your Smittybilt SRC Gen 2 bumper is now installed!
Installation Instructions Written by Extreme Terrain Customer Michael Gee 05/01/2017


