 FREE 1 to 3-Day Delivery on Orders $149+ Details

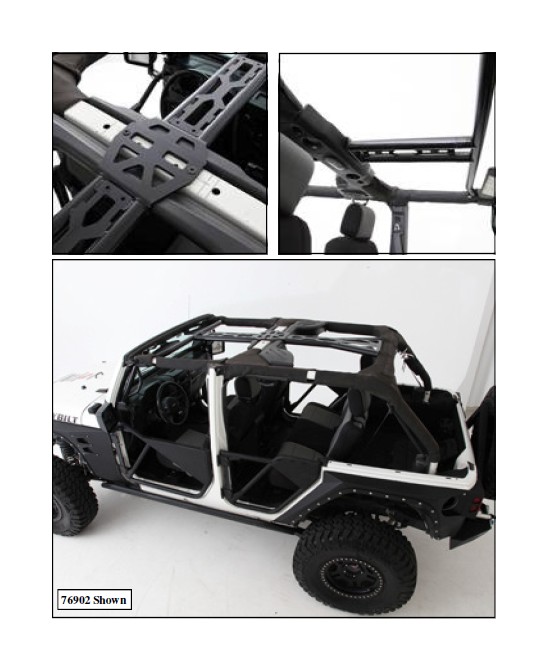
How to Install Smittybilt SRC Cage Kit - 7 Piece - Gloss Black (07-10 Wrangler JK 2 Door) on your Jeep Wrangler

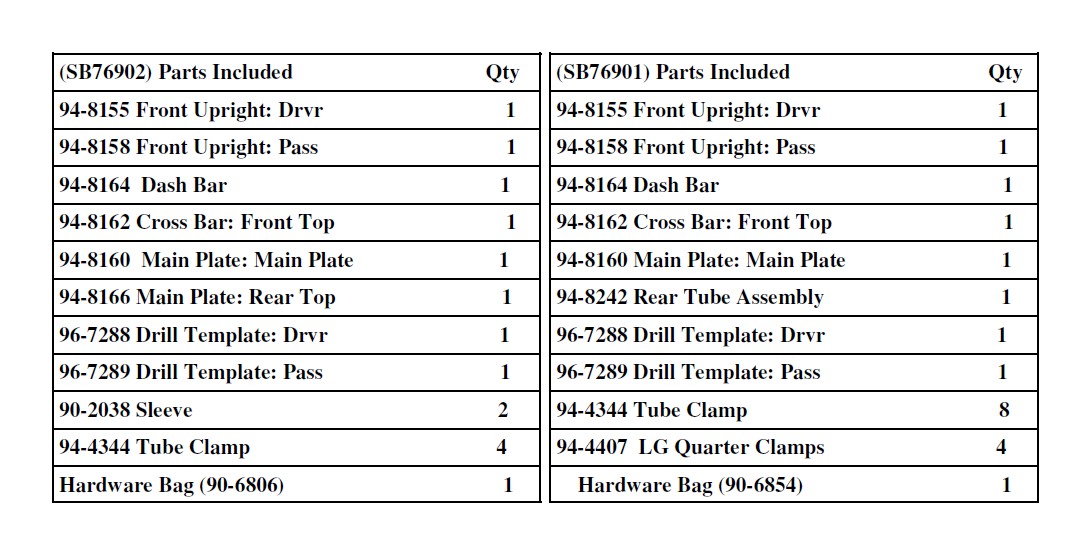
Shop Parts in this Guide
NOTE: Carefully read entire instructions thoroughly before attempting to install this part.
INSTALLATION:
Step 1: Place the vehicle on a flat, level surface and engage the parking brake.
Step 2: If equipped fold down your soft top or remove your hardtop.
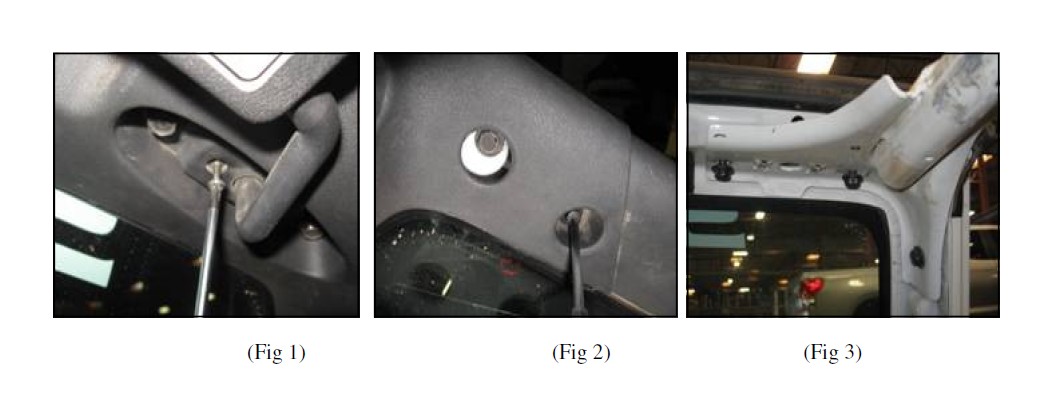
Step 3: Remove your sun visors and front top corner plastic molded piece. (Fig 1, 2, 3)
Step 4: Unzip the sport bar padding covers on the tubes above each door. Remove the hard foam core underneath. Use care when doing so.
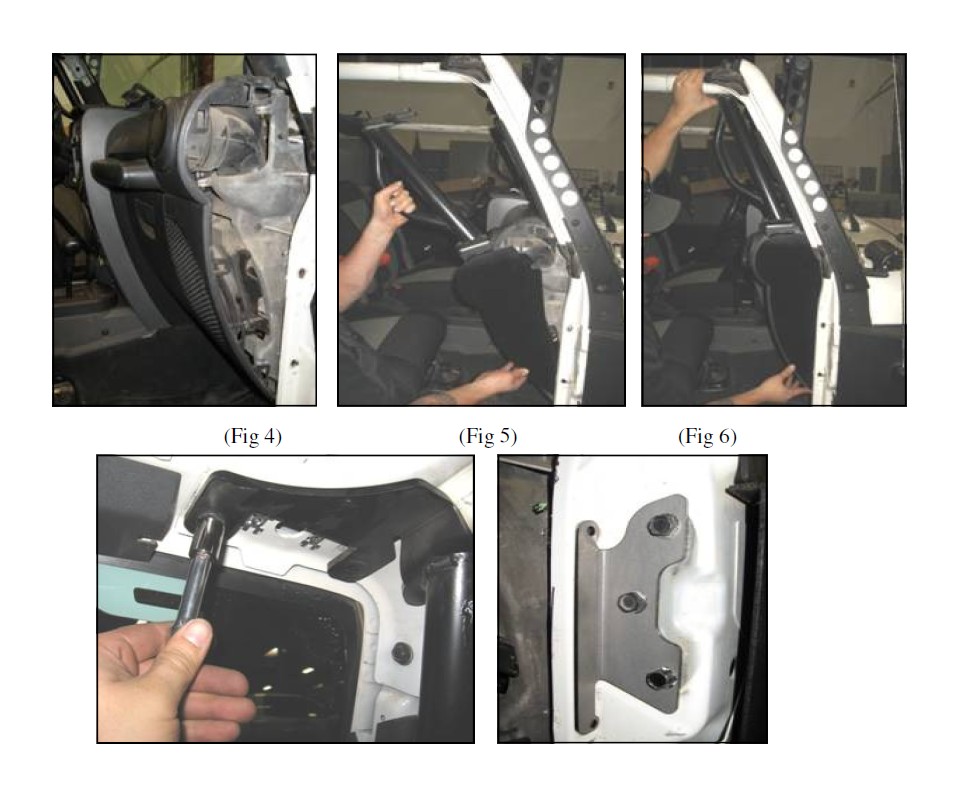
Step 5: Remove the vehicles doors and the top inside hinge. Take off both side panels from the side of your front dash. (Fig 4)
Step 6: Install the passenger side drill template (7289) by attaching it to the top inner hinge location on the vehicle using the OEM hardware. (Fig 8)
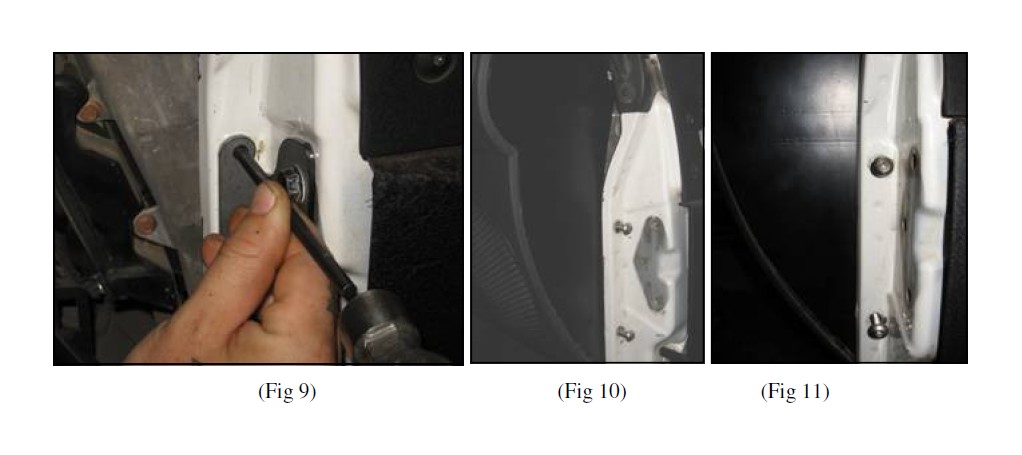
Step 7: Using the drill template as a guide, drill the (2) holes using a 1/4” drill bit. (Fig 9) NOTE: Always use caution when drilling.
Step 8: Remove the drill template and drill out the (2) 1/4” holes using a 7/16” drill bit. Note: It is recommended to use a step drill bit to prevent the drill bit from walking.
Step 9: Install the passenger side vertical front upright; by first sliding the lower corner in first rotating inward slightly and then pushing up horizontally. (Fig 5,6)
Step 10: Line the top of the upright with the two holes near the windshield visor mount. (Fig 7) You may need to knock it into place in order to line up the holes. Re-install the bolts and tighten sung.
Step 11: Repeat steps 5-9 for the opposite side of the vehicle. Re-install the inner top OEM door hinges.
Step 12: Install the passenger side vertical front upright by securing the top bolts and two button head bolts through the door jam area. Do not tighten hardware at this time. (Fig 7, 10, 11)
Step 14: Install the drive side vertical front upright using the same process as Step 11 and attaching the dash bar in at the same time. After everything is connected proceed to tighten all bolts completely.

Step 15: Cut a slot in the OEM top side sport bar cover on the inside part of the cover. (Fig 15, 16)
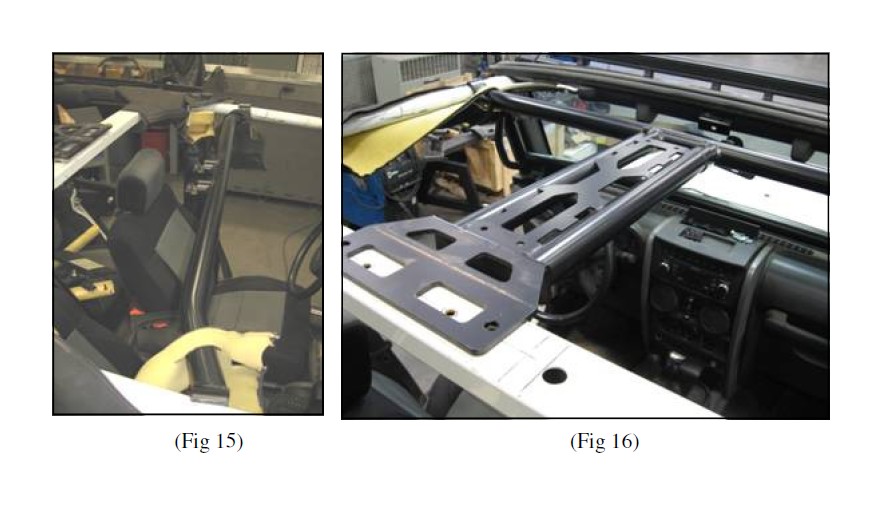
Step 16: Install the top front bar (The bend points towards the rear and up) Slide the ends of the bar through the slots you made in the cover. It may be easier to do this at a slight angle first. Move bar forward parallel with the windshield frame. Position it as far forwards as you can.
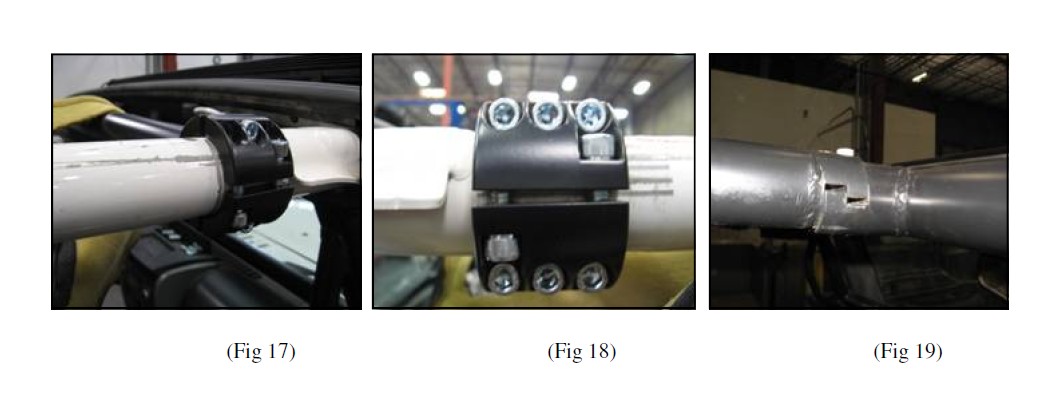
Step 17: Loosely attach front clamp brackets with the included socket cap bolts.(Fig 17, 18
Step 18: Remove the center sound bar.
Step 19: Install the front main plate. (From the front top bar back to the center roll cage) Fig 16 Tighten the front where it clamps to the front cross bar snug. (Fig 19)
Step 20: Making sure the rear is centered mark the holes. Then remove the main plate and center punch the holes and drill out to 1/2” (Fig 20, 21)
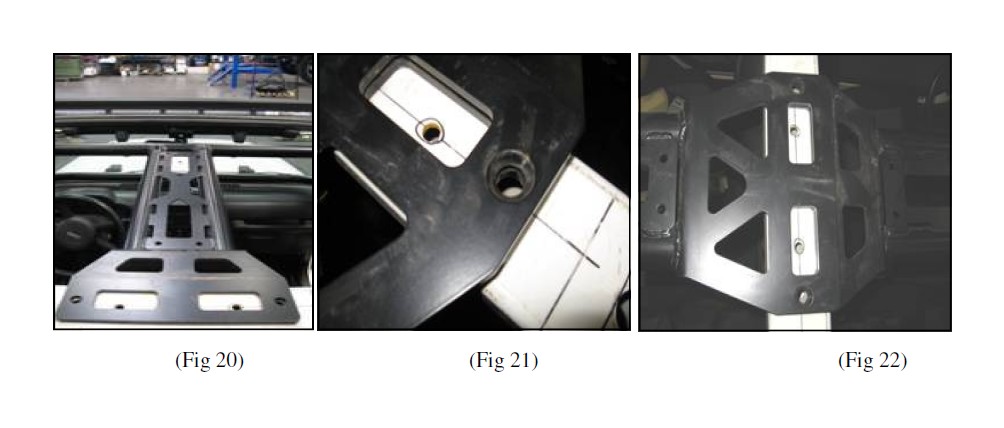
Step 21: Set the rear main plate on top of the front main plate on the center sport bar. (Fig 22)
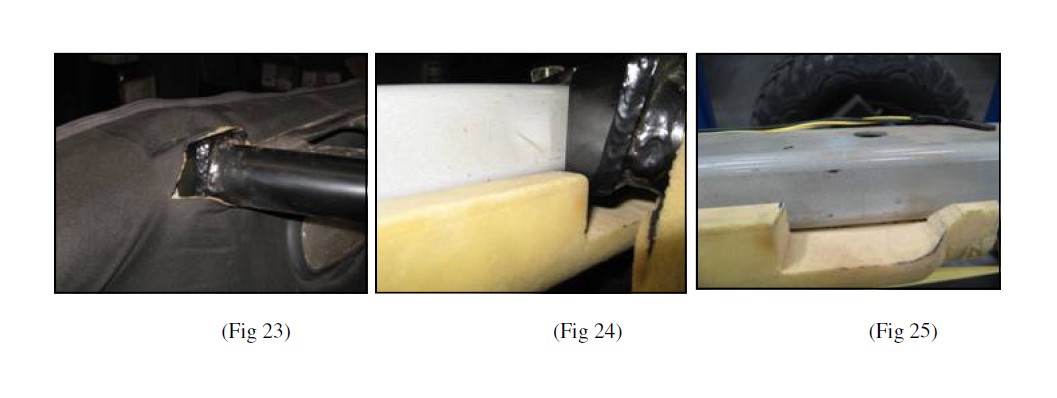
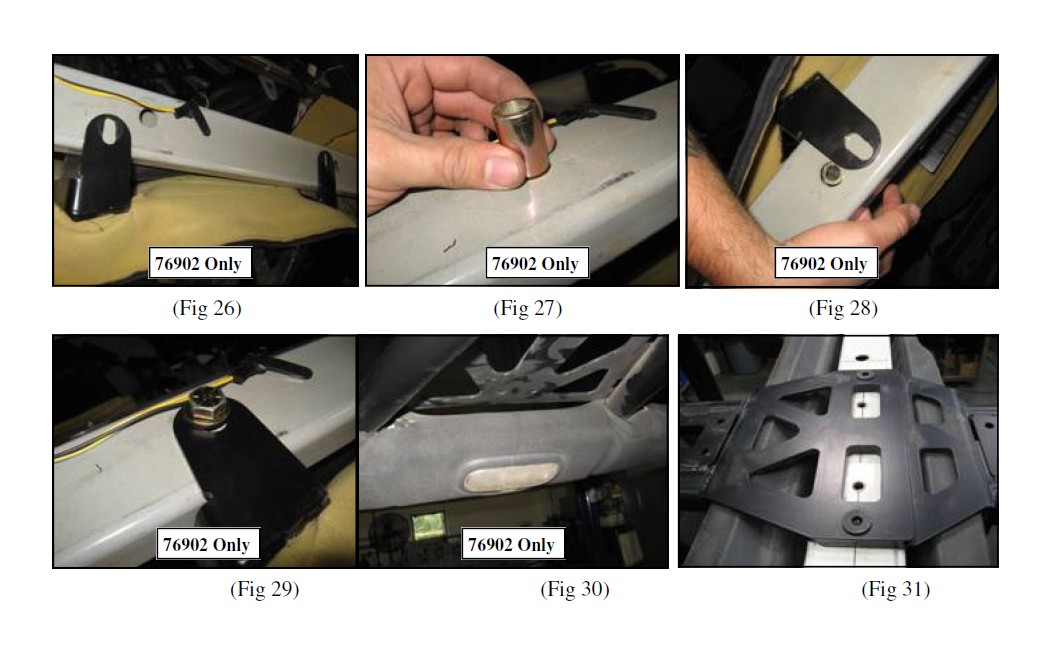
Step 22: 76902 Kit Only: Mark the rear sport cover where the rear of the rear top plate would mount. Remove the rear plate and carefully make a slot in the cover so the clamps can go through. You will also need to notch the foam with a sharp razor knife in order for the bracket to sit flush. (Fig 23, 24, 25)
Step 23: 76902 Kit Only: The rear of the rear main plate mounts into factory holes. Once padding is slotted and foam is notched reinstall the rear main plate by installing the included tube spacers and hex-bolts. Do not tighten hardware completely. (Fig 26, 27, 28, 29, 30)
Step 24: 76901 Kit Only: Install the rear bar with the bend points toward the rear of the vehicle facing up. Do not tighten at this time. Install the rear center bar and line up with front main plate.
Step 25: Secure both main plates on the center sport bar with included Allen head hardware. (Fig 31) Do not tighten completely at this time.
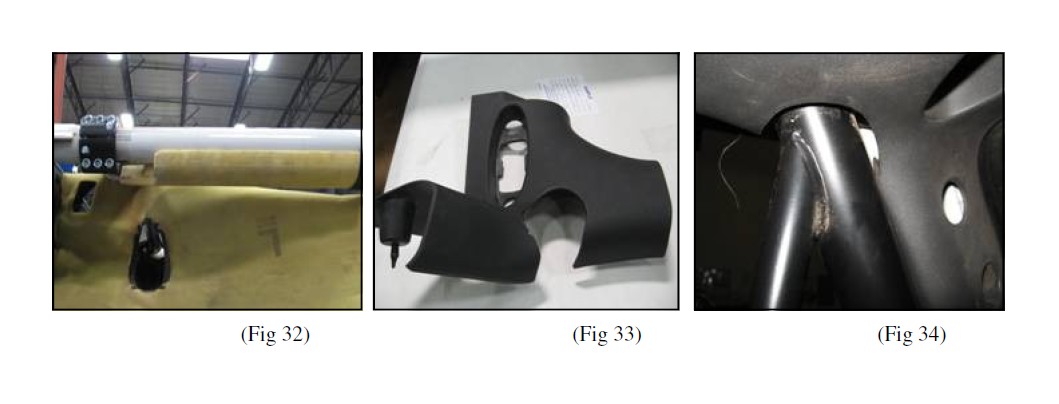
Step 26: Reinstall the foam and padding on the roll bar brace bars above the doors. You will also need to trim these in order to clear the front top bar of the front main plate. (Fig 32)
Step 27: Reinstall the sound bar. It will sit a little lower now. You can trim the lip edge on the inside of the large diameter hole that the “T” top screw goes into.
Step 28: OPTIONAL: The front corner molded pieces previously removed can be reinstalled with some careful trimming. If trimming use the installed vertical front uprights as a guide on where to trim. Installation of corner pieces is optional. ( Fig 33, 34)
Step 29: SOFT TOPS: If you are using your door surrounds you will need to trim a portion of the front clamp on both sides in order to clear the front top cage bar. This can easily be done with a hacksaw. Hold the surround up into position and mark the area that needs to be cut off and then carefully trim it.
Step 30: Go back and tighten all hardware completely. Installation is now complete.
Step 31: Installation is now complete.
Product cleaning and maintenance instructions
Stainless Steel Finish – Aluminum polish may be used to polish small scratches and scuffs on the finish. Mild soap, window or glass cleaner may be used to clean the finish. Dual state powder coat finish – Mild soap, window or glass cleaner may be used to clean the finish. In order to protect the finish, you may wax your product on a regular basis with pure carnauba automotive wax. Do not use any types of soap, polish or was that contains abrasive that could damage the finish. Textured coated finishes should be cleaned with a mild soap on a damp sponge. Do not apply polish or was that requires to be removed by means of buffing. This type of wax is commonly used at car wash facilities. Chrome Finish – Mild soap, window or glass cleaner may be used to clean the finish. In order to protect the finish you should wax your product on a regular basis with pure carnauba automotive wax. Do not use any types of soap, polish or was that contains abrasive that could damage the finish.

