 FREE 1 to 3-Day Delivery on Orders $149+ Details

How to install a Smittybilt OEM Replacement Top with Tinted Windows on your 2007-2009 Jeep Wrangler
Shop Parts in this Guide
NOTE: Read entire instructions thoroughly before installing this product. It is recommended to install this Top when temperatures are above 70 degrees. The top can contract and stretch an inch or more. If the Top has any wrinkles this is caused from packaging but once the top relaxes they will go away. You must have the factory bow assembly and door surrounds in order to install this product.
Step 1: If there is currently a soft top on the vehicle, remove it and save the screws removed from where the top attaches to the rear bows. Once the windows are removed and the screws from the rear bows, you will need to fold your top down.
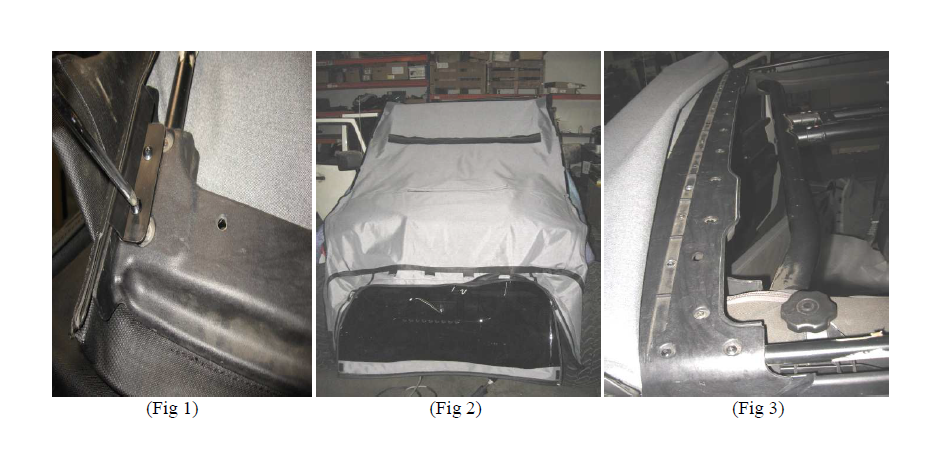
Remove the two screws from the front two corner plastic pieces. (Fig 1) Save hardware for later use. Now you will need to raise the bow assembly and lock the header into the windshield frame. Carefully pull the softop forward over the windshield frame and onto the hood. (Fig 2)
To remove the top from the header piece remove all of the screws holding the top portion of the header onto the base. (Fig 3) Keep screws for later use. You may now remove the top portion of the header and the top completely.
Step 2: Drape your new top over the hood upside down with the front of the top up on the windshield header. (Fig 2)
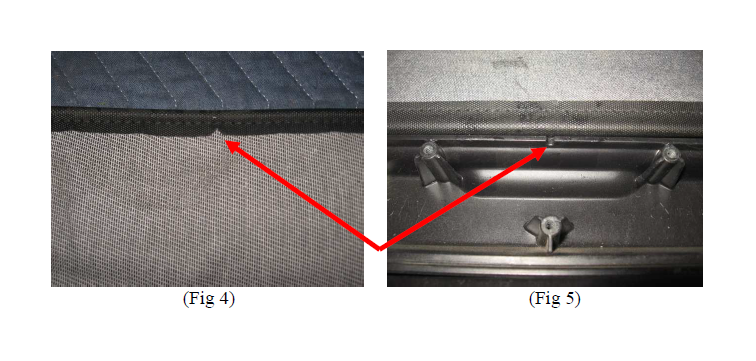
Step 3: Place the sewn in plastic tube on the top on the front edge of the header inside the extrusion; lining up the mark in the center of the top with the notch in the center of the header. (Fig 4, 5)
Step 4: Use masking tape to help hold the top along the header. (Fig 6, 7)

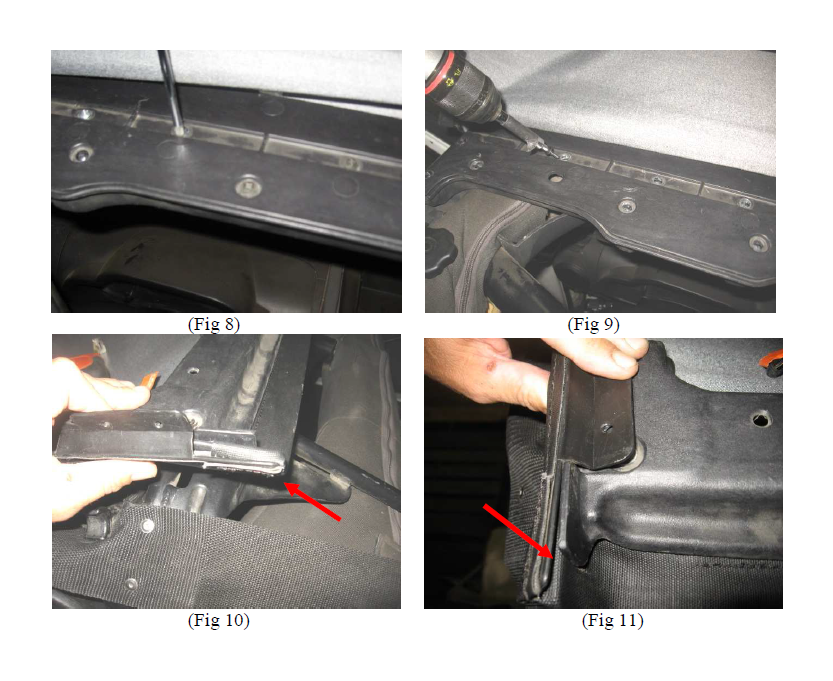
Step 5: Re-install the top portion of the header back on with the previously removed screws. This will clap the front of the top inside the header. (Fig 8, 9)
Step 6: Un-clamp the front header from the windshield frame and fold the front section of bow back over top while draping the top back around the header .Pull the front corners back tight around header so fabric is smooth around header. (Fig 10, 11) Wrap the plastic front side extrusions of the header and re attach with the previously removed hardware. (Fig 11, 1)
Step 7: Flip the header back down on the windshield frame. Drape the top back completely over the bow assembly. (Fig 12)
Step 8: Make sure the rear of the top is centered over the rear bow. Then secure the flaps on the top to the bow using the previously removed hardware. (Fig 13)
Step 9: Now secure the flap to the middle bow, again using the hardware previously removed. (Fig 14)
Step 10: Wrap the front flap around the front part of the bow and fasten secure by fastening the Velcro. (Fig 15)

Step 11: Make sure the bow assembly is latched into each side latch (Fig 16) and then proceed to clamp the front header to the windshield frame. (Fig 17)
Step 12: Pull down the rear corner of the bow assembly from the outside and attach the rear corner of the top by sliding the sewn in extrusion into the body tub rail. (Fig 18)
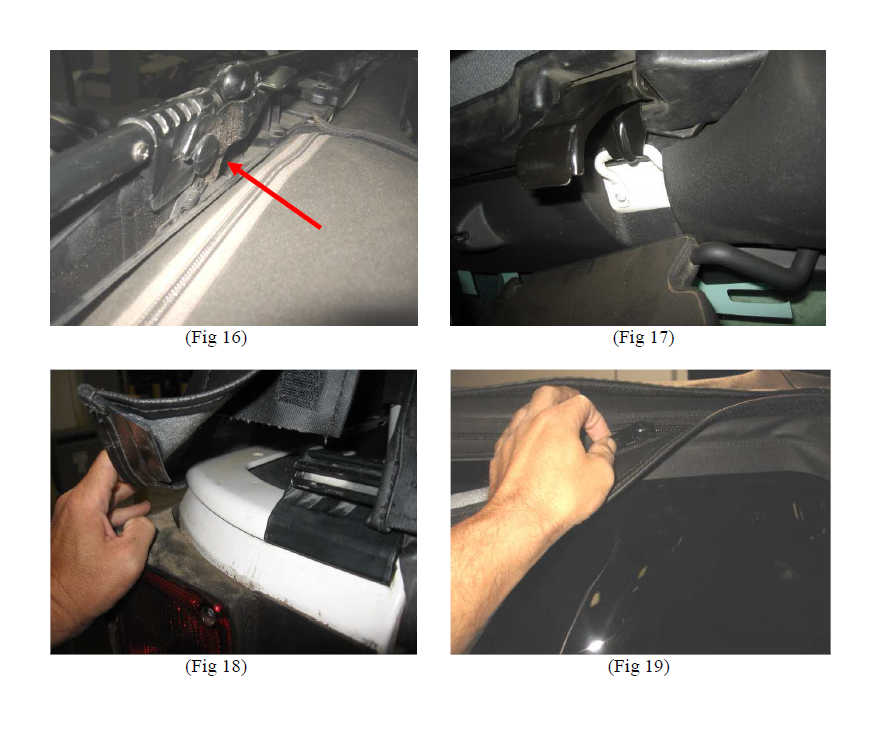
Step 13: Start the zipper on the rear quarter windows. Zip closed a few inches. (Fig 19)
Step 14: Fold the plastic extrusion sewn along the front of the windows into the channel on the door surround. (Fig 20, 21)
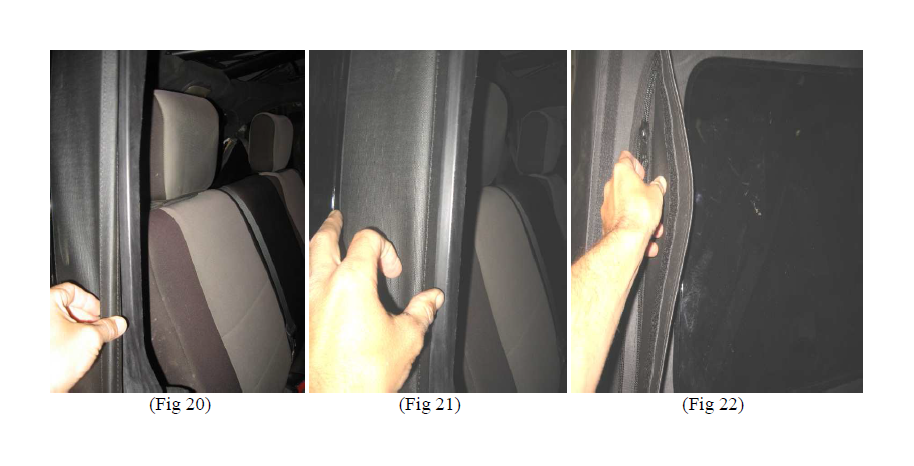
Step 15: Zip the windows on completely (Fig 22) and secure the bottom of it by sliding the plastic extrusion on the window into the body tub rail. (Fig 23)
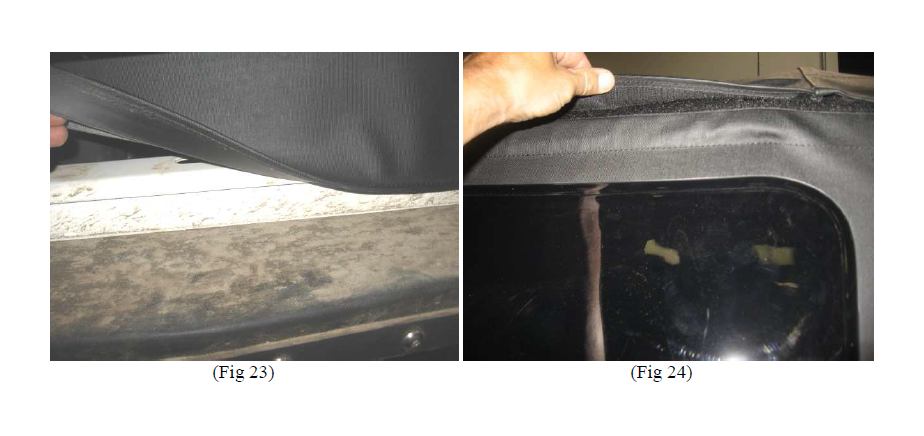
Step 16: Fasten together the Velcro located on the top of the windows and the top. (Fig 24)
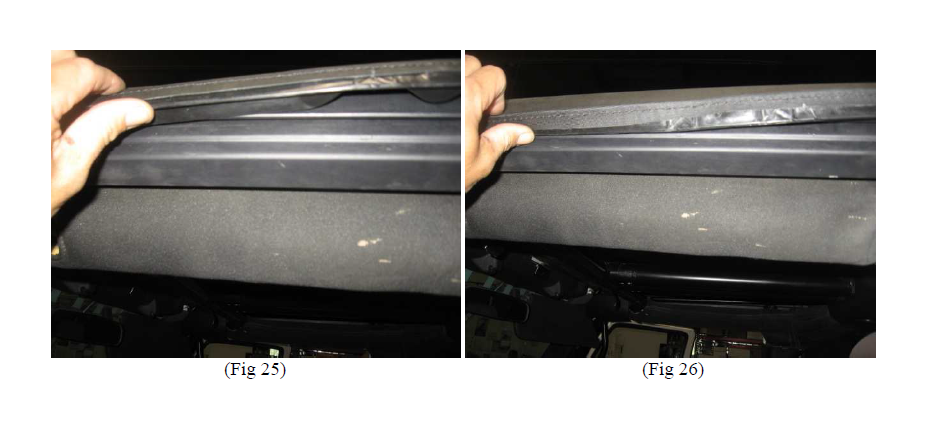
Step 17: Insert the plastic extrusions sewn into the top above the doors into the channel above each door. (Fig 25, 26)
Step 18: Snap the two rear elastic window straps on the rear bow corners. (Fig 27)
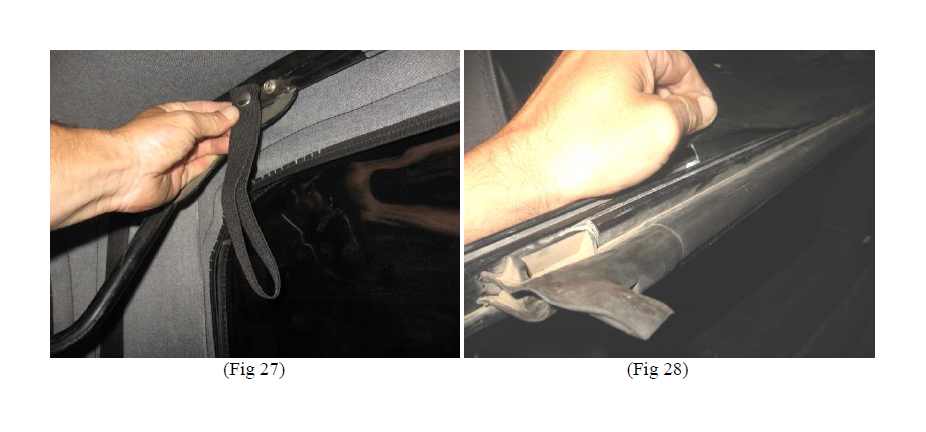
Step 19: Zip the rear window in and slide the factory tailgate bar onto the bottom of the window. (Fig 28 )
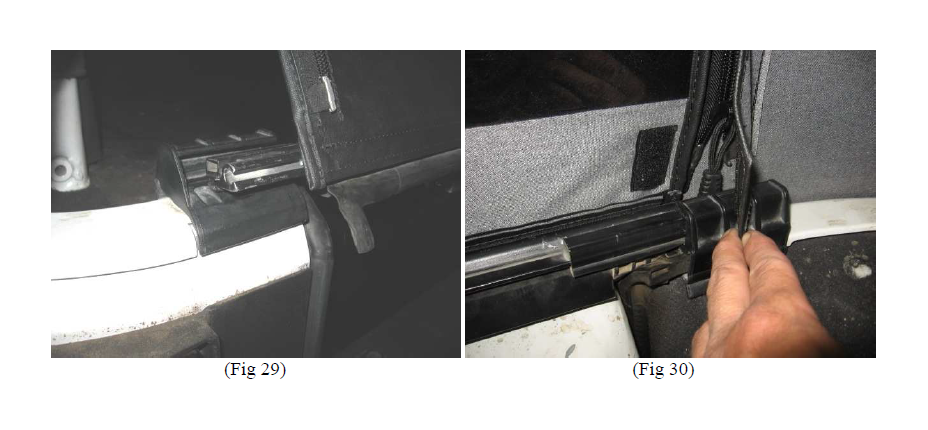
Step 20: Attach each end of the tailgate bar into the brackets on each end of the tailgate. (Fig 29) Velcro the flap on the inside of each bottom corner of the rear window. (Fig 30)
Step 21: Installation is now complete. (Fig 31,32)

Troubleshooting
Due to variances in vehicles and climate conditions the following tips may help during installation.
> Do not fully clamp the front header down until top is completely on.
> Install with help from a friend.
> Make sure door surrounds are installed correctly.
> Install Side rear windows before installing the rear corners on the body.
> Make mental note on how your OEM top fit.
> Refer to owners manual for bow assembly operation.
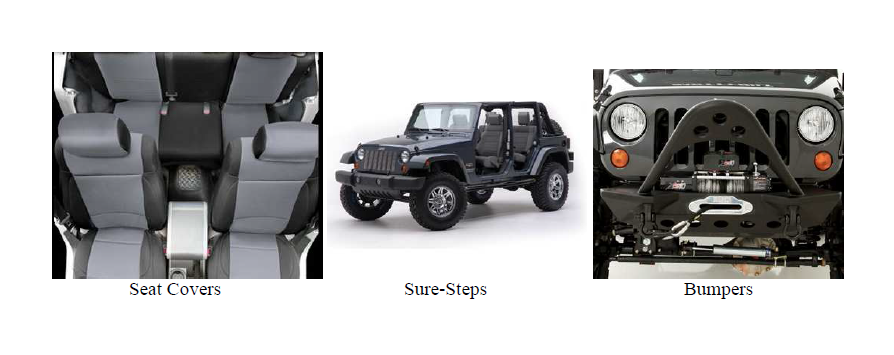
Compliment your new Top with other quality Smittybilt products
Care and Maintenance
-TOP, The top should only be washed with soap and warm water. Do not use an abrasive cleaner or rag. Especially on the windows.
- SNAPS, Keep the snaps (if applicable) clean and silicone lubrication will help prevent them from sticking together.
-SEAMS, If seeps happen to occur in seams they can be treated with a Scotchguard type of spray. Patches can also be applied on the inside of the top in the case of a rip or tear.
-Zippers, Keep zippers clean and apply a silicone lubricant to them to help prevent damaged to them and keep them operating smoothly. Zipper heads can also be repaired if they happen to spread apart by using pliers to gently squeeze the head back
together
