FREE 1 to 3-Day Delivery on Orders $149+ Details

How to Install Smittybilt Rear XRC Body Armor Skins - Textured Matte Black on your Wrangler

Shop Parts in this Guide
IMPORTANT!: In order to install this rear armor kit you will have to drill holes in the body.
INSTALLATION:
Step 1: Remove any previously installed armor or rear fender accessories.
Step 2: Thoroughly clean and dry the rear fenders using compressed air or clean cloths.
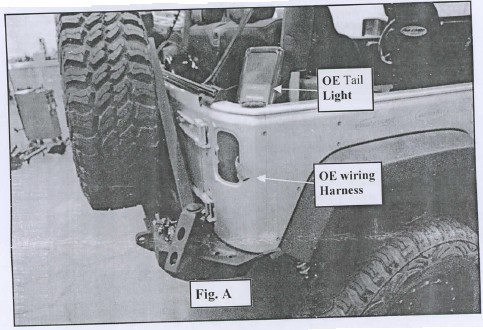
Step 3: Remove the tail light assemblies from the rear of the vehicle. Unclip the OE wiring harnesses. Save the OE hardware for reinstallation. (Fig. A)
NOTE: Take special care not to damage the paint.
Step 4: Working on the drivers side of the vehicle, apply painters masking tape to outer edges of the rear fender and any other area that may be contacted during armor installation. This will prevent any possible damage to the paint.
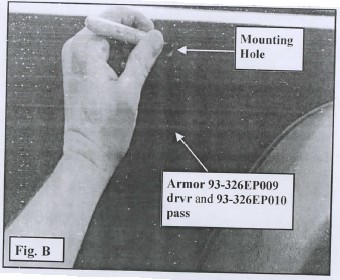
Step 5: Carefully raise the rear fender armor (93-326EP009 drvr and 93-326EP010 pass) into position on the rear fender. Make sure the armor is level and is following the same edges as the vehicle.. Mark the location of the armor mounting holes using a permanent marker.
IMPORTANT!: Align the upper edge of the armor with the body line. The bottom rear edge of the armor should line up with the radius of the lower edge and fender con-tour. The front of the armor should be aligned so that it provides proper clearance for door operation. (Fig G)
NOTE: Applying painters masking tape to the marked drill locations may help to pro-tect the paint.
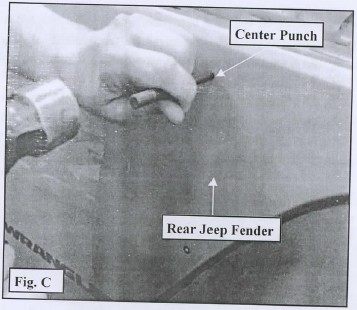
Step 6: Center punch the previously applied drill marks and drill each hole to 17/32". (Fig. C)
Step 7: Remove the armor (93-326EP009 drvr and 93-326EP010 pass) from the rear fender.
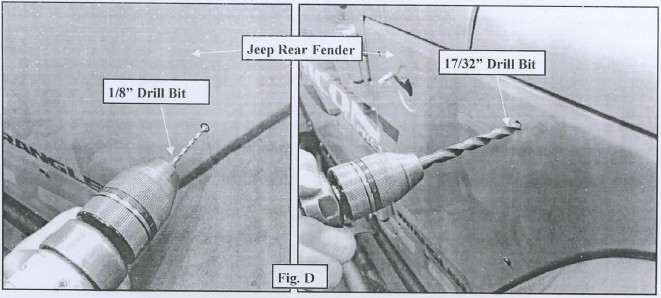
Step 8: It is recommended starting out with an 1/8" bit working up to 17/32". This method will help reduce the chances of paint chipping. A Unibit or similar tool is recommended. (Fig. D)
NOTE: Areas around the door jamb will need to penetrate both layers of sheet metal when drilling.
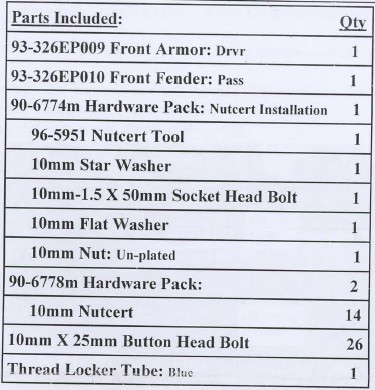
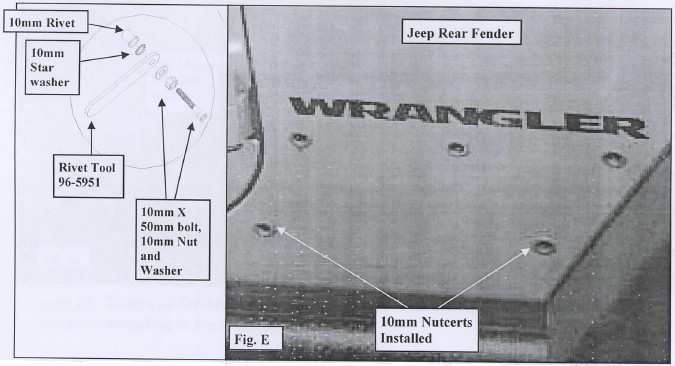
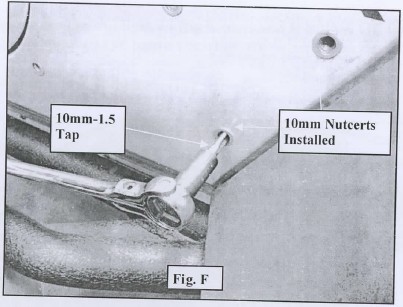
Step 9: Install the (13 per side) 10mm nutcerts into the previously drilled 17/32" holes. (Fig. E)
NOTE: Ifyou do not have a professional nutcert installation tool, use the 10mm X 50mm socket head bolt, 10mm nut and washer. Install the nutcert into the 1/2" hole on the vehicle. Thread the nut up as far on the 10mm bolt as it will go and then follow that with the washer. Thread the boll, nut, washer, nutcert tool (96-5951) and star washer as-sembly into the nutcert. (Fig. E) While holding the 10mm bolt with an Allen wrench, tighten the nut and washer down against the nutcert. Use the nutcert tool and star washer to keep the nutcert body from spinning while tightening the 10mm bolt. Once the nutcert is properly installed into the vehicle remove the 10mm bolt, nut, washer, nutcert tool (96-5951) and star washer.
Step 10; After installing the nutcerts, run a lOmm-1.5 tap through the threads. Installation can often warp the nutcert threads. (Fig. F)
Step 11: Reinstall the armor (93-326EP009 drvr and 93-326EP010 pass) and secure using the supplied (13 per side) 10mm X 25mm bolts. Be sure to apply threadlocker to the 10mm bolts. (Fig. G)
NOTE: The nutcerts are prone to spinning if not installed properly or cross threaded. Be sure to start the bolts by hand in the nutcerts.

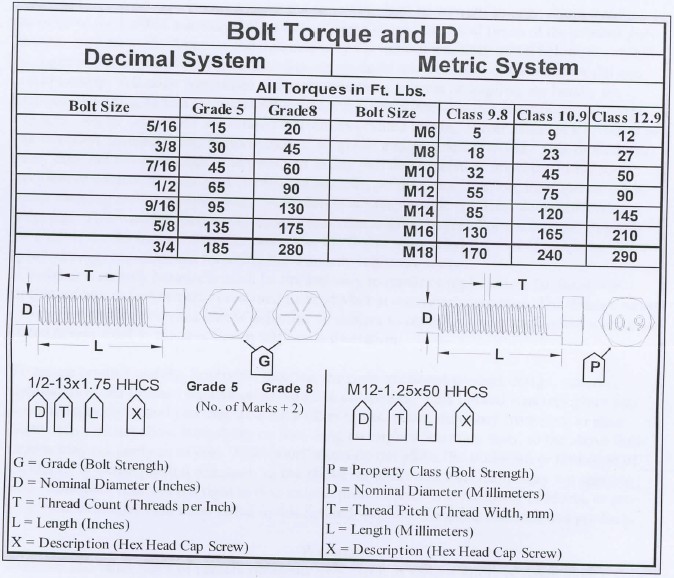
Step 12: Torque all OE hardware according to manufacturers specifications or the supplied hardware according to the torque chart below.
Step 13: Repeat steps 4 through 12 on the passenger side of the vehicle.
Step 14: Reconnect the OE tail light wiring harness and install the OE tail light assemblies using the previously removed OE hardware. (Fig. A)
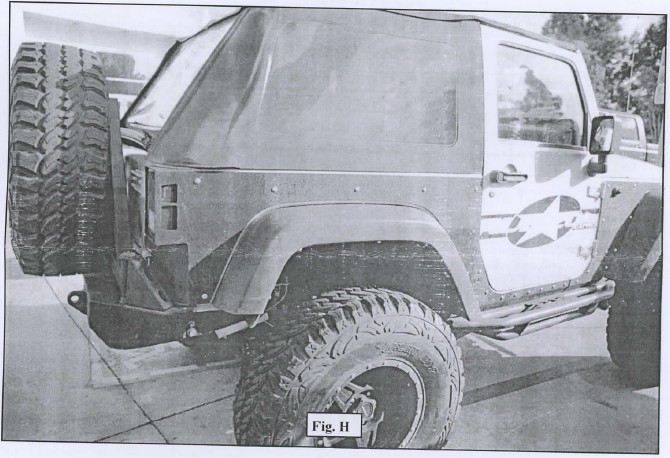
Step 15: Installation is now complete. (Fig. H)