 FREE 1 to 3-Day Delivery on Orders $149+ Details

How to Install Smittybilt Overlander Roof Tent on your Wrangler
Attaching the Mounting Rails to the Smittybilt Rooftop Tent
Direction of Opening
Before you fit your new rooftop tent to your vehicle, you will need to decide whether you wish to have the rooftop tent open to the back or to the side of your vehicle.
A. "Off the Back"
For most larger size ( SUV) vehicles opening "off the back" is preferable. The advantages of this orientation are:
• Leaves extra roof space for additional storage.
• With the tent open you will gain weather protection from the tent above you head when accessing the back of your vehicle.
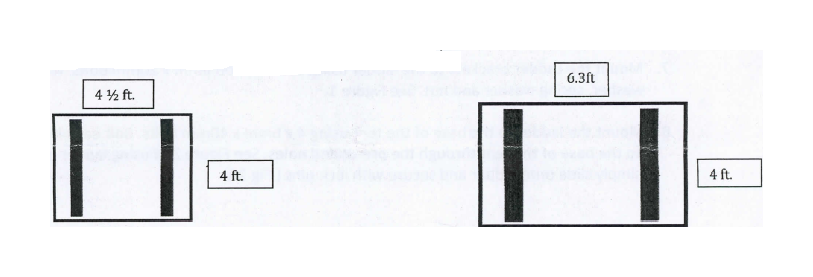
The mounting extrusions need to be cut off at both ends up to the second pre-drilled hole, prior to being fitted to the base of the rooftop tent. Use tent bottom as a template.
The mounting extrusions are then bolted to the base of the tent at right angles to the roof rack or roof bars, in the direction of opening (along the length of the tent base).
B. "Off the Side"
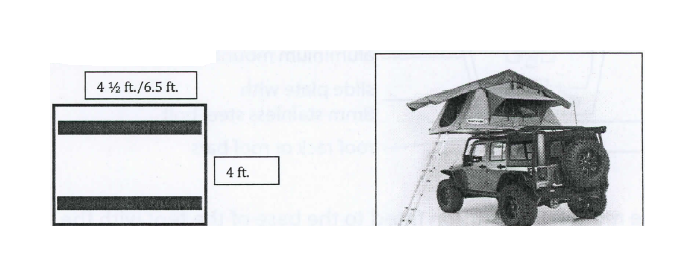
For most medium (such as Jeep Wrangler) or small vehicles opening "off the side" is preferable. The advantages of this orientation are:
• Allows for tailgates to operate normally.
• Means the closed tent pack is better balanced on the roof and creates less wind drag as the narrow face of the tent pack is travelling forward.
The mounting extrusions bolt to the base of the tent at right angles to the roof rack or roof bars (across the width of the tent base)
Once you have decided which is best suited to your application, follow the mounting instructions.
Mounting Extrusion - Attachment Instructions
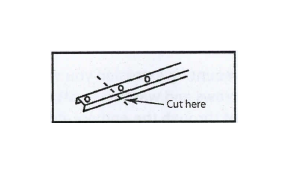
1. Remove mounting extrusion from the carton (cut as per Diagram 1 if you intend opening the rooftop tent off the rear of your vehicle.)
2. Place the tent on its side on the ground onto a clean surface.
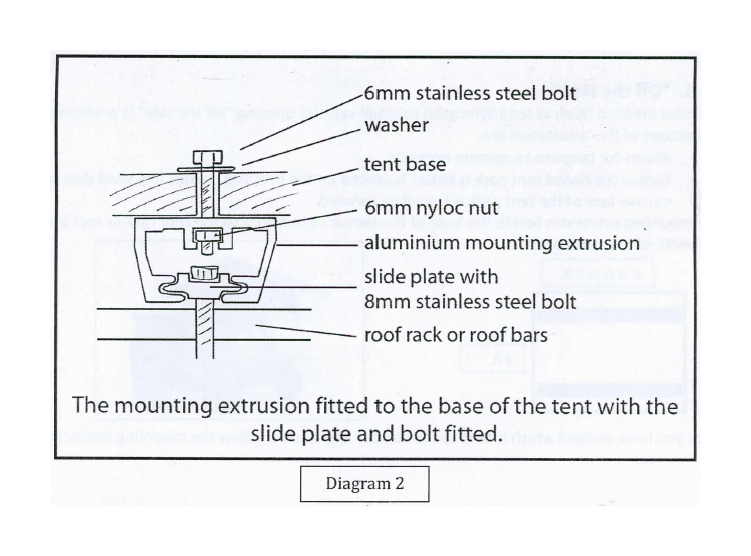
3. Using the supplied 6mm bolts and washers, slide your hand in between the inside of the base and the mattress and insert the bolts into the pre-drilled holes. See Diagram 2.
4. Place the mounting extrusion into position over the bolts.
5. Slide the 6mm nuts into the mounting extrusions and tighten the bolts from inside the tent. See Diagram 2.
6. Near the outside edges of the mounting extrusion you will find holes for the self drilling screws supplied. Use the self drilling screws and washers to attach the outside edge of the mounting extrusion to the base of the tent through the end pre-drilled holes.
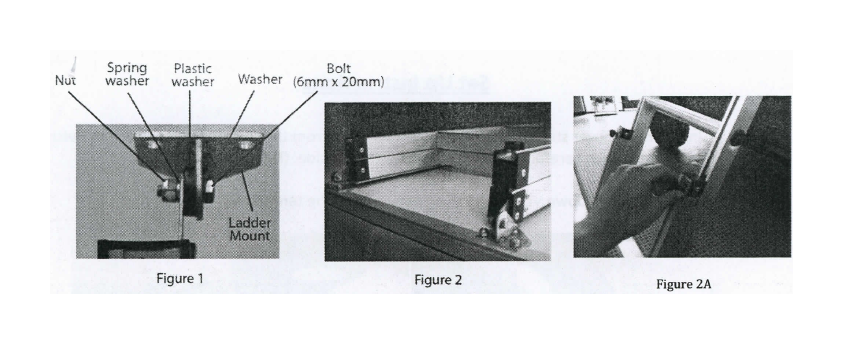
7. Mount the Ladder brackets to the ladder using the supplied 6mm x 20mm bolts, washer, plastic washer, spring washer and nut. See Figure 1.
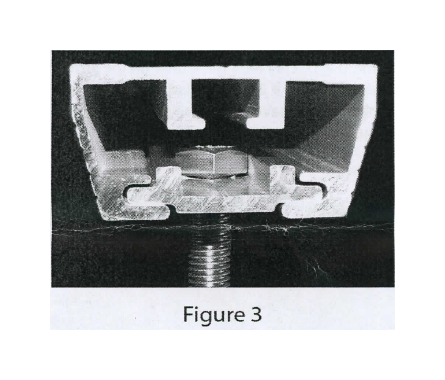
8. Mount the ladder to the base of the tent using 4 x 6mm x 40mm bolts. Bolt each ladder bracket to the base of the tent through the pre-drilled holes. See Figure 2. If using ladder extension simply slide onto ladder and secure with lock pins ( Fig 2A)
Fitting the Rooftop Tent to your Roof Rack or Roof Bars
1. With assistance, carefully lift the tent onto the vehicle.
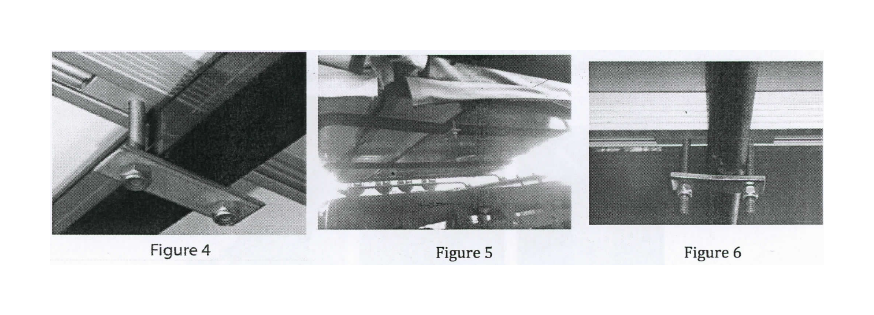
2. Place 8mm bolt into the slide plate. Slide the plate and bolt into the mounting extrusion. See Figure 3.
3. Attach the rooftop tent to your roof rack or roof bars in four places as per Figure 4, 5, 6. Use 2 bolts and 2 slide plates with the base plate to hug the bar. 1 set per corner.
4. Prior to tightening all the nuts, ensure that your rooftop tent is centered (side to side) on the roof of your vehicle and that the mounting points (as far as possible) are symmetrically positioned near each corner of the tent.
5. Do not over tighten nuts as this will cause the bolt head to strip the aluminum slide plate.
Set Up Instructions
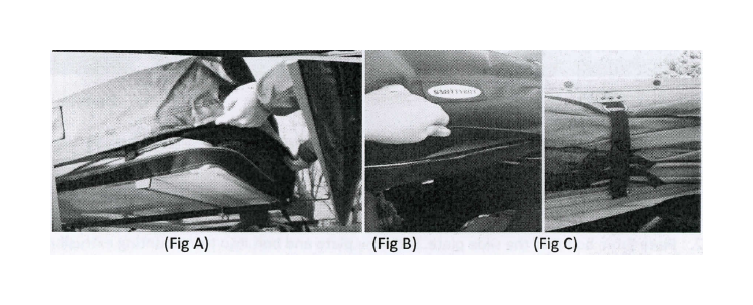
Step 1: Unfasten the cover strap and then remove the cover from the tent by unfastening the Velcro around the edge and then carefully fold the cover over to the side. (Fig A, B)
Step 2: Release the hold down Velcro straps on each side of the tent (Fig C)
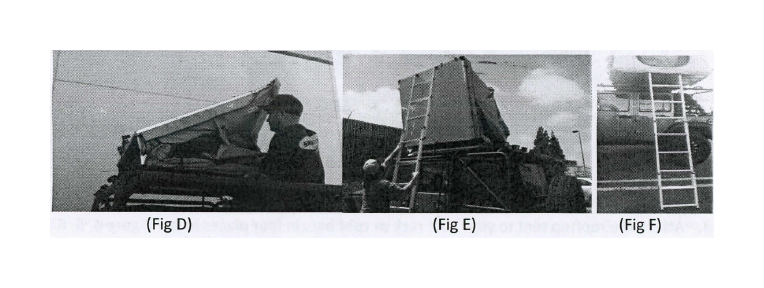
Step 3: Slide out the ladder until locking pins engage. The ladder can now be used as a lever to help open the tent. Carefully fold open tent. (Fig D, E, F) Rest the ladder on the ground. Note: if ladder is too vertical you will require a ladder extension. (Part # 2785) The ladder should be at a slight angle not to exceed 25°. Remove the internal bungee straps, save for repacking of the tent. (these straps run left to right and attach to the loops inside the tent.
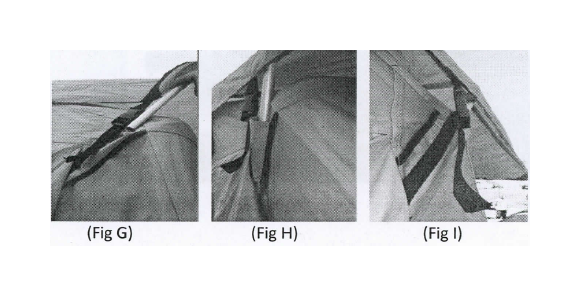
Step 4: If using the rain fly, slide the ends of the rain fly poles into the pockets on the side of the tent. After the poles are set into pockets and you have installed the side rods in the next step, go back and tighten the quick release straps/buckles on the sides of the rain fly. (G, H, I)
Step 5: You can now enter your tent. Install door/window cover rods. Line up the slot on the base of the tent with the predrilled hole. (Fig J) Slide base of rod through slot and into base of tent, make sure rod is installed completely. (Fig K, L) Note: They are meant to have a "bow" in them when installed. They will be at an angle to the side when installed into the holes. Place the hook end of rod through
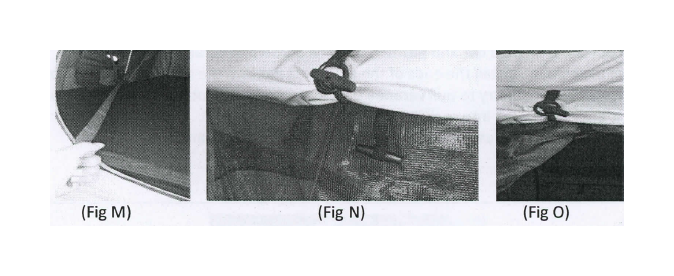
grommet on rain fly/shade cover with the hook part facing outward and downward. (Fig M, N, 0) Proceed to do this on all 4 sides (If desired)

Features
A. The tent features red nylon grab handle straps for assistance on getting in and out. ( Fig M) Always use caution when going up and down !adder.
B. The screens and covers can be rolled up and held up using the attached cords. ( Fig N, 0)
C. LED —Plug extension cord into accessory plug socket, run wire into tent thru opening in middle of tent behind center hinge. Disconnect when not in use. ( Fig P) . You may use a battery powered USB power supply( not included) to power LED light strip. These types of powers supplies are commonly used to charge cellular phones and tablets.
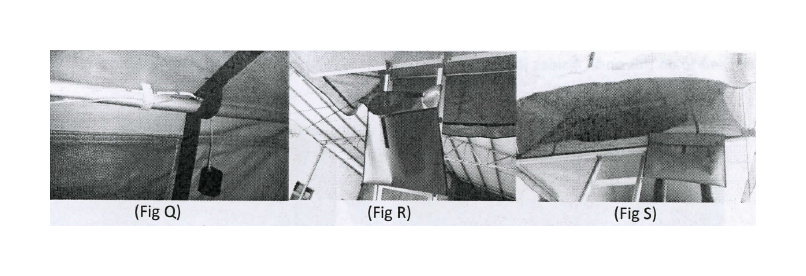
D. Shoe Bag- Included is a shoe/storage bag that can be installed on the ladder or side of tent on the clips on the underside of the tent. (Q, R, S)
E. Sun-Roof—This can be used with or without rain fly. For best use, remove the rainfly.
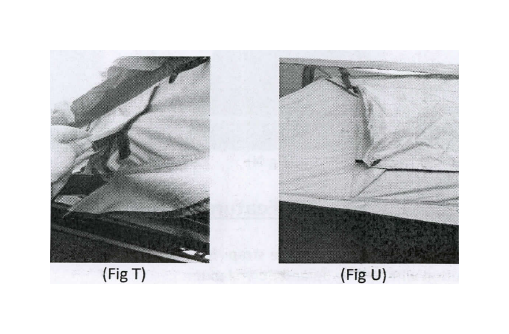
F. 12-Volt- Plug into your vehicle 12 volt outlet, run wire through vehicle window or door up towards tent and through side opening ( Fig T)
G. The side flaps can be strapped down by pulling the bottom cord with handle through the slots. (Fig U)
XL tent veranda set up.
1. Pull out the U-shaped bar and position into the corners of veranda.
2. Once in position , install the ends of the U-shaped bar into the retaining socket. Do not install bar into socket and then try to pull veranda over bar damage will occur. Always position bar inside fabric and then install into sockets.
3. Attach guy ropes and use stakes to provide tension on the veranda.

NOTES
> Repeat all the above steps in the reverse order to pack away your rooftop tent. It is helpful to have all windows and doors secured. Install the internal bungee cords, these help the tent fold evenly. It is recommended to remove the rain fly poles from the pockets.
> A Ladder Extension may be required depending on the height of your vehicle ( Smittybilt part # 2785)
WARNINGS
> The tent weighs approx 116Ibs/139 lbs, make sure accessory it is being installed on can hold this and content weight. Failure to do so may cause damage to part and/or vehicle
> The weight capacity of this tent is approx 661 lbs./770 lbs. (XL only) (evenly distributed) If tent is overloaded it can cause damage to your tent and/or vehicle.
> Disconnect 12v wire when not in use, do not use accessory that draws more than 5amps.
> Never drive with tent set-up
> Assist children when using ladder
Storage and Handling Guidelines
Cautions
- Do not pull down on side retaining Velcro straps when closing the tent. These straps are designed only to hold the tent base together, and are not designed to be used to pull the bases together. When you are closing the tent, hold down the top folded base to compact the tent, then use the velcro straps to secure the bases in this position. These straps will tear out of the tent if excessive force is applied to the strap.
- Do not store the tent wet. If you do have to pack away when the tent is wet, zip closed all canvas doors and windows to protect the inside of the tent, and pack away. As soon as you can, open the tent and let it dry out thoroughly to prevent mold and rot. If the tent is to be closed up for extended periods of time it is very important that the tent is completely dry.
- Do not drill locking holes below the existing locking pin holes in the ladder. This will weaken the structure of the ladder and can cause injury. If you need to extend the length of your ladder, please purchase a ladder extension. If you need to shorten the ladder you can drill holes above the existing ladder locking pin holes.
- Be aware that with a rooftop tent fitted to your vehicle the overall height is increased. Your should measure the overall height of your vehicle with the rooftop tent fitted as you will need this information to decide if the vehicle can enter carparks etc.
- Centre of gravity. The attachment of a rooftop tent to your vehicle (similar to any other load on your roof rack) will alter its centre of gravity. Adjust your driving accordingly.
- In trip inspections. Regularly check that all nuts and bolts attaching your rooftop tent to the roof of your vehicle are tight and in good repair. Check all tent hardware, such as hinge attachment hardware, ladder mounting hardware, EVERY nut and bolt. It is your responsibility for this maintenance. Improper or lack of maintenance will void tent warranty.
- Please note: The roof top tent is not made for extreme conditions, and a fair use policy is required. Excessive rain, wind and other extreme conditions can affect and/or damage the tent.
Storage of the Tent
1. If storing the tent off the vehicle, ensure the tent is packed away completely dry.
2. Be careful not to drag the tent on the ground. This will damage the cover and allow potential water ingress the next time you use your rooftop tent.
3. Do not store directly on concrete floor.
Care Instructions
1. Clean only with cold water and a soft brush - do not use soap or detergent, this will remove the waterproofing compounds.
2. Do not expose to petrol, oil or solvents.
3. New poly/cotton fabric will initially experience some weeping through the seams. This will reduce over time as the fabric cures.
4. Well worn products may be re-proofed using a good quality waterproofing solution. This is highly recommended. Generally this is re-applied every 2 years depending on how much you use the tent.
5. It is recommended to season your tent before your first trip. You can season the tent fabric by setting up tent on a level surface before actual use. Do a full set up, use all window rods. Make sure all windows and zippers are completely closed. Do not have the rain fly installed and remove all internal contents. With a hose, wet down the tent lightly. Then focus on all the areas that have been stitched and water log the fabric the best you can. Let tent dry completely on its own, do not use heat or compressed air to dry tent, let it dry naturally, avoid direct sunlight, this may take a day or so. Repeat this process two more times if necessary. This process allows the canvas and threads to shrink and expand as much as they can effectively sealing the seams. Do not be alarmed if the tent leaks for the first or second time you season the canvas as this is normal as the thread and canvas contract and expand together. Seam sealer can be applied after the 3rd seasoning.
6. Zippers can be lubed with a silicon spray, this keeps them lubed and helps with water resistance.
